Reactive Programming is a programming paradigm that is asynchronous programming paradigm, focusing on data streams and how changes are disseminated. – Wikipedia
Even after reading that definition, you might feel the same confusion I did initially: no closer to grasping its practical significance. However, a deeper dive into the fundamental concepts will quickly reveal its importance. You can initially conceptualize Reactive Programming as: “Event-driven programming on steroids.” Imagine an event handler as a stream, with each trigger of the handler representing a new data point within that stream. This, in essence, is Reactive Programming.
Before we delve further into Reactive Programming, let’s clarify some key concepts. Observables are entities providing access to these data streams. They offer a window into the stream’s data. Once this window is open, you can manipulate the data using Operators, enabling you to define how your application will react to changes within the stream. Finally, you define Observers on the resulting stream to dictate the actions taken whenever new data is emitted.
Practically speaking, this translates to enhanced control over how your application responds to various events, such as user button clicks, HTTP response reception, or even exception handling. The advantages of Reactive Programming (which are numerous) become readily apparent, making it difficult to revert to previous approaches. This is primarily because a significant portion of an app’s functionality revolves around reacting to specific events.
However, this new approach isn’t without its drawbacks. A significant hurdle is the steep learning curve. I’ve witnessed firsthand the struggles developers (regardless of their seniority) face when trying to determine the initial coding steps, understand the code execution sequence, or debug errors. My recommendation for introducing these concepts is to provide ample examples. As developers observe the intended functionality and usage patterns, they’ll gradually grasp the concepts.
For over a decade, I primarily worked with desktop applications (mainly Visual Basic 6, Java Swing, and Windows Forms) before encountering Windows Presentation Foundation (WPF) in 2010. Essentially, WPF was designed to replace Windows Forms, .NET’s initial framework for desktop development.
WPF and Windows Forms have significant differences, but the most crucial ones are:
- WPF employs robust and well-tested new development paradigms.
- WPF enables a strong separation between UI design and coding.
- WPF offers extensive UI customization and control.
Upon exploring WPF and its capabilities, I was captivated! The ease of implementing the MVVM pattern and the seamless property binding were remarkable. I couldn’t imagine a superior approach until I discovered Reactive Programming and its integration with WPF.
This post aims to provide a straightforward implementation of a WPF app that leverages Reactive Programming with the MVVM pattern to interact with a REST API.
The application will possess the following functionalities:
- Tracking cars and their positions
- Fetching data from a simulated source
- Displaying this information to the user using a Bing Maps WPF Control
The Architecture
We will construct a WPF client application that interacts with a RESTful Web API Core 2 service.
The client-side technologies:
The server-side technologies:
- .NET C# Web API Core 2
- Dependency injection
- JWT authentication
Requirements:
- Visual Studio 2017 Community (or any available edition)
The Back-end
Quick Start
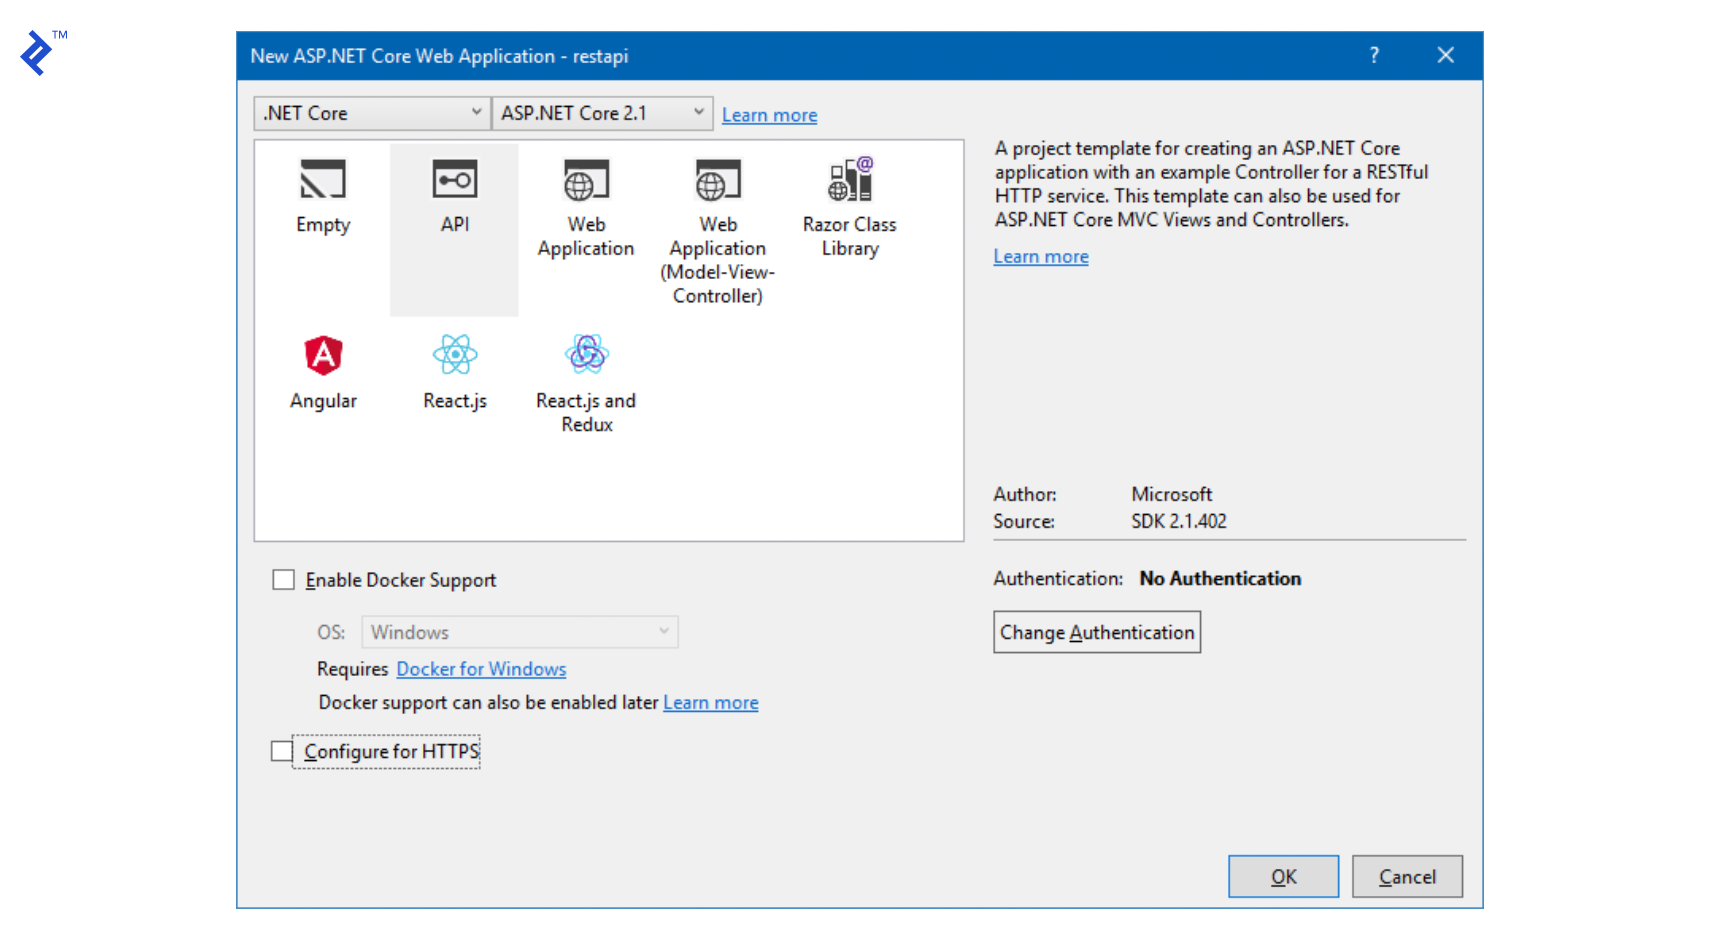
Begin by creating a new Visual Studio Solution containing an ASP.NET Core web application.
Configure it as an API, as we’ll exclusively use it as the backend for our WPF app.
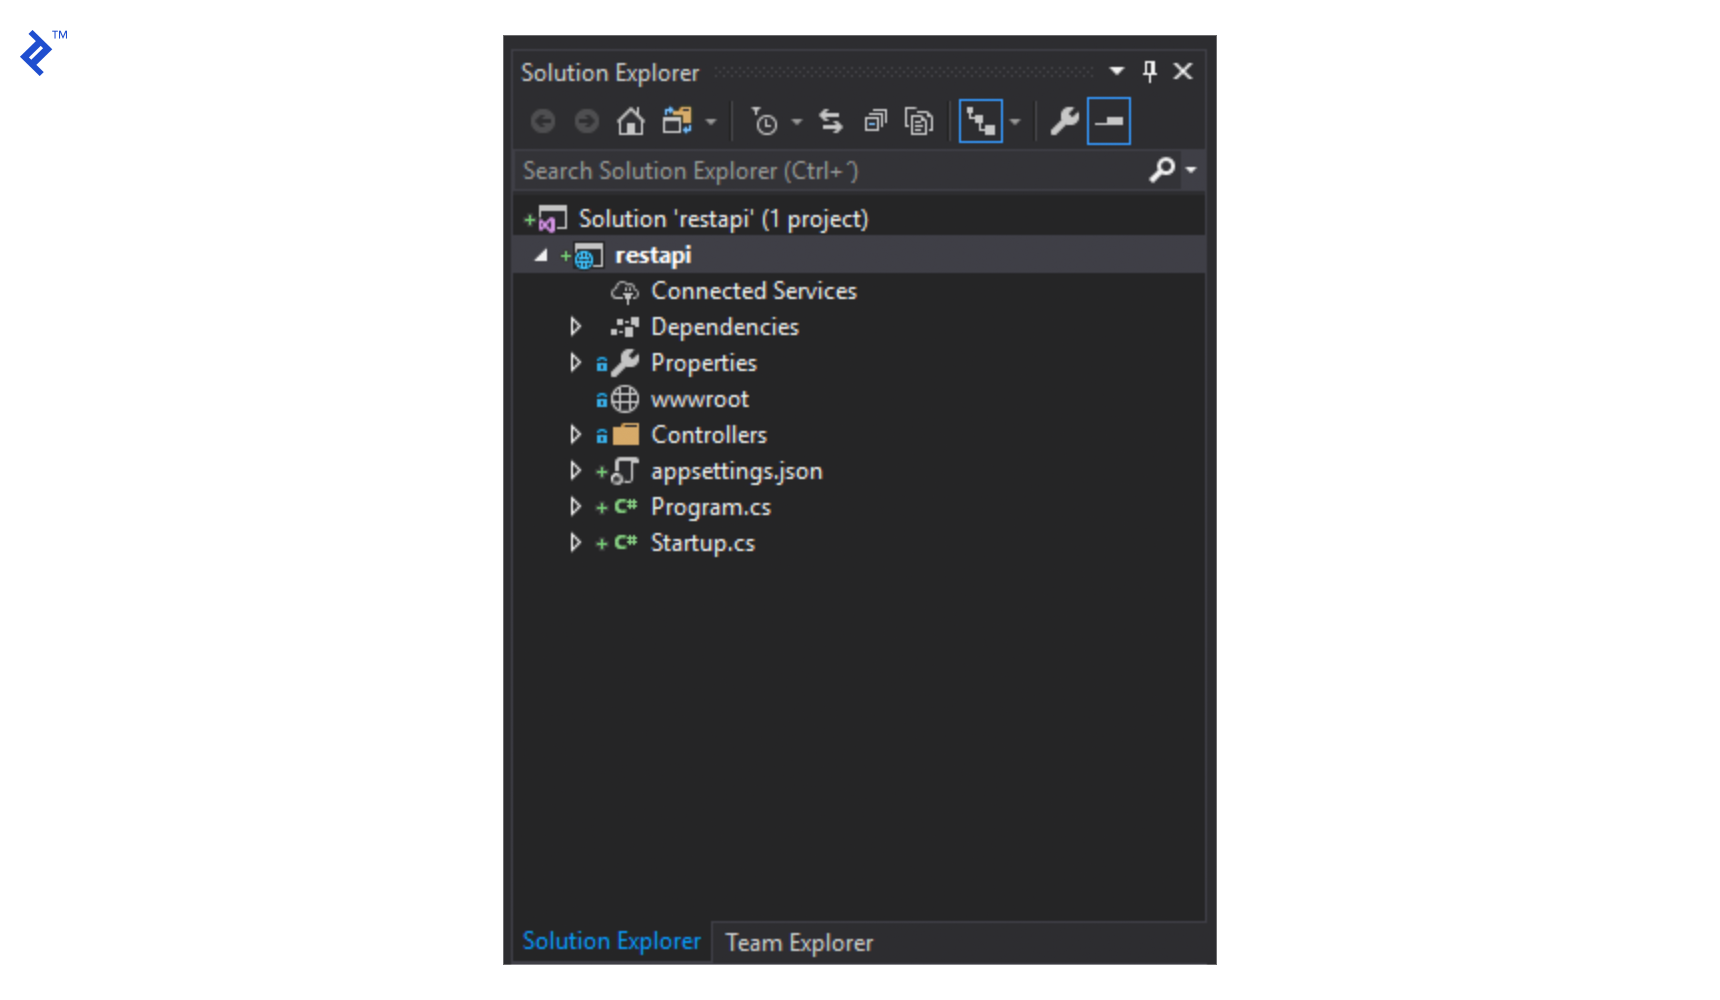
This process should result in a VS solution with a structure resembling this:
We now have the foundation to start building our REST API backend. Running the project will open a web browser (your default Visual Studio browser) directed to a website hosted on IIS Express. This website will display the response to a REST call as a JSON object.
Let’s proceed by setting up JWT Authentication for our REST Service.
At the end of the startup.cs file, add the following code:
 1
 2
 3
 4
 5
 6
 7
 8
 9
10
11
12
13
14
15
16
17
18
19
20
21
22
23
24
25
26
27
28
29
30
31
32
33
34
35
| static readonly byte[] JwtKey = Encoding.ASCII.GetBytes(@"this is a test key");
private void LoadJwtAuthorization(IServiceCollection services)
{
services.AddAuthentication(x =>
{
x.DefaultAuthenticateScheme = JwtBearerDefaults.AuthenticationScheme;
x.DefaultChallengeScheme = JwtBearerDefaults.AuthenticationScheme;
})
.AddJwtBearer(x =>
{
x.Events = new JwtBearerEvents
{
OnTokenValidated = context =>
{
var userId = int.Parse(context.Principal.Identity.Name);
if (userId == 0)
{
//Handle user validation against DB
context.Fail("Unauthorized");
}
return Task.CompletedTask;
}
};
x.RequireHttpsMetadata = false;
x.SaveToken = true;
x.TokenValidationParameters = new TokenValidationParameters
{
ValidateIssuerSigningKey = true,
IssuerSigningKey = new SymmetricSecurityKey(JwtKey),
ValidateIssuer = false,
ValidateAudience = false
};
});
}
|
Additionally, within the ConfigureServices method, call this newly created method before the AddMvc method is invoked.
1
2
3
4
5
6
| public void ConfigureServices(IServiceCollection services)
{
LoadJwtAuthorization(services);
services.AddMvc().SetCompatibilityVersion(CompatibilityVersion.Version_2_1);
}
|
Finally, modify the Configure method to match the following:
 1
 2
 3
 4
 5
 6
 7
 8
 9
10
| public void Configure(IApplicationBuilder app, IHostingEnvironment env)
{
if (env.IsDevelopment())
{
app.UseDeveloperExceptionPage();
}
app.UseAuthentication();
app.UseMvc();
}
|
With this, we’ve established JWT Authentication for our controllers, which will be applied if defined. Next, we’ll configure our controller to utilize the authentication mechanism we just implemented.
In the ValuesController, add the AuthorizeAttribute as follows:
1
2
3
4
5
6
7
| [Route("api/[controller]")]
[ApiController]
[Authorize]
public class ValuesController : ControllerBase
{
...
}
|
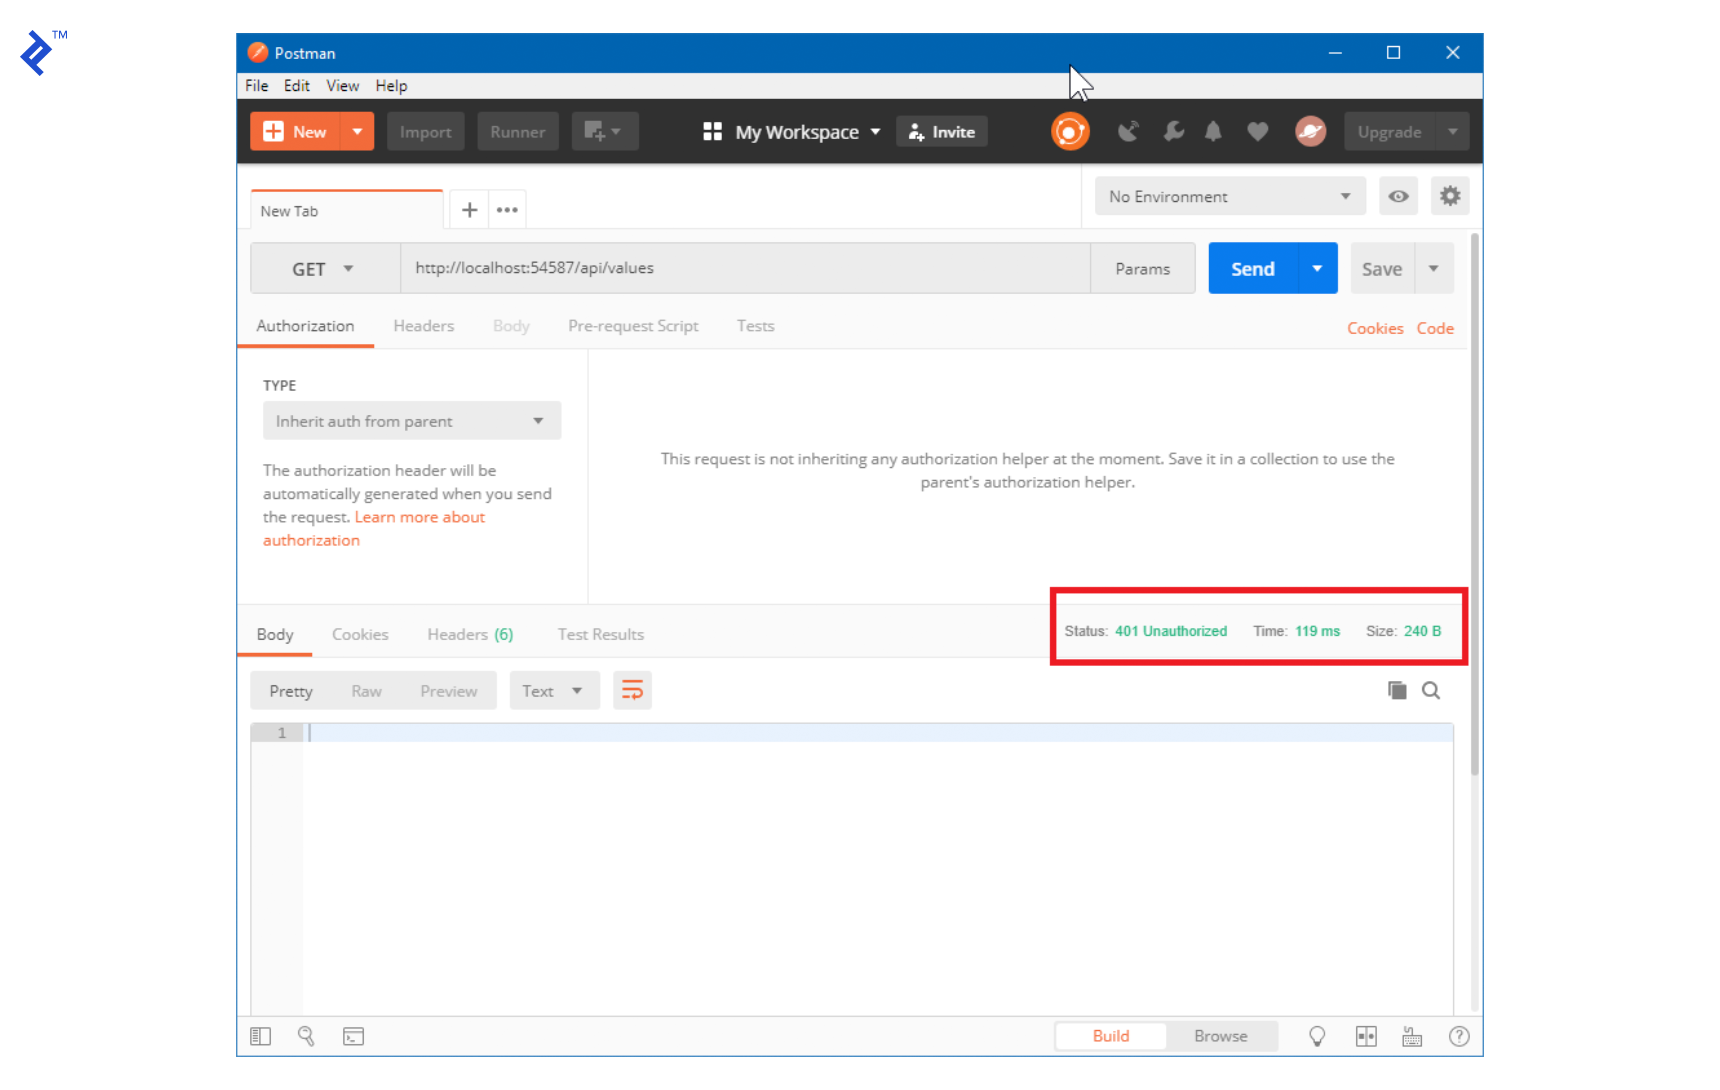
If we attempt to run our service now, a 401 Unauthorized error will occur:
To address this, we need to implement a user authentication method. For simplicity, we’ll incorporate it directly into the ValuesController class.
 1
 2
 3
 4
 5
 6
 7
 8
 9
10
11
12
13
14
15
16
17
18
19
20
21
22
23
24
25
26
27
28
29
30
31
32
| [AllowAnonymous]
[HttpPost("authenticate")]
public IActionResult Authenticate([FromBody]JObject userInfo)
{
var username = userInfo["username"].ToString();
var password = userInfo["password"].ToString();
//We would validate against the DB
if (username != "user" || password != "123")
{
return BadRequest(new { message = "Username or password is incorrect" });
}
// return basic user info (without password) and token to store on the front-end
return Ok(CreateUserToken(1));
}
private string CreateUserToken(int userId)
{
var tokenHandler = new JwtSecurityTokenHandler();
var tokenDescriptor = new SecurityTokenDescriptor
{
Subject = new ClaimsIdentity(new[]
{
new Claim(ClaimTypes.Name, userId.ToString())
}),
Expires = DateTime.UtcNow.AddDays(7),
SigningCredentials = new SigningCredentials(new SymmetricSecurityKey(Startup.JwtKey), SecurityAlgorithms.HmacSha256Signature)
};
var token = tokenHandler.CreateToken(tokenDescriptor);
return tokenHandler.WriteToken(token);
}
|
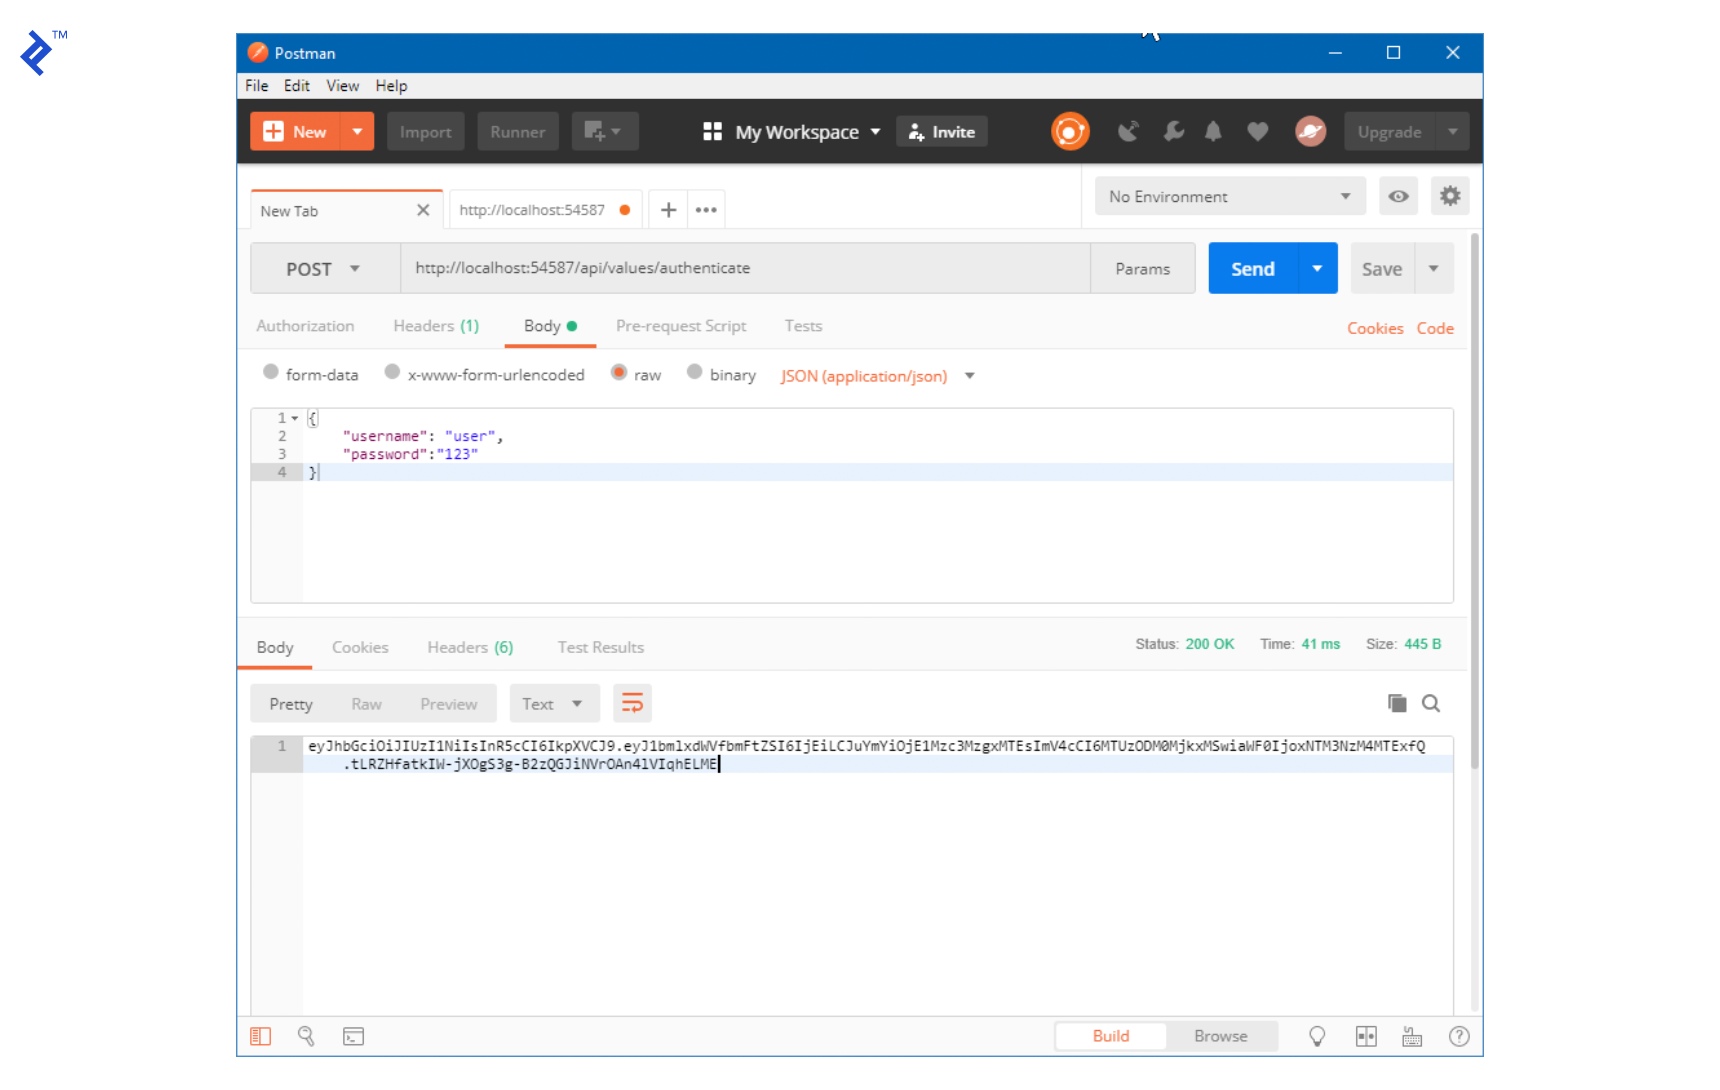
We’ve now created a method with Anonymous access, allowing any client, even unauthenticated ones, to call it. This call is made via a POST request containing a JSON object with a username and password string.
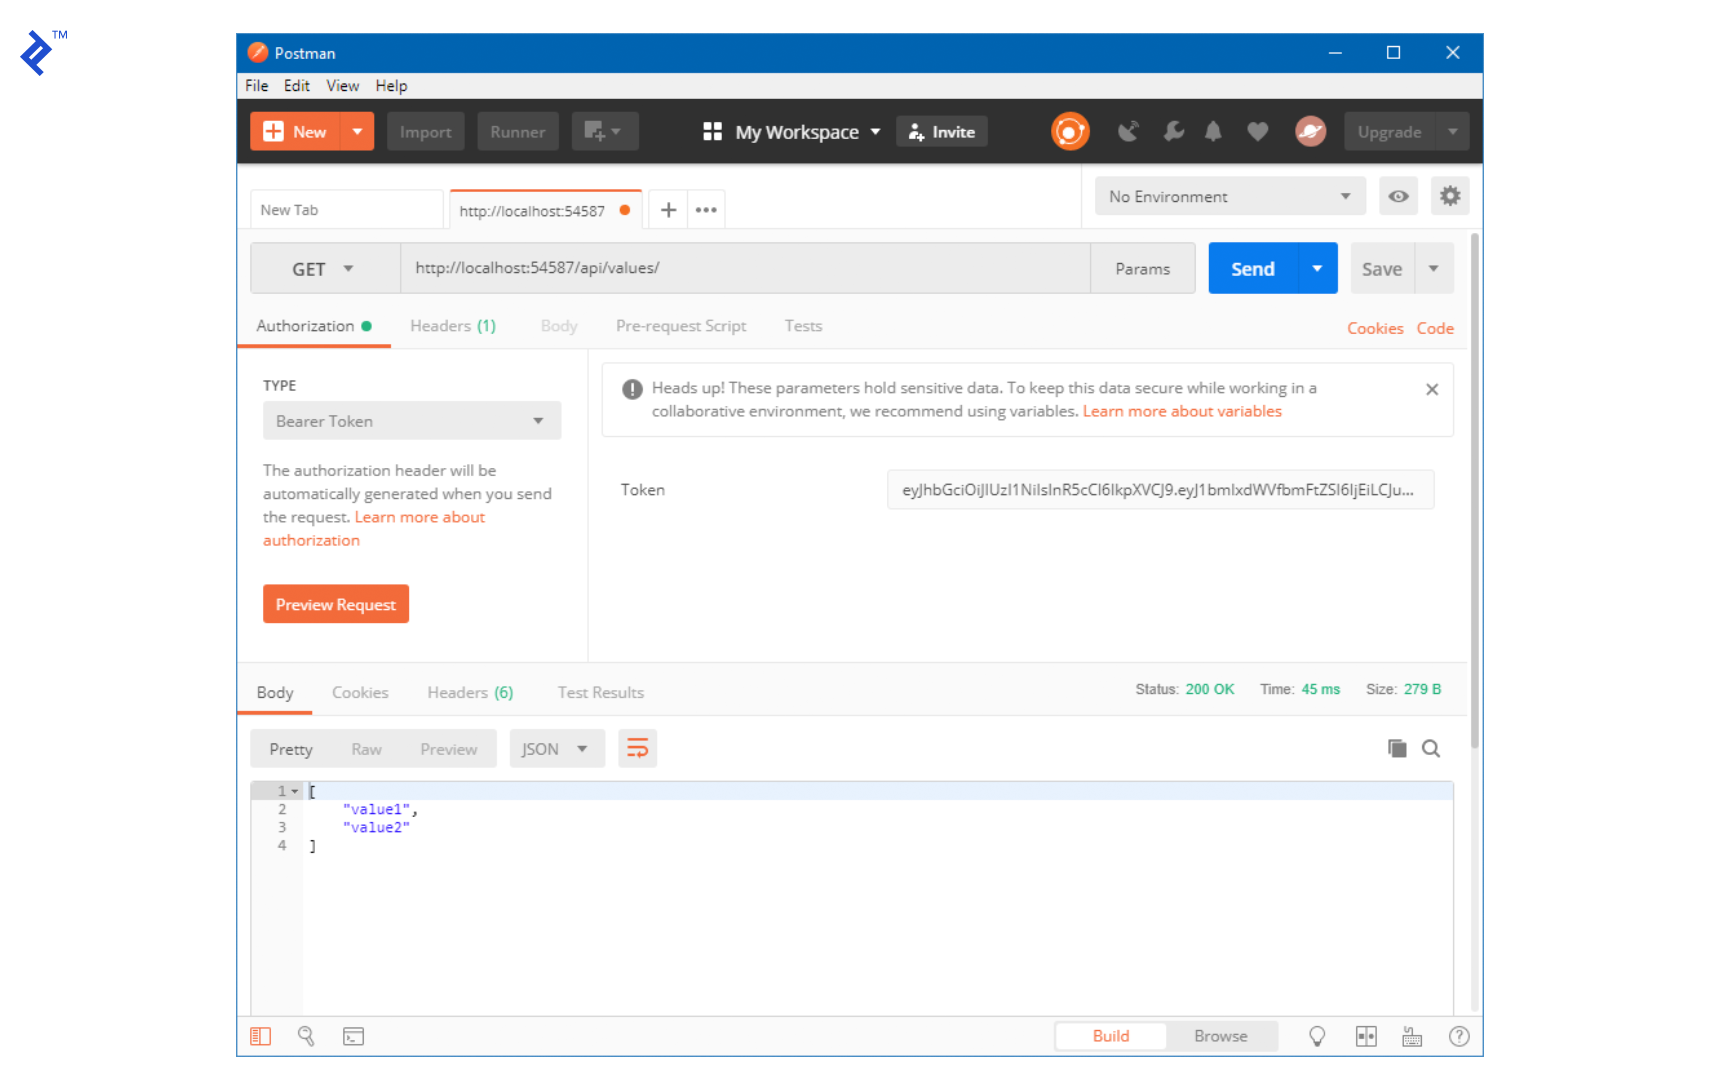
Testing this with Postman yields the following result:
As demonstrated, the authenticate method returns the string we need as a token for every subsequent API call.
Including this token in the message headers triggers the validation process. If the correct parameters are provided, the service executes the method and returns its value. For instance, calling the values controller with the token now produces the same result as before:
Let’s now create a method to retrieve the latitude and longitude of our currently tracked car. For simplicity, this will be a placeholder method that initially returns a random location and then simulates car movement by a fixed distance with each call.
First, we modify the Get(int id) method within the ValuesController class as follows:
 1
 2
 3
 4
 5
 6
 7
 8
 9
10
11
| [HttpGet("{id}")]
public ActionResult<string> Get(int id)
{
var location = LocationHelper.GetCurrentLocation(id);
dynamic jsonObject = new JObject();
jsonObject.Latitude = location.latitude;
jsonObject.Longitude = location.longitude;
return jsonObject.ToString();
}
|
Next, we introduce a new class called LocationHelper to manage the current and future locations of the cars we’re tracking.
 1
 2
 3
 4
 5
 6
 7
 8
 9
10
11
12
13
14
15
16
17
18
19
20
21
22
23
24
25
26
27
28
29
30
31
32
33
34
35
36
37
38
39
40
41
42
43
44
45
46
47
48
49
50
51
52
53
54
| public static class LocationHelper
{
private static readonly Random Randomizer = new Random();
private const double PositionDelta = 0.0001d;
internal static (double latitude, double longitude) GetCurrentLocation(int id)
{
if (!Locations.ContainsKey(id))
{
Locations.Add(id, default((double latitude, double longitude)));
}
//This method updates the last known location for the car and simulates its movement
UpdateLocation(id);
return Locations[id];
}
private static void UpdateLocation(int id)
{
(double latitude, double longitude)loc = Locations[id];
//If the default value is found, randomly assign a starting point.
if (loc.latitude == default(double) && loc.longitude == default(double))
{
loc = Locations[id] = GetRandomStartingPoint();
}
if (Randomizer.Next(2) > 0)
{
//In this scenario we simulate an updated latitude
loc.latitude = loc.latitude + PositionDelta;
}
else
{
//Simulated longitude change
loc.longitude = loc.longitude + PositionDelta;
}
Locations[id] = loc;
}
private static (double latitude, double longitude) GetRandomStartingPoint()
{
//Set inside the continental US
return (Randomizer.Next(31, 49), Randomizer.Next(-121, -75));
}
private static readonly Dictionary<int, (double latitude, double longitude)> Locations = new Dictionary<int, (double latitude, double longitude)>();
}
|
This completes the backend setup.
The Front-end:
Now, let’s create a new WPF application. Upon creation, Visual Studio will add a new project with the following structure to our solution:
Bing Maps Control:
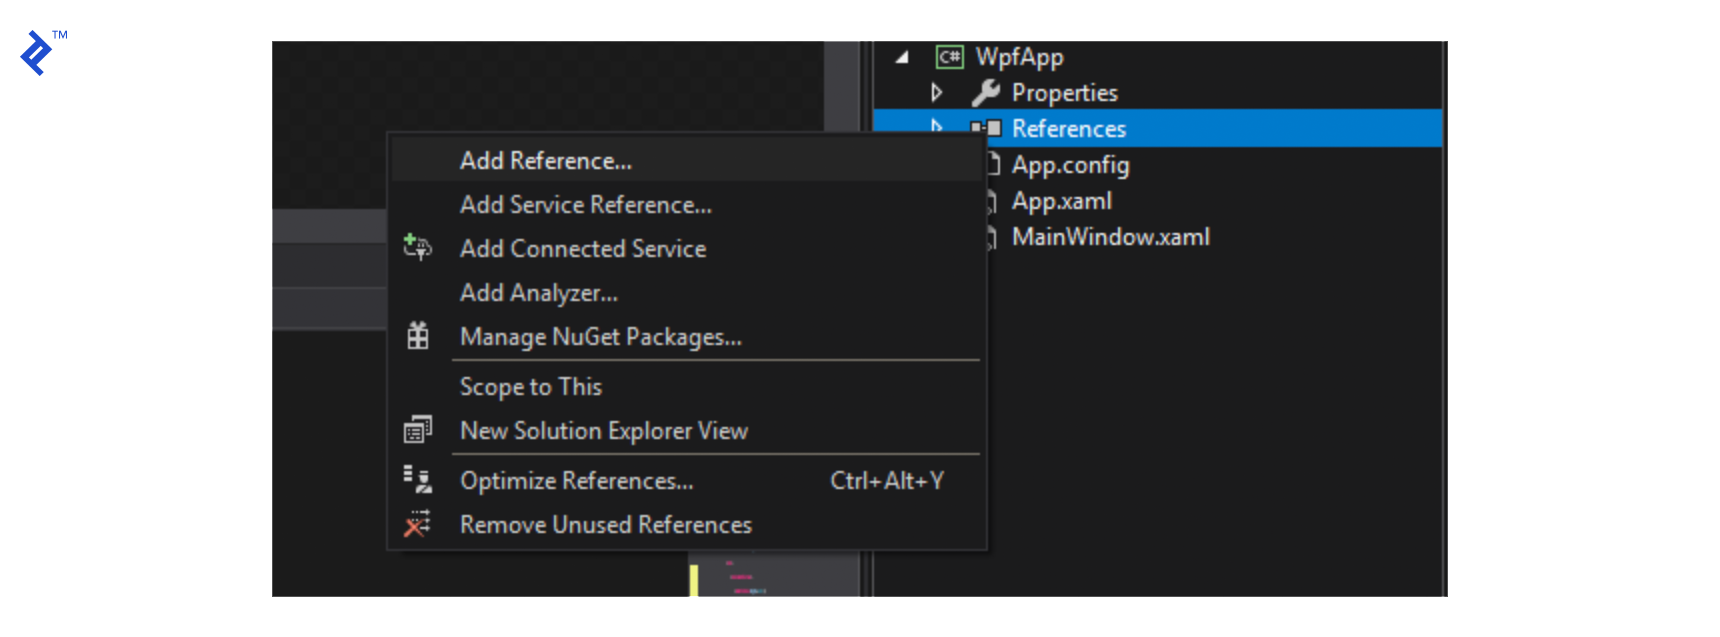
Utilizing the WPF control for Bing Maps requires installing the SDK (mentioned earlier) and adding it as a reference to our WPF application. The DLL’s location might differ depending on your installation path. In my case, with the default installation directory, I added it as follows:
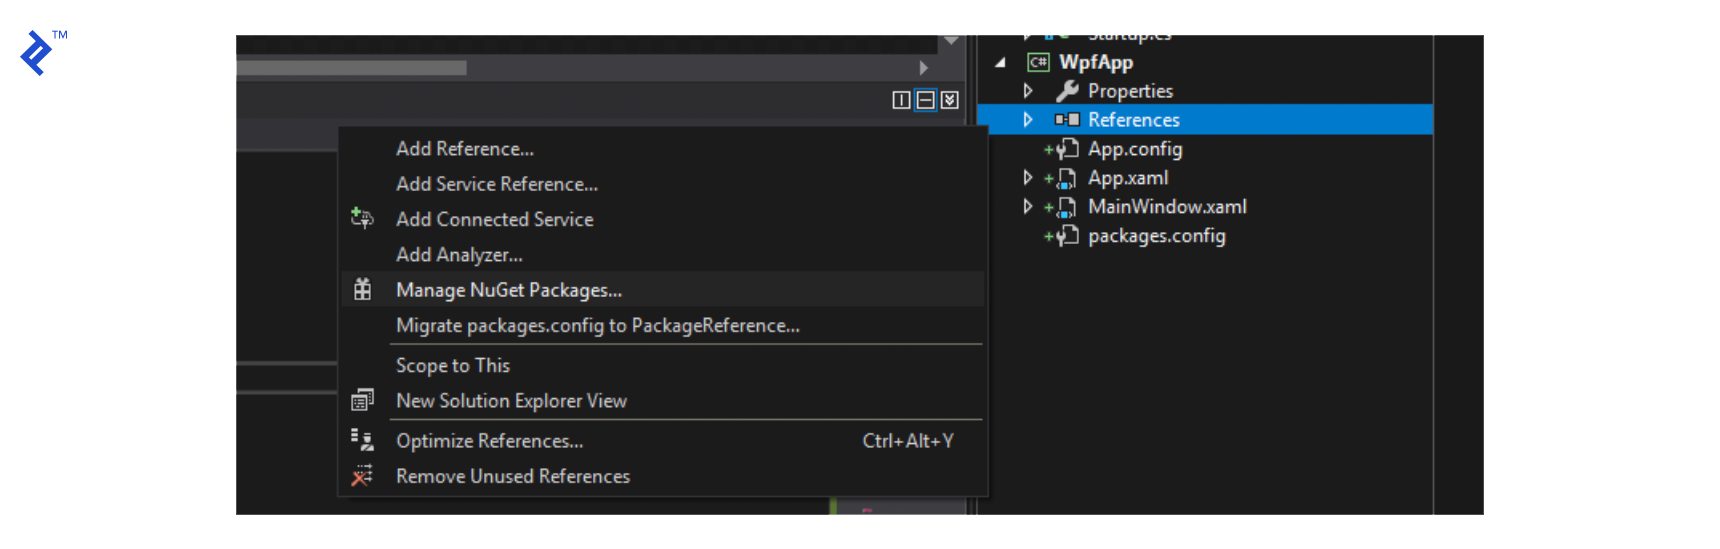
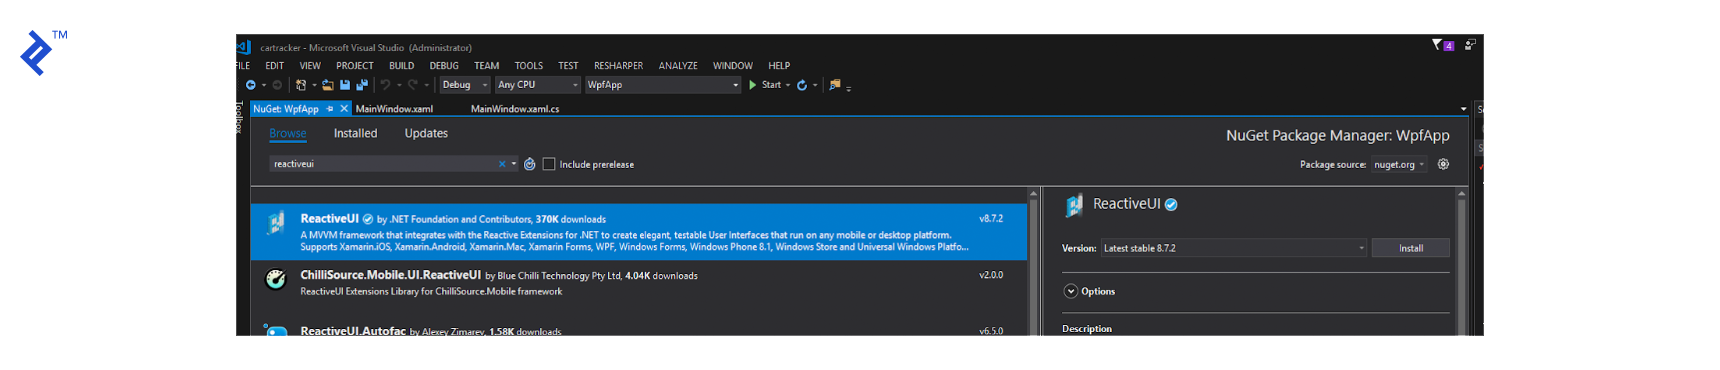
Next, we’ll incorporate NuGet packages for reactiveui, reactiveui-wpf, and refit into our WPF project. These packages will enable us to create view models using Reactive Programming and consume our REST API.
Now, let’s create our ViewModel. Add a new class named MainViewModel.cs with the following code:
 1
 2
 3
 4
 5
 6
 7
 8
 9
10
11
12
13
14
15
16
17
18
19
20
21
22
23
24
25
26
27
28
29
30
31
32
33
34
35
36
37
38
39
40
41
42
43
44
45
46
47
48
49
50
51
52
53
54
55
56
57
58
59
60
61
62
63
64
65
66
67
68
69
70
71
72
73
| public class MainViewModel : ReactiveObject
{
#region Private Members
private readonly ITrackingService _service;
private readonly ISubject<(double latitude, double longitude)> _locationUpdate;
#endregion
#region Methods
public MainViewModel()
{
_service = Locator.Current.GetService<ITrackingService>();
_locationUpdate = new Subject<(double latitude, double longitude)>();
UpdateCar = ReactiveCommand.Create(() =>
{
var parsedCorrectly = int.TryParse(NewCarToFollow, out int newCar);
NewCarToFollow = null;
if (!parsedCorrectly)
{
MessageBox.Show("There was an error reading the number of the car to follow. Please, review it.",
"Car Tracking Service", MessageBoxButton.OK, MessageBoxImage.Warning);
return;
}
FollowedCar = newCar;
}, canExecute: this.WhenAnyValue(x => x.NewCarToFollow).Select(x => !string.IsNullOrWhiteSpace(x)));
/*This Scheduled method is where we get the location for the car being followed every 500 ms. We call the service with the car id, our JWT Token, and transform the result to a ValueTuple (double latitude, double longitude) to pass to our Subject's OnNext method so it can be received by the view */
Scheduler.Default.SchedulePeriodic(TimeSpan.FromMilliseconds(500),
() => _service.GetLocation(FollowedCar, App.GetToken())
.Select(jo =>
(
latitude: double.Parse(jo["Latitude"].ToString()),
longitude: double.Parse(jo["Longitude"].ToString())
)).Subscribe(newLocation => _locationUpdate.OnNext(newLocation)));
}
#endregion
#region Properties
private string _newCarToFollow;
public string NewCarToFollow
{
get => _newCarToFollow;
set => this.RaiseAndSetIfChanged(ref _newCarToFollow, value);
}
private int _followedCar = 1;
public int FollowedCar
{
get => _followedCar;
set => this.RaiseAndSetIfChanged(ref _followedCar, value);
}
public IObservable<(double latitude, double longitude)> LocationUpdate => _locationUpdate;
private ReactiveCommand _updateCar;
public ReactiveCommand UpdateCar
{
get => _updateCar;
set => this.RaiseAndSetIfChanged(ref _updateCar, value);
}
#endregion
}
|
To inform the view about the attached ViewModel and enable its usage, we’ll make a few modifications to the MainView.xaml.cs file:
 1
 2
 3
 4
 5
 6
 7
 8
 9
10
11
12
13
14
15
16
17
18
19
20
21
22
23
24
25
26
27
28
29
30
31
32
33
34
35
36
37
38
39
40
41
42
43
44
45
46
47
48
49
50
51
52
53
54
55
56
57
| public partial class MainWindow : IViewFor<MainViewModel>
{
public MainWindow()
{
InitializeComponent();
ViewModel = Locator.CurrentMutable.GetService<MainViewModel>();
/*Our ViewModel exposes an IObservable with a parameter of type ValueTuple (double latitude, double longitude) and it gets called every time the ViewModel updates the car's location from the REST API.*/
ViewModel.LocationUpdate
.ObserveOn(RxApp.MainThreadScheduler)
.Subscribe(SetLocation);
}
private void SetLocation((double latitude, double longitude) newLocation)
{
//New location for the tracked vehicle.
var location = new Location(newLocation.latitude, newLocation.longitude);
//Remove previous pin
myMap.Children.Clear();
//Center pin and keep same Zoom Level
myMap.SetView(location, myMap.ZoomLevel);
var pin = new Pushpin
{
Location = location,
Background = Brushes.Green
};
//Add new pin to the map
myMap.Children.Add(pin);
}
/// <summary>
/// Allows the ViewModel to be used on the XAML via a dependency property
/// </summary>
public static readonly DependencyProperty ViewModelProperty =
DependencyProperty.Register("ViewModel", typeof(MainViewModel), typeof(MainWindow),
new PropertyMetadata(default(MainViewModel)));
/// <summary>
/// Implementation for the IViewFor interface
/// </summary>
object IViewFor.ViewModel
{
get => ViewModel;
set => ViewModel = (MainViewModel)value;
}
/// <summary>
/// Regular property to use the ViewModel from this class
/// </summary>
public MainViewModel ViewModel
{
get => (MainViewModel)GetValue(ViewModelProperty);
set => SetValue(ViewModelProperty, value);
}
}
|
Subsequently, we’ll modify the MainWindow.xaml file to look like this:
 1
 2
 3
 4
 5
 6
 7
 8
 9
10
11
12
13
14
15
16
17
18
19
20
21
22
23
24
25
26
27
28
29
30
31
32
33
34
35
36
| <Window x:Class="WpfApp.MainWindow"
xmlns="http://schemas.microsoft.com/winfx/2006/xaml/presentation"
xmlns:x="http://schemas.microsoft.com/winfx/2006/xaml"
xmlns:d="http://schemas.microsoft.com/expression/blend/2008"
xmlns:mc="http://schemas.openxmlformats.org/markup-compatibility/2006"
xmlns:wpf="clr-namespace:Microsoft.Maps.MapControl.WPF;assembly=Microsoft.Maps.MapControl.WPF"
xmlns:local="clr-namespace:WpfApp"
DataContext="{Binding ViewModel,RelativeSource={RelativeSource Self}}"
d:DataContext="{d:DesignInstance Type=local:MainViewModel, IsDesignTimeCreatable=True}"
mc:Ignorable="d" WindowStartupLocation="CenterScreen"
Title="Car Tracker" Height="800" Width="1200">
<Grid>
<Grid.RowDefinitions>
<RowDefinition Height="Auto"/>
<RowDefinition Height="*"/>
</Grid.RowDefinitions>
<DockPanel>
<StackPanel Orientation="Horizontal" Margin="10" DockPanel.Dock="Left">
<Label>Car to follow</Label>
<TextBox Width="50" Text="{Binding NewCarToFollow, UpdateSourceTrigger=PropertyChanged}" VerticalAlignment="Center"/>
<Button Margin="15,0,0,0" Content="Update Followed Car"
Command="{Binding UpdateCar}"/>
</StackPanel>
<TextBlock Text="{Binding FollowedCar,StringFormat=Following Car: {0}}"
Margin="0,0,10,0"
HorizontalAlignment="Right" VerticalAlignment="Center" DockPanel.Dock="Right"/>
</DockPanel>
<wpf:Map x:Name="myMap" ZoomLevel="15" Grid.Row="1" Margin="10"
CredentialsProvider="ENTER-YOUR-BING-MAPS-CREDENTIAL-HERE"/>
</Grid>
</Window>
|
Remember to replace the placeholder in the CredentialsProvider property with your Bing Maps key.
For interacting with our REST API, we’ll utilize Refit. This involves creating an interface that outlines the API methods we’ll be using. Therefore, we’ll create a new interface named ITrackingService with the following content:
 1
 2
 3
 4
 5
 6
 7
 8
 9
10
| public interface ITrackingService
{
[Post("/api/values/authenticate")]
IObservable<string> Authenticate([Body] JObject user);
[Get("/api/values/{id}")]
IObservable<JObject> GetLocation(int id, [Header("Authorization")] string authorization);
}
|
Lastly, we’ll modify the App class to incorporate dependency injection (using Splat, which was included with the reactiveui reference), set the ServerUri (make sure to change this to your REST API’s port), and simulate a login at the application’s start.
 1
 2
 3
 4
 5
 6
 7
 8
 9
10
11
12
13
14
15
16
17
18
19
20
21
22
23
24
25
26
27
28
29
30
31
32
33
34
35
36
37
38
39
40
41
42
43
44
| public partial class App : Application
{
protected override void OnStartup(StartupEventArgs e)
{
base.OnStartup(e);
SetDependencyInjection();
LogIn();
}
private void SetDependencyInjection()
{
Locator.CurrentMutable.RegisterLazySingleton(() => RestService.For<ITrackingService>(ServerUri), typeof(ITrackingService));
Locator.CurrentMutable.RegisterLazySingleton(() => new MainViewModel(), typeof(MainViewModel));
}
private static string Token;
private const string ServerUri = "http://localhost:54587";
private void LogIn()
{
try
{
var userInfo = new JObject {
["username"] = "user", ["password"] = "123"
};
Token = Locator.Current.GetService<ITrackingService>()
.Authenticate(userInfo)
.Wait();
}
catch
{
MessageBox.Show("There was an error validating the user. Is the service up?");
Shutdown();
}
}
internal static string GetToken()
{
return $"Bearer {Token}";
}
}
|
Running the application will now present a real-time simulation of a moving car, with its coordinates being fetched from the REST API every 500ms. Users can switch between cars by ID, triggering the creation of a new dataset for the selected car.
This concise example aimed to provide a clear introduction to managing a REST API in WPF using Reactive Programming.
Feel free to download the complete source code for this project from this repository.
Here are some potential areas for expanding on this example to deepen your understanding:
- Implement a login window for user authentication and logout functionality.
- Incorporate user data validation against a database.
- Create distinct user roles with restricted access to specific REST API methods based on their roles. Integrate roles into the JWT Authentication.
- Explore Reactive Programming in more depth by examining the various operators and their behaviors using Rx Marbles. Rx Marbles is a helpful application that allows you to experiment with streams and apply operators to data points within those streams.
Conclusion
Reactive Programming offers a valuable approach to achieving controlled event-driven programming while mitigating common issues inherent in this paradigm. Implementing it in new projects is as simple as adding a few references to well-maintained open-source libraries. More importantly, integrating it into existing codebases can be done incrementally without disrupting backward compatibility with components that don’t utilize it. This article focused on Reactive Programming in the context of WPF, but ports exist for major languages and frameworks, making Reactive Programming an exciting endeavor for any developer.
As an exercise, try these next steps:
- Enhance the project’s functionality by:
- Adding a database to store Users, Cars, and Locations
- Retrieving car location data from the database and displaying it to the user, allowing them to visualize a car’s movements over a period
- Implementing user permissions, granting admin users the ability to create cars and users while restricting regular users to read-only access. Integrate roles into JWT Authentication.
- Explore the source code for .NET reactive extensions in https://github.com/dotnet/reactive.