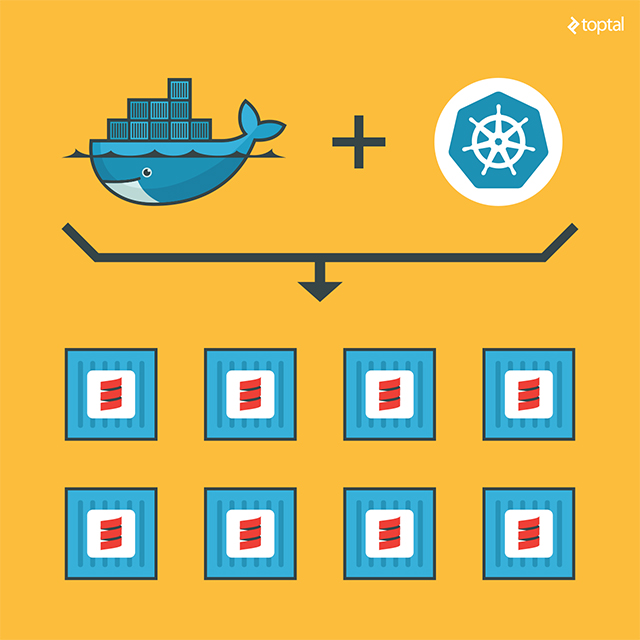
Kubernetes is a relatively new technology designed to streamline the process of deploying and scaling applications in the cloud. In the realm of microservices architecture, Scala has become a popular choice for building API servers.
If you’re planning a Scala application and envision scaling it in the cloud, you’re in the right place. This article provides a step-by-step guide to deploying a typical Scala application using Kubernetes and Docker. We’ll create multiple instances of the application, resulting in a load-balanced deployment managed by Kubernetes.
This entire process is simplified by incorporating the Kubernetes source kit into your Scala application. While the kit streamlines complex installation and configuration details, its concise design allows for easy analysis and understanding. To keep things simple, we’ll deploy everything locally. However, the configuration can be seamlessly applied to real-world cloud deployments using Kubernetes.
Understanding Kubernetes
Before delving into implementation details, let’s clarify what Kubernetes is and why it’s significant.
You might already be familiar with Docker, a technology that provides a lightweight virtualization solution.
These factors have contributed to Docker’s widespread adoption as a tool for deploying applications in cloud environments. Creating and replicating Docker images is significantly easier and faster compared to traditional virtual machines like VMWare, VirtualBox, or XEN.
Kubernetes complements Docker by providing a comprehensive environment for managing dockerized applications. With Kubernetes, you can effortlessly deploy, configure, orchestrate, manage, and monitor hundreds or even thousands of Docker applications.
Developed by Google, Kubernetes is an open-source tool embraced by numerous vendors. It’s natively available on Google Cloud Platform and has been adopted by others for their OpenShift cloud services. You’ll find it on Amazon AWS, Microsoft Azure, RedHat OpenShift, and other cloud platforms. It’s well-positioned to emerge as a standard for deploying cloud applications.
Prerequisites
With the basics covered, let’s ensure you have the necessary software installed. Firstly, you’ll need Docker. On Windows or Mac, you’ll need the Docker Toolbox. Linux users need to install the appropriate package provided by their distribution or directly install follow the official directions.
We’ll be coding in Scala, a JVM language, so you’ll need the Java Development Kit and the scala SBT tool installed and accessible in your system’s path. As a Scala programmer, you likely have these tools installed already.
On Windows or Mac, Docker defaults to creating a virtual machine named ‘default’ with 1GB of memory, which might be insufficient for running Kubernetes. I’ve encountered issues with these default settings. I suggest opening the VirtualBox GUI, selecting the ‘default’ virtual machine, and increasing the memory to at least 2048MB.

The Application: Ready for Clustering
While these instructions apply to any Scala application, I’ll use a common example to demonstrate a simple REST microservice in Scala called Akka HTTP. I recommend testing the source kit with this example before applying it to your application. I’ve tested the kit with this demo; however, I cannot guarantee there won’t be conflicts with your specific codebase.
Begin by cloning the demo application:
| |
Next, ensure everything functions correctly:
| |
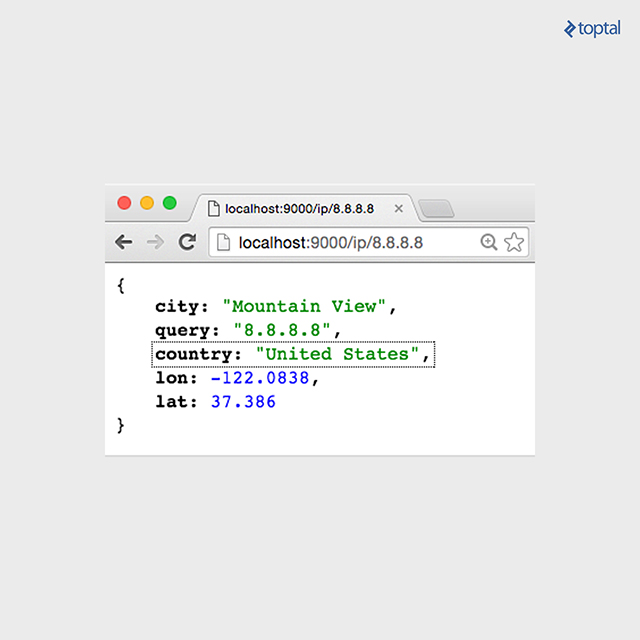
Now, navigate to http://localhost:9000/ip/8.8.8.8 in your browser, and you should observe something similar to the following image:
Integrating the Source Kit
Now, let’s integrate the source kit using some Git magic:
| |
With that, your demo includes the source kit, ready for you to experiment with. Alternatively, you can copy the code directly into your application.
Launching Kubernetes
Once you’ve downloaded the kit, download the required kubectl binary:
| |
The installer should download the correct kubectl binary for your OS (OSX, Linux, or Windows). Please report any issues to help improve the kit.
After installing the kubectl binary, initiate Kubernetes locally within Docker:
| |
On its first run, this command downloads the images for the entire Kubernetes stack and sets up a local registry for storing your images. Be patient, as this might take some time and requires direct internet access. If you’re behind a proxy, you’ll need to configure tools like Docker and curl to use it, which can be complex. Consider temporarily using an unrestricted connection.
Once the download is complete, verify if Kubernetes is running correctly:
| |
The expected response is:
| |
Note that the ‘age’ value may differ. Starting Kubernetes can take a while, so you might need to run the command a few times before seeing a response. If there are no errors, Kubernetes is successfully running on your machine.
Dockerizing Your Scala Application
With Kubernetes running, you can now deploy your application. Previously, without Docker, deploying your application required a dedicated server. With Kubernetes, you only need to:
- Create a Docker image.
- Push it to a registry for launching.
- Launch the instance with Kubernetes, which pulls the image from the registry.
This process is surprisingly straightforward, especially when using the SBT build tool.
The kit includes two files containing the necessary definitions to create an image capable of running Scala applications, or at least the Akka HTTP demo. These files are a good starting point and should work for many different configurations. The files for building the Docker image are:
| |
Let’s examine their contents. The file project/docker.sbt imports the sbt-docker plugin:
| |
This plugin handles building the Docker image using SBT. The Docker definition resides in the docker.sbt file:
| |
A thorough understanding of this file requires familiarity with Docker and its definition file structure. However, a deep understanding isn’t necessary to build the image.
the SBT will take care of collecting all the files for you.
Note that the classpath is automatically generated by this command:
| |
Gathering all the necessary JAR files for running an application can be complex. With SBT, the Dockerfile is generated with add(classpath.files, "/app/"). This allows SBT to collect all the JAR files and create a Dockerfile to run your application.
The remaining commands gather the necessary components to create a Docker image. The image is built using an existing image designed for running Java programs (anapsix/alpine-java:8, available on Docker Hub). Other instructions add the remaining files required to run your application. Finally, specifying an entry point enables us to run it. Note that the name intentionally starts with localhost:5000, as that’s where the registry is set up in the start-kube-local.sh script.
Building the Docker Image with SBT
You can disregard the Dockerfile details when building the Docker image. Simply type:
| |
The sbt-docker plugin then builds a Docker image, downloading the necessary components from the internet. It then pushes the image to the Docker registry that was previously started alongside the Kubernetes application at localhost.
If you encounter problems, reset everything to a known state:
| |
These commands stop and restart all containers, preparing your registry to receive the image built and pushed by sbt.
Launching the Service in Kubernetes
With the application packaged in a container and pushed to the registry, it’s time to utilize it. Kubernetes relies on command-line instructions and configuration files to manage the cluster. Since command lines can become lengthy, I’ll be using configuration files here. You can find all the samples in the source kit within the kube folder.
The next step is to launch an instance of the image. In Kubernetes terminology, a running image is referred to as a pod. Create a pod using this command:
| |
Inspect the current status:
| |
You should see something similar to this:
| |
The status might vary; for instance, it could be “ContainerCreating”. It might take a few seconds to transition to “Running”. Alternatively, you might encounter an “Error” status if, for instance, you forgot to create the image beforehand.
You can also check the pod’s status:
| |
The output should resemble this:
| |
The service is now up and running within the container. However, it’s not yet accessible. This is by design in Kubernetes. While your pod is running, you must explicitly expose it. Otherwise, the service remains internal.
Creating a Service
To create a service and verify the outcome, execute:
| |
You should observe something like this:
| |
Note that the port number might differ. Kubernetes assigns a port to the service and starts it. On Linux, you can directly open a browser and type http://10.0.0.54:9000/ip/8.8.8.8 to view the result. However, if you’re using Windows or Mac with Docker Toolbox, the IP is local to the virtual machine running Docker, making it unreachable.
It’s crucial to understand that this is not a Kubernetes issue, but rather a limitation of Docker Toolbox, which in turn stems from constraints imposed by virtual machines like VirtualBox. Virtual machines essentially act as a computer within a computer. To address this limitation, we need to establish a tunnel. The provided script simplifies this by creating a tunnel on an arbitrary port, granting access to any deployed service. Run the following command:
| |
Note that the tunnel requires the terminal window to remain open. While it’s running, open http://localhost:9000/ip/8.8.8.8 in your browser to finally see the application running in Kubernetes.
Scaling Up
So far, we’ve deployed our application in Kubernetes. While this is a significant achievement, it doesn’t fully leverage the power of Kubernetes. We’ve bypassed the effort of manual server uploads, installations, and proxy configurations.
Kubernetes truly shines in its scaling capabilities. You can deploy multiple instances of your application by simply modifying the number of replicas in the configuration file.
Let’s stop the single pod and initiate a deployment instead. Execute the following:
| |
Next, check the status, keeping in mind that deployment might take some time:
| |
Instead of one, there are now two pods running because the provided configuration file specifies replica: 2. The system generates two different names for these replicas. I won’t delve into the specifics of the configuration files, as this article serves as a starting point for Scala programmers venturing into Kubernetes.
The key takeaway is that we now have two active pods. Interestingly, the service remains the same. We’ve configured it to load balance between all pods labeled akkahttp, eliminating the need to redeploy the service when replacing the single instance with a replicated one.
Verify this by relaunching the proxy (if you closed it):
| |
Now, open two terminal windows to observe the logs for each pod. In the first window, type:
| |
In the second window:
| |
Remember to modify the command lines based on your system’s specific values.
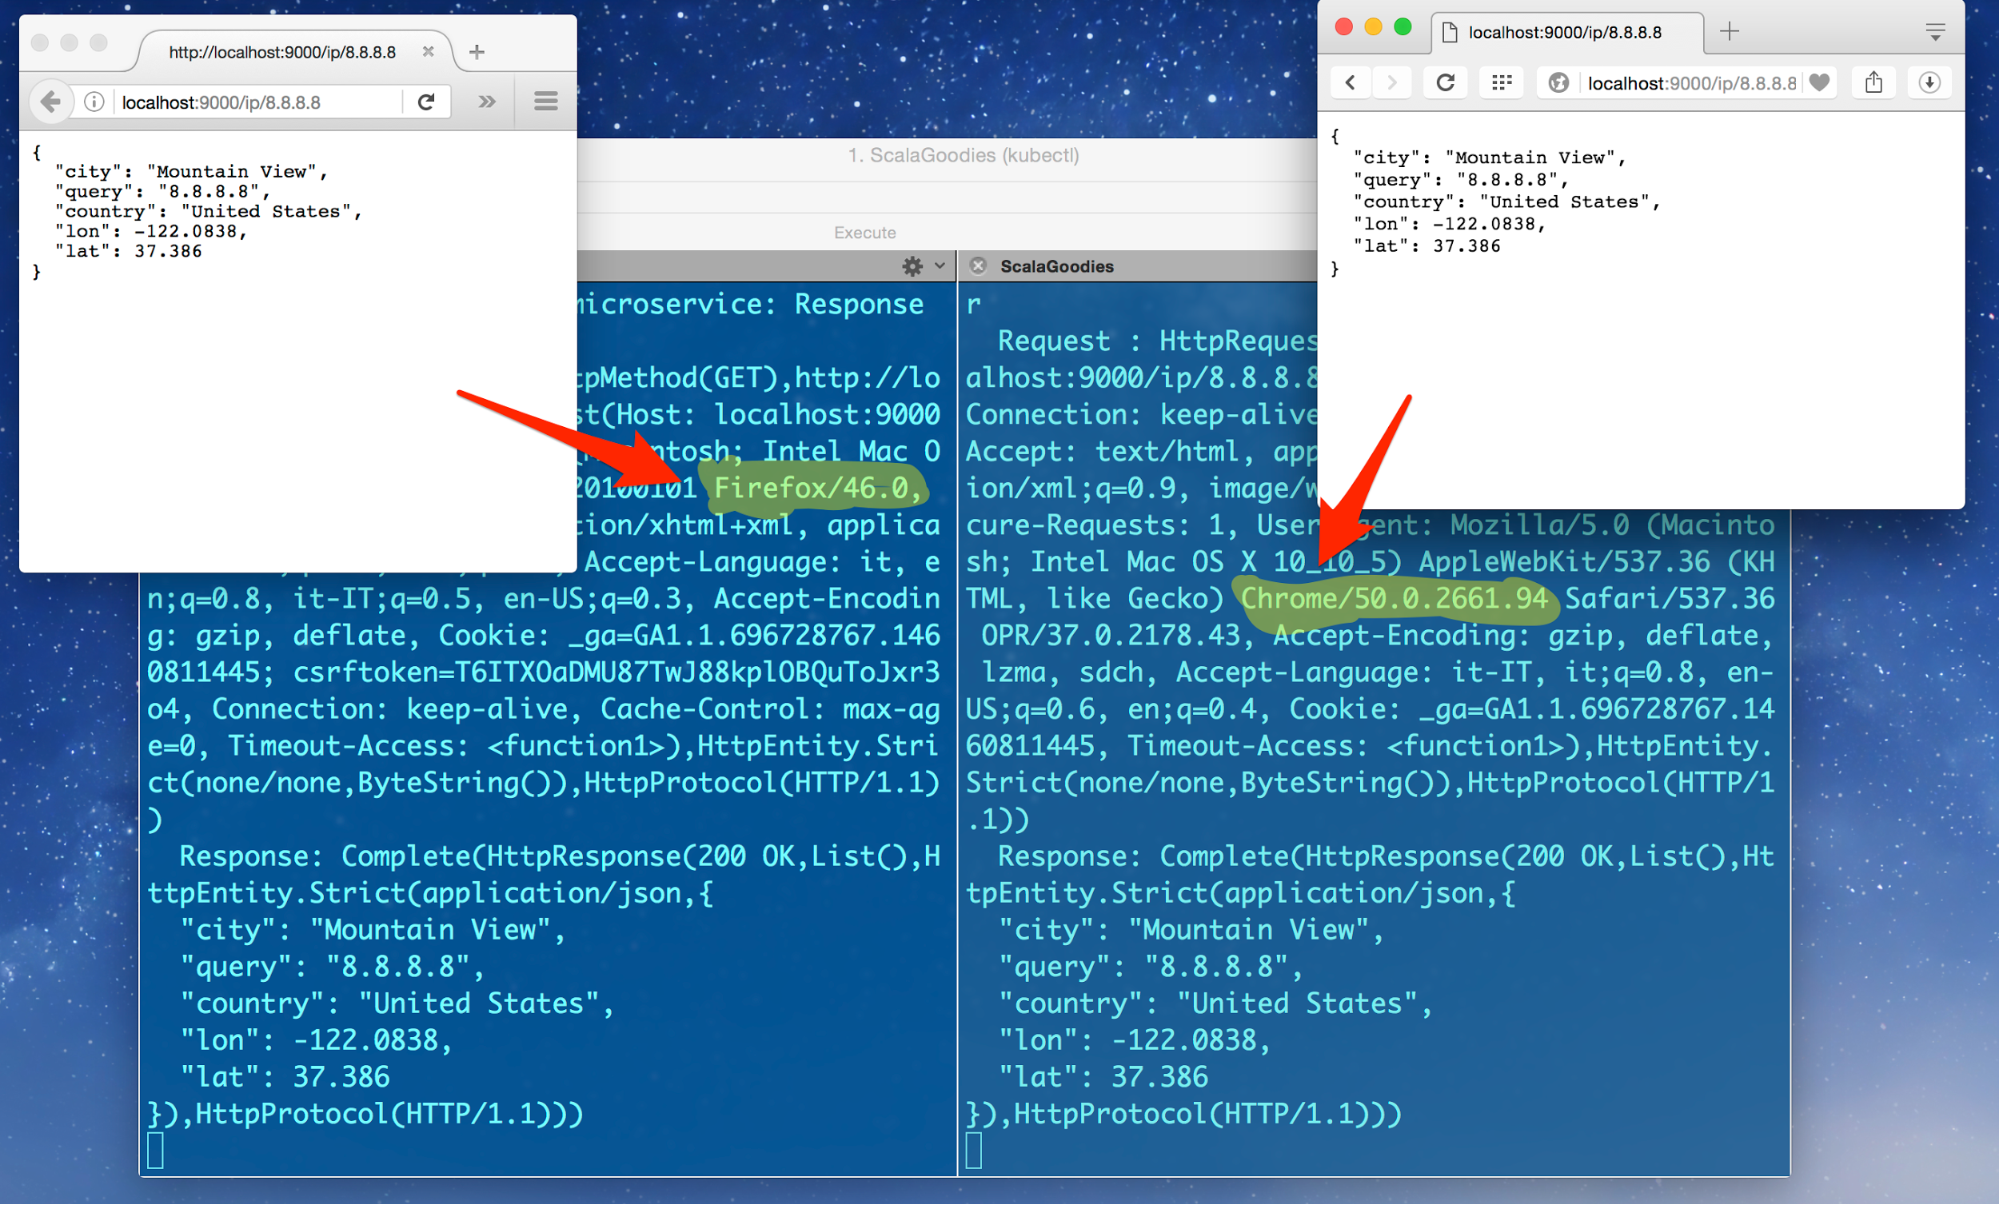
Access the service using two different browsers. The requests should be distributed among the available servers:
Conclusion
This tutorial provides a basic introduction to Kubernetes. Kubernetes offers a vast array of capabilities, including automated scaling, restarts, incremental deployments, and volumes. The example application used here is deliberately simplified—it’s stateless, meaning the instances don’t need to be aware of each other. In reality, distributed applications require inter-instance communication and need to adapt their configurations based on the availability of other servers. Kubernetes addresses this with its distributed keystore (etcd), facilitating communication between applications when new instances are deployed. This example focuses on core functionalities to provide a manageable learning curve. By following these steps, you can set up a functional environment for your Scala application without getting lost in complexities.