EhCache is a widely adopted Java caching solution that seamlessly integrates with popular frameworks like Spring and Hibernate. Its ease of integration within Java applications makes it a popular option. For instance:
- Integrating it into projects is as simple as adding the JAR file, with no additional setup required.
- As it operates within the application’s process, it delivers swift performance without relying on external services.
To summarize, EhCache proves to be an excellent option for pure-Java applications.
Furthermore, EhCache Spring Annotations allows for effortless integration with Spring applications. This is achieved by adding annotations to methods that require caching, eliminating the need for code modifications.
While EhCache offers straightforward and comprehensive APIs for programmatic cache management, this article will primarily focus on enhancing your Spring applications using the less intrusive approach of EhCache Spring Annotations. We will create a Spring MVC project and deploy a RESTful web service on Tomcat, and then integrate EhCache into this web service.
Project Overview
To illustrate the use of EhCache Annotations, we will employ an example project. Our setup will involve a Spring MVC-based web service hosted on a Tomcat 8 server.
I built this project using Eclipse, which can be set up by referring to the instructions provided here.
The most recent stable release of Tomcat, Tomcat 8, can be downloaded here.
It’s important to note that using these platforms is not mandatory for using EhCache. You are welcome to use your preferred IDE and server.
The EhCache Spring Annotations JAR file is accessible here. Each version offers two JAR files: one containing dependencies and one without. The former includes EhCache 2 and Spring 3, which are essential for EhCache annotations to work. Downloading the version with dependencies simplifies setup, as it can be directly added to your project’s build path.
Although EhCache Spring Annotations is compatible with Spring 4, it requires a separate configuration process. Currently, there’s no confirmed support for EhCache 3 in the near future. Therefore, if you are using or planning to use EhCache 3, the annotation approach discussed in this article is not recommended.
Finally, we will use Maven as our build tool. While Maven is often included in Eclipse installations, it can also be downloaded separately here. Adding Spring MVC and EhCache Spring Annotations as dependencies is straightforward, as we’ll demonstrate later in this article.
Project Setup
If you’re new to setting up a Spring project, you might find Stefan Varga’s guide on the topic helpful.
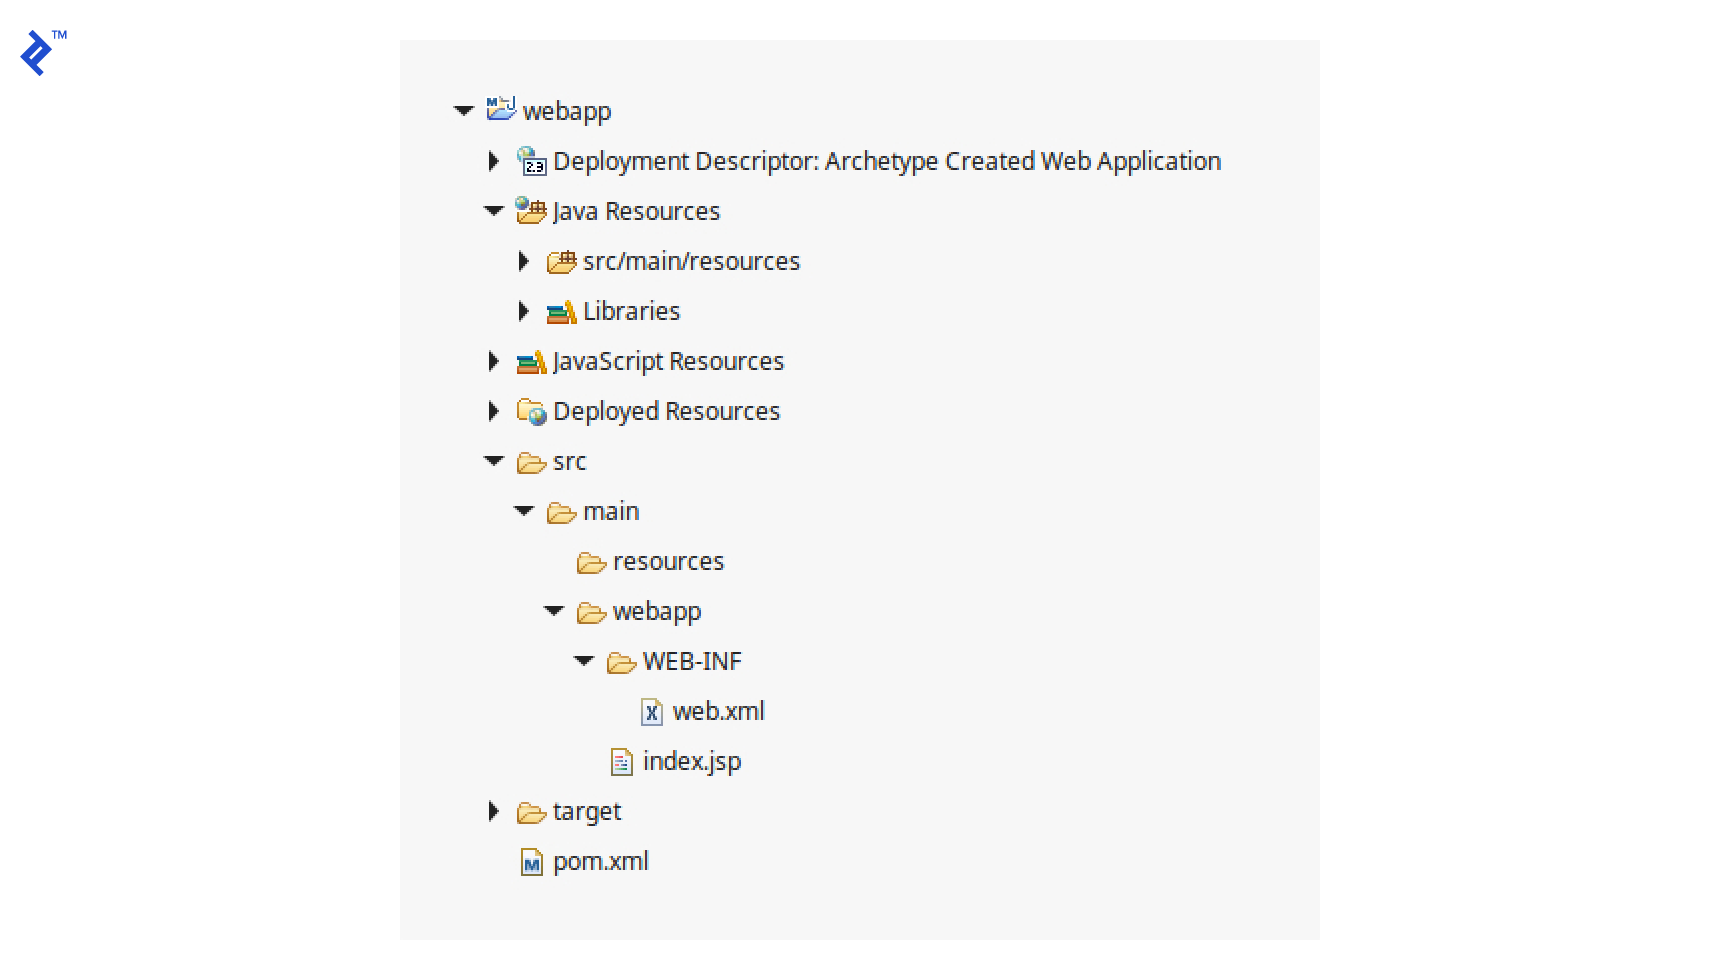
For this example, we’ll create a simple project using the Maven archetype maven-archetype-webapp. The final file structure will resemble this:
Within the project, establish a directory named src/main/java and create three packages: com.toptal.blog, com.toptal.blog.cache, and com.toptal.blog.service. These packages will hold our application’s source code, as explained in more detail below.
Let’s configure a Tomcat servlet named “springrest” within the web.xml file:
| |
By default, a Spring MVC DispatcherServlet searches for an XML configuration file named {servlet-name}-servlet.xml in the WEB-INF directory. So, let’s create a configuration file called springrest-servlet.xml. To enable Spring to process controller methods marked with the @RequestMapping annotation, we’ll add <mvc:annotation-driven /> to this file. We also need to define the base package for Spring to automatically scan and register beans. This can be done by adding <context:component-scan base-package="com.toptal.blog" />. Now, the springrest-servlet.xml configuration file should look like this:
| |
A Simple RESTful Web Service
With our project properly configured, we can implement a simple “message service” API. Inside our base package, project.toptal.blog, we will add a Java class named SpringRestControllerWithEhCache.java. This class will have two methods: a GET method to retrieve a message by ID and a POST method to store a message associated with a specific ID:
| |
Next, we’ll define the MessageService class within the com.toptal.blog.service package. This class will interact with messages stored in our System of Records (SOR). While in a real-world application, the SOR might be a database, for simplicity, we’ll use a HashMap in this example:
| |
Now, if you package the project as a WAR file and deploy it to Tomcat, you should be able to set a message, such as “test_message” for ID=1, by sending an HTTP POST request to http://localhost:8080/EhCacheExample/message/set/1/test_message. You should then be able to retrieve “test_message” using an HTTP GET request sent to http://localhost:8080/EhCacheExample/message/1. As a convenient tool for these tests, I opted for Insomnia, a REST client.
Integrating EhCache Spring Annotations
Let’s now integrate EhCache into our project. Configuring our project to leverage EhCache is a straightforward process that involves a few steps.
Step 1: Adding the EhCache Spring Annotations Dependency
To incorporate EhCache Spring Annotations into our project, we’ll add its dependency to the Maven pom.xml file:
| |
Step 2: Implementing a Custom Cache Manager
Spring provides a built-in EhCache cache manager, org.springframework.cache.ehcache.EhCacheManagerFactoryBean, which suits most caching scenarios. However, I’ve found it beneficial to define a custom cache manager for greater control. This approach allows me to manage the cache either programmatically or using annotations with the same cache manager. Although our focus in this article is on annotations, let’s define a custom cache manager to be prepared for situations where programmatic control might be needed. If you prefer using the default cache manager, you can skip this step.
We’ll create a new class, CustomCacheManager, within the com.toptal.blog.cache package:
| |
To enable it, update the springrest-servlet.xml configuration file as follows:
| |
Step 3: Configuring EhCache
Next, create the EhCache configuration file, ehcache.xml, and place it in the project’s classpath. In Eclipse, the src/main/resources directory is usually included in the classpath by default. We’ll place the file there. This file is crucial for EhCache to operate correctly, as it defines cache names and their properties, such as the timeToLiveSeconds:
| |
Step 4: Testing the Cache Implementation
With everything set up, utilizing EhCache is simple and efficient. You can add the @Cacheable annotation to any method or class you wish to cache. For instance, I added @Cacheable to the getMessage method in the MessageService class. It’s that easy!
| |
To verify if our cache is functioning as expected, send an HTTP POST request to http://localhost:8080/EhCacheExample/message/set/1/newMessage to create a message with ID=1. Then, send multiple HTTP GET requests to http://localhost:8080/EhCacheExample/message/1 to retrieve the message with ID=1. As you’ll notice in the console output below, the web service initially queries the SOR to fetch the message but doesn’t do so for subsequent requests, instead returning the cached message. Since we set the timeToLiveSeconds to 10, after 10 seconds, the web service again contacts the SOR to get the message:
| |
Cache Refresh
We’re now benefiting from the speed and convenience of caching, with EhCache automatically refreshing the cache every 10 seconds. But what if we want to refresh it right after updating our SOR? EhCache Spring Annotation provides @TriggersRemove, which removes specific keys from the cache when the annotated method is invoked. In our message service API, the cached message should be evicted from the cache when the setMessage method is called. Consequently, the next time a getMessage request arrives, the cache will retrieve the updated record from the SOR:
| |
Cache managers employ a key generator to generate unique cache keys. A list of pre-defined key generators is available here. By default, @KeyGenerator uses both the method name and the provided parameters to generate the cache key. However, since we want setMessage to generate the same key as getMessage and remove the associated cached value, we must exclude the method name from key generation, using only the message ID. Therefore, we set the key generator’s includeMethod property to false for both methods. Moreover, as setMessage has two arguments, we use EhCache’s @PartialCacheKey annotation on the id parameter to indicate that it’s the only one that the key generator should use. Lastly, recall that we configured a dedicated cache, messageCache, for this resource type. Therefore, using only the ID for the key poses no risk of conflicts with other resource types.
Now, if we execute several HTTP requests for the message with ID=1 as follows:
| |
We should observe the following output in the console:
| |
Conclusion
This is what the final project structure looks like:
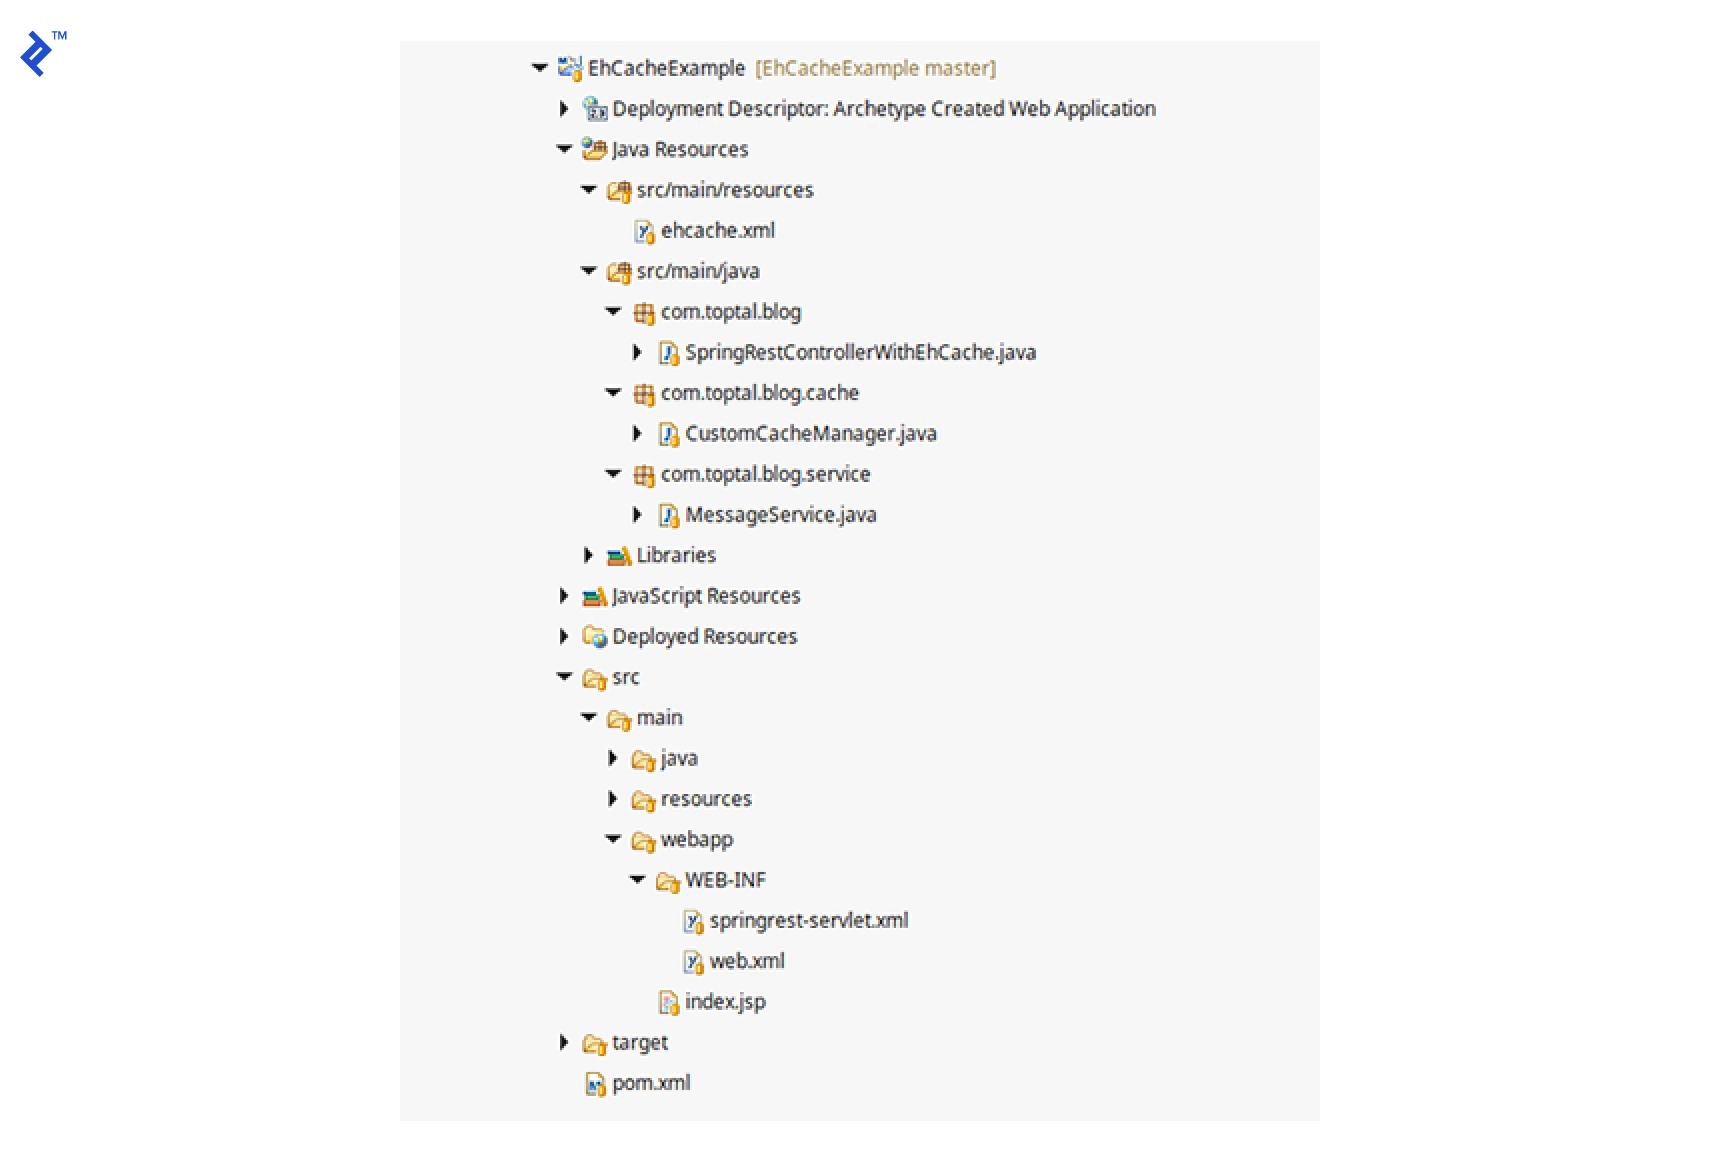
In this example, we first constructed a simple Spring MVC RESTful web application. Then, without altering the existing application code, we seamlessly integrated EhCache using EhCache Spring Annotations. This demonstrates how EhCache Spring Annotations is both easy to integrate (by adding its Maven dependency) and elegant to implement (by annotating methods).
Further Resources
The EhCache documentation can be found here, and the EhCache Spring Annotations documentation is available here.
Additionally, you can explore the sample project described in this article on GitHub.