Sometimes, generating static pages is more than enough for a project’s requirements; it can even be the most effective way to achieve optimal speed and scalability.
This article series began by demonstrating how to combine Node.js, Express, MongoDB, cron, and Heroku to build a CI-ready back end that uses GitHub’s API to retrieve data daily. Now, we’re going to integrate Gatsby to finish building our static page generation project.
Building the Front End: Creating a Gatsby Website
Gatsby websites are built using React, so familiarity with React web development is beneficial.
I opted for Bootstrap, reactstrap, and react-markdown for styling. It’s worth noting that release notes in GitHub are stored in Markdown format, so we’ll need a converter.
Project Structure for the Static Website
Our project will have the following file and folder organization:
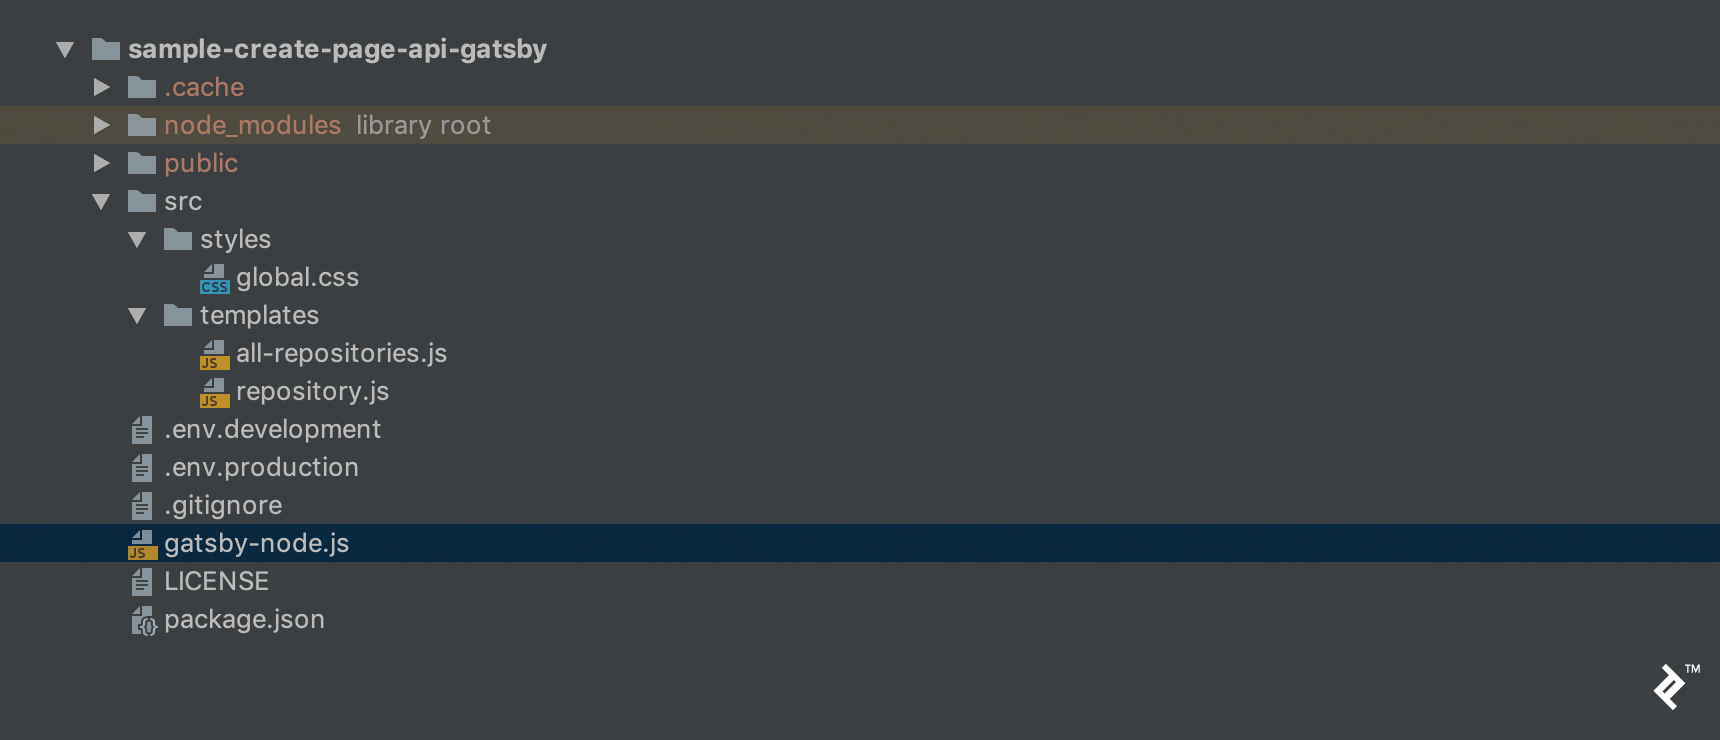
Here’s a breakdown of these files:
env.developmentandenv.productionare configuration files for environment variables.all-repositories.jsis a template for our homepage, displaying a list of repositories.repository.jsis a template to show details of a specific repository.gatsby-node.jsis where we’ll consume our back-end endpoint and execute thecreatePagemethods.package.jsonlists project dependencies and properties, as usual.global.cssis our primary stylesheet.
Implementing the Gatsby Website
Similar to setting up the back end, you’ll need to run npm install (or yarn, if you have Yarn installed) after adding the necessary dependencies to your front end’s package.json:
| |
The env.development and env.production files contain only the back-end URLs for their respective environments. Here’s what env.development looks like:
| |
…and here’s the env.production file:
| |
The code in gatsby-node.js is executed only once during the build process. Therefore, we need to retrieve all the required data from our back end at this stage. The response will then be used with our templates to generate the appropriate static pages.
In this case, all-repositories.js needs access to all repositories, while repository.js requires the data of the corresponding repository for each iteration. Finally, we can generate page paths dynamically, incorporating the repository owner and name parameters within the path field:
| |
For both all-repositories.js and repository.js, ignoring styling for now, we’re simply fetching data from pageContext and using it like we would parameters in React.
In all-repositories.js, the repositories field of pageContext will be used like this:
| |
In repository.js, we’ll use the repository field of pageContext instead:
| |
Ensure your back end is up and running. In this project, we configured it as http://localhost:3000.
Now, navigate to the root of your front-end project and run gatsby develop. Then, open your web browser and go to http://localhost:8000.
If you’ve added some repositories (owner/name) to your back end and executed the GitHub API update feature at least once, you should see something like this:
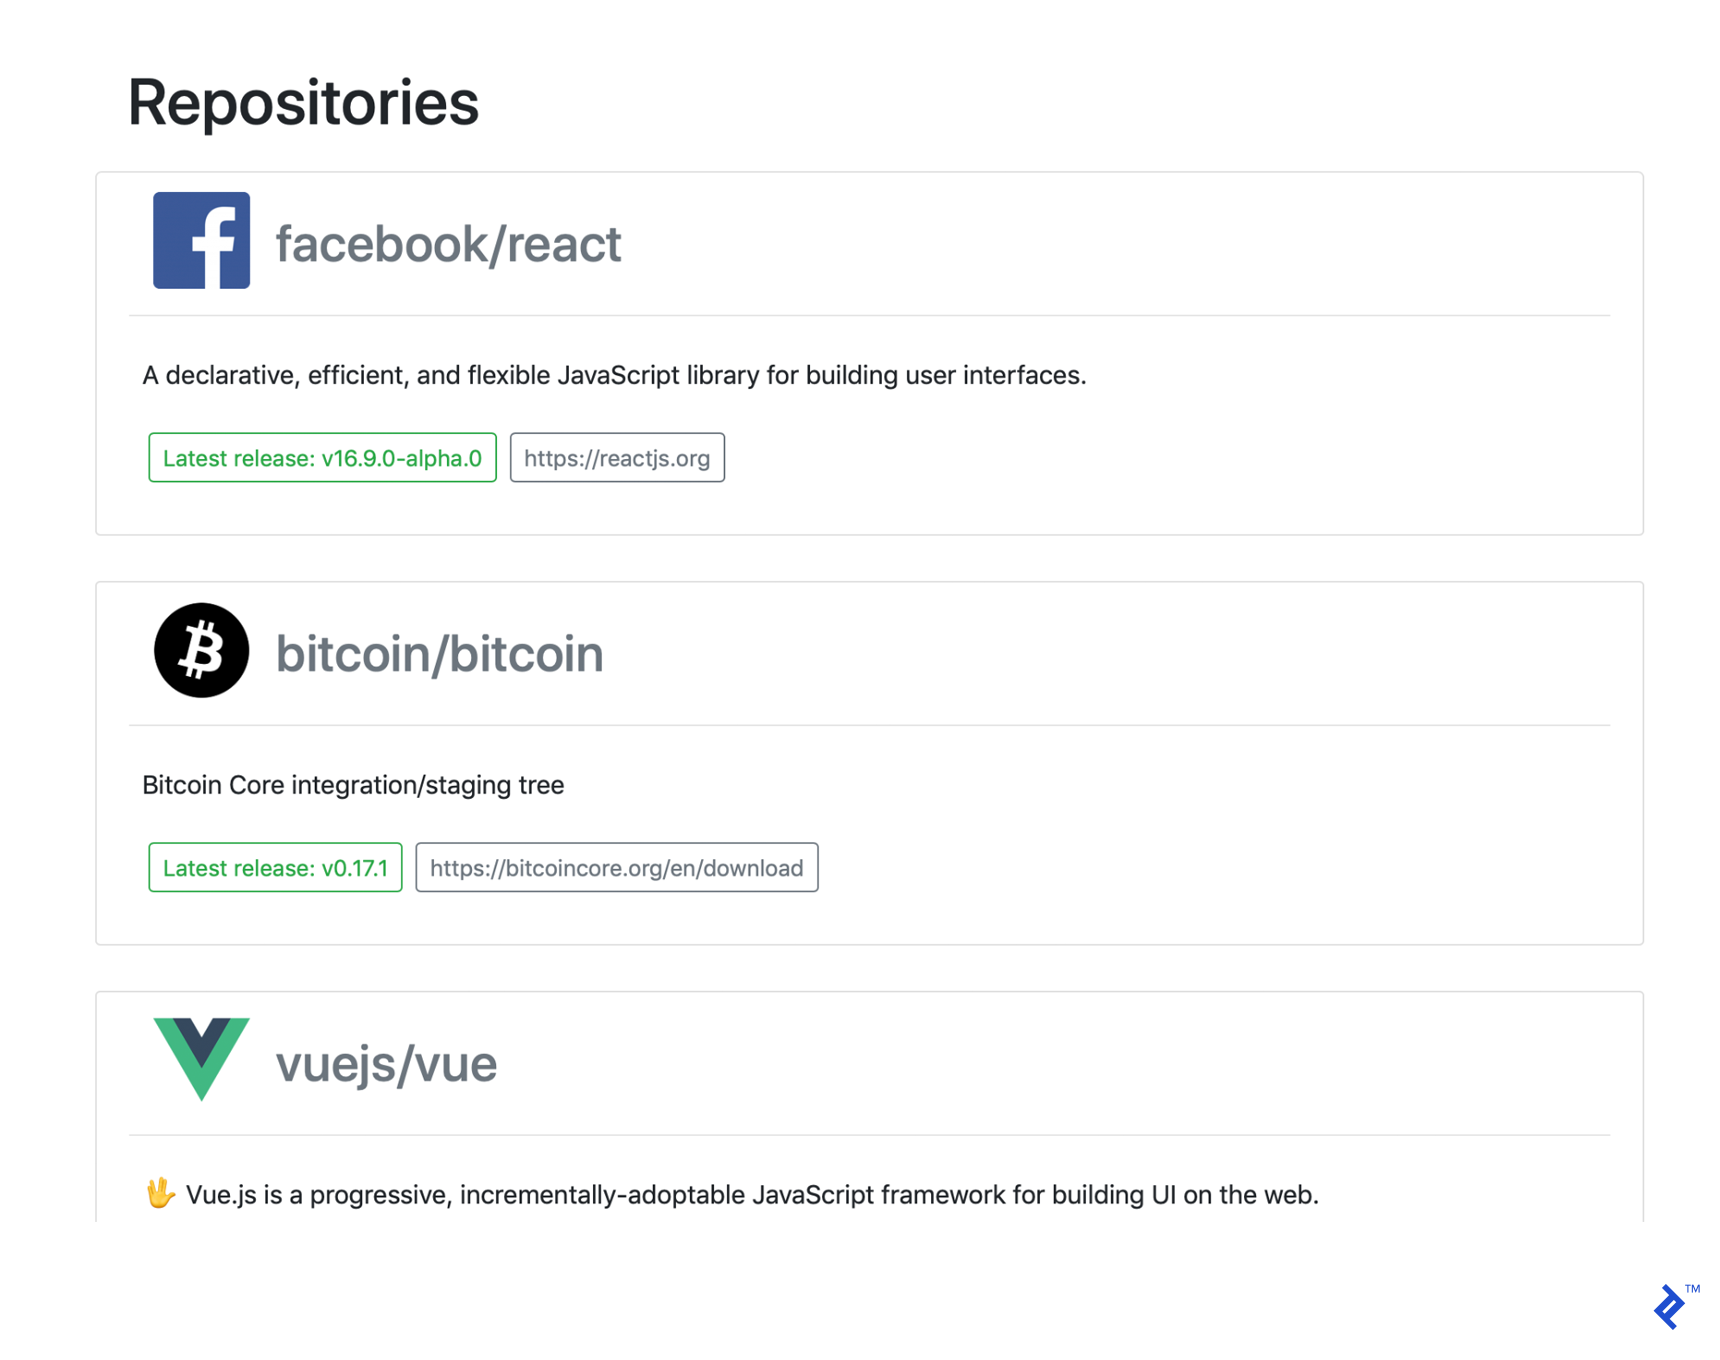
And upon clicking one of the repositories, you should see a page like this:
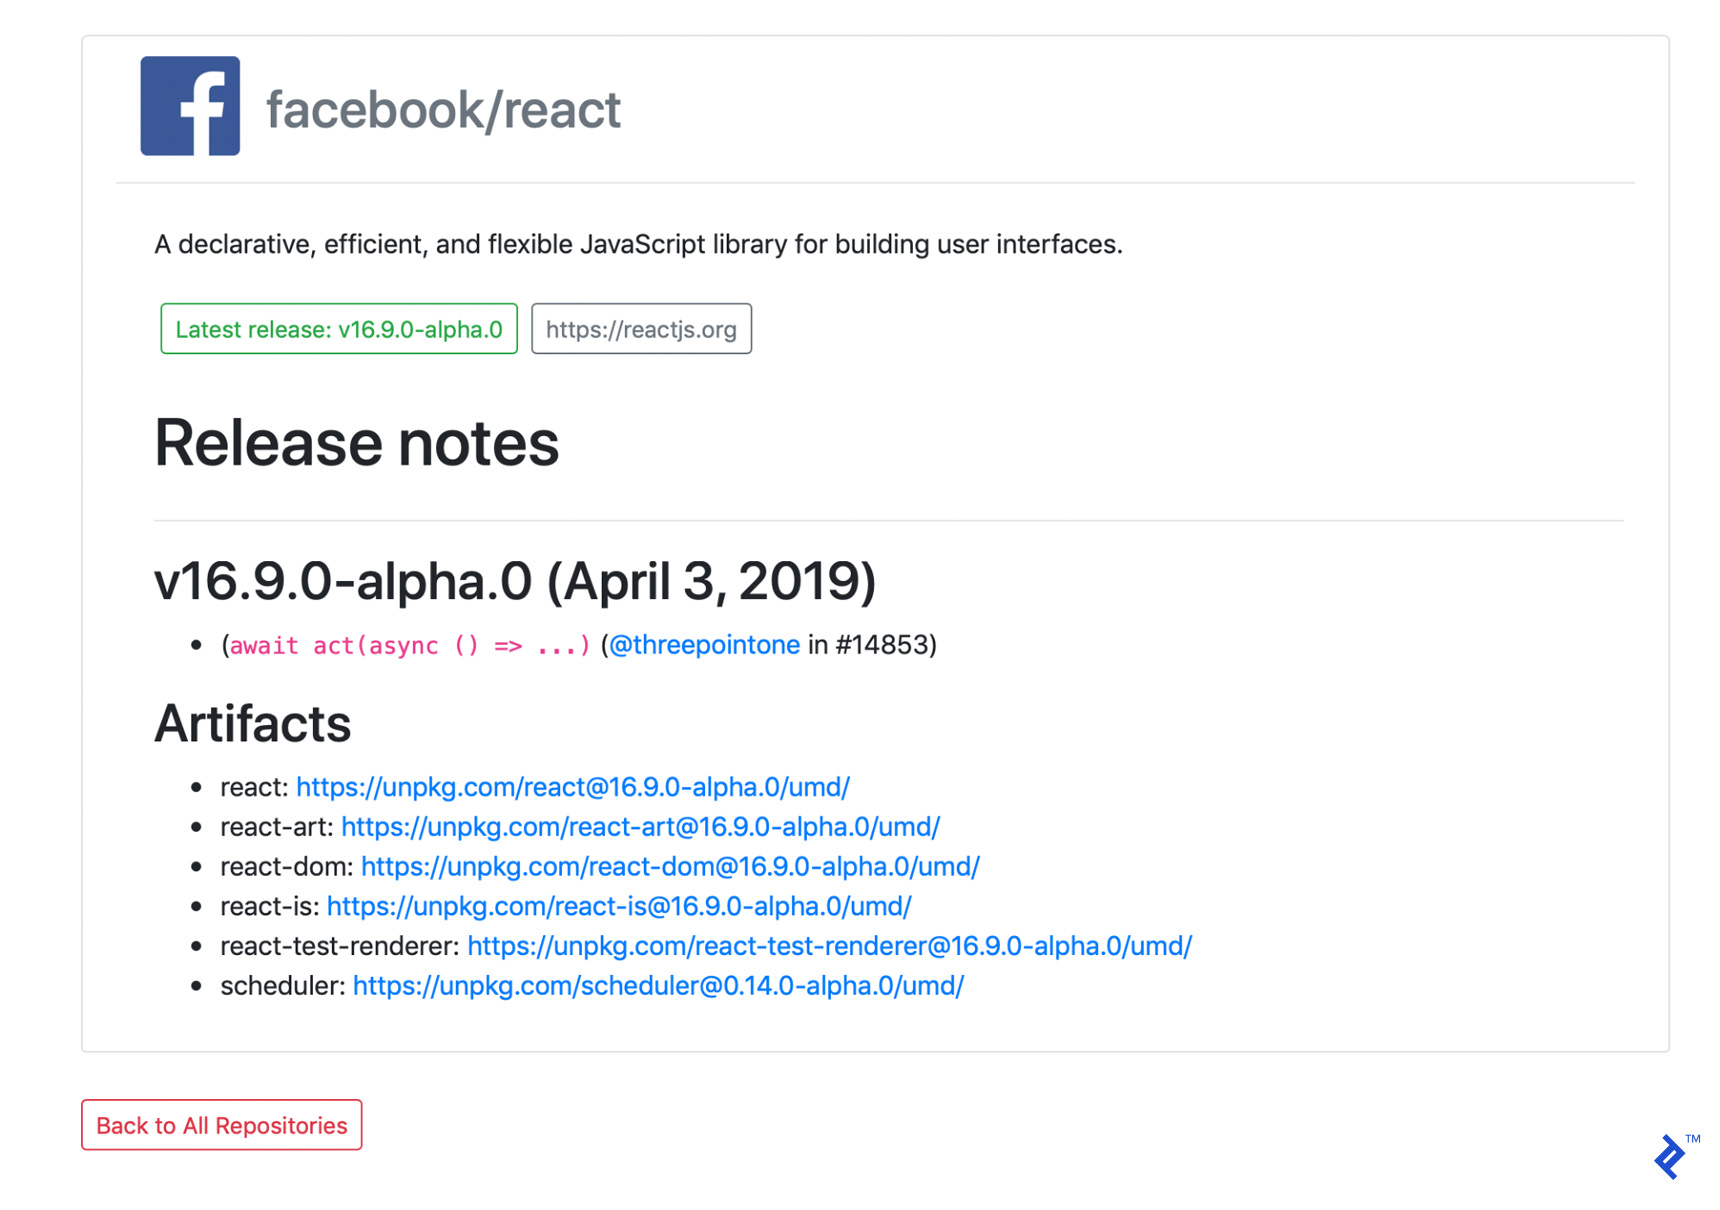
After these modifications, our front-end implementation is done.
Excellent! We’re ready for deployment.
Deploying the Front End
No changes are needed in our front-end application for this part. We’ll deploy it to Netlify. (You’ll need an account to proceed.)
Before that, we must push our code to a Git repository hosting service like GitHub, GitLab, or Bitbucket. Like we did with the back end, I deployed my code to GitHub.
Log in to Netlify and click the “New site from Git” button on your dashboard. Follow the prompts to choose your Git provider and locate your repository.
If your code structure is correct, Netlify will automatically configure the build command and publish directory as follows:
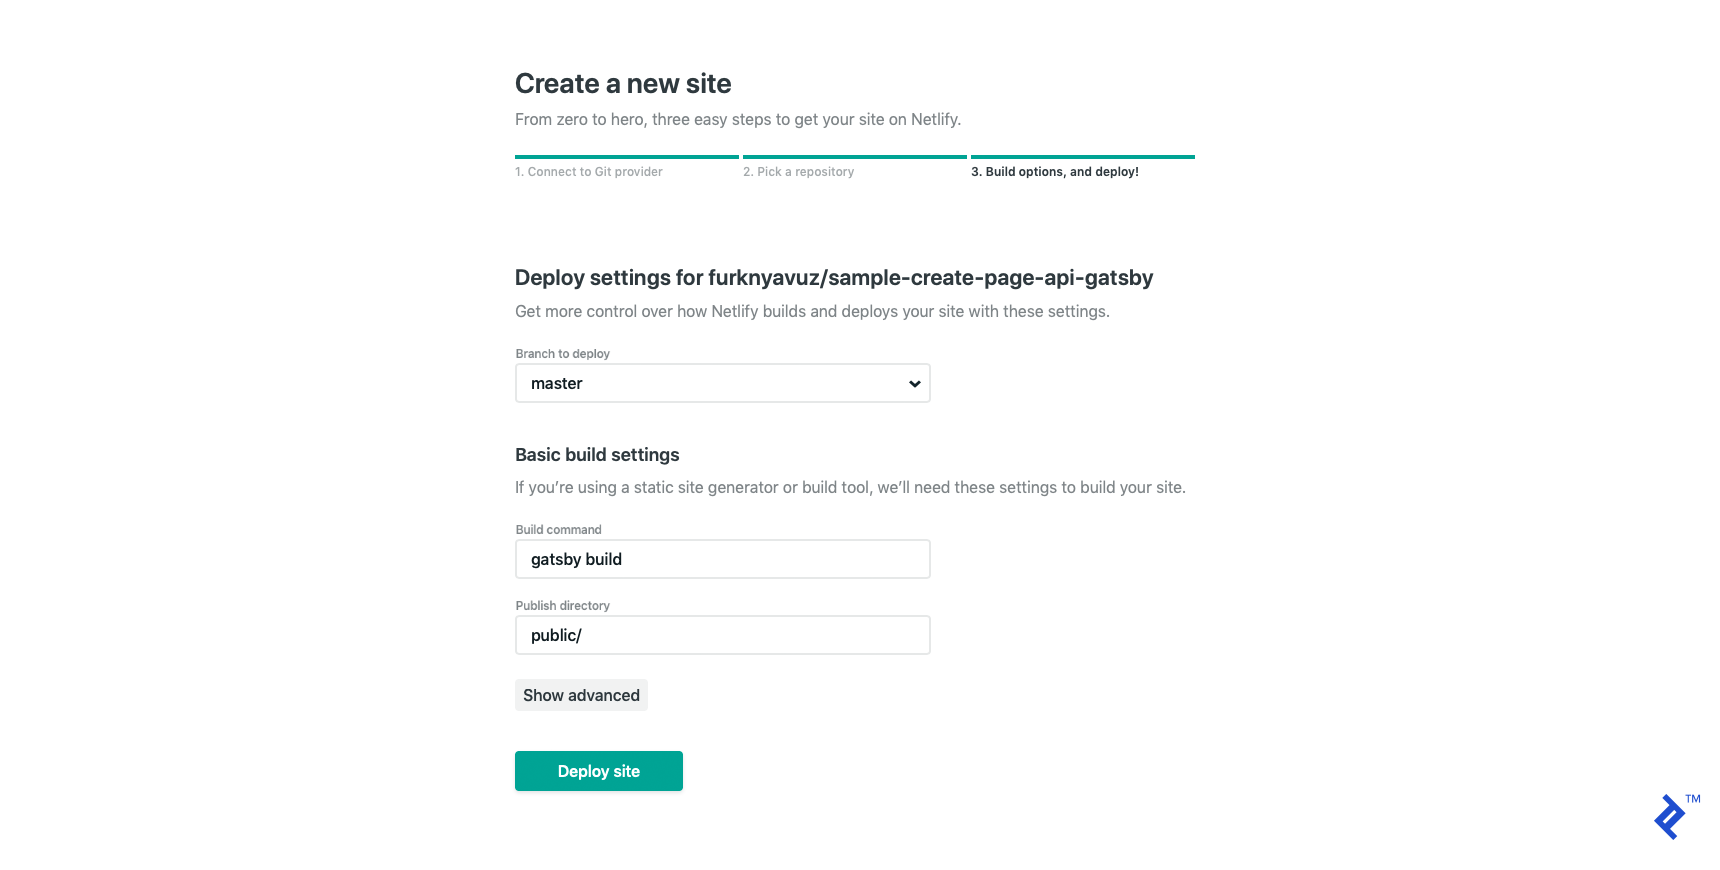
Finally, click “Deploy site.” Netlify will deploy your website to a randomly generated subdomain, which you can customize at any time. I set my deployment to https://sample-create-page-api-gatsby.netlify.com, where you can find a live demo of the completed app.
Because we are working with a static page application, we need to rebuild it every day to ensure its information stays current.
Using a Build Hook for Daily Updates
Netlify’s build hooks act as triggers for rebuilding your site. This allows you to trigger them from your back end once the cron job is completed. Let’s start by creating a build hook in Netlify.
Go to “Build & deploy → Continuous Deployment” where you’ll find the “Build hooks” option. Click “Add build hook.”
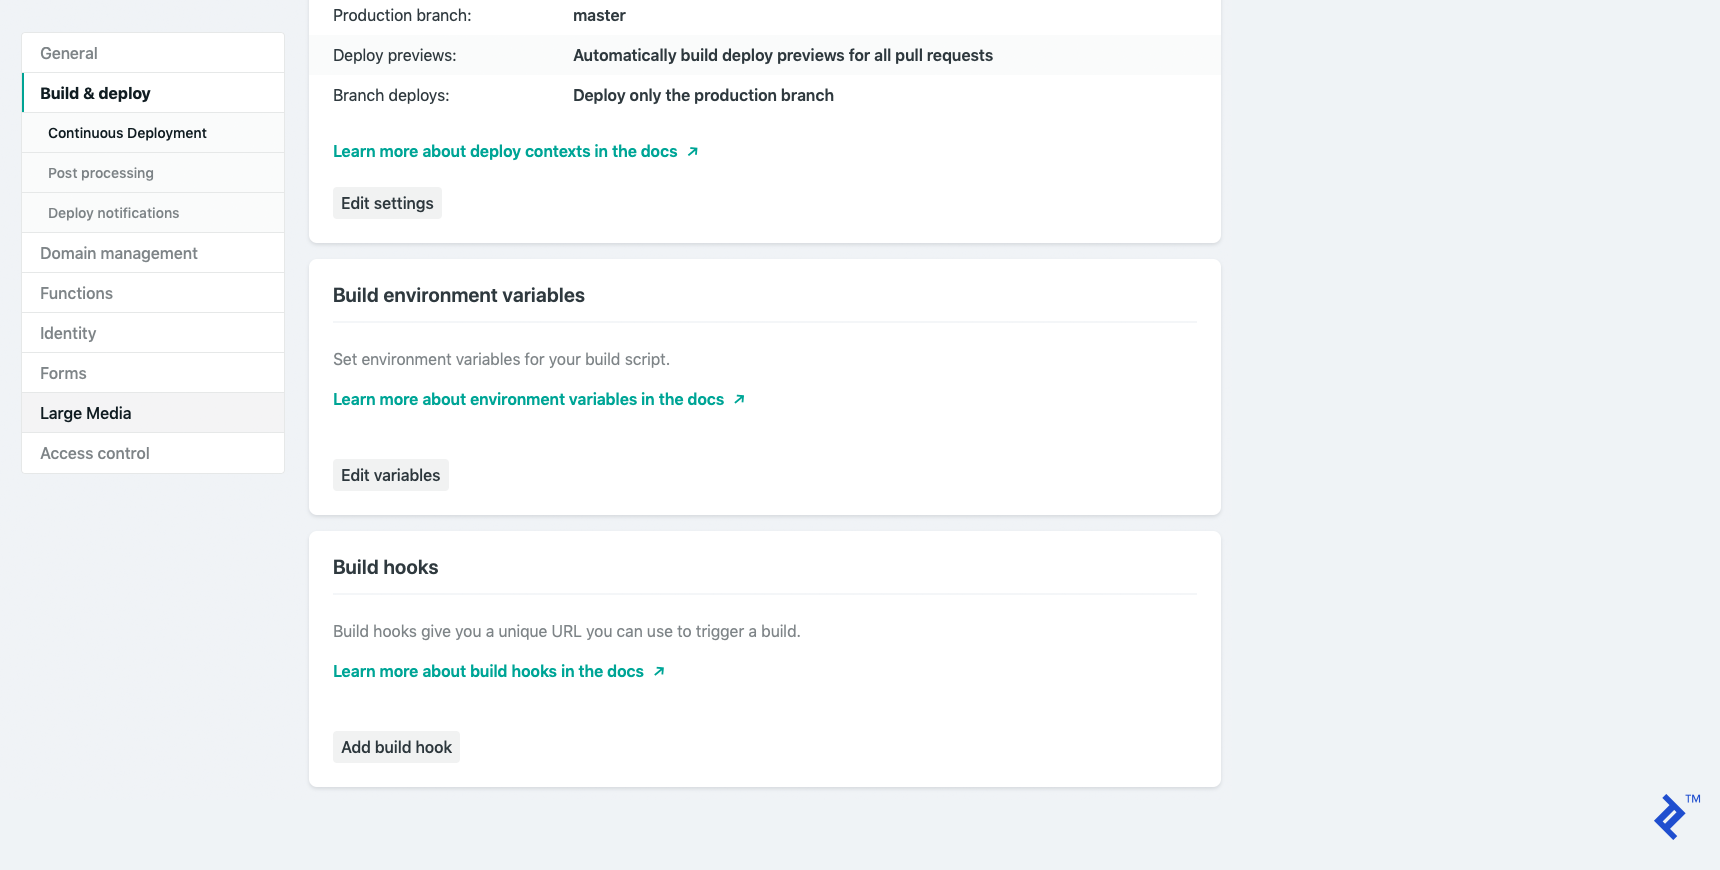
Provide a descriptive name and save the build hook. (I named mine build-from-backend.) Copy the generated link for later use.
Now, open your back-end project and add the following lines of code to the cron.controller.js file. These lines send a POST request to your Netlify build hook URL.
| |
Next, update the updateDaily function:
| |
Update the env.config.js file to retrieve the netlifyEndpoint property from environment variables:
| |
Now you need to set the NETLIFY_BUILD_HOOK environment variable with the link you copied from Netlify. To do this in Heroku, you can set environment variables from the “settings” section of your application.
Once you push your commit, the back-end application will send a build request to Netlify, and your static pages will be updated daily after the cron job finishes. Here’s what the repo should look like after adding the build hook functionality, as well as the final versions of the back-end repo and the front-end repo.
To wrap up the project, we’ll set up an AWS Lambda function triggered by AWS CloudWatch to wake up your back end in time for the daily updates.
AWS Lambda and AWS CloudWatch Simple Request
AWS Lambda is a serverless computing service. We’ll only use the very basics from this platform, and you’ll need an AWS account.
Start by logging into your AWS account and go to the Lambda Management Console. For instance, if you’re in the us-east-2 region, the console can be found at https://us-east-2.console.aws.amazon.com/lambda/home.
Navigate to the “Functions” section if it’s not already selected:
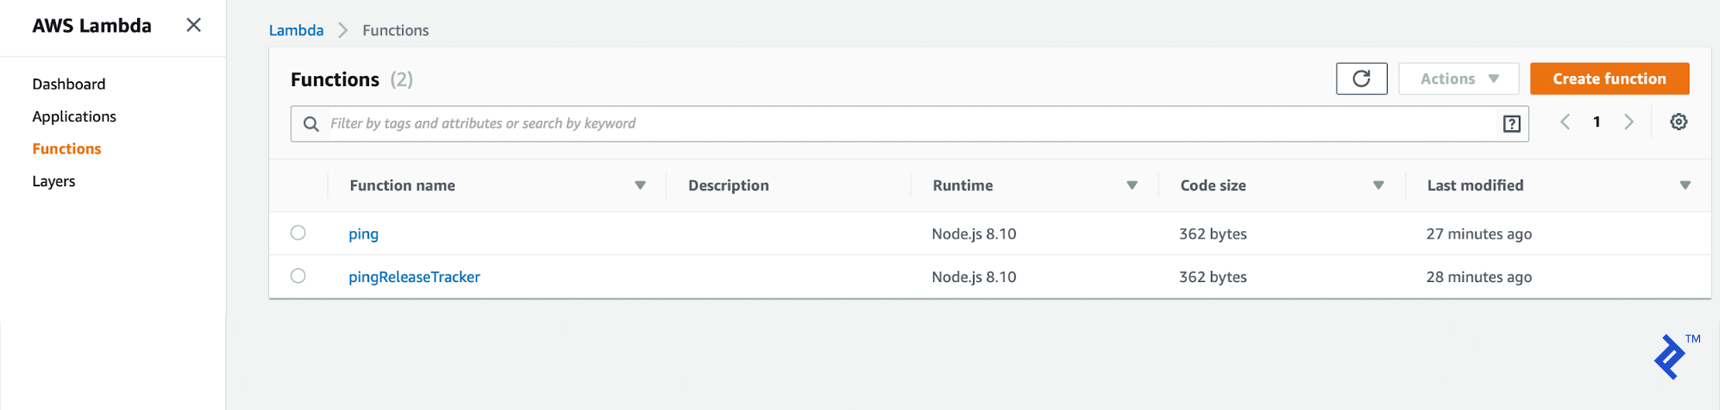
Here, we will create a new function by clicking on “Create function.” Choose a clear and descriptive name for your function. We will use Node.js for the runtime environment. To finalize the creation process, click on the next “Create function” button.
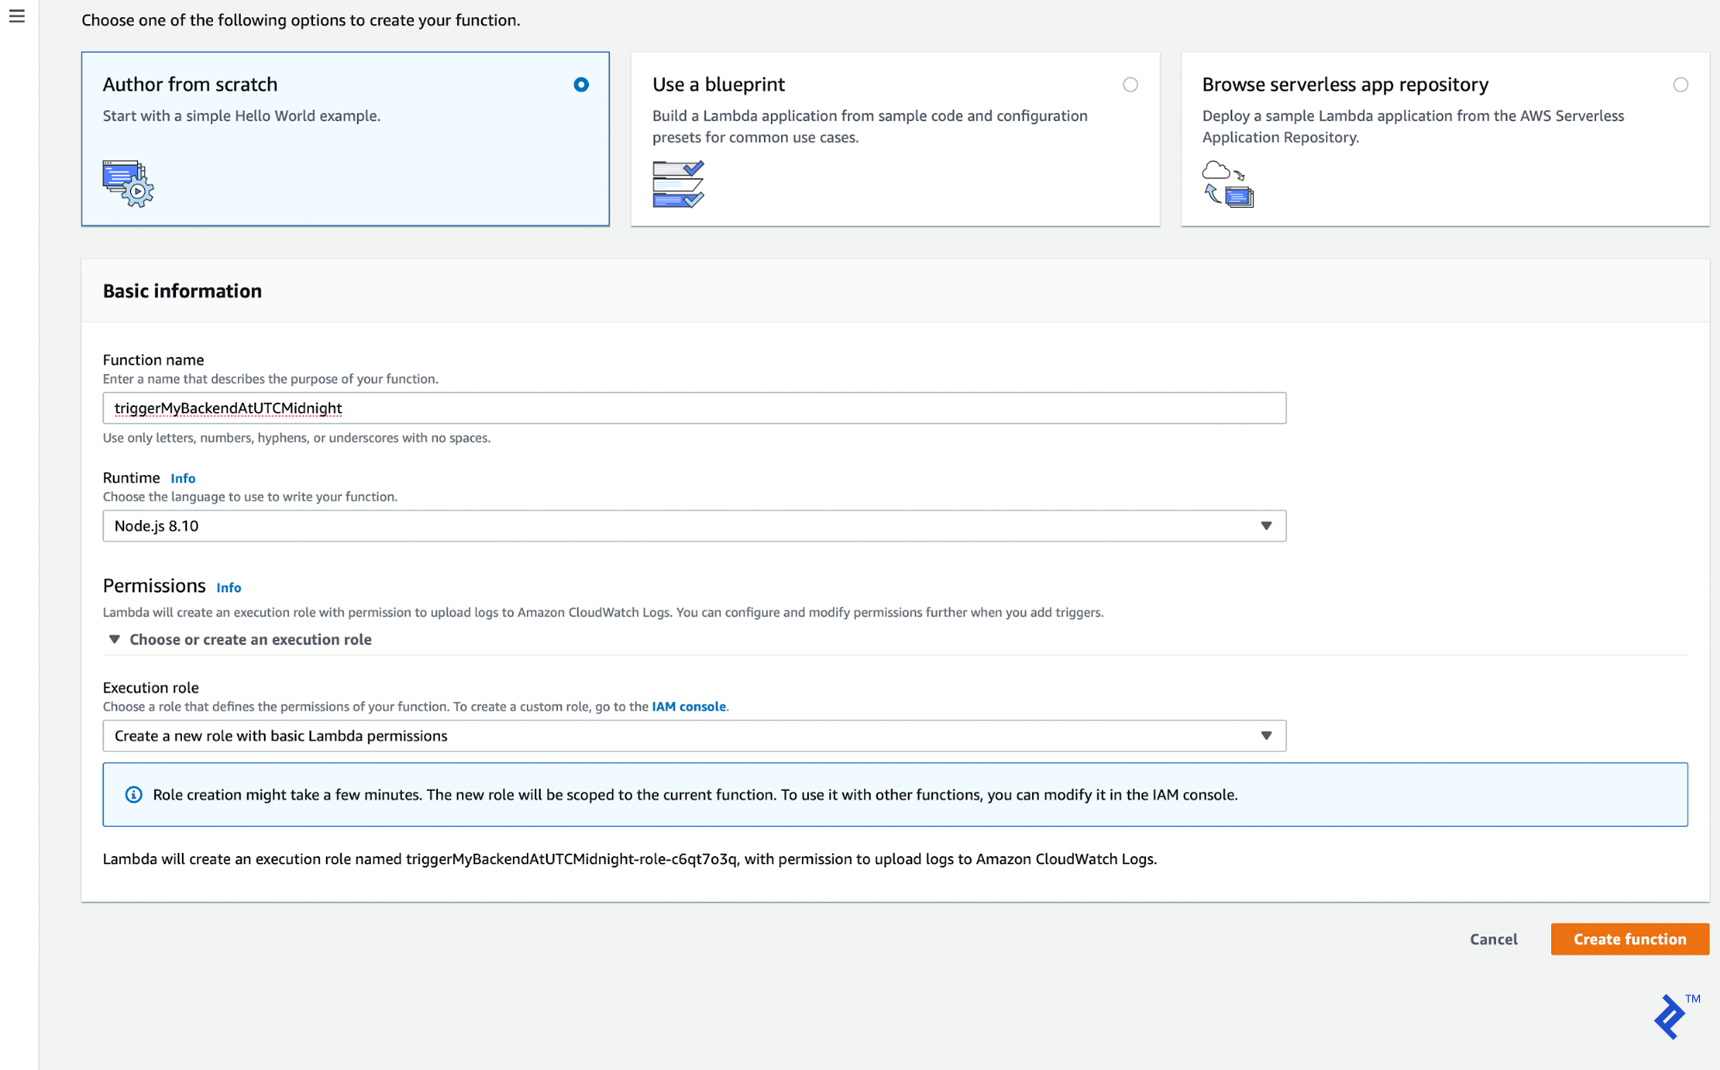
This will redirect you to the newly created function’s page. Here, you can write your code directly in the index.js file.
Let’s proceed with implementing our first Lambda function. As we do not have any external dependencies, we will need to rely on the core modules provided by Node.js. (If you prefer to utilize third-party dependencies, please refer to follow this guide from AWS.)
Ensure that the exported method name, which is handler in our case, matches the “Handler” parameter specified on the page:

The remaining code is a simple GET request sent to your back-end application:
| |
Make sure to set the HEROKU_APP_URL environment variable on the page, and don’t forget to save your configuration:

The last step is to add a CloudWatch trigger rule that will execute this function ten minutes before each daily update—in the context of this article series, this translates to 23:50:
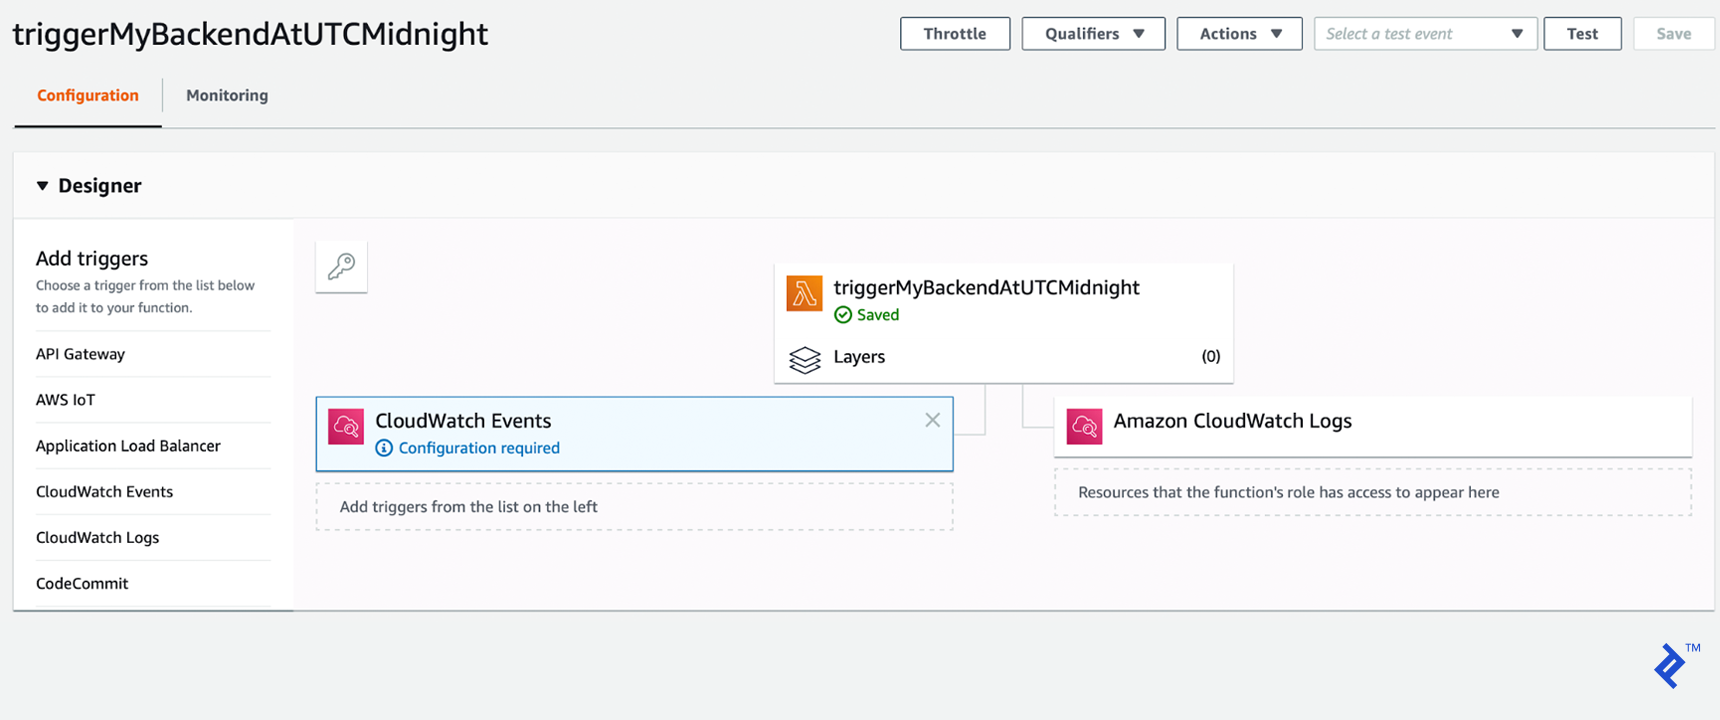
We will set the CloudWatch trigger rule type to “Schedule expression.” Following the accepted format, our cron expression will be cron(50 23 * * ? *).

With this configuration in place, our AWS Lambda function is now set up to be triggered by the CloudWatch rule.
Our Static Web Page Powerhouse: Gatsby/React and Netlify
We’ve reached the finish line! Our application is complete, powered by a Node.js/MongoDB/Heroku back end with a sprinkle of AWS Lambda/CloudWatch, and a Gatsby and Netlify-driven front end for generating and hosting.
Feel free to revisit the live demo link shared earlier. You can also check out an enhanced version of my prototype, which includes some additional enhancements that I think you’ll appreciate.
Consider this project a template for your own endeavors. I hope these articles empower you to prototype your applications more efficiently and cost-effectively. Happy coding!