Getting Started with Continuous Integration in Xcode
Before Xcode 9, setting up Apple’s continuous integration tools was a complicated process involving a separate macOS Server app. This led developers to either give up on continuous integration for their iOS projects or turn to external solutions, often with mixed results.
However, Xcode 9.0, released in September 2017, simplified this process significantly. Automated code signing is now an option, and the whole system is integrated directly into Xcode, eliminating the need for additional software.
While third-party options such as Fastlane](https://fastlane.tools/), Bluepill, etc., can be very helpful and automate many tasks, this article will focus on using Xcode and Apple’s own tools for your [continuous integration needs. We’ll be using manual code signing because it’s a common sticking point and automatic signing isn’t always ideal for projects with multiple build configurations.
Note: This article is based on Xcode 9.4.1 and focuses on iOS development, but much of the information applies to Xcode 10 (currently in beta 5) and macOS development.
Setting up Your Xcode Server
Xcode 9 not only streamlined the integration process but also made setting up Xcode Server easier.
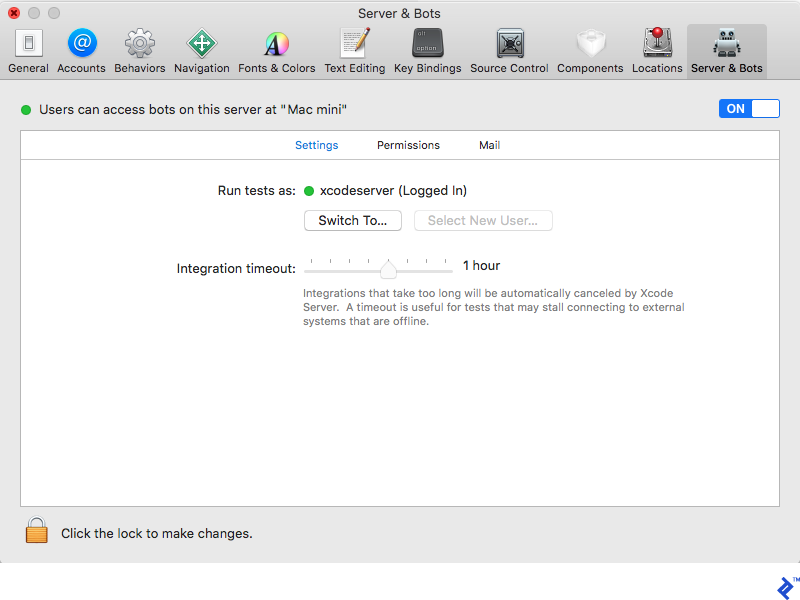
On your designated CI server, open Xcode and go to Preferences.
Select the Server & Bots tab at the end.

Enable Xcode Server by clicking the switch in the top-right corner. You’ll be asked to choose a user for running build scripts on this machine. It’s recommended to create a dedicated user for this purpose.
This user needs to be logged in for Xcode bots to function. A green circle next to the username confirms this.
That’s it! Now, let’s delve into Xcode bots.
Xcode Bot Configuration
You’re now ready to configure Xcode bots on your server. This can be done from any development machine on the same network.
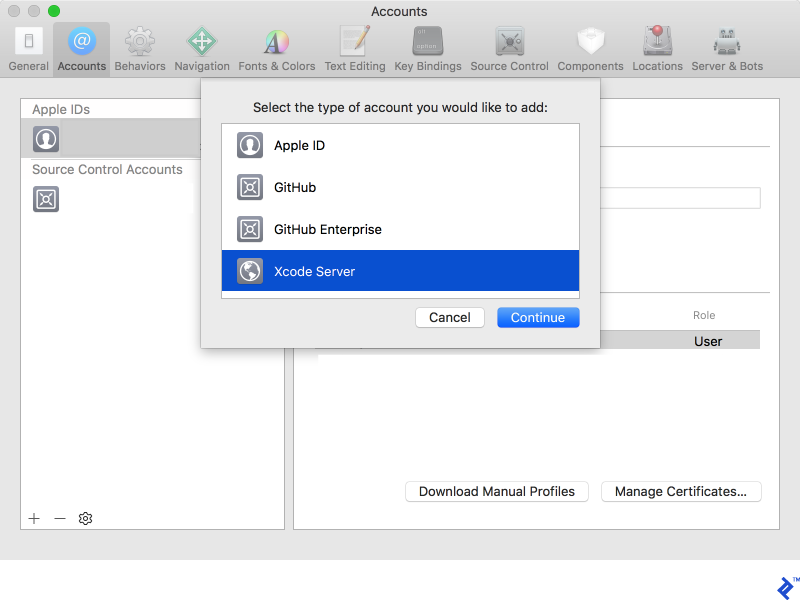
In Xcode on your development machine, navigate to Xcode > Preferences and select the Accounts tab. Click the + icon at the bottom left and choose Xcode Server.
To create a bot, open your project in Xcode and select Product > Create Bot…. The bot setup process involves several steps, which we’ll cover in the following sections.
Distributing Your App Automatically
A common use for iOS app build automation is setting up a bot to upload your app to a distribution platform such as TestFlight, Fabric, etc.
This article will focus on uploading to App Store Connect and downloading directly from your Xcode Server, as these are Apple’s native iOS distribution tools.
Distributing through App Store Connect Using Xcode
Before you begin, ensure you have an App Store Connect app record matching your project’s bundle ID. Each build also needs a unique build version and build number. We’ll discuss how to manage this when we look at Xcode bot settings.
Step 1: Choosing the right build configuration is crucial. Select the scheme and configuration that generate the app you want to upload to App Store Connect. This includes using the correct bundle ID registered with your Apple Developer account (for code signing) and App Store Connect (for uploading).
Step 2: In the “Configuration” tab, we’ll define export options. Select “Use Custom Export Options Plist” to use a custom property list for this purpose.
Step 3: Create your export options property list. A complete list of keys is available by running xcodebuild --help in Terminal, but we’ll cover the relevant ones here:
compileBitcode– Bitcode is an intermediate format Apple uses for app source code before compiling to machine code. It allows for future optimizations and architecture support. Enabling it is optional and doesn’t affect your app directly.method– Specifies the type of product you’re exporting. Options include development (installation limited to devices in the provisioning profile), enterprise (installation allowed for all users but requires explicit trust), and app-store (for distributing through the App Store or App Store Connect). We’ll be using the latter.provisioningProfiles– Defines the provisioning profiles used for code signing. It’s a dictionary where the key is the product’s bundle ID and the value is the provisioning profile name.signingCertificate– Specifies the code signing certificate, either the full name or its SHA-1 hash.teamID– Your organization’s 10-character Apple Developer program identifier.uploadBitcode– Choose whether to upload bitcode (if enabled) to AppStore Connect for potential optimizations and future architecture support.uploadSymbols– Uploads debug symbols, providing helpful crash reports instead of just memory dumps.
Your export options property list might resemble this:
| |
Step 4: Select the .plist file you created as the export options property list.
Step 5: In the “Schedule” tab, configure the bot’s run schedule as needed.
Step 6: On the Signing tab, uncheck “Allow Xcode Server to manage my certificates and profiles” and manually upload the correct signing certificate and provisioning profile on the Certificates & Profiles page.
Step 7: Leave the Devices tab as is since we’re uploading, not testing.
Step 8: Use the Arguments tab to define custom xcodebuild arguments or environment variables for your build or pre/post-integration scripts.
Step 9: The final tab, Triggers, is the most powerful aspect of Xcode Server. For debugging, add these commands as a pre-integration script:
| |
The first command displays all Xcode Server variables and their values for the current integration. The second shows all environment variables and their values.
To ensure unique build numbers for each App Store Connect upload, create another pre-integration script called “set build number” with the following content:
| |
If you use CocoaPods without committing the Pods directory, add another pre-integration script:
| |
Step 10: To upload the build to AppStore Connect, add a post-integration script using the Application Loader tool:
| |
$XCS_PRODUCT is an Xcode Server variable containing the path to the generated app. You need to set up $TESTFLIGHT_USERNAME and $TESTFLIGHT_PASSWORD environment variables on the server with your Apple ID credentials for security reasons, as API key support for AppStore Connect uploads has been discontinued.
Distributing with Xcode Server
The Xcode Server distribution bot uses the same configuration as the App Store Connect bot, except for the post-integration scripts. However, downloading and installing the app requires some attention. Ensure the provisioning profile used to sign your app allows installation on the target device.
Open Safari on your iOS device and navigate to your Xcode Server web dashboard (e.g., “mac-server-name.local/xcode”). You’ll see a list of your Xcode bots and their latest integration statuses.
Choose the bot that built the app you want. You’ll see Install and Profile buttons. Click Profile to trust the server’s certificate if this is your first download. Then, click Install and confirm the iOS dialog to install the app.
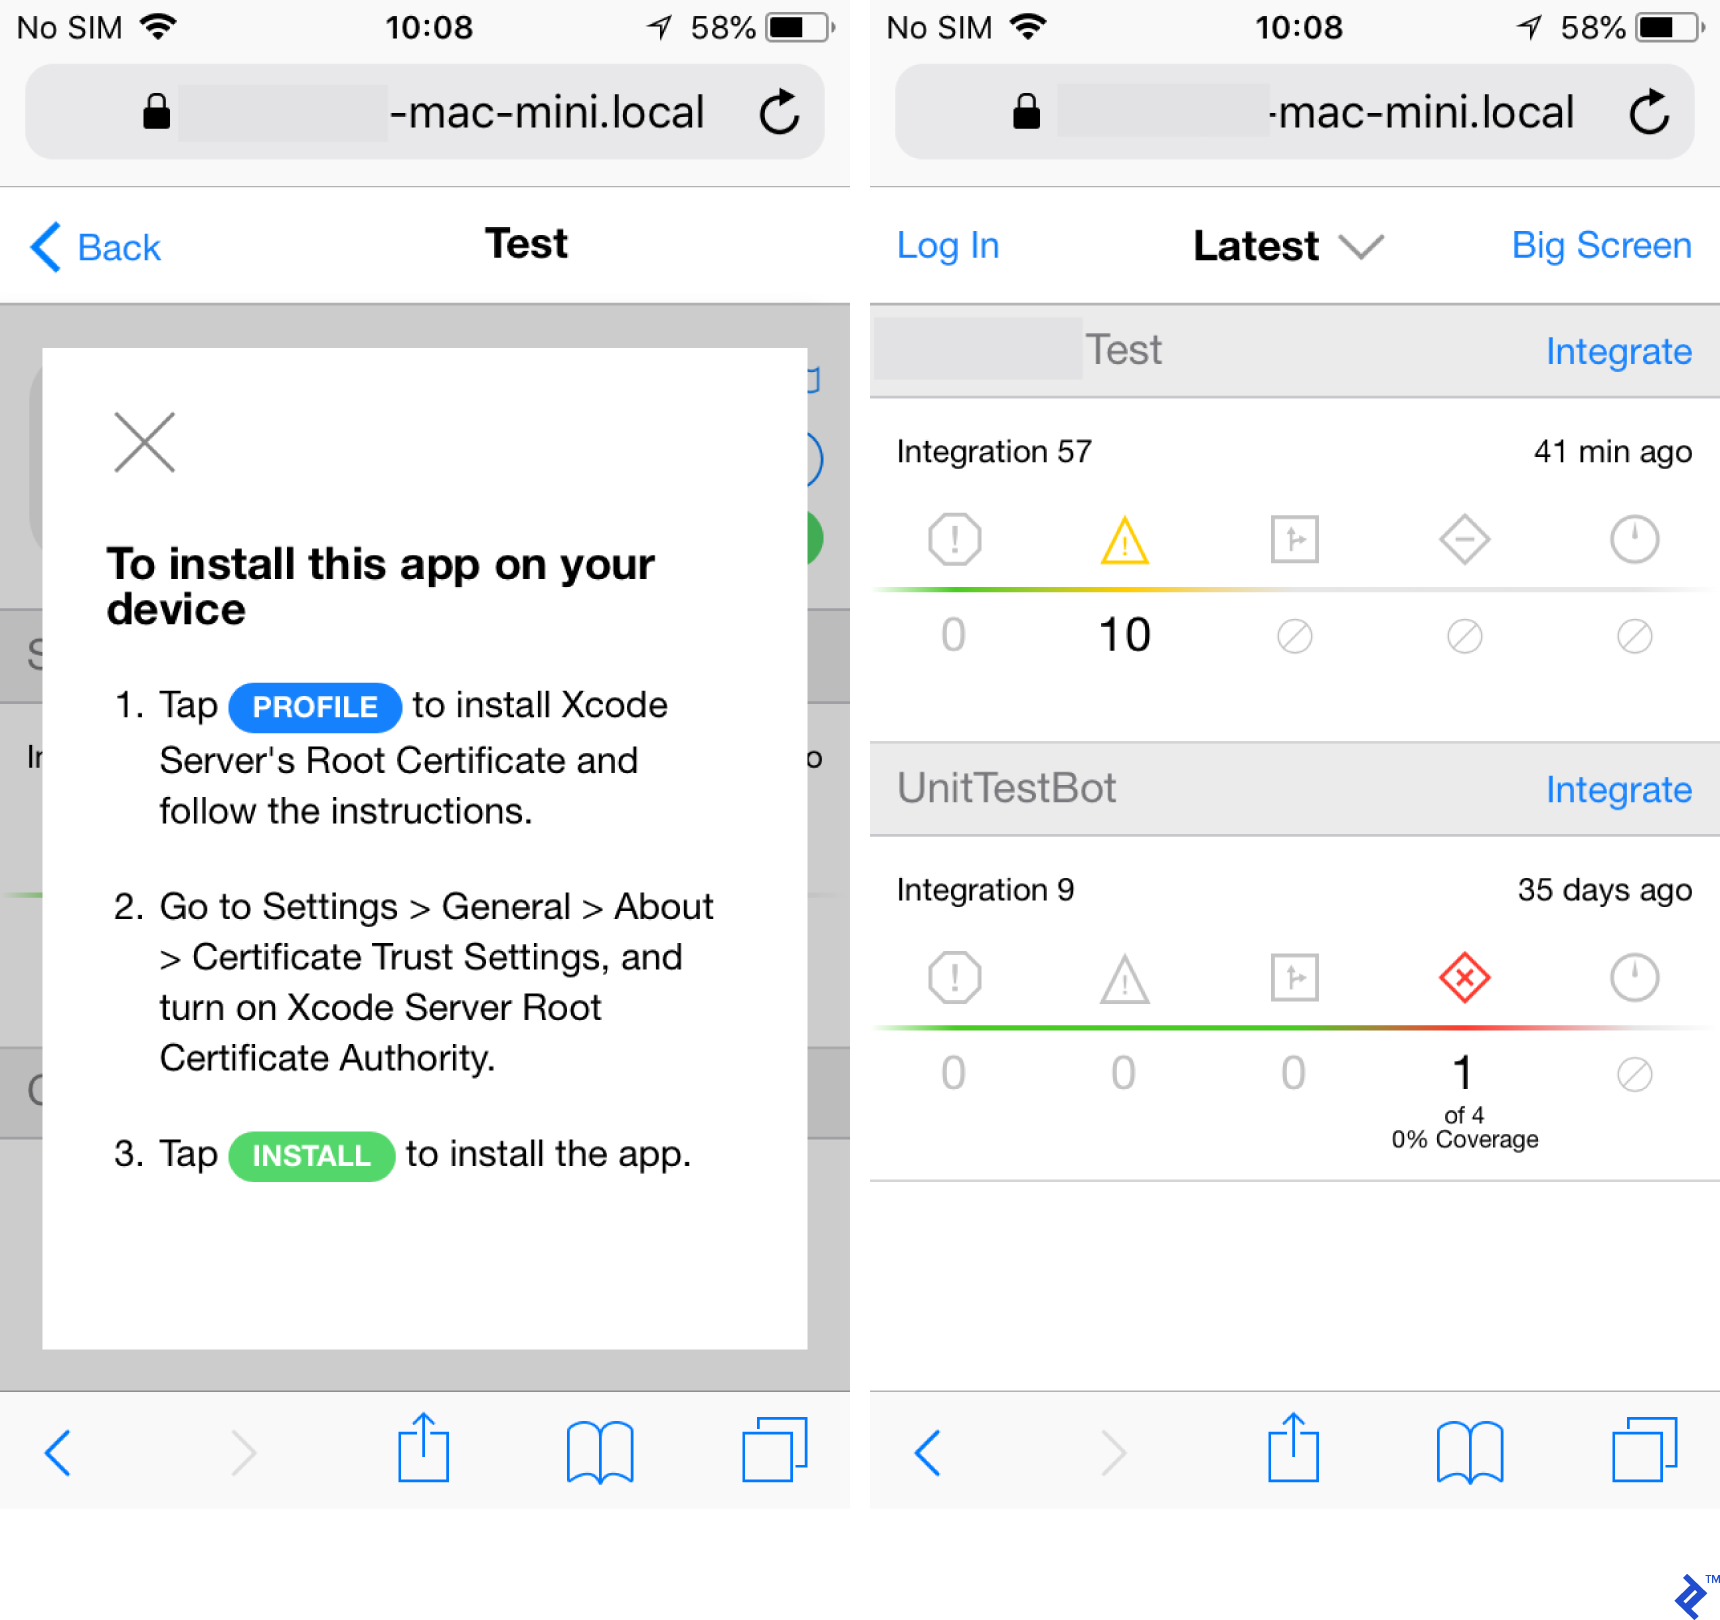
For iOS 10.3 and later, a “Cannot connect to *.local” error may occur if the self-signed certificate isn’t trusted. To resolve this:
Step 1: On your iPhone, install the self-signed certificate(s) from the Xcode server’s bots page.
Step 2: Go to Settings > General > About > Certificate Trust Settings.
Step 3: Under ENABLE FULL TRUST FOR ROOT CERTIFICATES, find and enable your server’s self-signed certificate(s).
Step 4: Return to the Xcode Server bot integration page and click Install.
Automated Testing with Xcode Server
Another useful application of Xcode Server is automated unit or UI testing. You’ll need a target in your project specifically for running these tests.
The setup process is similar to the previous examples but with some key differences. In the Configuration tab, check “Analyze” and “Testing”. It’s recommended not to archive or export the product with this bot, as testing and distribution have different output and scheduling needs.
Distribution usually happens at the end of a development cycle, while testing should ideally be done on every commit. Merging both into one bot could consume excessive disk space and increase integration times.
In the “Schedule” tab, configure the testing bot to run on each commit.
For code signing, even if your testing target doesn’t require a provisioning profile, configure it to use the same team and signing certificate as the main app for testing on actual devices. Also, ensure the test device won’t lock due to inactivity, which can stall the integration process.
On the Devices tab, select the iOS devices and/or simulators you want to test on. You can choose parallel or sequential testing based on your needs and server resources.
No custom settings are needed in the Arguments tab.
Finally, in the Triggers tab, add a pre-integration script for debugging:
| |
And a post-integration script to notify you of test failures:
| |
The $HOSTNAME variable contains the server’s address (e.g., “computer-name.local”). You might encounter security warnings when accessing the link due to the self-signed certificate. You can customize the “Test failure” script further, for example, to send email notifications or automatically create JIRA issues.
Conclusion
This article has explored some of the capabilities of Xcode Server beyond simple app building. While it may not have covered your specific needs directly, the goal was to demonstrate how to leverage built-in tools and Xcode Server variables for greater automation.
Numerous third-party services like Fabric, Bluepill, and Fastlane offer more features and automation. However, they introduce dependencies and often require setup and configuration. The techniques described here utilize readily available tools on every Mac, minimizing setup time and streamlining your continuous integration workflow.