Apple just revealed ARKit, their latest augmented reality (AR) library. While it might seem like another addition to the AR toolkit, its impact runs deeper, especially given the advancements in AR over the past few years.

This post will guide you through building a fun ARKit example project using iOS ARKit. Imagine placing your fingers on a table as if holding a pen, tapping your thumbnail on the screen, and starting to draw. Upon finishing, you can transform your drawing into a 3D object, as illustrated in the animation below. The complete source code for this iOS ARKit example is available at GitHub.

The Timeliness of iOS ARKit
Augmented reality is not a new concept for seasoned developers. Its initial significant development can be traced back to the time when developers gained access to individual frames from webcams. Those early AR applications were primarily focused on facial transformations. However, the novelty of turning faces into bunnies wore off quickly, and the initial hype subsided.
The missing ingredients for AR’s practicality have always been usability and immersion. Previous AR trends highlight this observation. For instance, when developers gained access to individual mobile camera frames, AR experienced a resurgence. Alongside the triumphant return of bunny transformers, a wave of apps emerged that superimposed 3D objects onto printed QR codes. However, these never gained widespread adoption because they augmented QR codes, not reality.
Then came Google Glass, a glimpse into the future. Sadly, within two years, this promising product met its demise. While critics attributed its failure to various factors, including social implications and Google’s lackluster launch, a crucial reason stands out - environmental immersion. Although Google Glass addressed usability, it remained limited to projecting 2D images onto the real world.
Tech giants like Microsoft, Facebook, and Apple took this lesson to heart. In June 2017, Apple unveiled iOS ARKit, a remarkable library that prioritized immersion. Holding a phone still poses a user experience barrier, but as Google Glass demonstrated, hardware isn’t the main obstacle.
With this significant shift, a new wave of AR excitement seems imminent. This time, it might find its niche and propel AR app development into the mainstream. This opens up Apple’s ecosystem and user base to augmented reality app development companies.
With that historical context, let’s delve into coding and experience Apple’s augmented reality firsthand!
Exploring ARKit’s Immersive Capabilities
ARKit offers two primary features: determining the camera’s location in 3D space and detecting horizontal planes. For the former, ARKit treats your phone as a camera moving within a 3D environment, anchoring virtual 3D objects to specific points. For the latter, it identifies horizontal surfaces like tables for object placement.
The technology behind this is Visual Inertial Odometry (VIO). Put simply, VIO merges camera frames with motion sensor data to track the device’s position in 3D space. This tracking is achieved by identifying high-contrast features or edge points in the image, such as the boundary between a blue vase and a white table. The relative movement of these points between frames helps estimate the device’s 3D location. Consequently, ARKit struggles when facing a featureless wall or experiencing rapid movements that result in blurry images.
Starting Your ARKit Journey in iOS
As of this writing, ARKit is integrated into the beta version of iOS 11. To begin, download iOS 11 Beta on an iPhone 6s or later and install the latest Xcode Beta. While you can initiate a new ARKit project through New > Project > Augmented Reality App, starting with the official Apple ARKit sample is more convenient for this tutorial, particularly for plane detection. It provides essential code blocks. Let’s dissect this example code and tailor it for our project.
First, determine the engine - Sprite SceneKit or Metal. The Apple ARKit example uses iOS SceneKit, Apple’s 3D engine. Next, set up a view for rendering 3D objects by adding an ARSCNView type view.
ARSCNView, a subclass of SceneKit’s SCNView, renders the live camera feed as the scene background, seamlessly aligning SceneKit space with the real world by treating the device as a moving camera.
However, ARSCNView requires an AR session object to handle camera and motion processing. So, begin by assigning a new session:
| |
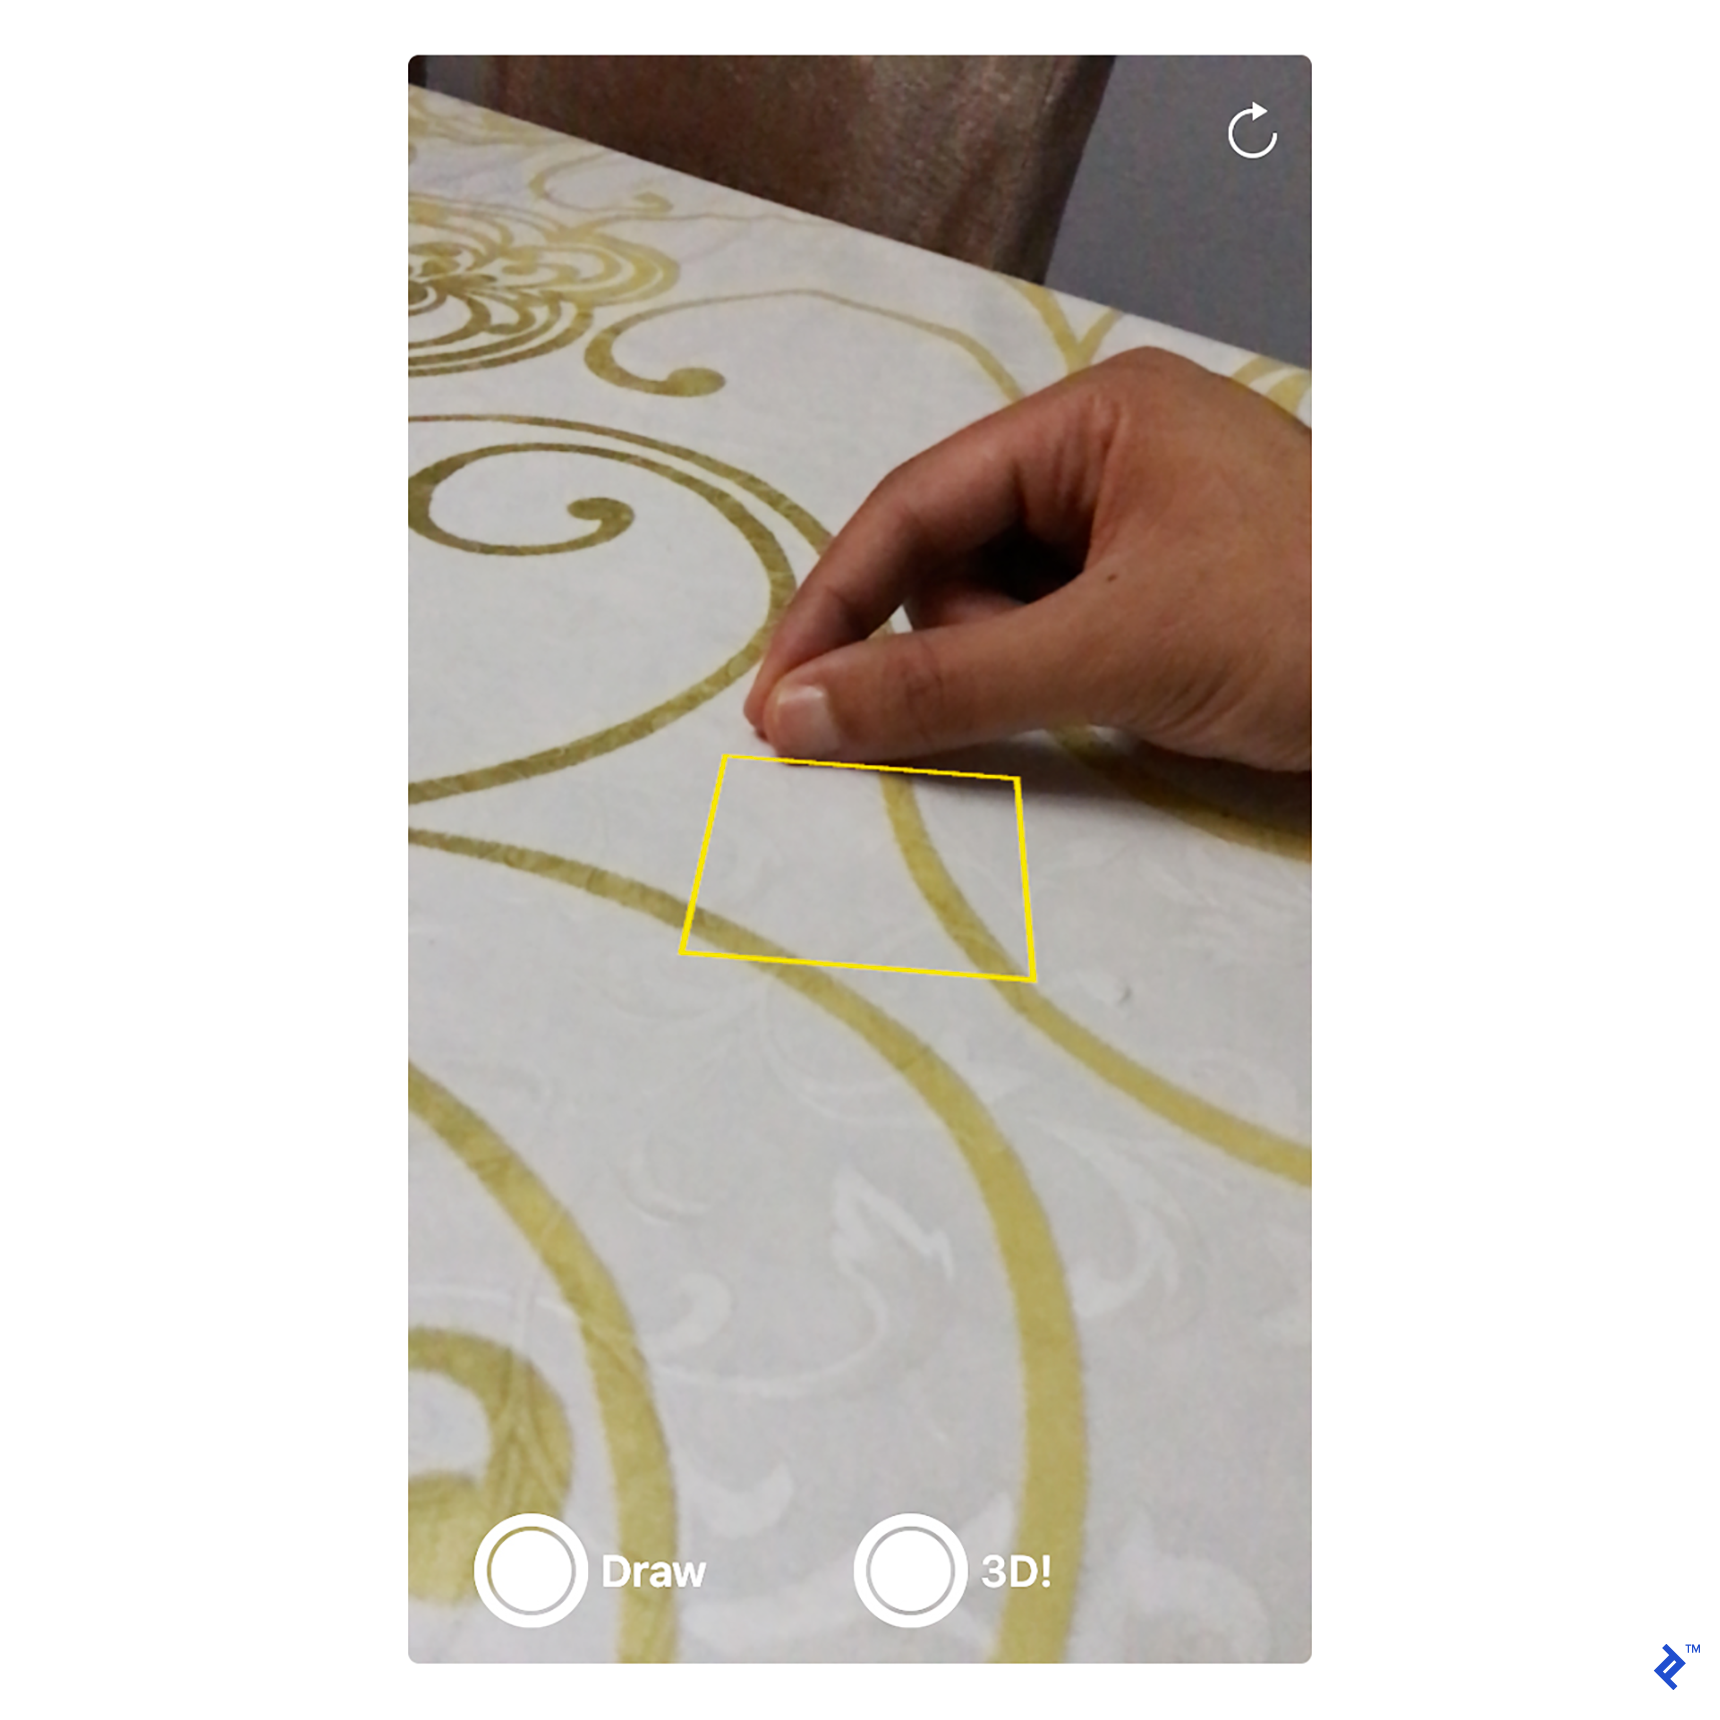
The last line incorporates a visual aid, Focus Square (provided by the sample code, not ARKit), which helps visualize plane detection status. The image below shows a focus square projected onto a table:
The next step is to activate the ARKit session. Restarting it each time the view appears is recommended, as past session data becomes irrelevant when user tracking is lost. Therefore, start the session in viewDidAppear:
| |
This code configures the ARKit session to detect horizontal planes, currently the only option provided by Apple, although future object detection capabilities are hinted at. It then initiates the session and resets tracking.
Lastly, update the Focus Square whenever the camera’s position (device orientation or position) changes. This is achieved within the SCNView renderer delegate function, called before each 3D engine frame render:
| |
At this point, running the app should display the focus square over the camera stream, actively searching for a horizontal plane. The next section will delve into plane detection and positioning the focus square accordingly.
Plane Detection in ARKit
ARKit can detect, update, and remove planes. For streamlined handling, create a dummy SceneKit node that stores the plane’s position information and a reference to the focus square. Planes are defined along the X and Z axes, with Y representing the surface normal. Keeping drawn nodes’ positions within the plane’s Y value creates the illusion of being printed on it.
Plane detection relies on ARKit’s callback functions. For instance, this function is triggered when a new plane is detected:
| |
This function receives two parameters: anchor and node. node is a regular SceneKit node positioned at the plane’s location and orientation, but invisible due to lacking geometry. It serves as a placeholder for your custom, also invisible, plane node, which stores orientation and position data within the anchor.
This information is stored in ARPlaneAnchor using a 4x4 matrix. While a deep dive into matrices is beyond this post’s scope, envision it as a 2D array containing 4x4 floating-point numbers. By multiplying these numbers with a 3D vertex (v1) in its local space, you obtain a new vertex (v2) representing v1 in world space. For instance, if v1 = (1, 0, 0) locally and you want to position it at x = 100 in world space, v2 becomes (101, 0, 0) relative to world space. This math becomes more complex with rotations, but understanding it isn’t strictly necessary (refer to this excellent article’s relevant section for a thorough explanation).
checkIfObjectShouldMoveOntoPlane verifies if any drawings exist and whether their y-axis aligns with the newly detected plane.
Returning to updateFocusSquare() from the previous section, the goal is to keep the focus square centered on the screen while projecting it onto the nearest detected plane. The following code accomplishes this:
| |
sceneView.hitTest identifies real-world planes corresponding to a 2D screen point by projecting it onto the closest underlying plane. result.worldTransform is a 4x4 matrix encompassing the detected plane’s transform data, while result.worldTransform.translation conveniently extracts the position.
With this information, you can place 3D objects on detected surfaces based on a 2D screen point. Let’s proceed to the drawing aspect.
Drawing in AR
Drawing shapes by following a finger involves detecting the finger’s movement, placing vertices at those locations, and connecting them. While Bezier curves offer smooth connections, we’ll opt for a simplified approach. For each new finger position, a tiny, rounded box with near-zero height is placed on the detected plane, resembling a dot. Once the drawing is finished and the 3D button is selected, the height of these objects will be adjusted based on finger movement.
The PointNode class represents a point:
| |
The geometry is translated along the y-axis by half its height to ensure the object’s base rests at y = 0, appearing above the plane.
Within SceneKit’s renderer callback function, an indicator mimicking a pen tip is drawn using the same PointNode class. A point is placed at that location if drawing is enabled, or the drawing is raised into a 3D structure if 3D mode is active:
| |
virtualObjectManager manages the drawn points. In 3D mode, the difference from the previous position is calculated to adjust the height of all points.
Currently, drawing occurs on the detected surface, assuming the virtual pen is at the screen center. Now, let’s make it interactive by incorporating finger detection.
Detecting Fingertips in AR
Apple’s iOS 11 introduces the Vision Framework, offering efficient computer vision techniques. We’ll leverage its object tracking for this tutorial. Object tracking involves providing an image with the target object’s bounding box coordinates, initializing tracking, and then feeding in new images with the object’s movement. The library will then return the object’s updated location.
Here’s a little trick: Ask the user to position their hand on the table as if holding a pen, ensuring their thumbnail faces the camera. Then, they should tap their thumbnail on the screen. Two points to note: the thumbnail’s contrast against the skin and table should provide sufficient features for tracking, and since both the hand and table are on the same plane, projecting the thumbnail’s 2D location into 3D will approximate the finger’s position.
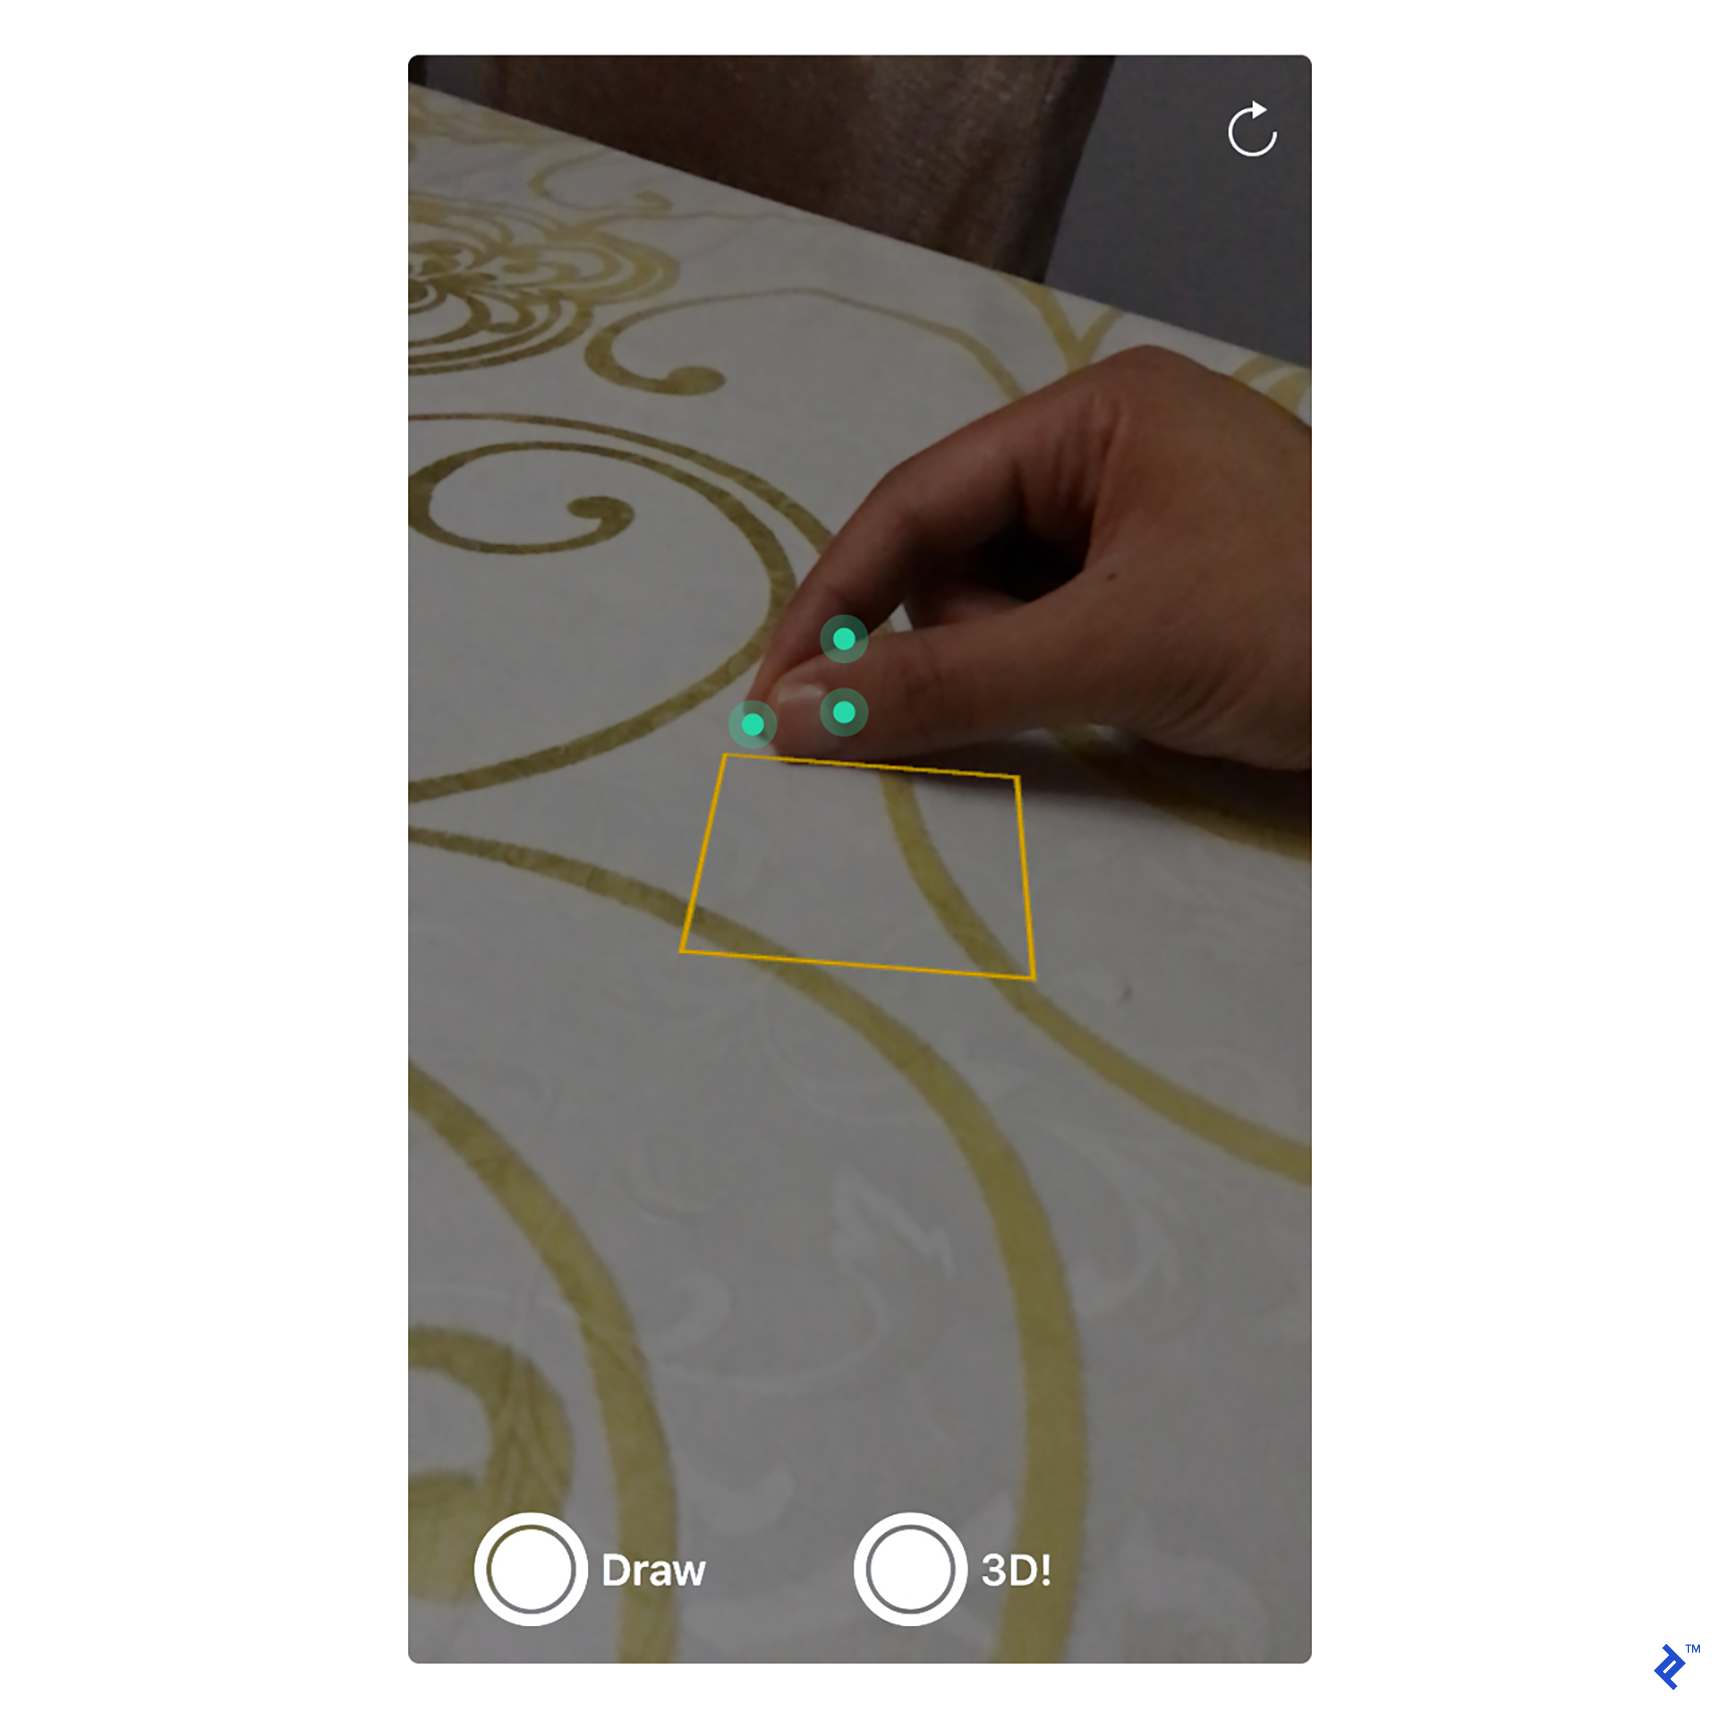
The image below illustrates potential feature points detectable by the Vision library:
Initialize thumbnail tracking within a tap gesture:
| |
The challenge lies in converting the tap location from UIView coordinates to image coordinates. ARKit provides displayTransform for image to viewport conversion, but not the inverse. The solution? Using the matrix inverse.
Within the renderer, feed in new images to track finger movement:
| |
Upon completion, the object tracking triggers a callback function to update the thumbnail’s location, essentially reversing the tap recognizer code:
| |
Finally, use self.lastFingerWorldPos instead of the screen center for drawing.
The Future of ARKit
This post showcased AR’s immersive potential through finger interaction and real-world object integration. Advancements in computer vision and AR-focused hardware like depth cameras will further enhance our ability to interact with the 3D world.
While not yet publicly available, Microsoft’s Hololens demonstrates a serious commitment to AR. This device combines specialized hardware with advanced 3D environment recognition. While the future of AR unfolds, you can be a part of it by developing captivating and immersive augmented reality experiences. Just do us all a favor and explore creative possibilities beyond turning objects into bunnies!