As seasoned app developers, we instinctively know when our applications need to undergo testing. Maintaining stability across different releases is often a business requirement. Ideally, we aim to automate the build and publishing process. To achieve this, we require reliable Android testing tools to ensure our build functions as expected.
Tests provide an additional layer of confidence in our creations. Building a flawless, bug-free product is nearly impossible. Our objective, therefore, should be to increase our chances of market success. This can be achieved by implementing a test suite that can quickly identify newly introduced bugs within our application.

Testing Android and other mobile platform apps can be tricky. Implementing unit tests and adhering to principles like test-driven development can feel counterintuitive. However, testing remains crucial and should never be underestimated or neglected. David, Kent, and Martin have explored the advantages and disadvantages of testing in a series of dialogues. These conversations have been compiled into an article entitled “Is TDD dead?.” The article also features links to the video recordings of these discussions, providing further insights into incorporating testing into your development process and determining the extent to which it aligns with your needs.
This Android testing tutorial will guide you through unit, acceptance, and regression testing on the Android platform. We will delve into the abstraction of test units on Android. This will be followed by examples of acceptance testing, with an emphasis on simplifying and accelerating the process to minimize delays between developers and QA.
Is This Tutorial For Me?
This tutorial explores various possibilities for testing Android applications. Developers or project managers seeking a deeper understanding of current Android testing options can use this tutorial to determine if the approaches discussed here align with their requirements. However, it’s important to remember that testing is not a one-size-fits-all solution. The ideal approach varies depending on factors like product specifics, deadlines, existing code quality, system coupling, developer preferences in architectural design, and the anticipated lifespan of the feature being tested.
Thinking in Units: Android Testing
Ideally, we strive to test each logical unit or component of an architecture independently. This ensures each component functions correctly with its expected inputs. Mocking dependencies enables us to write fast-executing tests. Additionally, we can simulate various system states based on the input provided to the test, encompassing even unusual cases.
“The goal of Android unit testing is to isolate each part of the program and show that the individual parts are correct. A unit test provides a strict, written contract that the piece of code must satisfy. As a result, it affords several benefits.” —Wikipedia
Robolectric
Robolectric is an Android unit testing framework that allows you to run tests within the JVM on your development machine. Robolectric accomplishes this by rewriting Android SDK classes as they load, allowing them to function within a standard JVM environment. This results in significantly faster test execution times. Moreover, it handles view inflation, resource loading, and other tasks typically performed by native C code on Android devices. This eliminates the need for emulators or physical devices to run automated tests.
Mockito
Mockito is a mocking framework that facilitates clean and efficient test writing in Java. It simplifies the creation of “test doubles” (mocks), which replace actual dependencies of a component or module during testing. A StackOverflow answer offers a clear and concise explanation of about the differences between mocks and stubs, which you may find helpful.
| |
Mockito also allows us to verify method calls:
| |

As you can see, we can define action-reaction pairs that dictate what happens when a specific action is performed on the mocked object or component. This enables us to mock entire modules of our application. For each test case, we can manipulate the mocked module to react differently, reflecting various potential states of the tested component and the mocked component pair.
Unit Testing
In this section, we’ll assume an MVP (Model View Presenter) architecture. Activities and fragments represent the views, models act as the repository layer for database or remote service calls, and the presenter serves as the “brain.” The presenter connects everything, implementing logic to manage views, models, and the flow of data within the application.
Abstracting Components
Mocking Views and Models
In this example, we’ll mock the views, models, and repository components to unit test the presenter. This constitutes one of the simplest tests, focusing on a single component within the architecture. We will use method stubbing to establish a testable chain of reactions:
| |
Mocking the Global Networking Layer with MockWebServer
Mocking the global networking layer can be quite beneficial. MockWebServer lets us queue responses for specific requests made during our tests. This allows us to simulate unusual server responses that are difficult to reproduce, ensuring comprehensive test coverage with minimal code.
MockWebServer’s code repository provides a clear example that you can reference to gain a deeper understanding of this library.
Custom Test Doubles
You have the option to create your own model or repository component and inject it into the test. This is achieved by providing a different module to the object graph using Dagger (http://square.github.io/dagger/). You can then verify if the view state updates correctly based on the data provided by the mocked model component:
| |
| |
Running Tests
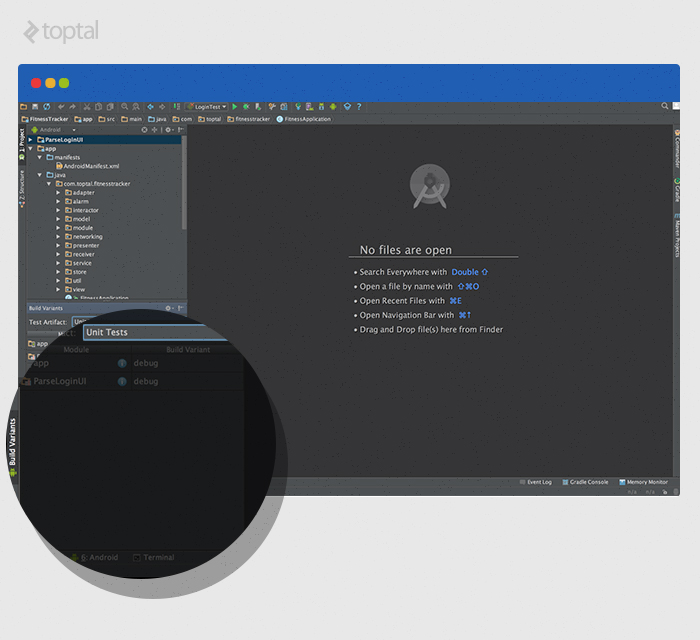
Android Studio
Right-clicking on a test class, method, or entire package in Android Studio allows you to run tests directly from the IDE’s options dialog.
Terminal
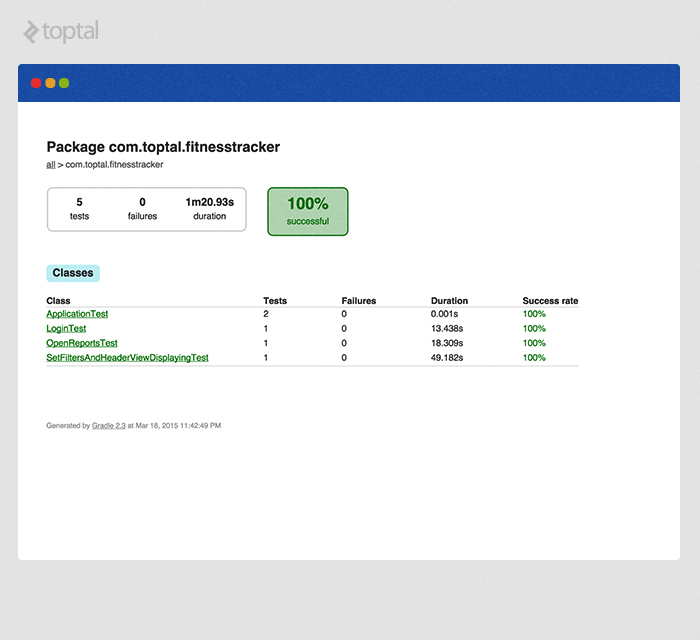
Running Android app tests from the terminal generates reports for the tested classes, which are placed in the “build” folder of the target module. The terminal approach is particularly useful if you’re setting up an automated build process. In Gradle, you can run all debug-flavored tests by executing the following command:
| |
Accessing Source Set “test” from Android Studio Version
Android Studio 1.1 and later, along with the Android Gradle plugin, introduced support for unit testing. You can find more details in their excellent documentation on it. While this feature is still experimental, it’s a valuable addition. It lets you switch between unit test and instrumentation test source sets directly within the IDE, similar to switching between flavors.
Simplifying the Process
Writing tests might not be as enjoyable as developing the application itself. However, some tips can make writing tests easier and help you avoid common setup issues.
AssertJ Android
As the name implies, AssertJ Android provides a collection of helper functions specifically designed for Android testing. It extends the popular AssertJ library. AssertJ Android offers a range of functionalities. These range from simple assertions like “assertThat(view).isGone()” to more complex ones like:
| |
AssertJ Android’s extensibility provides a straightforward and convenient starting point for writing Android application tests.
Robolectric and Manifest Path
When using Robolectric, you might need to specify the manifest location and set the SDK version to 18. You can achieve this using the “Config” annotation:
| |
Running Robolectric tests from the terminal can sometimes lead to new challenges. For example, you might encounter exceptions like “Theme not set.” If your tests run correctly in the IDE but fail from the terminal, it could be due to an unresolved manifest path. The hardcoded manifest path might be incorrect from the command’s execution point. Custom runners can resolve this:
| |
Gradle Configuration
Here’s a sample Gradle configuration for unit testing. You may need to adjust dependency names and versions as needed for your project:
| |
Robolectric and Play Services
If your application utilizes Google Play Services, you’ll need to define a custom integer constant for the Play Services version. This ensures Robolectric functions correctly:
| |
Robolectric Dependencies to Support Libraries
Another interesting challenge is that Robolectric sometimes struggles to reference support libraries properly. A workaround is to create a “project.properties” file within the module containing your tests. For instance, for Support-v4 and AppCompat libraries, the file should include:
| |
Acceptance/Regression Testing
Acceptance/Regression testing automates a portion of the final testing phase, running tests in a real, complete Android environment. Unlike unit tests, we do not use mocked Android OS classes at this level. Instead, tests are executed on actual devices or emulators.
The variety of physical devices, emulator configurations, device states, and feature sets makes this testing phase less predictable. Additionally, factors like the operating system version and screen size can significantly impact how content is displayed, further complicating matters.
Creating tests that consistently pass across a wide range of devices is complex. However, it’s best to start small and gradually expand. Creating tests with Robotium is an iterative process that can be streamlined with a few tricks.
Robotium
Robotium](https://code.google.com/p/robotium/) is an open-source Android test automation framework that has been around since January 2010. It’s worth noting that while Robotium is a paid solution, it offers a free trial.
To expedite the process of writing Robotium tests, we can transition from manually writing tests to recording them. This approach prioritizes speed over code quality. If your user interface undergoes frequent changes, test recording can be highly beneficial as it allows for quick creation of new tests.
Testdroid Recorder is a free test recorder that automatically generates Robotium tests as you interact with the user interface. Installation is simple, and described in their documentations offers a step-by-step video guide.
While Testdroid Recorder is an Eclipse plugin and this article focuses on Android Studio, compatibility is not a concern. You can use the plugin directly with an APK to record tests.
Once the tests are created, you can easily copy and paste them into Android Studio along with any required Testdroid Recorder dependencies. A recorded test might resemble the class shown below:
| |
As you can see, much of the code is quite straightforward.
When recording tests, use “wait” statements liberally. Wait for dialogs, activities, and text to appear before interacting with them. This ensures the activity and view hierarchy are fully loaded and ready for interaction, preventing unexpected behavior. Simultaneously, incorporate screenshots into your tests. Since automated tests typically run unattended, screenshots provide valuable insights into what occurred during those tests.
Whether tests pass or fail, reports are invaluable. You can find these reports in the “module/build/outputs/reports” directory within the build folder:
In theory, the QA team could take on the responsibility of recording and optimizing tests. This could be achieved by establishing a standardized test case optimization model. Typically, recorded tests require some tweaking for optimal performance.
Finally, to run these tests from Android Studio, simply select and run them as you would unit tests. From the terminal, it’s a single command:
| |
Performance of Testing
Android unit testing with Robolectric is incredibly fast because it executes directly within the JVM on your local machine. Conversely, acceptance testing on emulators and physical devices is significantly slower. Depending on the complexity of the flows being tested, individual test cases can take anywhere from a few seconds to several minutes to complete. Ideally, the acceptance test phase should be integrated into an automated build process on a continuous integration server.
Parallelization across multiple devices can enhance speed. Explore this excellent tool from Jake Wharton and the team at Square, http://square.github.io/spoon/. It offers impressive reporting capabilities as well.
In Conclusion
A variety of Android testing tools are available, and as the ecosystem continues to evolve, setting up testable environments and writing tests will likely become more manageable. Numerous challenges still lie ahead. However, with a large community of developers tackling these challenges daily, there’s ample opportunity for constructive dialogue and rapid feedback.
Use the approaches outlined in this tutorial as a guide for overcoming your testing challenges. If you encounter issues, revisit this article or the linked references for solutions to known problems.
In a future post, we’ll delve deeper into parallelization, build automation, continuous integration, Github/BitBucket hooks, artifact versioning, and best practices for managing large-scale mobile application projects.