When discussing iOS architecture patterns, the Model-View-Controller (MVC) design pattern is excellent for ensuring the longevity and maintainability of an app’s codebase. It promotes the decoupling of classes, making them easy to reuse or replace to meet different needs. This approach maximizes the benefits of Object-Oriented Programming (OOP).
While this iOS application architecture works effectively at the micro level (individual screens or sections of an app), as your app grows, you might find yourself adding similar functions to multiple models. For tasks like networking, shifting common logic from your model classes into singleton helper classes can be a more efficient strategy. This AFNetworking iOS tutorial will guide you on setting up a centralized singleton networking object that, decoupled from micro-level MVC components, can be reused throughout your application with a decoupled architecture.
Challenges in iOS Networking
Apple has successfully abstracted many complexities of managing mobile hardware through user-friendly iOS SDKs. However, certain areas like networking, Bluetooth, OpenGL, and multimedia processing can become cumbersome due to the SDKs’ emphasis on flexibility. Fortunately, the vibrant iOS developer community has developed high-level frameworks to simplify common use cases, ultimately streamlining application design and structure. A skilled programmer, adhering to iOS app architecture best practices, understands which tools to use, why to use them, and when it’s more appropriate to build custom tools and classes.
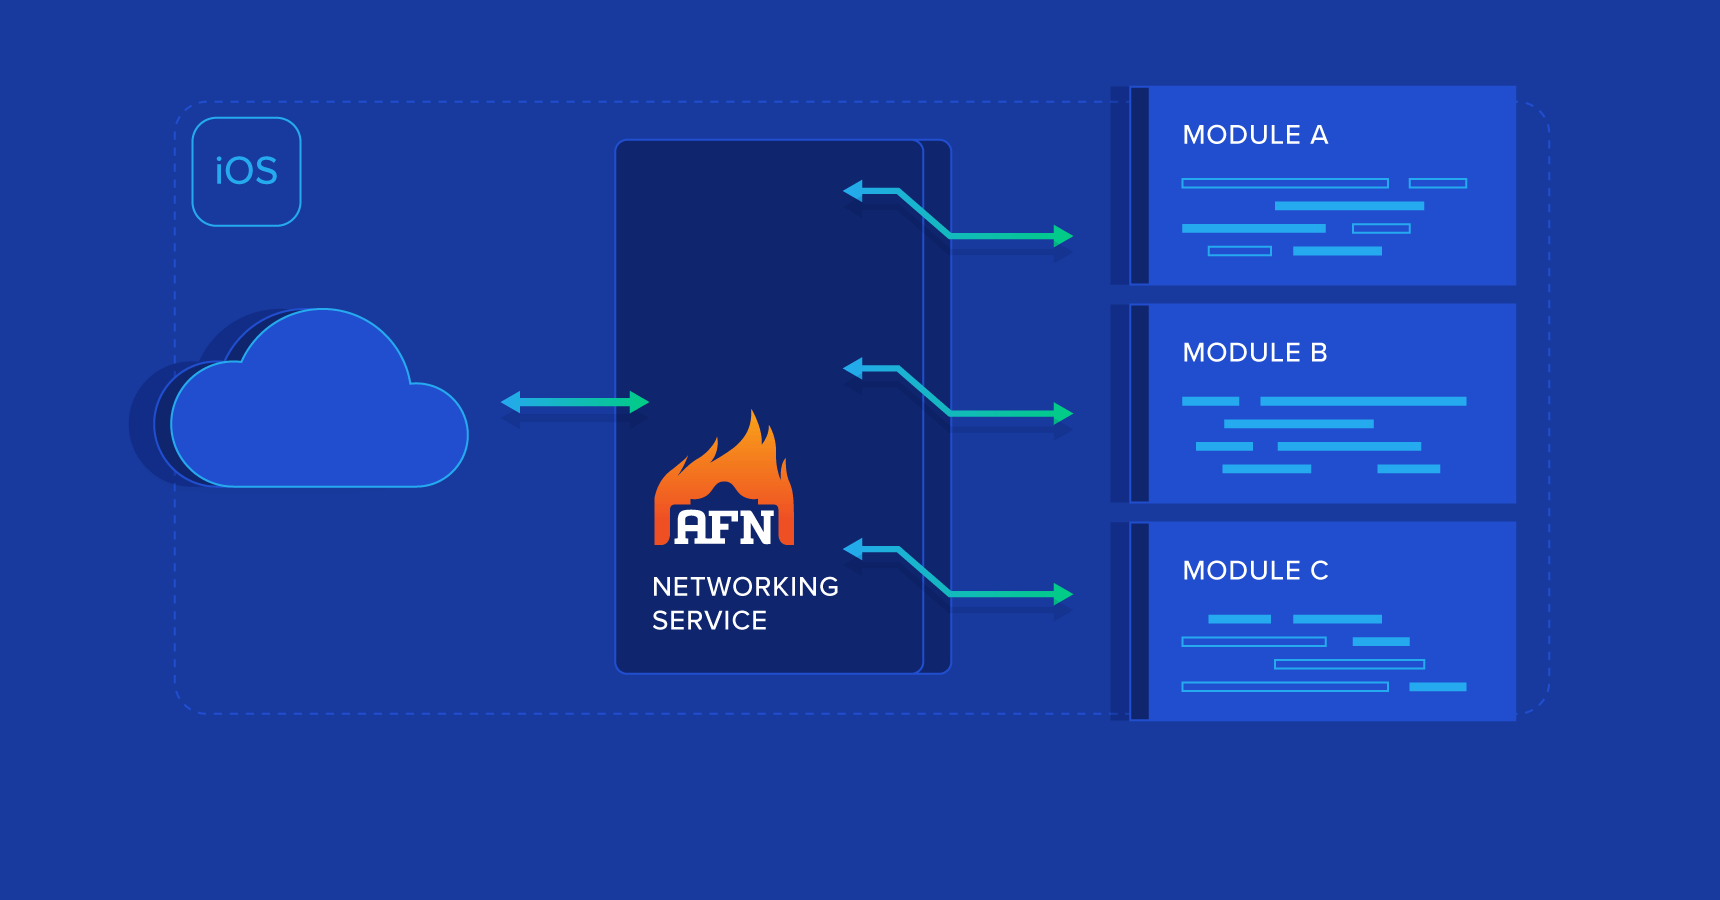
AFNetworking exemplifies this concept in networking. As one of the most popular open-source frameworks, it simplifies RESTful API networking and establishes modular request/response patterns with success, progress, and failure completion blocks. This eliminates the need for developer-implemented delegate methods and custom request/connection settings, allowing for swift integration into any class.
Challenges with AFNetworking
While powerful, AFNetworking’s modularity can sometimes lead to fragmented implementations. Common inefficient practices include:
Multiple network requests within a single view controller using similar methods and properties.
Almost identical requests across multiple view controllers, leading to distributed common variables that can become unsynchronized.
Network requests within a class for data unrelated to that class.
These might not pose significant problems for applications with limited views, few API calls, and infrequent changes. However, if you envision long-term growth and updates, you’ll likely encounter the need to handle:
API versioning to support multiple app generations.
Adding new parameters or modifying existing ones over time to enhance functionality.
Implementing entirely new APIs.
Having networking code dispersed throughout your codebase can transform these updates into a nightmare. While defining some parameters statically in a common header can help, even minor changes might still require modifying numerous classes.
Addressing AFNetworking’s Limitations
A solution is to create a networking singleton that centralizes the management of requests, responses, and their parameters.
A singleton object provides a global access point to the resources of its class. They are used in situations where a single point of control is desirable, such as with classes offering general services or resources. You obtain this global instance from a singleton class through a factory method. – Apple
Essentially, a singleton is a class with only one instance throughout the application’s lifecycle. This single instance is easily accessible by any class needing its methods or properties.
Here’s why a singleton is beneficial for networking:
Static initialization: Once created, its methods and properties are consistently available to any accessing class, eliminating synchronization issues or data requests from incorrect instances.
Rate limiting: It allows you to control API call frequency (e.g., limiting requests to five per second).
Centralized static properties: Hostname, port numbers, endpoints, API versions, device types, persistent IDs, screen sizes, etc., are co-located, so changes affect all network requests.
Reusability: Common properties can be reused across multiple network requests.
On-demand instantiation: The singleton object consumes memory only when instantiated, beneficial for specific use cases that might not be needed by all users.
Decoupling: Network requests are independent of views and controllers, continuing even if the latter are destroyed.
Centralized logging: Network logging is streamlined and centralized.
Reusable error handling: Common failure events like alerts can be reused for all requests.
Reusability across projects: The singleton’s main structure can be adapted for other projects with minor modifications to top-level static properties.
However, there are also reasons to be cautious about singletons:
Overuse: They can be misused to handle multiple responsibilities within a single class, leading to poorly designed and confusing code. Instead, create multiple singletons with distinct responsibilities.
Limited inheritance: Singletons cannot be subclassed.
Hidden dependencies: Excessive reliance on singletons can obscure dependencies, reducing modularity. Removing a singleton might expose missing imports in other classes, leading to issues, especially with external libraries.
Unexpected modifications: A class might alter shared properties within singletons during lengthy operations, leading to unpredictable outcomes in other classes without careful consideration.
Memory leaks: Leaks in a singleton can become problematic as the singleton itself is never deallocated.
However, these drawbacks can be mitigated with iOS app architecture best practices, such as:
Single responsibility: Each singleton should handle one specific responsibility.
Avoid storing rapidly changing data: Don’t use singletons for data frequently modified by multiple classes or threads if high accuracy is crucial.
Enable/disable based on dependencies: Design singletons to enable or disable features based on available dependencies.
Limit stored data: Avoid storing large amounts of data in singleton properties, as they persist throughout the application’s lifecycle unless managed manually.
Simple Singleton Example with AFNetworking
As a prerequisite, add AFNetworking to your project. The easiest way is through Cocoapods, with instructions found on its GitHub page.
While you’re at it, consider adding UIAlertController+Blocks and MBProgressHUD (also easily added via CocoaPods). These are optional but simplify progress indicators and alerts if you wish to implement them within the singleton on the AppDelegate window.
Once AFNetworking is integrated, create a new Cocoa Touch Class named NetworkManager as a subclass of NSObject. Add a class method to access the manager. Your NetworkManager.h file should resemble:
| |
Next, implement the basic initialization methods for the singleton and import the AFNetworking header. Your class implementation should look like this (assuming Automatic Reference Counting):
| |
Now you’re ready to add properties and methods. As a quick test of singleton access, add the following to NetworkManager.h:
| |
And this to NetworkManager.m:
| |
In your main ViewController.m file (or equivalent), import NetworkManager.h and add the following within viewDidLoad:
| |
Run the app, and you should see the following output:
Testing our the networking singleton for appID: 1, HOST: http://www.apitesting.dev/, and PORT: 80
While it’s unusual to mix #define, static const, and @property simultaneously, this demonstrates the options available. While “static const” is generally better for type safety, #define can be useful in string building with macros. Here, #define is used for brevity. Unless dealing with pointers, there’s little practical difference between these declaration methods.
With an understanding of #defines, constants, properties, and methods, let’s remove these test elements and proceed to more practical examples.
Networking Example
Consider an app requiring user login for access. Upon launch, it should check for a saved authentication token and, if present, make a GET request to the API to verify its validity.
In AppDelegate.m, register a default value for the token:
| |
Add a token check to NetworkManager with feedback via completion blocks. Design these blocks according to your needs. This example uses success with the response object data and failure with the error response string and status code. Note that the failure block is optional if the receiving side doesn’t require it.
NetworkManager.h
Above @interface:
| |
Within @interface:
@property (nonatomic, strong) AFHTTPSessionManager *networkingManager;
| |
NetworkManager.m:
Define the BASE_URL:
| |
Add helper methods for simplified authenticated requests and error parsing (assuming JSON web tokens):
| |
If you added MBProgressHUD, it can be used here:
| |
And the token check request:
| |
Now, in ViewController.m’s viewWillAppear method, call this singleton method. Observe the request’s simplicity and minimal implementation on the View Controller side:
| |
Notice how this code snippet can be reused in virtually any app that needs to verify authentication on launch.
Similarly, you can handle a POST request for login:
NetworkManager.h:
| |
NetworkManager.m:
| |
You could add alerts using AlertController+Blocks on the AppDelegate window or send failure objects back to the view controller. Additionally, you could save user credentials here or let the view controller handle it. A separate UserManager singleton for managing credentials and permissions, communicating directly with NetworkManager, might be preferable.
Again, the view controller implementation remains simple:
| |
However, the API version and device type are missing. Also, the endpoint has changed from “/checktoken” to “/token”. Thankfully, due to centralized networking, updates are straightforward.
Create a helper method for these parameters:
| |
You can easily add more common parameters in the future. Now update the token check and authentication methods:
| |
Conclusion
This tutorial showcased centralized networking parameters and methods within a singleton manager, significantly simplifying view controller implementations. Future updates are now simpler, faster, and most importantly, the networking logic is decoupled from the user experience.
While this example focused on a networking singleton, the same principles apply to other centralized functions like:
- Managing user state and permissions
- Routing touch actions for app navigation
- Handling video and audio
- Implementing analytics
- Managing notifications
- Interacting with peripherals
- And much more…
Although centered on iOS app architecture, these concepts extend to Android and even JavaScript. Moreover, this well-defined and function-oriented code facilitates porting apps to new platforms.
In summary, investing time in early project planning to establish key singleton methods, like the networking example above, results in cleaner, simpler, and more maintainable code in the long run.