In the previous installment of this blockchain series, we explored smart contract development, but only briefly considered how to create a decentralized application (dapp, stylized ĐApp). This time, we’ll delve into that topic. To make our exploration more practical, we’ll build a service enabling users to generate free Ethereum subdomains with just one blockchain transaction.
We’ll begin this ĐApp tutorial by explaining the Ethereum Name Service (ENS).
The Ethereum Name Service
ENS is essentially a blockchain-based counterpart to the familiar Domain Name System (DNS). Both can be compared to phone books. They act as lookup services, translating human-readable names into their underlying representations. For DNS and ENS, this means converting names into computer addresses instead of phone numbers.
DNS translates domain names in website addresses into Internet Protocol (IP) addresses. While easily understood by computers, these addresses are not very user-friendly for humans. For example, as of this writing, toptal.com represents 35.186.228.167—which is easier to remember and type?
| |
ENS serves a similar function, but instead of IP addresses, domains are mapped to Ethereum addresses, which are 42 characters long. The top-level ENS domain is .eth.
An interesting fact: the equivalent of DNS’s Central Registry is a collection of smart contracts. These contracts run on the Ethereum blockchain in a distributed fashion, meaning that it “… doesn’t suffer from the insecurity of the DNS system. You can be confident names you enter work the way their owner intended,” as the ENS website explains.
Below, you’ll find a high-level illustration of the ENS architecture. The core of the service is the ENS registry smart contract, which links domain name representations to ENS resolvers’ smart contracts. These resolvers, in turn, map to the target Ethereum address. As shown in the diagram, if an application needs to resolve the ENS address radek.freedomain.eth, it first queries the ENS Registry for the corresponding ENS Resolver. Then, it asks the resolver for the associated Ethereum address, receiving 0x0987... in response. For further details, explore the ENS Documentation here.

.eth ENS Domains
ENS debuted on May 4th, 2017. Currently, in its initial phase, domains must consist of at least seven characters. Therefore, using toptal.eth, which has six characters, is not possible. Instead, we’ll employ an ENS domain I acquired: freedomain.eth.
Anyone can register a .eth domain name by committing ether through a Vickrey auction process managed by deployed smart contracts. The auction involves two phases: bid and reveal, lasting three and two days, respectively.
An auction for a domain starts with an initial bid. During the bidding phase, anyone can submit their bids. After the first stage concludes, no new bids are accepted. Participants then reveal their bids. The highest bidder only needs to match the second-highest bid, and any excess ether is returned. Other participants receive refunds as well. However, failing to reveal a bid in time results in forfeiting the bid amount.
Once declared the winner, you must finalize the auction, setting the resolver and the target address. Sounds straightforward? It might not be for those new to Ethereum. Fortunately, several tools, such as MyCrypto, MyEtherWallet, and ENS Manager, can assist with this multi-step process.
Now, what about subdomains? Are they any less complex? Let’s find out.
ENS Subdomains
Why use a subdomain in the first place? They seem to serve the same purpose as subdomains in DNS, providing a way to organize users. The domain represents the organization, while the subdomain resembles the structure of email addresses:
| |
A novel use case being implemented by Tenzorum Project involves using your subdomain as a username or login for Ethereum ĐApps. Imagine a scenario where you’ve been playing a ĐApp game for a while. It would be convenient to continue using the same login on both your laptop and your mobile phone, even with different key pairs on each device. This can be achieved as follows:
- Log in to the ĐApp using your subdomain, for example,
radek.tenz-id.eth - The ĐApp requests a message signature to verify you possess the corresponding private key.
- The ĐApp confirms your login authorization by querying your personal wallet smart contract. (As you might have guessed, the ENS subdomain used for login points to your personal wallet’s address.)
This approach offers an additional advantage: if you lose a device (and its private key), you won’t lose access to your personal wallet, allowing you to continue playing.
Subdomains, like domains, map names to addresses. However, creating one doesn’t involve an auction. Fortunately, there’s no minimum length requirement for ENS subdomains.
To register a subdomain, you must be the domain owner. Creating or updating a subdomain requires calling setSubnodeOwner on the ENS registry smart contract. After that, the process mirrors that of domains: the owner must set the resolver and target address.
Could we automate this process and make it simpler for users? I created a smart contract that accomplishes this—the previously mentioned EnsSubdomainFactory.sol. It allows anyone to create a subdomain with a single blockchain call. However, since this article focuses on building ĐApps, I’ll leave it as an exercise for you to examine.
Distributed Applications (ĐApps)
A ĐApp is simply a front-end website interacting with a blockchain back end. Users must access the website through an Ethereum-enabled browser like Mist](https://github.com/ethereum/mist), Parity, or the mobile app Cipher. Alternatively, they can install the [MetaMask plugin.
Unlike traditional setups with a server and database as the back end, read and write calls are made directly to the Ethereum blockchain. While the JSON RPC protocol facilitates these calls, a library exists to simplify them for developers.
Enter Web3. It exists in various programming languages, but we’ll be using the JavaScript version, web3.js. Conveniently, the web3 instance is injected by the browser, or in our case, the MetaMask plugin.
HTML Website
Let’s dive into building a ĐApp. For our project, a simple form with five elements will suffice:
- An input field for the subdomain name
- A dropdown menu listing available domains
- An input field for the new subdomain owner
- An input field for the target address
- A submit button
I’ve enhanced it slightly with Bootstrap. (It’s worth noting that in terms of UI features, a ĐApp is similar to any other web app, so a specific ĐApp framework isn’t strictly necessary—standard web technologies like Bootstrap work perfectly fine.) Here’s how it appears:
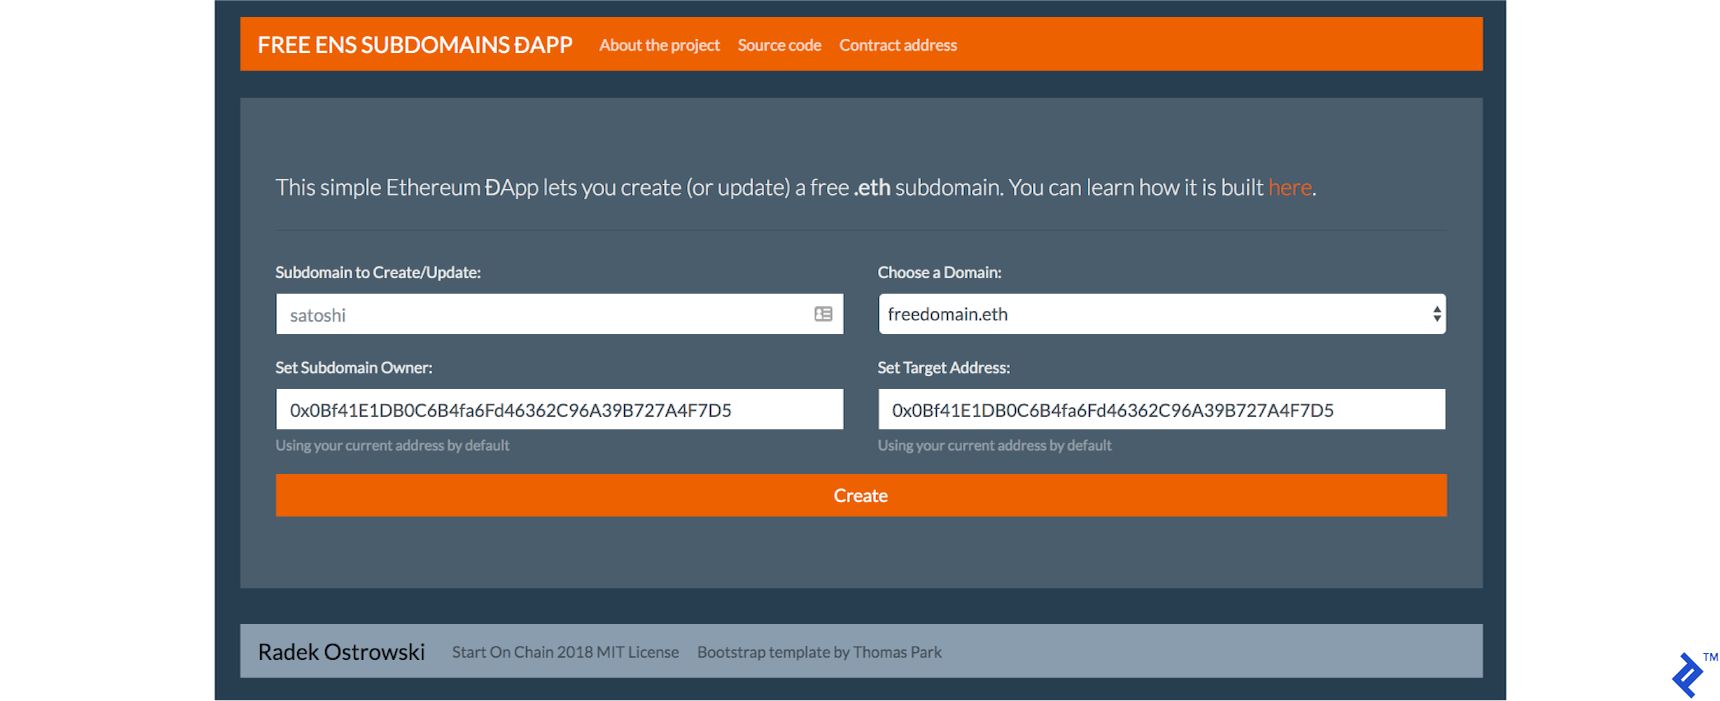
It’s a standard HTML website, so we won’t elaborate further. The key functionality resides in the JavaScript file, dapp.js.
JavaScript and Web3
To build a general-purpose ĐApp, you’ll need:
- A Web3 instance (for instance, using a MetaMask provider)
- A mechanism to read from the blockchain (e.g., ethereum balance)
- A way to write to the blockchain (e.g., send ether)
- A method for reading from a smart contract (e.g., ENS domain owner or ERC20 token balance)
- A means to write to a smart contract (e.g., create a subdomain or transfer ERC20 tokens)
Furthermore, enabling your decentralized application to interact with a smart contract requires:
- An Application Binary Interface (ABI)
- The deployed address of the smart contract
We’ll cover each of these aspects and demonstrate their application in our ĐApp.
Web3.js and MetaMask
Developing ĐApps is most convenient using Firefox or Chrome with the MetaMask plugin. Refer to the previous article for installation instructions.
Currently, there are two relevant versions of web3.js to consider for decentralized app development: the 0.20 and the not yet officially released but widely used 1.0.0. This article utilizes the latter version.
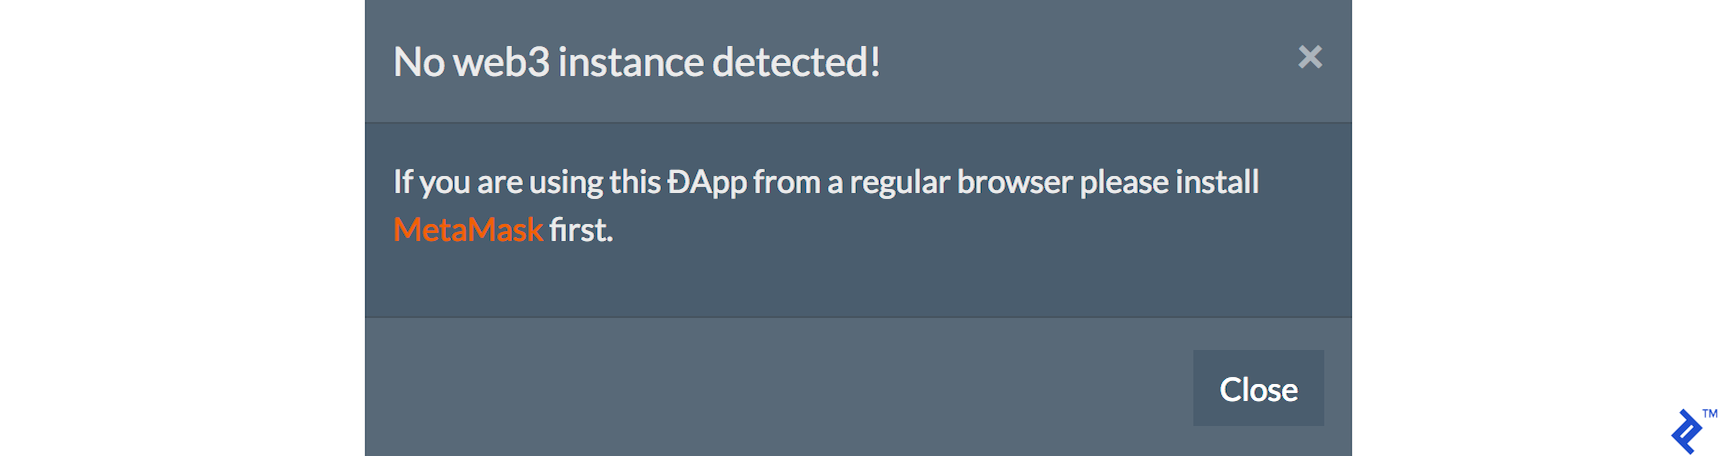
The initWeb3() function checks for the web3 instance, ensuring compatibility with upcoming MetaMask web3 injection changes:
| |
If no web3 instance is found, a notification can be displayed to the user:
Interacting with the Blockchain
First, we’ll retrieve the currently loaded Ethereum account using the loadAccount() function:
| |
We can then auto-populate the new owner and target input fields with the current account’s address.

While our application doesn’t require interaction with ether balances, here’s how to check an account balance for completeness:
| |
…and here’s how to send ether:
| |
Note that the from and to fields require Ethereum addresses, and the value represents the amount of ether to send in wei. For reference, 1000000000000000000 wei equals one ether.
Interacting with Smart Contracts
Interacting with a smart contract starts by creating a proxy object. This requires the contract’s application binary interface (ABI), which defines the available operations, and the Ethereum address where the contract is deployed on the blockchain.
Our application interacts with a single smart contract, our EnsSubdomainFactory:
| |
The contract is initialized in the initContracts() function:
| |
With this setup complete, we can finally make calls. In our case, we need to determine the current owner of a specific domain and subdomain. The checkSubdomainOwner() function achieves this:
| |
It’s important to note that this is a read-only operation using the call() function, which incurs no gas cost.
Our ĐApp will indicate if a domain is available, taken, or owned by the current user:


The final blockchain call involves creating or updating the subdomain, handled by the newSubdomain() function:
| |
This function receives four parameters: subdomain, domain, owner, and target, all self-explanatory.
We use send() instead of call() because this is a write operation that modifies the blockchain’s state and incurs a gas cost. We include an additional gas parameter representing the gas limit for the transaction. If the transaction cost exceeds this limit, it will be reverted.
Listening for Events
Ideally, we want to be notified when our transaction completes successfully, informing the user that their subdomain is ready.
The factory smart contract defines an event emitted upon subdomain creation or update:
| |
According to the web3.js documentation, this should be achievable with:
| |
Here, we specify SubdomainCreated as the event to listen for and use the filter parameter to limit events to those where the creator is our DApp.currentAccount. However, the current MetaMask version does not yet support web sockets, required by web3.js 1.0 events, doesn’t support this functionality. While this works in older versions of web3.js, the syntax differs.
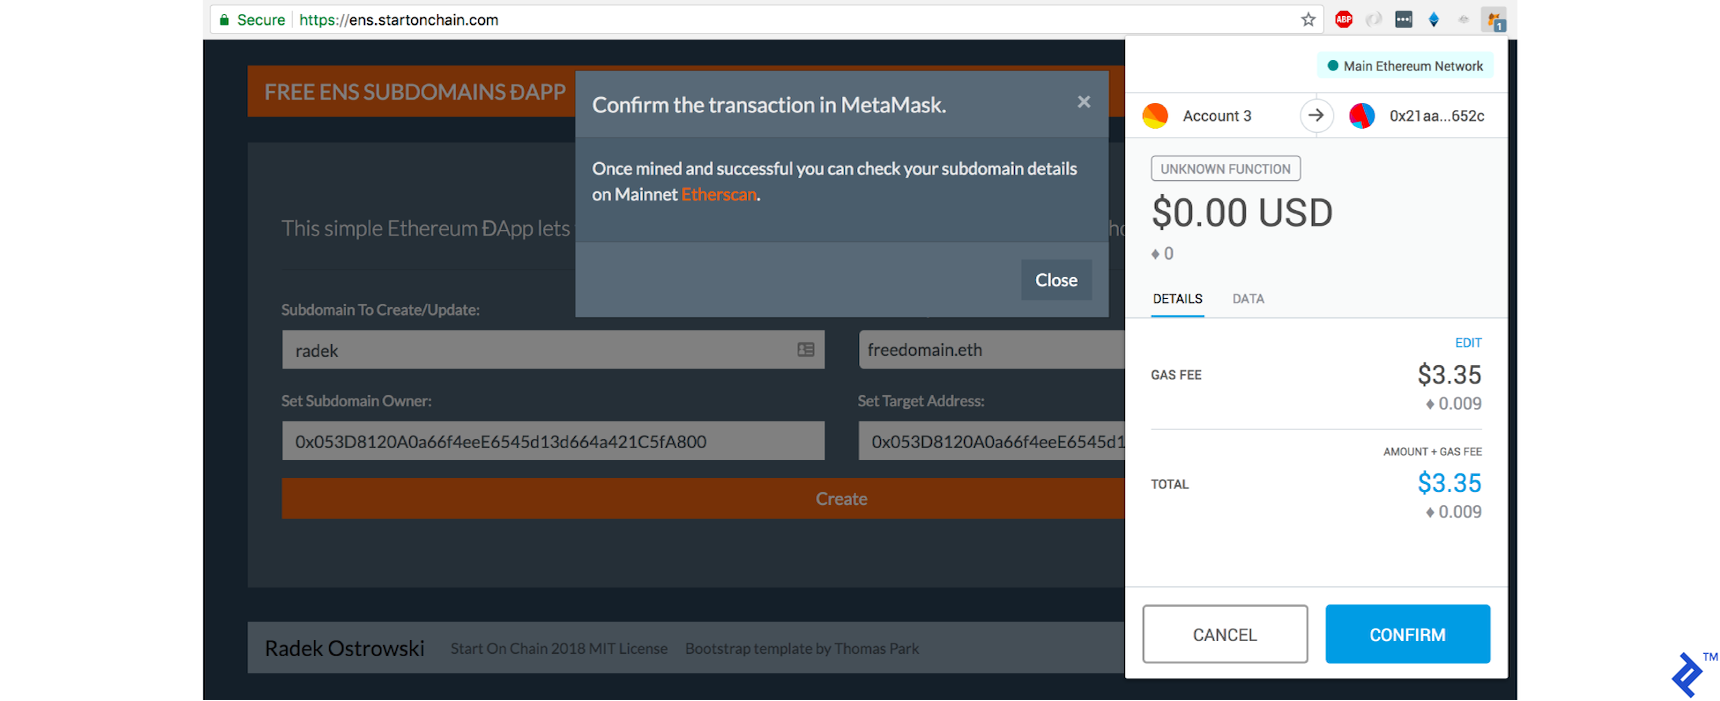
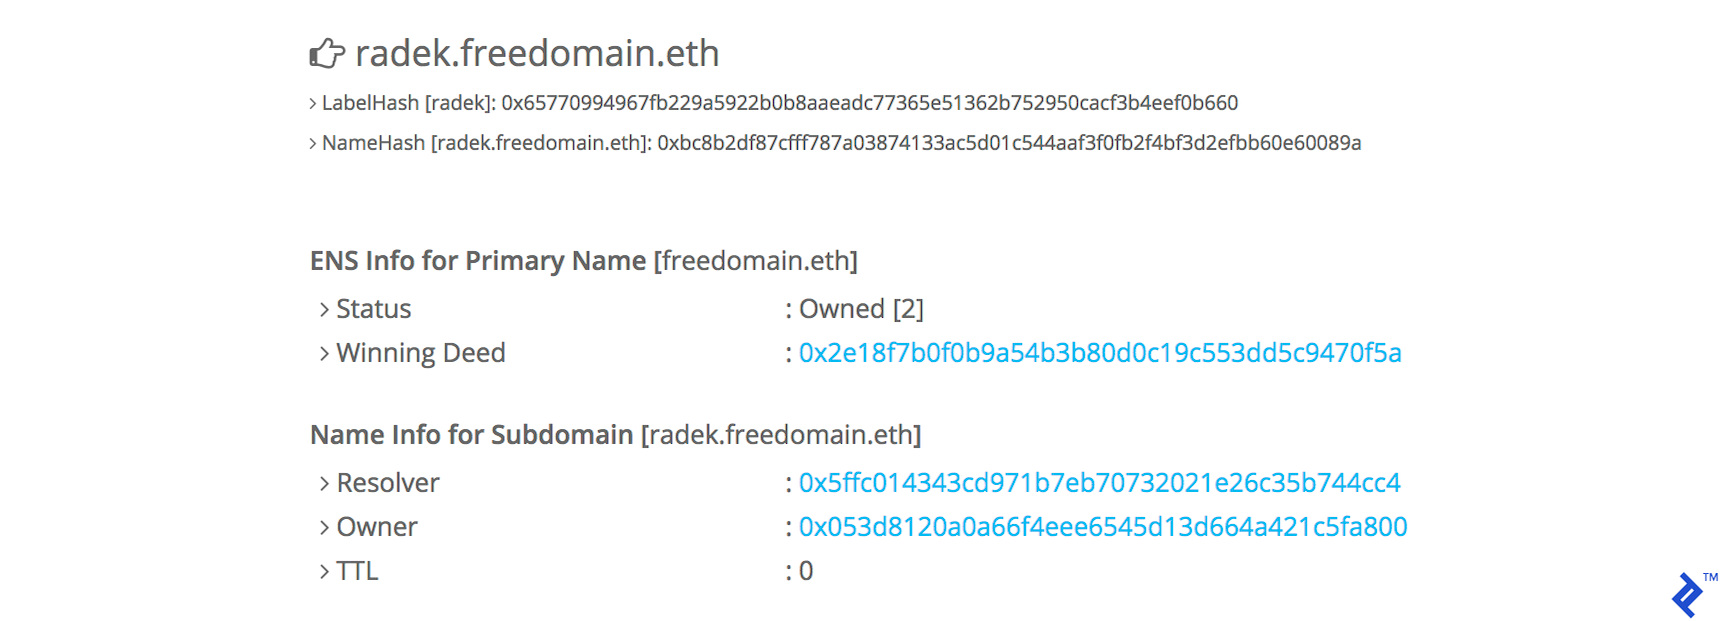
As a workaround, we could poll for the transaction receipt to confirm its mining. For simplicity, we’ll display a link to Etherscan’s ENS lookup service with details of the new subdomain, for example, https://etherscan.io/enslookup?q=radek.freedomain.eth. The transaction status is also visible in the MetaMask window.
And that’s essentially all we need for our simple ĐApp. Feel free to explore the complete source code here.
Running Locally
To experiment with the code locally, check it out and ensure you have the following npm packages installed:
| |
You can launch the local testnet using Truffle:
| |
Finally, redirect the factory smart contract to your local node by uncommenting a line in dapp.js:
| |
Execute npm run dev to start the web server, which should open your browser at localhost:3000.
Note: For simplified local development, I’ve included ENS registry and resolver mock contracts.
The Results on the Ethereum Network
The contract is deployed to 0xbd185de5172ca64eec3d8cc763883a68f9154cd6.
Our production ĐApp website is accessible at https://ens.startonchain.com.
The source code, licensed under MIT, is available is available on GitHub.
Disclaimer: This runs on the main network, not the testnet, involving real money. Use at your own risk.
Remember: domain owners can always modify subdomain owners, even if already assigned. While this option is disabled in our smart contract, exercise caution when using someone else’s domain.
Welcome to the World of ĐApps
This ĐApp tutorial covered the Ethereum Name Service (ENS), web3.js, ABI, smart contracts, MetaMask, transaction event listeners, and generating a Truffle project. This ĐApp serves a practical purpose, allowing users to create free Ethereum subdomains with a single blockchain transaction. Combined with my smart contract tutorial, you now have ample information (and hopefully inspiration) to build your own Ethereum-based blockchain application. Good luck!