This guide will walk you through building a React application using test-driven development (TDD), starting from user stories and progressing through the development process. We will use Jest and Enzyme for our TDD implementation. By the end of this tutorial, you’ll be equipped to:
- Translate requirements into epics and user stories.
- Create tests based on user stories.
- Develop a React app following TDD principles.
- Test a React app using Enzyme and Jest.
- Utilize CSS variables for responsive design.
- Build a reusable React component with varying rendering and functionality based on props.
- Perform type checking on component props using React PropTypes.
This article assumes a basic understanding of React. If you are new to React, I recommend completing the official tutorial](https://reactjs.org/tutorial/tutorial.html) and exploring Toptal’s 2019 React Tutorial: [Part 1 and Part 2.
Building a Test-driven React App: An Overview
We’ll be creating a simple pomodoro timer app with several UI components. Each component will have its own set of tests in a dedicated test file. Let’s begin by outlining our epics and user stories based on the project requirements.
| EPIC | USER STORY | ACCEPTANCE CRITERIA |
| As a user, I need to use the timer so that I can manage my time. | As a user, I need to start the timer so that I can count down my time. | Ensure the user is able to:
*start the timer
*see the timer start counting down
Counting down the time should not be interrupted even if the user clicks the start button more than once. |
| As a user, I need to stop the timer so that I can count down my time only when needed. | Ensure the user is able to:
*stop the timer
*see the timer stopped
Nothing should happen even if the user clicks the stop button more than once. |
| As a user, I need to reset the timer so that I can count down my time from the beginning. | Ensure the user is able to:
*reset the timer
*see the timer reset to the default |
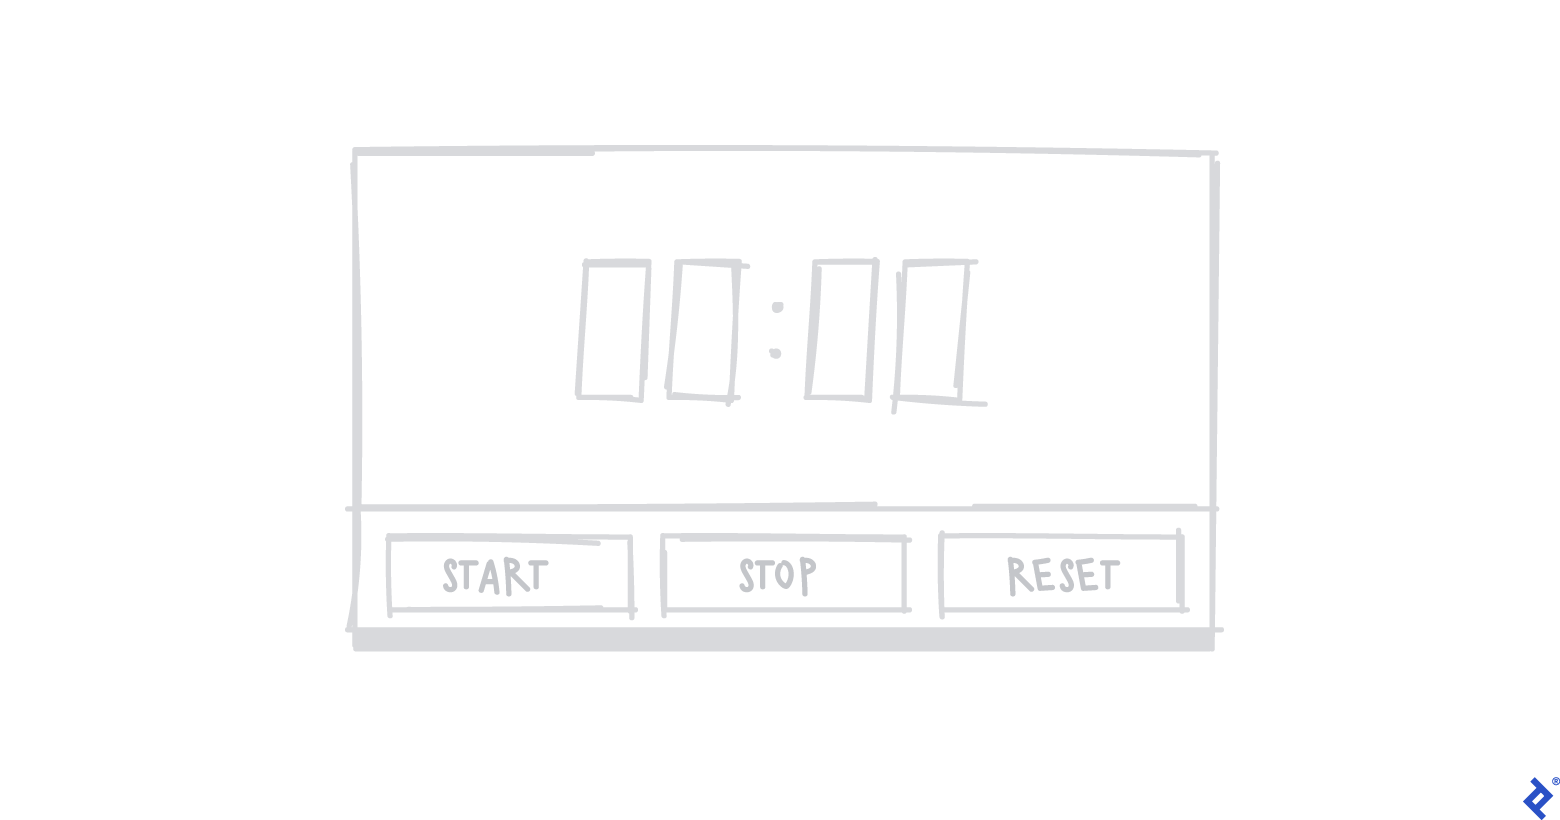
Visualizing the Structure: Wireframe
Setting Up the Project
Let’s start by creating a React project using Create React App:
1
2
3
| $ npx create-react-app react-timer
$ cd react-timer
$ npm start
|
A new browser tab will open, displaying the app at http://localhost:3000. You can halt the running app using Ctrl+C.
Now, let’s incorporate Jest, Enzyme, and some dependencies:
1
2
| $ npm i -D enzyme
$ npm i -D react-test-renderer enzyme-adapter-react-16
|
We also need to add or modify a file named setupTests.js within the src directory:
1
2
3
4
| import { configure } from ‘enzyme’;
import Adapter from ‘enzyme-adapter-react-16’;
configure({ adapter: new Adapter() });
|
Create React App automatically executes setupTests.js before each test, ensuring Enzyme is configured correctly.
Configuring CSS for the Application
To maintain a consistent style across our application, we will define CSS variables and a basic CSS reset, making the CSS variables globally accessible. We’ll be defining variables from the :root scope using custom property notation, where each variable starts with ‘–’ followed by its name.
In the index.css file, add the following:
1
2
3
4
5
6
7
8
| :root {
--main-font: “Roboto”, sans-serif;
}
body, div, p {
margin: 0;
padding: 0;
}
|
Next, we need to import the CSS into our application. Update the index.js file as follows:
1
2
3
4
5
6
7
8
9
| import React from ‘react’;
import ReactDOM from ‘react-dom’;
import ‘./index.css’;
ReactDOM.render(
<React.StrictMode>
<App />
</React.StrictMode>
document.getElementById(“root”)
)
|
Implementing a Shallow Render Test
As you may already know, the TDD process generally follows these steps:
- Begin by adding a test.
- Run all tests, which will initially result in a failure.
- Write the code necessary to make the test pass.
- Run all tests again to verify the fix.
- Refactor the code for clarity and efficiency.
- Repeat these steps iteratively.
Following this process, we will add our first test for a shallow render and then write the necessary code to make it pass. Create a new spec file named App.spec.js in the src/components/App directory with the following code:
 1
 2
 3
 4
 5
 6
 7
 8
 9
10
| import React from ‘react’;
import { shallow } from ‘enzyme’;
import App from ‘./App’;
describe(‘App’, () => {
it(‘should render a <div />’, () => {
const container = shallow(<App />);
expect(container.find(‘div’).length).toEqual(1);
});
});
|
Now, run the test using:
As expected, the test will fail at this point.
Building the App Component
Let’s create the App component to pass the test. In the App.jsx file located in the src/components/App directory, add the following code:
1
2
3
4
5
| import React from ‘react’;
const App = () => <div className=”app-container” />;
export default App;
|
Now, rerun the test:
This time, our first test should pass successfully.
Styling the App Component
Let’s add some styling to our App component. Create a file named App.css in the src/components/App directory and add the following styles:
1
2
3
4
5
6
7
| .app-container {
height: 100vh;
width: 100vw;
align-items: center;
display: flex;
justify-content: center;
}
|
Next, import the CSS into the App.jsx file:
1
2
3
4
5
6
| import React from ‘react’;
import ‘./App.css’;
const App = () => <div className=”app-container” />;
export default App;
|
Finally, update the index.js file to import the App component:
 1
 2
 3
 4
 5
 6
 7
 8
 9
10
11
12
13
14
15
16
17
| import React from "react"
import ReactDOM from "react-dom"
import "./index.css"
import App from "./components/App/App"
import * as serviceWorker from "./serviceWorker"
ReactDOM.render(
<React.StrictMode>
<App />
</React.StrictMode>,
document.getElementById("root")
)
// If you want your app to work offline and load faster, you can change
// unregister() to register() below. Note this comes with some pitfalls.
// Learn more about service workers: https://bit.ly/CRA-PWA
serviceWorker.unregister()
|
Introducing the Timer Component
Our application will include a Timer component. To incorporate this, update the App.spec.js file to verify its presence within our app. Additionally, declare the ‘container’ variable outside the first test case as the shallow render test requires it before each test execution.
 1
 2
 3
 4
 5
 6
 7
 8
 9
10
11
12
13
14
15
16
17
18
| import React from "react"
import { shallow } from "enzyme"
import App from "./App"
import Timer from "../Timer/Timer"
describe("App", () => {
let container
beforeEach(() => (container = shallow(<App />)))
it("should render a <div />", () => {
expect(container.find("div").length).toEqual(1)
})
it("should render the Timer Component", () => {
expect(container.containsMatchingElement(<Timer />)).toEqual(true)
})
})
|
Running npm test at this stage will result in a failed test, as the Timer component hasn’t been created yet.
Writing the Timer Shallow Rendering Test
Create a new directory named Timer under the src/components directory and add a file named Timer.spec.js.
In the Timer.spec.js file, add the shallow render test:
 1
 2
 3
 4
 5
 6
 7
 8
 9
10
11
12
13
| import React from "react"
import { shallow } from "enzyme"
import Timer from "./Timer"
describe("Timer", () => {
let container
beforeEach(() => (container = shallow(<Timer />)))
it("should render a <div />", () => {
expect(container.find("div").length).toBeGreaterThanOrEqual(1)
})
})
|
This test will also fail, as expected.
Implementing the Timer Component
Create a new file named Timer.jsx and define the variables and methods based on our user stories:
 1
 2
 3
 4
 5
 6
 7
 8
 9
10
11
12
13
14
15
16
17
18
19
20
21
22
23
24
25
26
27
28
29
30
| import React, { Component } from 'react';
class Timer extends Component {
constructor(props) {
super(props);
this.state = {
minutes: 25,
seconds: 0,
isOn: false
};
}
startTimer() {
console.log('Starting timer.');
}
stopTimer() {
console.log('Stopping timer.');
}
resetTimer() {
console.log('Resetting timer.');
}
render = () => {
return <div className="timer-container" />;
};
}
export default Timer;
|
This should pass the test and result in a rendered <div /> in the Timer.spec.js file. However, it should not render the Timer component itself since we haven’t added it to the App component yet.
Let’s add the Timer component to our App.jsx file:
 1
 2
 3
 4
 5
 6
 7
 8
 9
10
11
| import React from 'react';
import './App.css';
import Timer from '../Timer/Timer';
const App = () => (
<div className="app-container">
<Timer />
</div>
);
export default App;
|
All tests should now pass successfully.
Styling the Timer Component
Let’s add some styling for our Timer component, including CSS variables and media queries for smaller devices.
Update the index.css file as follows:
 1
 2
 3
 4
 5
 6
 7
 8
 9
10
11
12
13
14
15
16
17
18
| :root {
--timer-background-color: #FFFFFF;
--timer-border: 1px solid #000000;
--timer-height: 70%;
--timer-width: 70%;
}
body, div, p {
margin: 0;
padding: 0;
}
@media screen and (max-width: 1024px) {
:root {
--timer-height: 100%;
--timer-width: 100%;
}
}
|
Create a Timer.css file in the components/Timer directory:
1
2
3
4
5
6
| .timer-container {
background-color: var(--timer-background-color);
border: var(--timer-border);
height: var(--timer-height);
width: var(--timer-width);
}
|
Import the Timer.css file into Timer.jsx:
1
2
| import React, { Component } from "react"
import "./Timer.css"
|
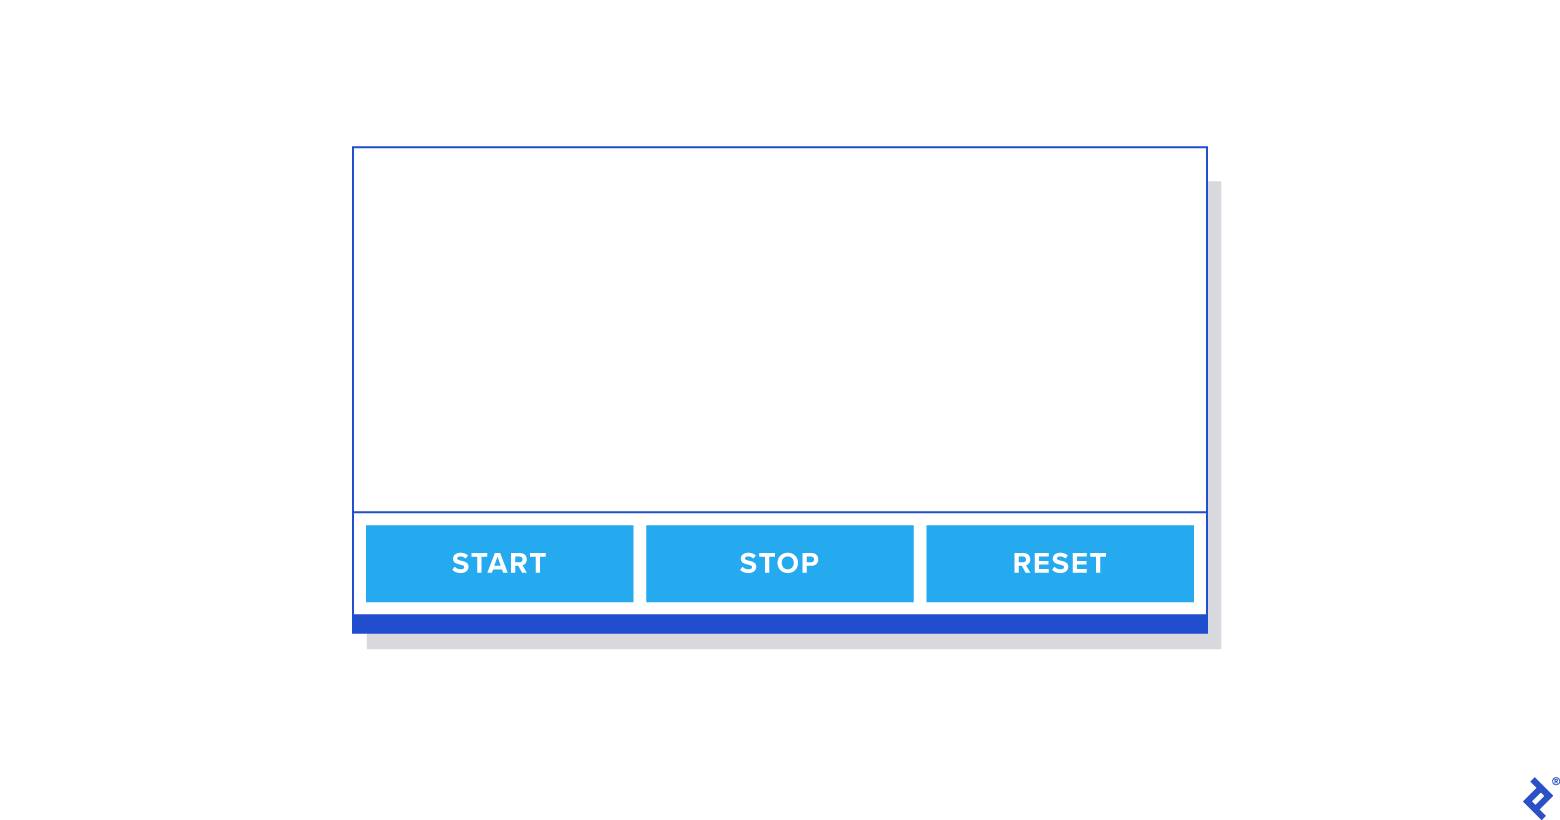
If you run the React app now, you should see a basic screen with a border in your browser.
We need three buttons: Start, Stop, and Reset. Let’s create a TimerButton component to represent these.
First, update the Timer.spec.js file to check for the presence of the TimerButton component within the Timer component:
1
2
3
| it("should render instances of the TimerButton component", () => {
expect(container.find("TimerButton").length).toEqual(3)
})
|
Next, create a new directory called TimerButton under src/components and add a file named TimerButton.spec.js. Add the test code to this file:
 1
 2
 3
 4
 5
 6
 7
 8
 9
10
11
12
13
14
15
16
17
18
19
20
| import React from "react"
import { shallow } from "enzyme"
import TimerButton from "./TimerButton"
describe("TimerButton", () => {
let container
beforeEach(() => {
container = shallow(
<TimerButton
buttonAction={jest.fn()}
buttonValue={""}
/>
)
})
it("should render a <div />", () => {
expect(container.find("div").length).toBeGreaterThanOrEqual(1)
})
})
|
Running the test now will result in a failure.
Let’s create the TimerButton.jsx file to define the TimerButton component:
 1
 2
 3
 4
 5
 6
 7
 8
 9
10
11
12
13
| import React from 'react';
import PropTypes from 'prop-types';
const TimerButton = ({ buttonAction, buttonValue }) => (
<div className="button-container" />
);
TimerButton.propTypes = {
buttonAction: PropTypes.func.isRequired,
buttonValue: PropTypes.string.isRequired,
};
export default TimerButton;
|
If you run npm test at this stage, it should successfully render instances of the TimerButton component. However, the test will still fail because we haven’t added the TimerButton components to the Timer component itself.
Let’s import and add three TimerButton components within the render method of our Timer.jsx:
 1
 2
 3
 4
 5
 6
 7
 8
 9
10
11
12
| render = () => {
return (
<div className="timer-container">
<div className="time-display"></div>
<div className="timer-button-container">
<TimerButton buttonAction={this.startTimer} buttonValue={'Start'} />
<TimerButton buttonAction={this.stopTimer} buttonValue={'Stop'} />
<TimerButton buttonAction={this.resetTimer} buttonValue={'Reset'} />
</div>
</div>
);
};
|
Add CSS variables for the TimerButton component in the :root scope within the index.css file:
 1
 2
 3
 4
 5
 6
 7
 8
 9
10
11
12
13
14
15
| :root {
...
--button-border: 3px solid #000000;
--button-text-size: 2em;
}
@media screen and (max-width: 1024px) {
:root {
…
--button-text-size: 4em;
}
}
|
Create a file named TimerButton.css in the TimerButton directory under src/components:
 1
 2
 3
 4
 5
 6
 7
 8
 9
10
11
| .button-container {
flex: 1 1 auto;
text-align: center;
margin: 0px 20px;
border: var(--button-border);
font-size: var(--button-text-size);
}
.button-container:hover {
cursor: pointer;
}
|
Update TimerButton.jsx to import the TimerButton.css file and display the button value:
 1
 2
 3
 4
 5
 6
 7
 8
 9
10
11
12
13
14
15
16
| import React from 'react';
import PropTypes from 'prop-types';
import './TimerButton.css';
const TimerButton = ({ buttonAction, buttonValue }) => (
<div className="button-container">
<p className="button-value">{buttonValue}</p>
</div>
);
TimerButton.propTypes = {
buttonAction: PropTypes.func.isRequired,
buttonValue: PropTypes.string.isRequired,
};
export default TimerButton;
|
Update the Timer.css file to align the three buttons horizontally:
 1
 2
 3
 4
 5
 6
 7
 8
 9
10
11
12
13
14
15
16
| import React from 'react';
import PropTypes from 'prop-types';
import './TimerButton.css';
const TimerButton = ({ buttonAction, buttonValue }) => (
<div className="button-container">
<p className="button-value">{buttonValue}</p>
</div>
);
TimerButton.propTypes = {
buttonAction: PropTypes.func.isRequired,
buttonValue: PropTypes.string.isRequired,
};
export default TimerButton;
|
Running the React app now should display a screen similar to this:
Refactoring the Timer Component
Let’s refactor the Timer component to implement functions such as startTimer, stopTimer, restartTimer, and resetTimer.
Start by updating the Timer.spec.js file:
 1
 2
 3
 4
 5
 6
 7
 8
 9
10
11
12
13
14
15
16
17
18
19
20
21
22
23
24
25
26
27
28
29
| describe('mounted Timer', () => {
let container;
beforeEach(() => (container = mount(<Timer />)));
it('invokes startTimer when the start button is clicked', () => {
const spy = jest.spyOn(container.instance(), 'startTimer');
container.instance().forceUpdate();
expect(spy).toHaveBeenCalledTimes(0);
container.find('.start-timer').first().simulate('click');
expect(spy).toHaveBeenCalledTimes(1);
});
it('invokes stopTimer when the stop button is clicked', () => {
const spy = jest.spyOn(container.instance(), 'stopTimer');
container.instance().forceUpdate();
expect(spy).toHaveBeenCalledTimes(0);
container.find('.stop-timer').first().simulate('click');
expect(spy).toHaveBeenCalledTimes(1);
});
it('invokes resetTimer when the reset button is clicked', () => {
const spy = jest.spyOn(container.instance(), 'resetTimer');
container.instance().forceUpdate();
expect(spy).toHaveBeenCalledTimes(0);
container.find('.reset-timer').first().simulate('click');
expect(spy).toHaveBeenCalledTimes(1);
});
});
|
Running the test at this point will result in failures for the added tests as we haven’t updated the TimerButton component yet. Let’s add a click event handler to the TimerButton component:
1
2
3
4
5
| const TimerButton = ({ buttonAction, buttonValue }) => (
<div className="button-container" onClick={() => buttonAction()}>
<p className="button-value">{buttonValue}</p>
</div>
);
|
The tests should now pass.
Add more tests to the mounted Timer test case to check the state after invoking each function:
 1
 2
 3
 4
 5
 6
 7
 8
 9
10
11
12
13
14
15
16
17
18
19
| it('should change isOn state true when the start button is clicked', () => {
container.instance().forceUpdate();
container.find('.start-timer').first().simulate('click');
expect(container.instance().state.isOn).toEqual(true);
});
it('should change isOn state false when the stop button is clicked', () => {
container.instance().forceUpdate();
container.find('.stop-timer').first().simulate('click');
expect(container.instance().state.isOn).toEqual(false);
});
it('should change isOn state false when the reset button is clicked', () => {
container.instance().forceUpdate();
container.find('.stop-timer').first().simulate('click');
expect(container.instance().state.isOn).toEqual(false);
expect(container.instance().state.minutes).toEqual(25);
expect(container.instance().state.seconds).toEqual(0);
});
|
These tests will fail because we haven’t implemented the methods yet. Let’s implement the functions to make the tests pass:
 1
 2
 3
 4
 5
 6
 7
 8
 9
10
11
12
13
14
15
| startTimer() {
this.setState({ isOn: true });
}
stopTimer() {
this.setState({ isOn: false });
}
resetTimer() {
this.stopTimer();
this.setState({
minutes: 25,
seconds: 0,
});
}
|
Running the tests now should show successful execution. Now, implement the remaining functions in Timer.jsx:
 1
 2
 3
 4
 5
 6
 7
 8
 9
10
11
12
13
14
15
16
17
18
19
20
21
22
23
24
25
26
27
28
29
30
31
32
33
34
35
36
37
38
39
40
41
42
43
44
45
46
47
48
49
50
51
52
53
54
55
56
57
58
59
60
61
62
63
64
65
66
67
68
69
70
71
72
73
74
75
76
77
78
79
80
81
82
83
84
85
86
87
88
| import React, { Component } from 'react';
import './Timer.css';
import TimerButton from '../TimerButton/TimerButton';
class Timer extends Component {
constructor(props) {
super(props);
this.state = {
minutes: 25,
seconds: 0,
isOn: false,
};
this.startTimer = this.startTimer.bind(this);
this.stopTimer = this.stopTimer.bind(this);
this.resetTimer = this.resetTimer.bind(this);
}
startTimer() {
if (this.state.isOn === true) {
return;
}
this.myInterval = setInterval(() => {
const { seconds, minutes } = this.state;
if (seconds > 0) {
this.setState(({ seconds }) => ({
seconds: seconds - 1,
}));
}
if (seconds === 0) {
if (minutes === 0) {
clearInterval(this.myInterval);
} else {
this.setState(({ minutes }) => ({
minutes: minutes - 1,
seconds: 59,
}));
}
}
}, 1000);
this.setState({ isOn: true });
}
stopTimer() {
clearInterval(this.myInterval);
this.setState({ isOn: false });
}
resetTimer() {
this.stopTimer();
this.setState({
minutes: 25,
seconds: 0,
});
}
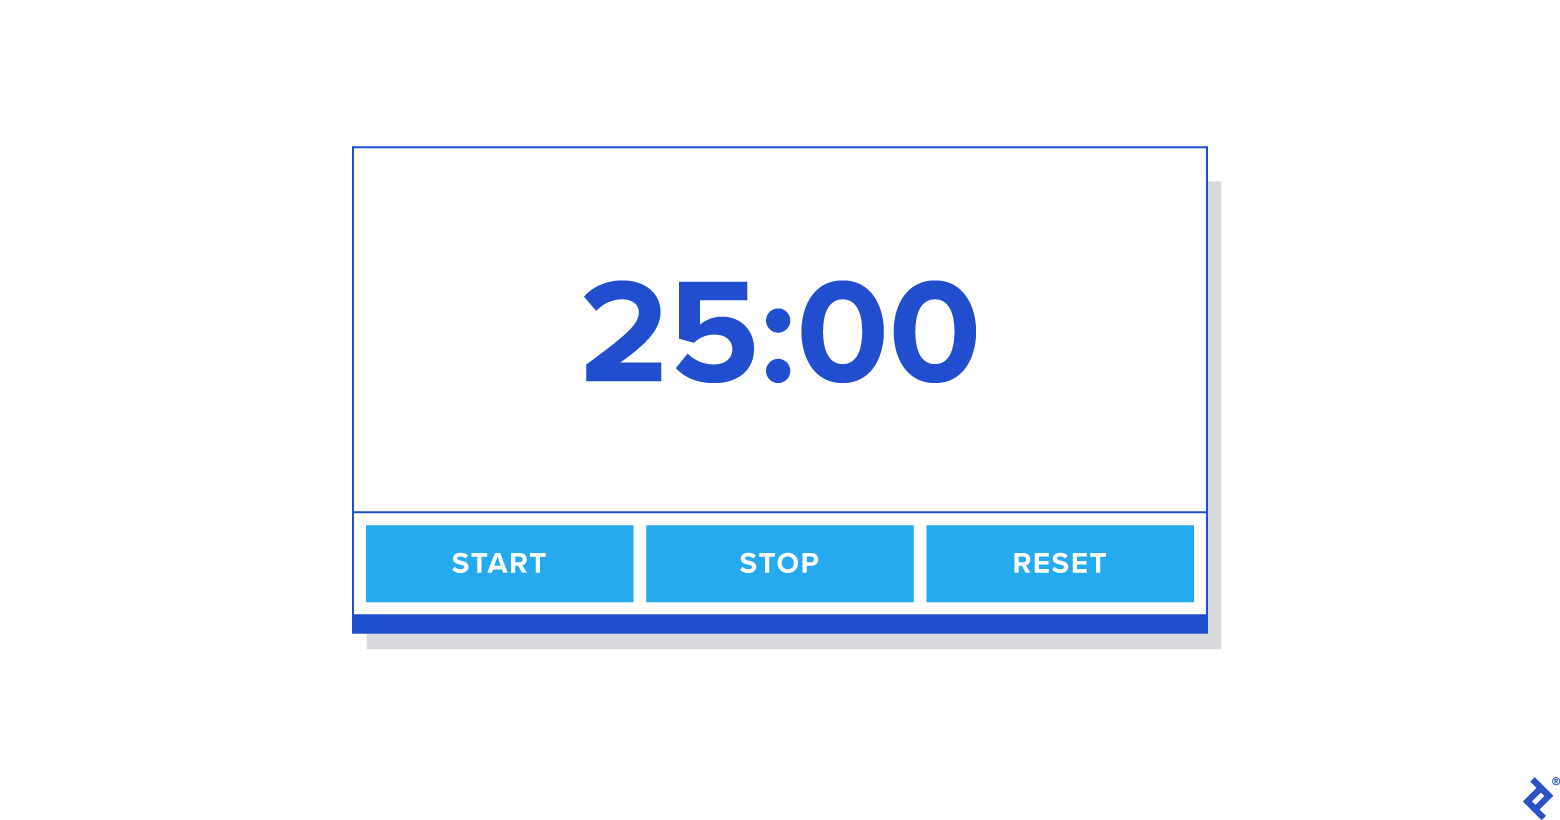
render = () => {
const { minutes, seconds } = this.state;
return (
<div className="timer-container">
<div className="time-display">
{minutes}:{seconds < 10 ? `0${seconds}` : seconds}
</div>
<div className="timer-button-container">
<TimerButton
className="start-timer"
buttonAction={this.startTimer}
buttonValue={'Start'}
/>
<TimerButton
className="stop-timer"
buttonAction={this.stopTimer}
buttonValue={'Stop'}
/>
<TimerButton
className="reset-timer"
buttonAction={this.resetTimer}
buttonValue={'Reset'}
/>
</div>
</div>
);
};
}
export default Timer;
|
All functions should now work according to the user stories we defined earlier.
This demonstrates how to develop a basic React application using TDD. More comprehensive user stories and acceptance criteria would enable us to write more precise test cases, further enhancing the development process.
Summary
When developing applications using TDD, it’s crucial to break down the project into manageable epics or user stories and define clear acceptance criteria. This article aimed to show how to structure a project, utilize prepared acceptance criteria, and implement TDD in React development.
While numerous resources are available on React TDD, hopefully, this article has provided valuable insights into using user stories to drive TDD in React. If you’d like to explore the complete codebase, please refer to here.