As the pace of product and service deployments continues to accelerate, quality assurance (QA) must evolve to keep up. This often requires achieving the same level of testing coverage in a much shorter timeframe. But how can we ensure we don’t prioritize Quantity over Quality in this process? How do we expand our test coverage, enhance efficiency, and maintain the effectiveness of our QA efforts?
Creating test cases is a notoriously time-consuming process. It involves implementing various techniques and test types, and meticulously documenting preconditions, steps, expected results, and more. On top of that, there’s the task of creating a comprehensive test plan.
Quality assurance specialists often find themselves racing against the clock, struggling to complete all phases of the QA process within tight deadlines. The most significant bottleneck tends to be the test planning and design phase, particularly the creation of test cases and accompanying documentation. These tasks can consume hours, sometimes even days, leading QA teams to take shortcuts, such as omitting certain deliverables or summarizing information, which can result in overlooking crucial tests or losing valuable knowledge-sharing opportunities.
A New Approach: Combining Traditional QA with User Flows
While traditional test cases and test plans are undeniably valuable for identifying test scenarios and thoroughly documenting a product, their creation can be time-intensive. These documents serve as excellent training resources, providing a shared understanding for all team members, regardless of their experience level. Test plans, in particular, offer a detailed overview of the testing scope, items to be tested, features included and excluded, and a risk analysis, among other critical information. However, the time required to develop these artifacts can be prohibitive in fast-paced environments.
Test plans serve as a crucial communication tool and a formal agreement between project stakeholders, outlining objectives, resource allocation, and the testing strategy. They provide assurance that all essential aspects are considered and instill confidence among stakeholders that the quality assurance process is strategically planned. However, there’s no hard and fast rule that dictates a specific length for a test plan. We can adapt it to suit the needs of agile teams.
The solution lies in streamlining traditional test cases and test plans, optimizing them for efficiency without compromising coverage or comprehensive documentation that all stakeholders can easily understand. This involves establishing a single source of truth - a user flow with a twist. By meticulously structuring and maintaining a user flow, you effectively lay the groundwork for your test case design. This versatile approach can be tailored to any product or team, allowing for varying levels of detail and structure.
Adopting the flow method expedites the test documentation process, benefiting both manual and automated QA. Furthermore, the flow can seamlessly feed into certain sections of the test plan.
Embracing the Flow
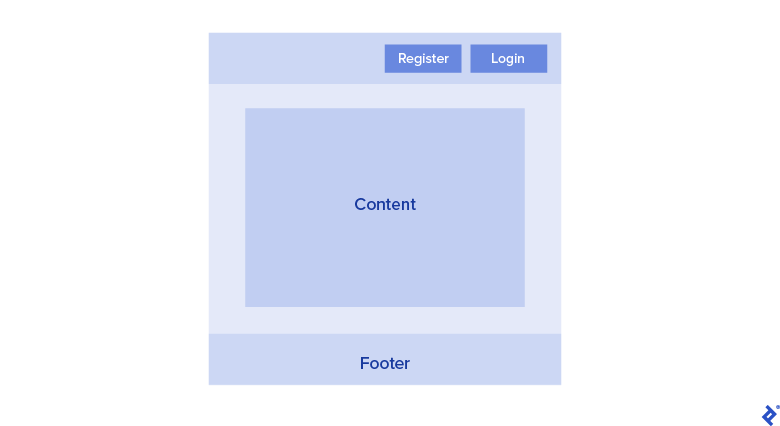
Let’s delve into building a user flow for a simplified messaging website.
We’ll begin with a free mind mapping tool. I personally prefer XMind. Feel free to use any tool you’re comfortable with. We’ll primarily leverage basic functionalities like creating flow diagrams, adding notes to topics, color-coding different conditions, and using labels.
The first order of business is to thoroughly understand the product. Typically, you’d refer to mock-ups, wireframes, or have a quick discussion with a developer to gather information about the expected screens. Don’t hesitate to follow along and apply these techniques. This flow-based approach extends beyond user interfaces; it can map out API interactions, database schemas, dependency structures, and more, using the same principles.
Conditions, States, and Actions
We’ll work with three fundamental elements: Conditions, States/Pages, and Actions. A Condition represents a user with a specific role, a cleared cache, or a first-time login scenario. States/Pages correspond to actual GUI components, such as a homepage or a sign-in window. Lastly, Actions are physical user interactions that trigger a change in state. Let’s illustrate this with an example.
Requirement Analysis
Our starting point is the homepage, representing a State. From here, we have two possible Actions: Register and Login.
Next, we have the Sign In window, another State. The actions here are Back and Login. Notice that we don’t treat input fields as actions. You’re welcome to adopt that approach, but in my experience with complex systems, it can become challenging to maintain. However, it can be a good fit for simpler applications.

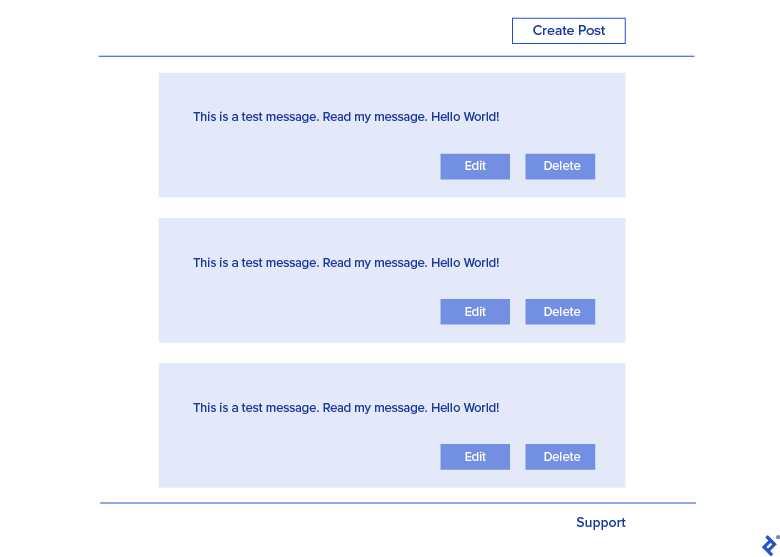
Finally, we have the dashboard, which the user accesses after successfully signing in. Here, we have three actions: Create, Edit, or Delete a message.
With this information, we can begin constructing our user flow. Let’s summarize our findings. We’ve identified four distinct product states or pages:
- Homepage
- Login Window
- Register Window
- Dashboard
We’ve also noted the actions associated with each state/page:
- Homepage
- Login
- Register
- Login Window
- Sign in
- Cancel
- Register Window
- TBD (depends on product)
- Dashboard
- Create
- Edit
- Delete
Our flow begins with the Product Name, which can be customized, but this generic term suits most teams and products. Below, you’ll see a question mark next to Register.
In agile environments, we often encounter components that are not yet in scope or planned for future releases. It’s essential to acknowledge their existence but leave them as unknowns until we have more concrete information.
Building the Flow Diagram
Using XMind, we can visualize our findings:
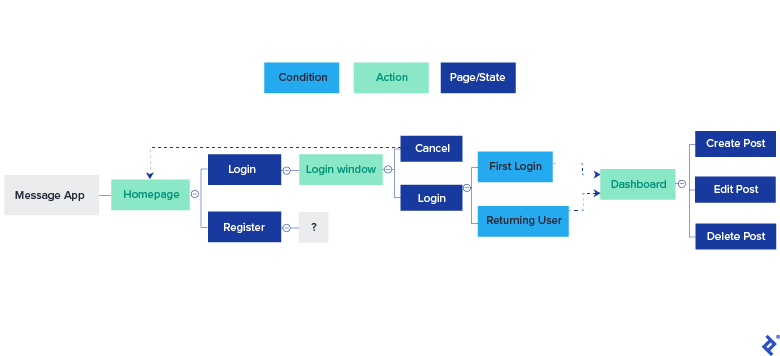
You’ll observe that I’m using color-coding to differentiate between states (blue) and actions (green). I’ve also added a line from the Cancel action back to the homepage to accurately represent that flow. Additionally, we see two conditions branching from the “Login” action. While both lead to the dashboard, we want to test both scenarios.
One of the strengths of XMind is its ability to handle complexity. For larger applications, we can create multi-level diagrams and link topics across different sheets. For instance, you can insert a hyperlink from the “Login” action to the “Dashboard” state, even if it’s on a separate sheet. Clicking on “Login” would instantly take you to the “Dashboard” section.
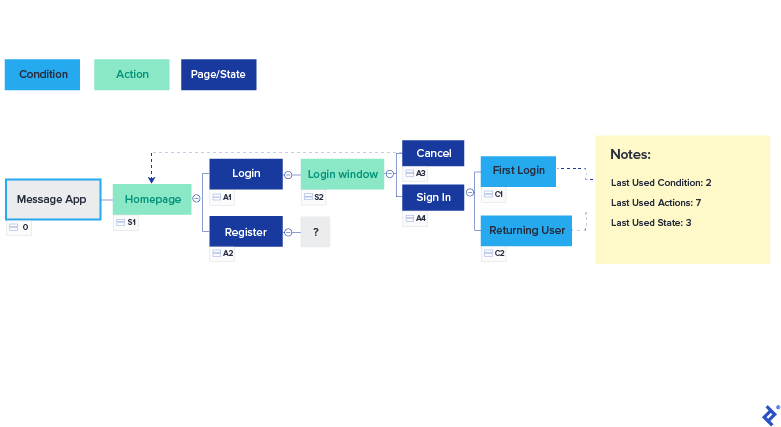
Next, we’ll incorporate labels into our flow. The product receives a label of 0, signifying the root. Each state (blue) gets an S# label, actions (green) receive an A# label, and conditions (cyan) are marked with a C# label. Each label must be unique. This results in the following:

To efficiently track the last used label number, especially as the product grows, I store it in the root topic of the flow:
Now, let’s move on to creating test cases. We’ll prioritize the Expected Results, a crucial element of a test case and part of the acceptance criteria. For each section or test, I’ll add a title and list the expected results underneath. To keep things concise, I’ll focus on a subset:
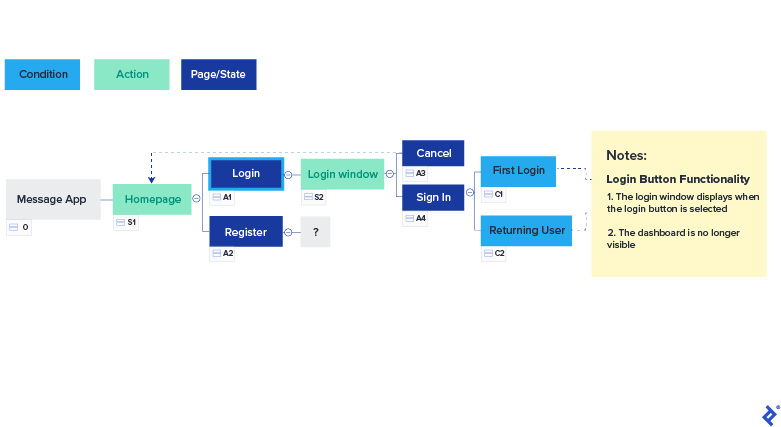
Next, the Login Window:
And the Sign In Action:

Our structure is taking shape. You’ll notice the inclusion of boundary and security tests. You can label these sections as per your preference. Sometimes, I tag the title with the test type, such as “Security - JS Inject - Email Field,” followed by the expected results.
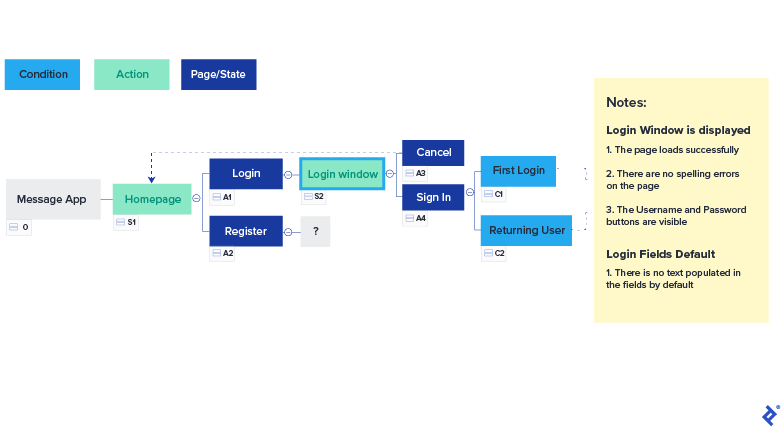
Changing requirements, often a headache in QA, are easily managed with this approach. For instance, let’s say we discover that all first-time users must agree to the Terms and Conditions before accessing the dashboard. We can seamlessly incorporate this new state and its actions:

This highlights the impact of adding a new state. The numbering might seem a bit unconventional at first, but remember, the labels simply serve as unique identifiers for each element, much like primary keys in a database. Don’t forget to update the “Last Used” notes to keep track of label assignments.
Generating Test Cases from the Flow
With our well-defined flow, creating test cases becomes incredibly straightforward. We have unique labels for each element, titles for tests, expected results, and conditions embedded within the flow.
All that remains is to transfer this information into your preferred test case management tool, Confluence page, or Excel spreadsheet. I personally favor Excel and maintain all my test cases in a file aptly named “Baseline.” After copying the data from our flow, we end up with:
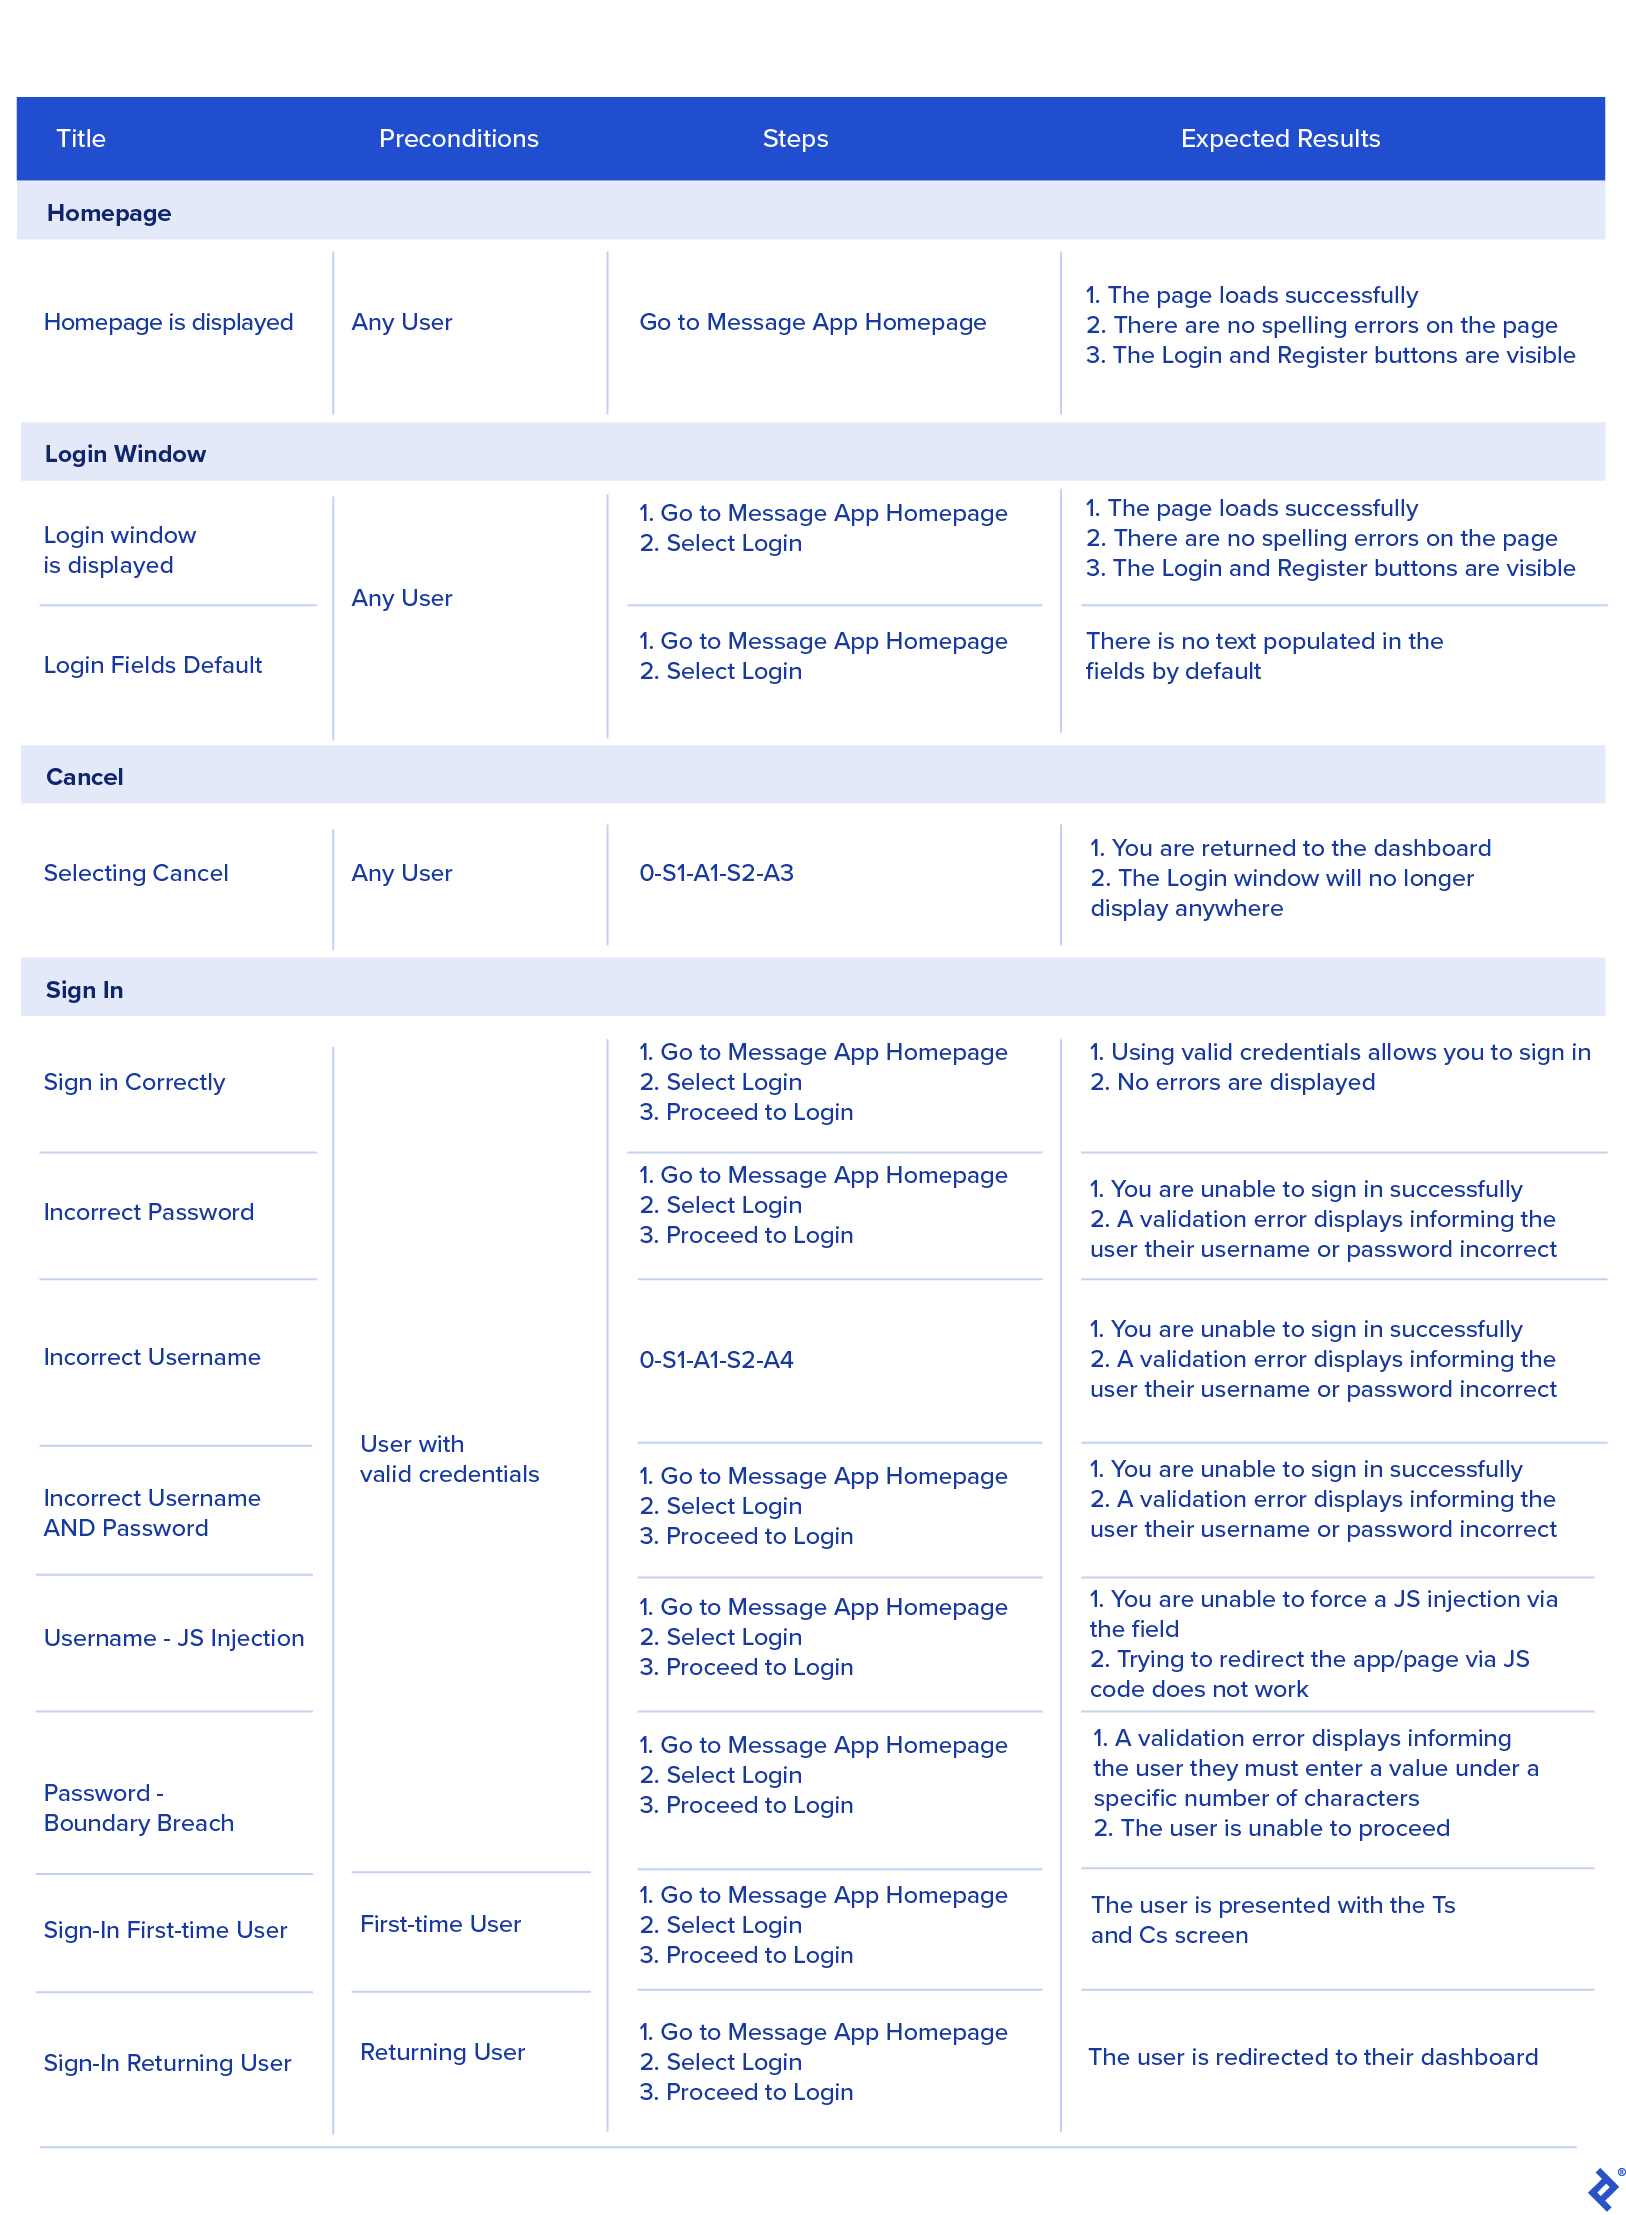
Feel free to add columns for test types, status, and configurations as needed. You could position the conditions before the “Sign In” action if you prefer. There’s no right or wrong way; it’s all about personal organization.
A couple of points to note: I’ve merged cells containing duplicate information to avoid redundancy and simplify maintenance. Secondly, notice how some test steps incorporate the State and Action numbers from our flow. This becomes particularly powerful when the flow is an integral part of your team’s SDLC. All stakeholders can contribute to and reference the flow, making onboarding new team members as simple as “follow the trail and refer to the notes.”
This approach also benefits automation. By assigning unique references to steps and actions and structuring your automation framework to mirror the flow, you can create a robust, modular, and scalable solution. This promotes the use of page objects on a larger scale, minimizing maintenance efforts and allowing for easy replacement of test functions.
The user flow can serve as the single source of truth for all product documentation, encompassing technical specifications, functional specifications, test cases, state transitions, data flows, and more.
Streamlining the Test Plan
You might be wondering about test plans. It’s quite simple. A test plan typically consists of sections like:
- Introduction & scope
- Test items
- Features to be tested
- Features not to be tested
- Assumptions
- Entry criteria
- Exit criteria
- Work Breakdown Structure (WBS)
- Risks
- Environment requirements
The Introduction and scope can be directly derived from the JIRA story or a corresponding task or story in your project management tool. Test items are simply the software versions or commit numbers deployed on your testing environment, which you can link to the relevant JIRA ticket or test run in tools like Confluence or your test management system.
Features to be tested and Features not to be tested are essentially your defined test cases. The test cases selected for execution within the scope of a particular JIRA story become “Features to be tested,” while any others are categorized as “Features not to be tested.” Simply list the States and Actions from your flow that will be covered.
Assumptions, Risks, and Environment requirements can be compiled in a separate document, added as comments to the JIRA ticket, or even documented on Confluence and linked to the story.
The WBS refers to the estimated effort assigned to the story, typically in story points or hours, depending on your project methodology. Entry and Exit criteria should already be defined within the story.
To align with traditional test plan practices, you can request developers or stakeholders to provide their agreement on the QA plan by commenting on the story with a simple “Yes” or “No.” This serves as a digital sign-off.
All these elements can be seamlessly integrated into your QA process, streamlining documentation and enhancing collaboration.
Key Takeaways
By combining user flows with this streamlined approach to test plans and leveraging existing tools, we can significantly reduce repetitive work and empower QA teams to deliver faster without compromising quality.
This methodology has been instrumental in helping me stay organized, ensure comprehensive coverage, and produce documentation that is easily understood by the entire team. In agile development, this approach is incredibly valuable, aligning with the agile principle of “Simplify Documentation.”
I genuinely hope you’ve found this information helpful. Remember, these are guidelines and not rigid rules. Every project, team, and product is unique, but these concepts can serve as a starting point for innovation and process improvement within your QA workflows.