Many digital marketers struggle to understand the connection between conversion tracking and website analytics. When businesses first start with online advertising, they frequently set up Google Analytics to monitor site traffic and track conversions separately for each paid channel (like Facebook and Google Ads) within their respective dashboards.
This approach might work on a small scale, but it will inevitably cause problems as your efforts grow. By having proper tracking in place to see granular paid channel performance in Google Analytics, you can add another layer of attribution and hold each channel responsible for its actual impact on your website.
Besides Analytics, Google provides tools to streamline managing website pixels and conversion tracking for each channel. With accurate conversion tracking and dependable analytics, you should be able to scale your paid programs confidently, knowing the information you’re viewing is reliable.
This post will guide you through four steps to enhance your paid channel performance reporting using Google Tag Manager and Google Analytics.
Step #1: Implement Google Tag Manager
Google Tag Manager (GTM) lets you manage and deploy website tags from a single location. This means you only need to add a single code snippet to your entire website instead of manually inserting tags from each channel. After implementing the GTM tag, you can add and manage tags from one central hub. I start here because many advertisers manually place each paid channel’s tracking pixel on their web pages. This can lead to confusion and clutter in your website’s code.
To simplify adding multiple pixels and tracking codes, I highly recommend setting up Google Tag Manager as soon as possible. This will also make things much easier for your web developer if your team and operations expand.
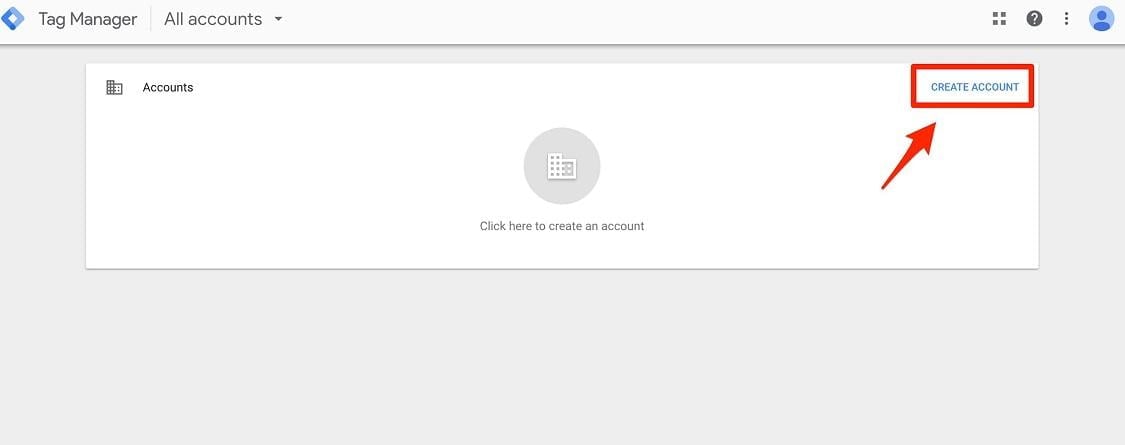
To get started with Tag Manager, you’ll need to create an account.
Next, follow the instructions to set up your account information. Name the account after your business and proceed to set up the “container.” Your website address will be your container:
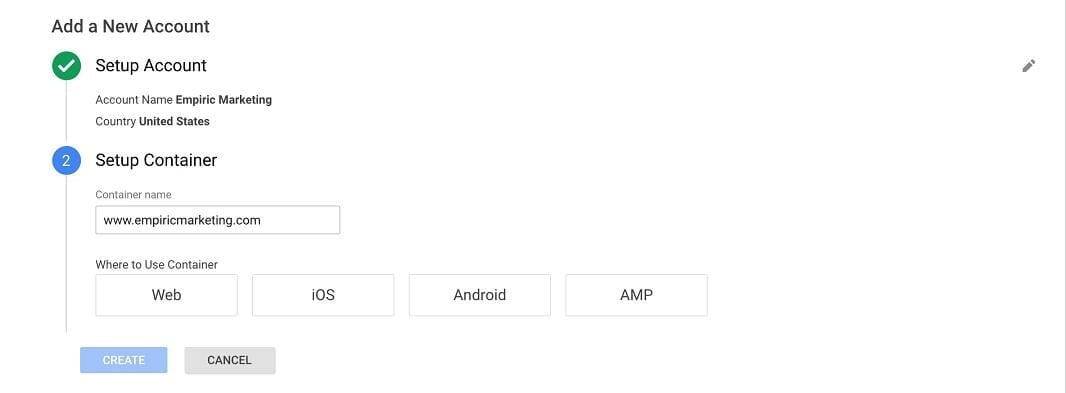
Before continuing, select “web.” Google will then generate two tags for you to place on your site.
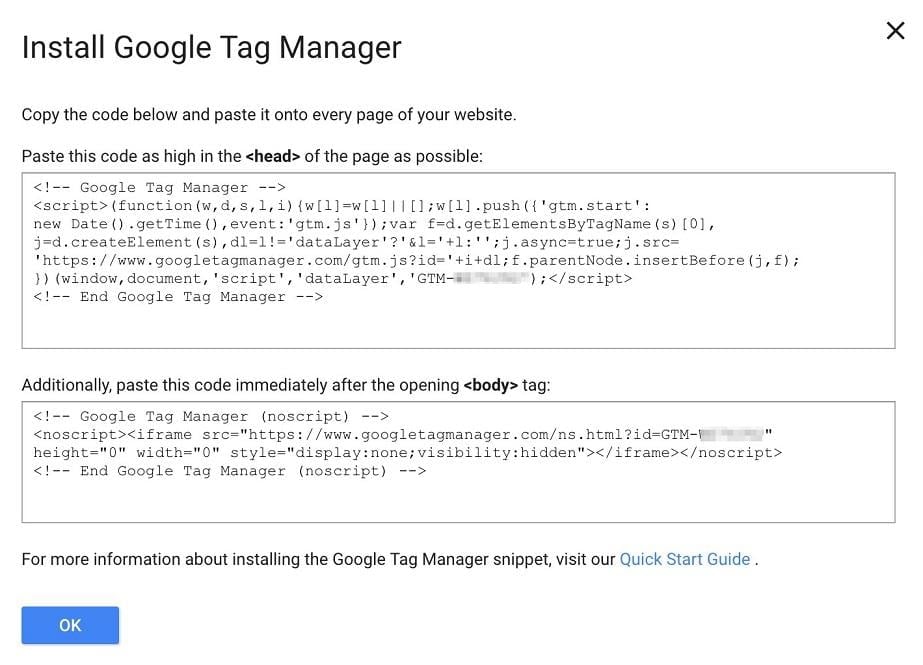
Place the first tag within the
and the second after the opening tag. Copying and pasting these tags into a document for easy access is recommended. If you manage your site with a platform like HubSpot, applying these tags across all pages is relatively simple.If you use a third party for landing pages, ensure this code is also added there.
Before implementing the GTM tag on your website, remove any manually installed paid channel tags. You can transfer these tags to GTM later, but removing them temporarily ensures they don’t fire multiple times or cause conflicts once the GTM tag is active. Saving these pre-existing code snippets in a document is also a good practice – I suggest the same one containing the GTM tags for safekeeping. If you manage client accounts, ensure they grant you publishing permissions in their GTM. This lets you create and publish new tags independently.
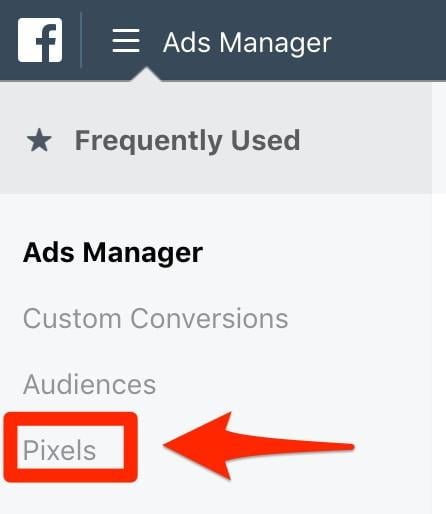
There’s a quick way to implement the Facebook pixel into GTM. After setting up your Tag Manager account and removing pre-existing paid channel tags, navigate to Facebook Business Manager and choose “Pixels” from the main dropdown menu:
Choose “Set Up Pixel”:
Then, select “Use an Integration or Tag Manager”:
You should now be able to choose Google Tag Manager from the list and follow the steps to implement the pixel easily. You can add conversions in Google by going to Tools > Conversion > and selecting the specific conversion. At the bottom of the page, there should be a “Tag Setup” option. You can select Google Tag Manager there:
This provides the necessary information to create the conversion in Google Tag Manager, including the conversion ID and label.
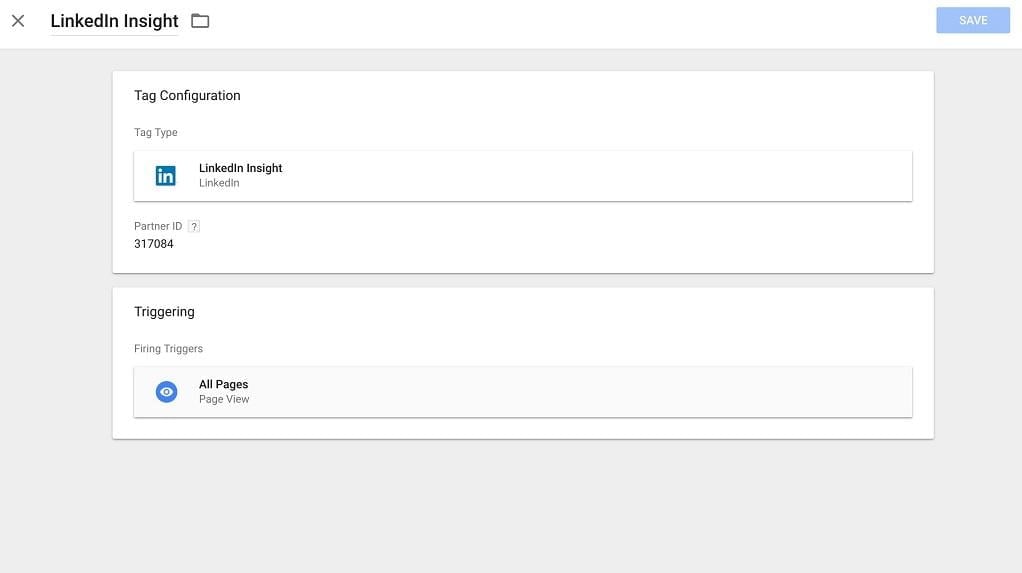
To create a new tag for any channel, select “New Tag” from the Google Tag Manager home screen and choose the channel you want to set up:
You’ll be prompted to define how each tag fires or its “trigger.” For LinkedIn, Facebook, and Google Remarketing tags, you’ll want them to fire on “All Pages”:
For something like Google Ads conversion tracking, you’ll want the tag to fire only on specific page URLs:
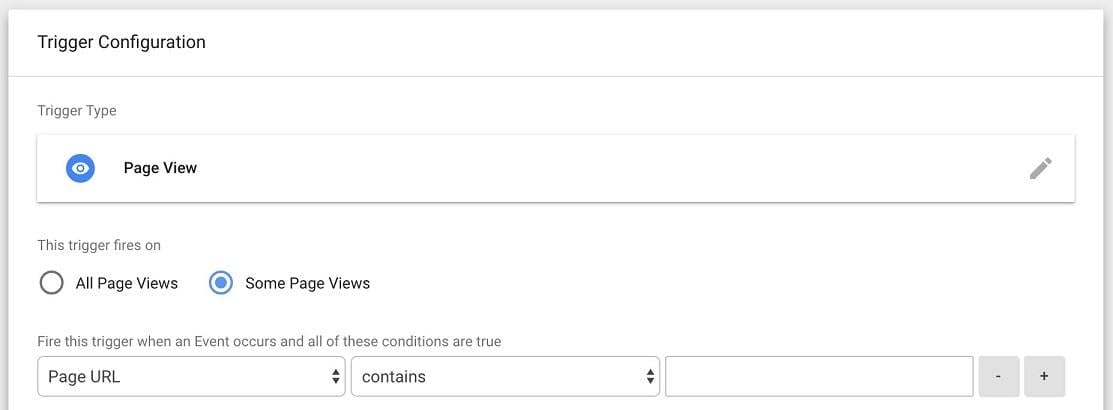
This allows you to specify the pages where you want the conversion to fire. Examples include “thank you” pages or any destination page associated with the conversion. You can also add a conversion linker tag to the pageview event. Conversion linkers help tags measure click data for accurate conversion measurement. To add a conversion linker tag, select “New Tag” and “Conversion Linker” from the tag configuration menu:
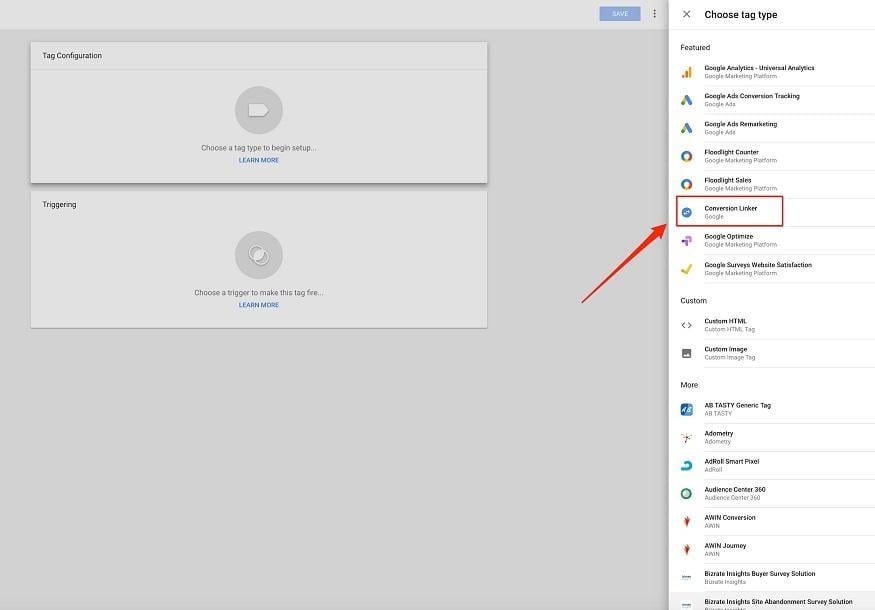
Then, set the linker trigger to “All Pages.”
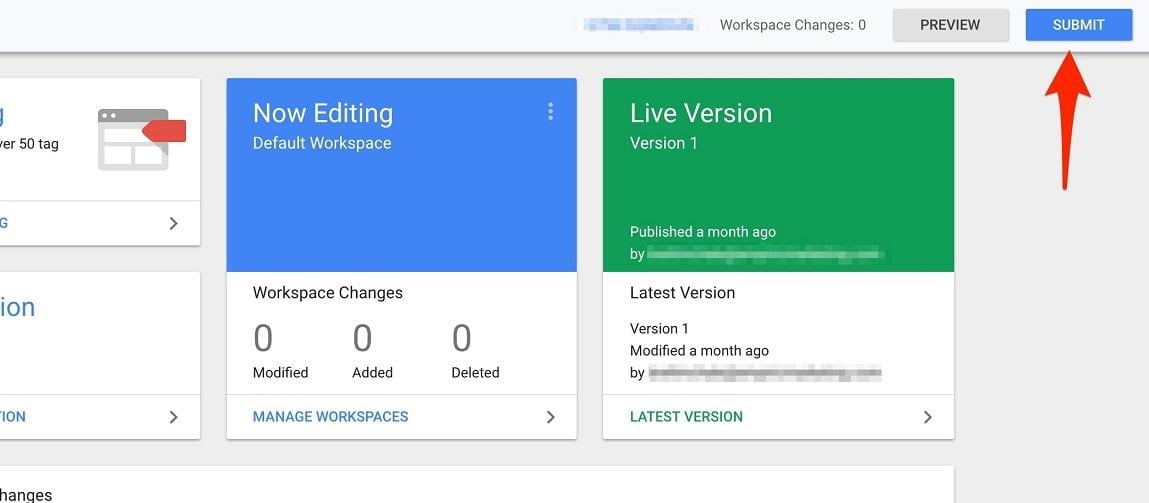
After adding your tags from each channel, click the “Submit” button at the top of the page to push the changes to Tag Manager Live:
I suggest downloading the Google Chrome extension Tag Assistant to ensure your GTM is functioning correctly. This plugin displays which tags are active on specific web pages.
You can also utilize the Facebook version of this tool to verify tag firing.
To use these tools, visit your website and enable the Tag Assistant extension:
You can see both tags are active and firing. This is a good way to confirm the removal of old tags without manually checking each page’s code.
Step #2: Set Your Google Analytics Goals
Connecting Google Analytics goals to your paid media efforts is crucial for reporting. If you haven’t set up Google Analytics Goals, I’ll guide you through it.
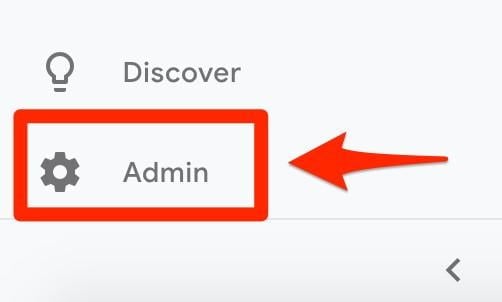
Sign in to your Google Analytics account and choose the correct view for your website. Select “Admin” on the left-hand side (you’ll need admin privileges to create goals in Analytics).
Next, select “Goals” from the desired view:
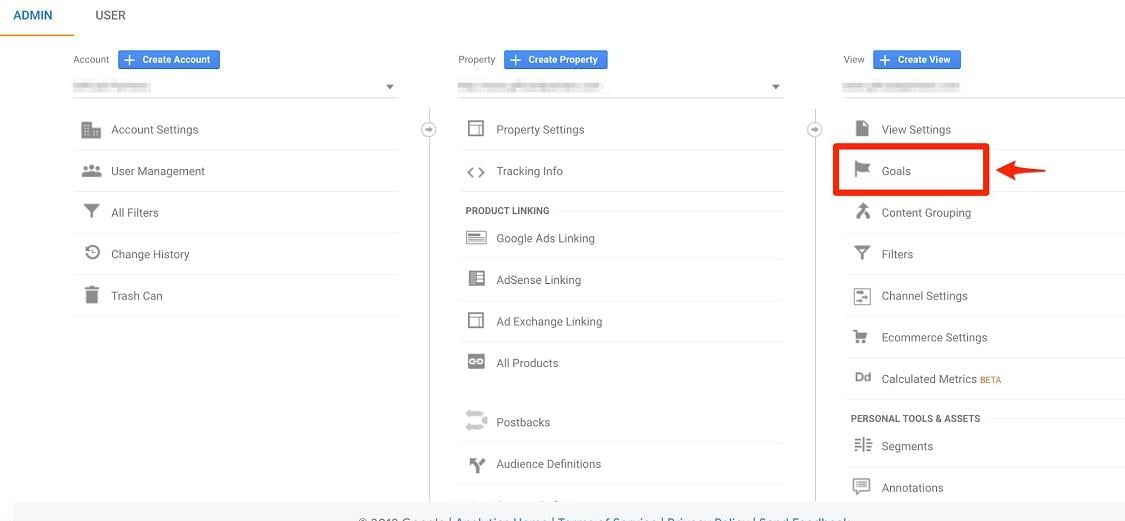
Here, you can view existing goals or create new ones. Ensure your goals align with your paid advertising conversions, like demo requests, ebook downloads, free trial starts, purchases, or add-to-carts. You can create various goals, including goals from a template, custom goals, and smart goals. I recommend custom goals for their flexibility in specifying destination URLs:
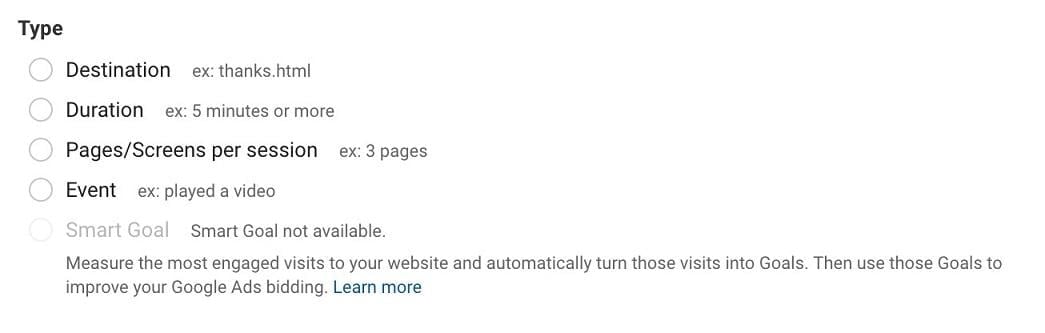
The idea is to create goals that mirror your paid channel conversions. For instance, if you’re driving traffic to an ebook landing page on Facebook, you’ll want to designate ebook “thank you” pages as goals within Analytics. In such cases, you’d select “Destination.” You can then specify the conversion event’s destination landing page, similar to your paid platforms.
Assuming Tag Manager is set up correctly, you’ll be recording conversions within each channel. With matching goals set up in Analytics, you can compare the results for consistency.
Step #3: Start Using Analytics URL tracking
You can use Google’s URL campaign builder to see the specific traffic source related to goal completions.
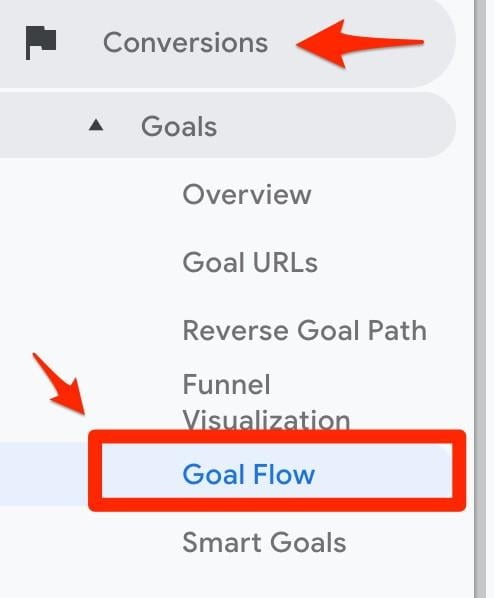
This allows you to create unique URL UTM parameters for each paid channel campaign. You can input the respective channel (Facebook, Google, LinkedIn, etc.) under “Campaign Source.” Once everything is set up, and your campaigns are running, navigate to “Goal Flow” under the “Conversions” section in Analytics:
You can then select one of your custom goals in the top right to view goal completions from each channel. For example, ebook downloads:
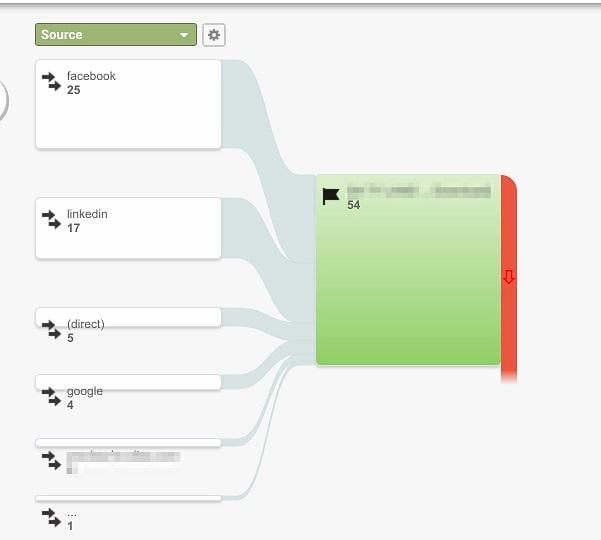
While alternative methods exist for obtaining this channel visibility, I find this the simplest.
Step #4: Keep Track of Your Reporting
You’re almost finished once Google Tag Manager and Google Analytics are set up with your desired conversions for each channel. Since you can now see which channels are driving which goals, consistently monitoring your reports is crucial to maximizing this information.
For example, if you notice discrepancies between Facebook and Google Analytics data, you can check your custom conversions on Facebook for issues. The goal is to make Google Analytics your primary source of truth for attributing costs from your paid efforts.
Analytics also allows you to monitor page traffic and associated metrics like pageviews and bounce rate (this is helpful as Facebook’s click data is often unreliable). You’ll also gain insights into how users interact with your site after arriving through a paid channel. For example, you can see if a user lands on your site through an ad but converts on a different page. This information allows you to tie it back to the overall paid ROI.
Consider using a tool to connect your accounts and generate reports automatically if you want to consolidate this data into a single dashboard. Some good options include Databox, OpenStack, and nexus-security Advisor.
By harmonizing Google Tag Manager and Google Analytics goals, your paid channel reporting will become more streamlined and accurate. Implementing these systems is the first step towards clarity if you’ve ever questioned your paid advertising results.