Editor’s note: This article was revised on December 2, 2022. The update reflects current editorial standards and incorporates new sources.
Application programming interfaces (APIs) are ubiquitous. They facilitate seamless communication between software components, both internal and external, a crucial factor for scalability and reusability.
Public-facing APIs have become commonplace for online services, allowing developers to integrate features such as social media logins, payment gateways, and analytics effortlessly. The prevalent standard for this is representational state transfer (REST).
Why choose Node.js for building a REST API? While numerous platforms and languages can achieve this – ASP.NET Core, Laravel (PHP), or Bottle (Python) are some examples – JavaScript reigns supreme as the most favored language](https://survey.stackoverflow.co/2022/#most-popular-technologies-language-prof) among developers. Therefore, this tutorial will construct a rudimentary yet secure REST API back end using components familiar to [JavaScript developers:
- Node.js, with which the reader should possess some prior knowledge.
- Express.js, a framework that streamlines common web server tasks and is a staple in Node.js REST API development.
- Mongoose, bridging our back end to a MongoDB database.
This tutorial assumes familiarity with the terminal (or command prompt).
Note: This tutorial won’t delve into front-end development, but the shared JavaScript foundation simplifies code reuse – such as object models – throughout the stack.
Understanding REST API Architecture
REST APIs utilize a standardized set of stateless operations to access and manipulate data. Inherent to the HTTP protocol, these operations underpin fundamental create, read, update, and delete (CRUD) functionalities, albeit not in a strict one-to-one mapping:
POST(creates a new resource or submits data)GET(retrieves a list of resources or a specific resource)PUT(creates or fully replaces a resource)PATCH(partially updates/modifies a resource)DELETE(removes a resource)
By employing these HTTP operations and a resource name as an address, we can construct a Node.js REST API. This involves creating an endpoint for each operation. Adhering to this pattern provides a stable and intuitive foundation for rapid code evolution and straightforward maintenance. This foundation also simplifies third-party feature integration, most of which rely on REST APIs.
Let’s embark on creating our secure Node.js REST API.
This tutorial focuses on building a common (and highly practical) secure REST API for a resource named users, structured as follows:
id(an automatically generated UUID)firstNamelastNameemailpasswordpermissionLevel(defines user privileges)
We will implement the following operations for this resource:
POSTon/users(creates a new user)GETon/users(lists all users)GETon/users/:userId(retrieves a specific user)PATCHon/users/:userId(updates user data)DELETEon/users/:userId(deletes a user)
For access tokens, we will utilize JSON web tokens (JWTs), creating an auth resource that receives user credentials (email and password) and returns an authentication token. (Dejan Milosevic’s comprehensive article on JWT for secure REST applications in Java provides further insights; the principles remain consistent.)
Setting Up Our Node.js REST API Tutorial
Start by ensuring you have the latest Node.js version installed. This article uses version 14.9.0; older versions might suffice.
Next, verify the installation of MongoDB. While we won’t delve into the intricacies of Mongoose and MongoDB, initiate the server in interactive mode (from the command line as mongo) instead of as a service. We’ll interact directly with MongoDB at one point, bypassing our Node.js code.
Note: With MongoDB, unlike some RDBMS systems, there’s no need to pre-create a database. Our Node.js code will automatically trigger its creation upon the first insert operation.
Instead of providing a complete project codebase, this tutorial encourages you to clone the companion repo and follow along with the key points. Alternatively, copy specific files and snippets from the repository as needed.
Navigate to the rest-api-tutorial/ folder in your terminal. Observe the three module folders:
common(manages shared services and inter-module information)users(encompasses everything user-related)auth(handles JWT generation and the login process)
Execute npm install (or yarn if available).
You’ve successfully set up the dependencies for our simple Node.js REST API back end!
Constructing the User Module
We’ll use Mongoose](https://mongoosejs.com/), an object [data modeling (ODM) library for MongoDB, to define the user model within the user schema.
Begin by creating the Mongoose schema in /users/models/users.model.js:
| |
With the schema defined, attaching it to the user model is straightforward.
| |
This model allows us to implement CRUD operations within our Express.js endpoints.
Let’s start with user creation by defining the Express.js route in users/routes.config.js:
| |
This route is integrated into our Express.js app in the main index.js file. The UsersController object, imported from our controller, handles password hashing (defined in /users/controllers/users.controller.js):
| |
We can now test our Mongoose model. Run the Node.js API server (npm start) and send a POST request with JSON data to /users:
| |
Various tools are available for this. We’ll cover Insomnia later, but you can utilize Postman, cURL (command-line), or Bruno. Even JavaScript from your browser’s developer console works:
| |
A successful post should return the created user’s ID: { "id": "5b02c5c84817bf28049e58a3" }. Let’s add the createUser method to the model in users/models/users.model.js:
| |
Next, we’ll implement user retrieval via ID using the /users/:userId endpoint.
Start with the Express.js route in /users/routes/config.js:
| |
Create the controller in /users/controllers/users.controller.js:
| |
Add the findById method to the model in /users/models/users.model.js:
| |
The response should resemble:
| |
Note the visible hashed password. While shown for demonstration, it’s crucial never to expose passwords, even hashed ones, in a production environment. Also, observe the permissionLevel, which we’ll leverage for user permissions later.
Following the established pattern, let’s add user update functionality. We’ll utilize PATCH, allowing us to send only the fields requiring modification. The Express.js route will be PATCH to /users/:userid. While we’ll need validation to restrict changes to the user or admins (and only admins can modify permissionLevel), we’ll address this after implementing the auth module. For now, the controller looks like this:
| |
We’ll use HTTP code 204 (No Content) to signal a successful update without a response body.
Add the patchUser method to the model:
| |
The following controller implements user listing with a GET request to /users/:
| |
The corresponding model method:
| |
The list response will be structured as follows:
| |
Finally, let’s implement user deletion with DELETE at /users/:userId.
The deletion controller:
| |
Similar to updates, the controller returns HTTP code 204 for confirmation.
The model method for deletion:
| |
We’ve implemented the core user resource operations for our Node.js REST API. This code provides a foundation for the REST pattern. We’ll revisit it to add validations and permissions, but first, let’s focus on security by creating the auth module.
Building the Auth Module
Before securing the users module with permissions and validation, we need a mechanism to generate valid user tokens. We’ll generate a JWT upon successful user authentication (email and password). JWTs allow users to make multiple requests without repeated validation. They typically have an expiration time, and refreshing the token periodically enhances security. For simplicity, this tutorial will use a single token per login.
First, create an endpoint for POST requests to /auth:
| |
Before the controller, validate the user in /authorization/middlewares/verify.user.middleware.js:
| |
While token refreshing is omitted in this tutorial, the controller is structured to facilitate its implementation later.
Create the Express.js route and invoke the middleware in /authorization/routes.config.js:
| |
The response will contain the JWT in the accessToken field:
| |
Include this token in the Authorization header of subsequent requests using the format Bearer ACCESS_TOKEN.
Implementing Permissions and Validations Middleware
Let’s define access control for the users resource:
- Public access for user creation (registration). JWT is not required here.
- Private access for the logged-in user and admins to update the user.
- Private access for admins only to delete user accounts.
We need middleware to validate the user’s JWT for all protected routes. This middleware in /common/middlewares/auth.validation.middleware.js can be implemented as:
| |
We’ll use HTTP error codes for handling request errors:
- HTTP 401 (Unauthorized) for an invalid request
- HTTP 403 (Forbidden) for a valid request with an invalid token or insufficient permissions
Bitwise AND (bitmasking) helps manage permissions. By representing each permission as a power of 2, each bit in a 32-bit integer acts as a flag. An admin with all permissions would have a value of 2147483647, granting access to all routes. A user with a permission value of 7 would have permissions corresponding to bits 0, 1, and 2 (2^0, 2^1, 2^2).
The middleware for this would look like:
| |
This generic middleware checks for overlapping bits between the user’s and required permission levels. If a match exists, the result is non-zero, and the action proceeds; otherwise, HTTP 403 is returned.
Add the authentication middleware to the user routes in /users/routes.config.js:
| |
Our basic secure Node.js REST API is complete. Now, let’s test it.
Running and Testing with Insomnia
Insomnia is a robust REST client with a capable free tier. While proper error reporting and integrated code tests are ideal, third-party clients are valuable for testing and integration, especially when debugging or error reporting is limited. We’ll simulate application behavior using Insomnia to gain insight into our API.
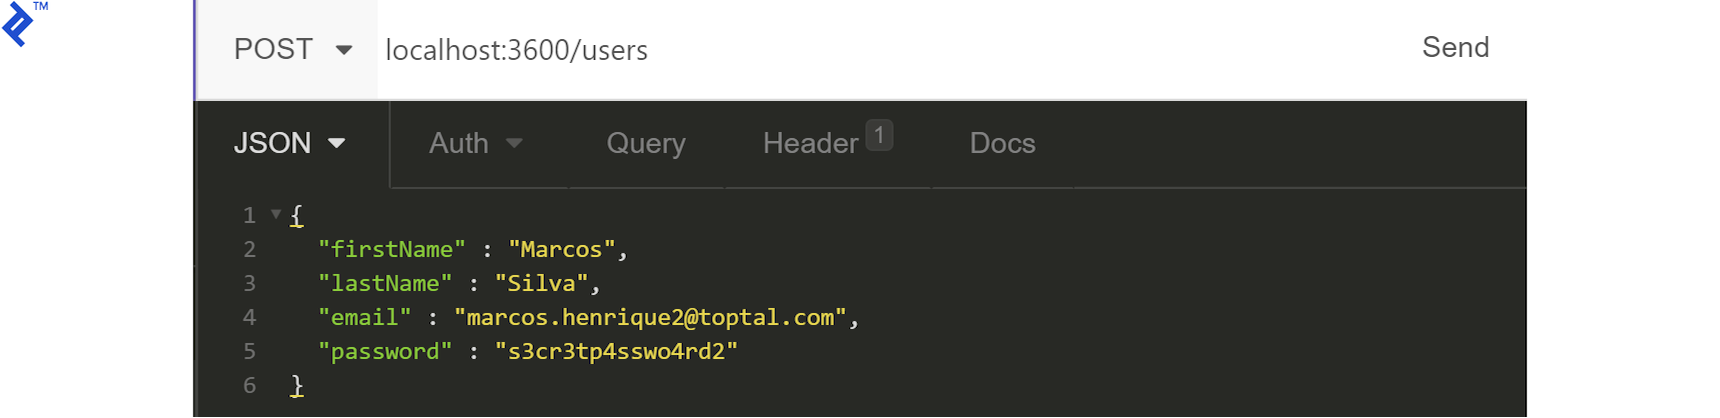
To create a user, send a POST request with the required data to the /users endpoint. Note the generated ID for later use.
The API should respond with the user ID:

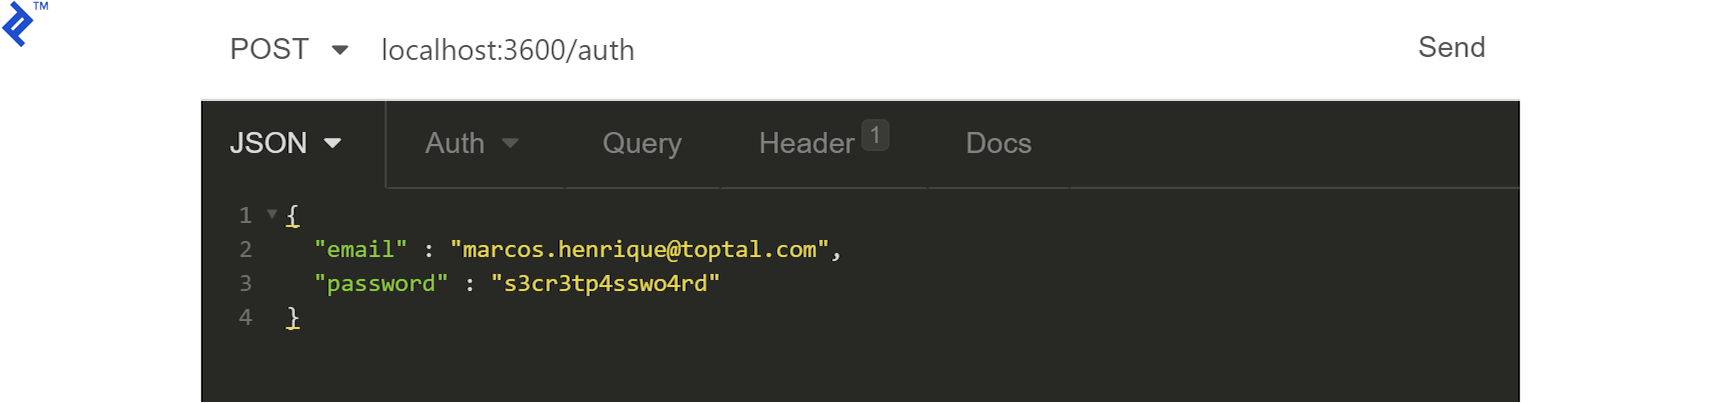
Generate a JWT using the /auth/ endpoint:
The response should be a token:
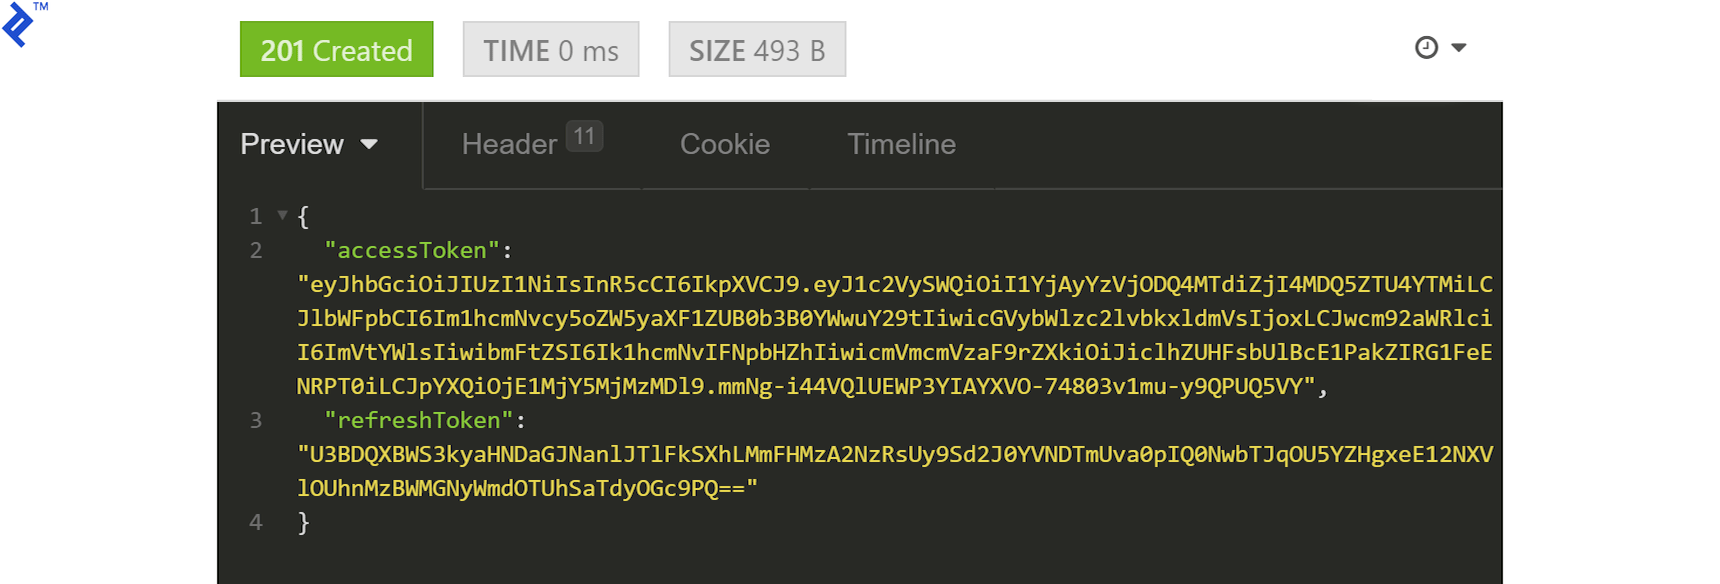
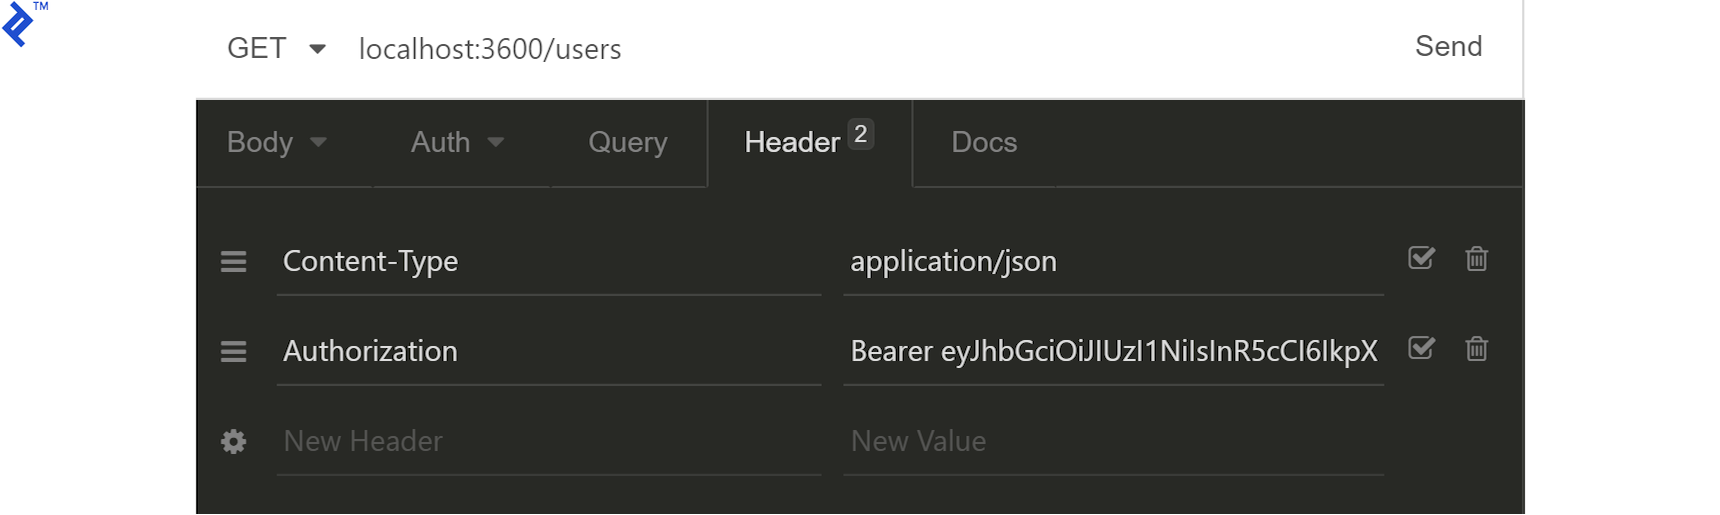
Copy the accessToken, prepend Bearer (with a space), and add it to the request headers under Authorization:
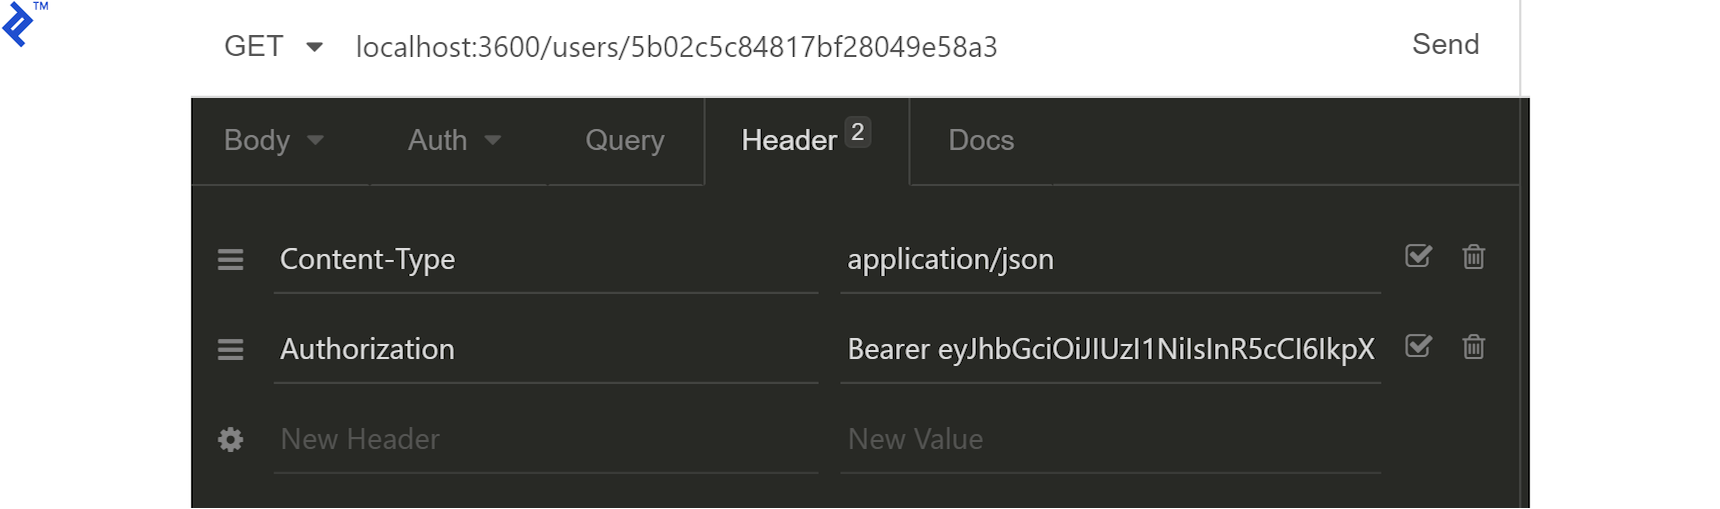
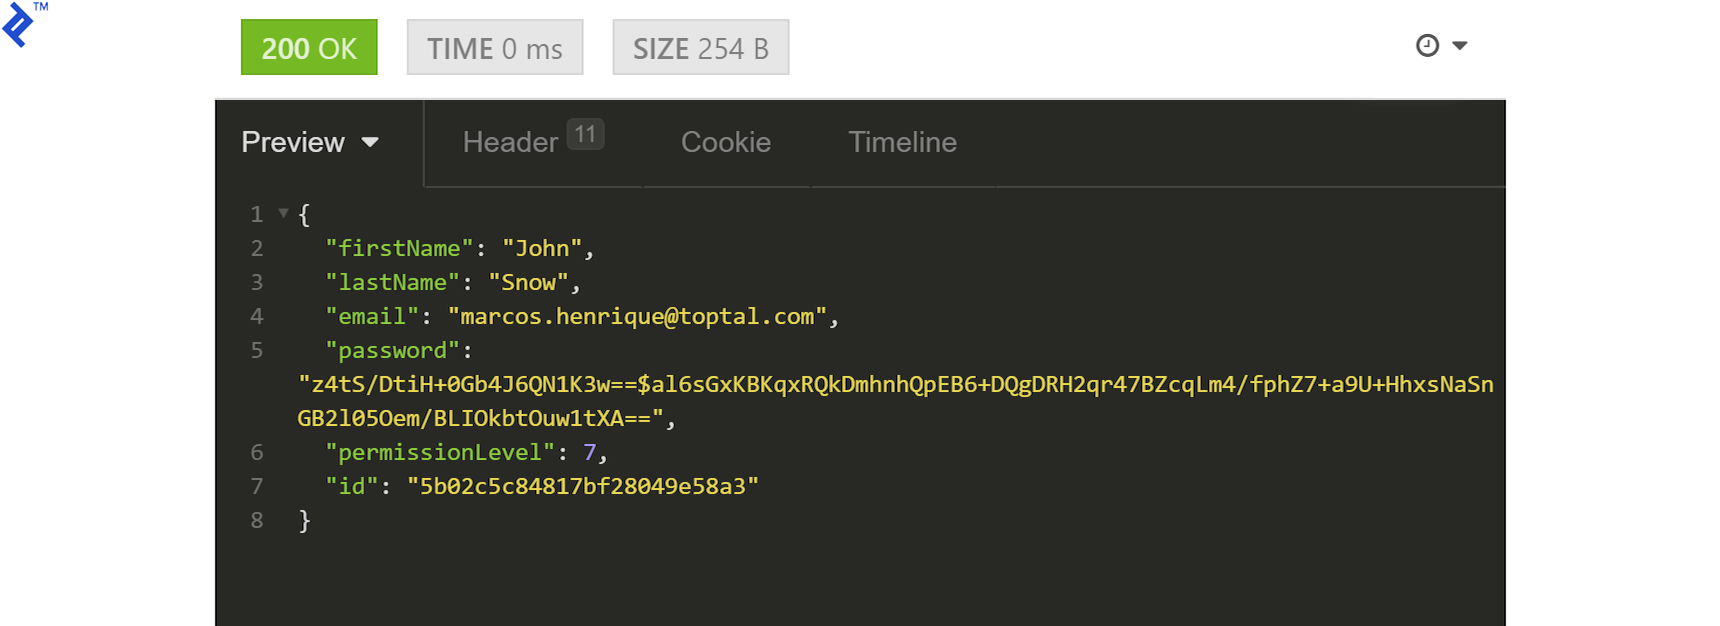
Without this token, all requests (except registration) would return HTTP 401 due to the permissions middleware. With a valid token, requesting /users/:userId should yield:
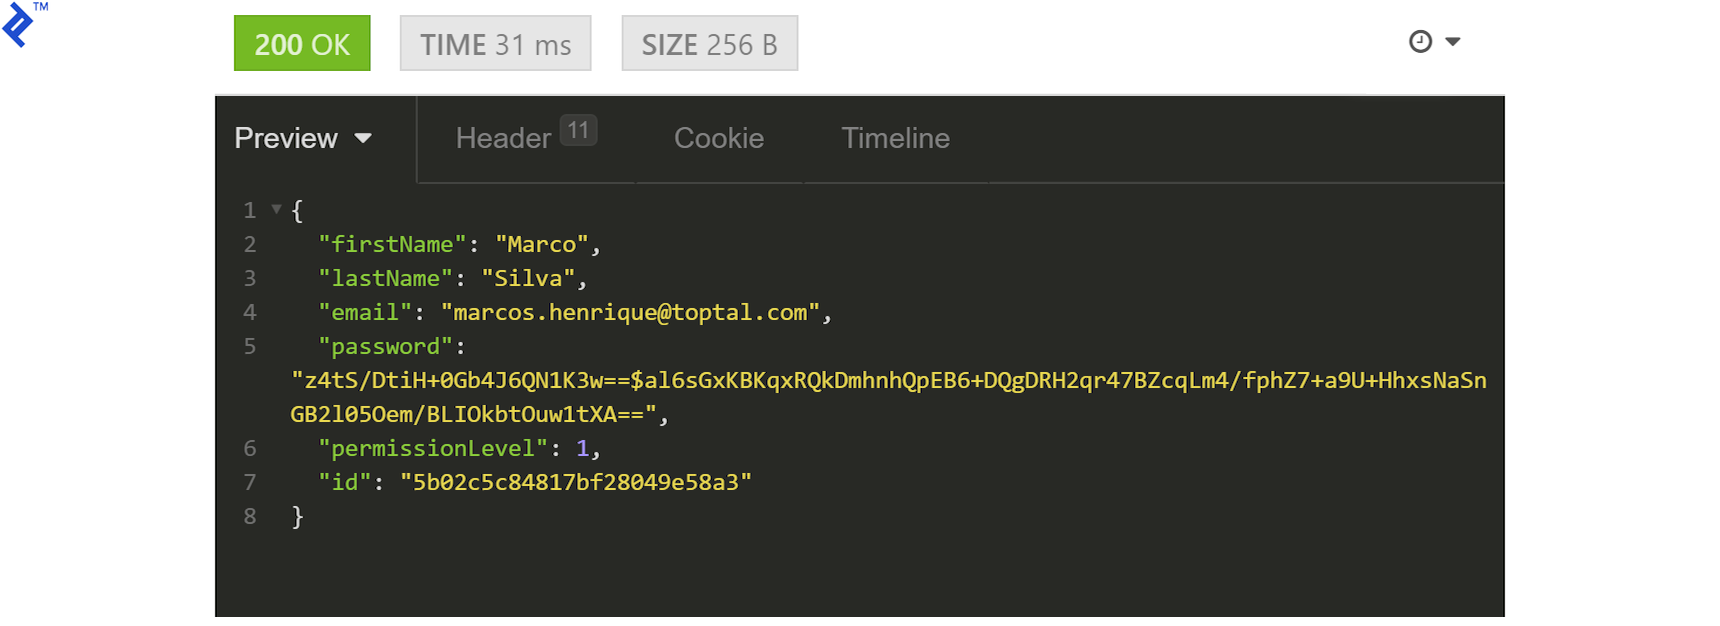
Remember, displaying all fields, including the password, is for demonstration only. Sensitive data should never be exposed in responses.
Now, try listing users:
You’ll encounter a 403 response:
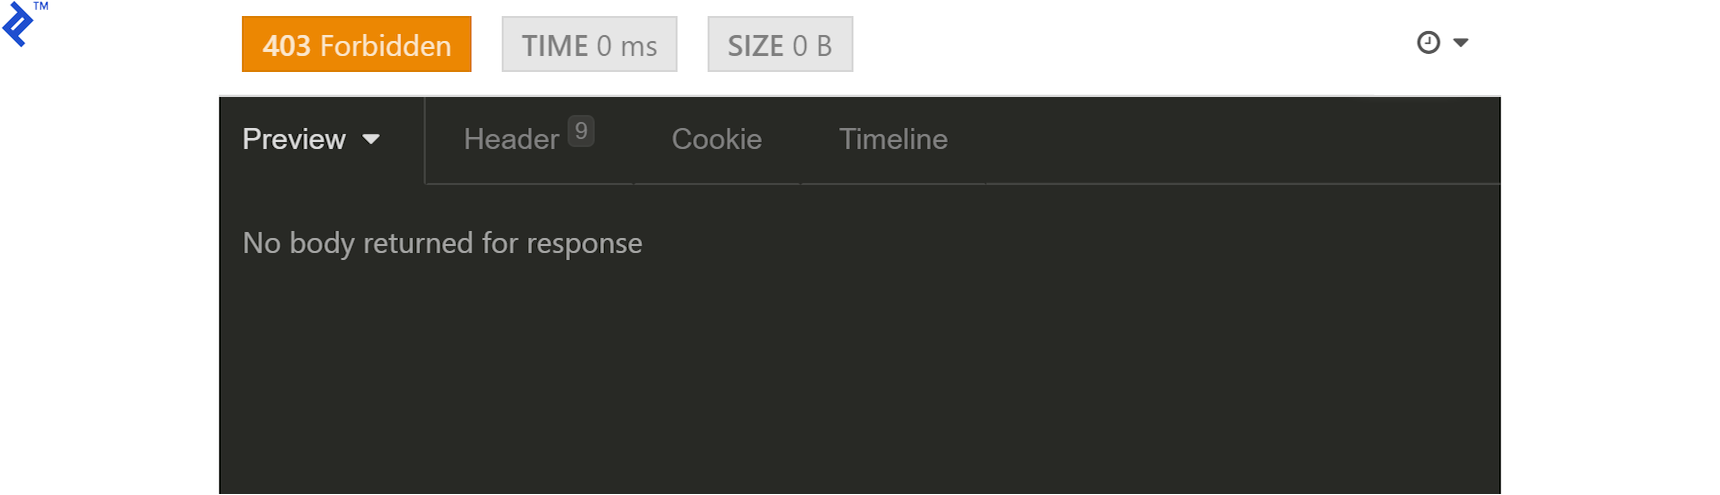
The current user lacks sufficient permissions. Modify the user’s permissionLevel from 1 to 7 (or even 5, representing free and paid permissions as 1 and 4, respectively) directly in MongoDB’s interactive prompt:
| |
Generate a new JWT.
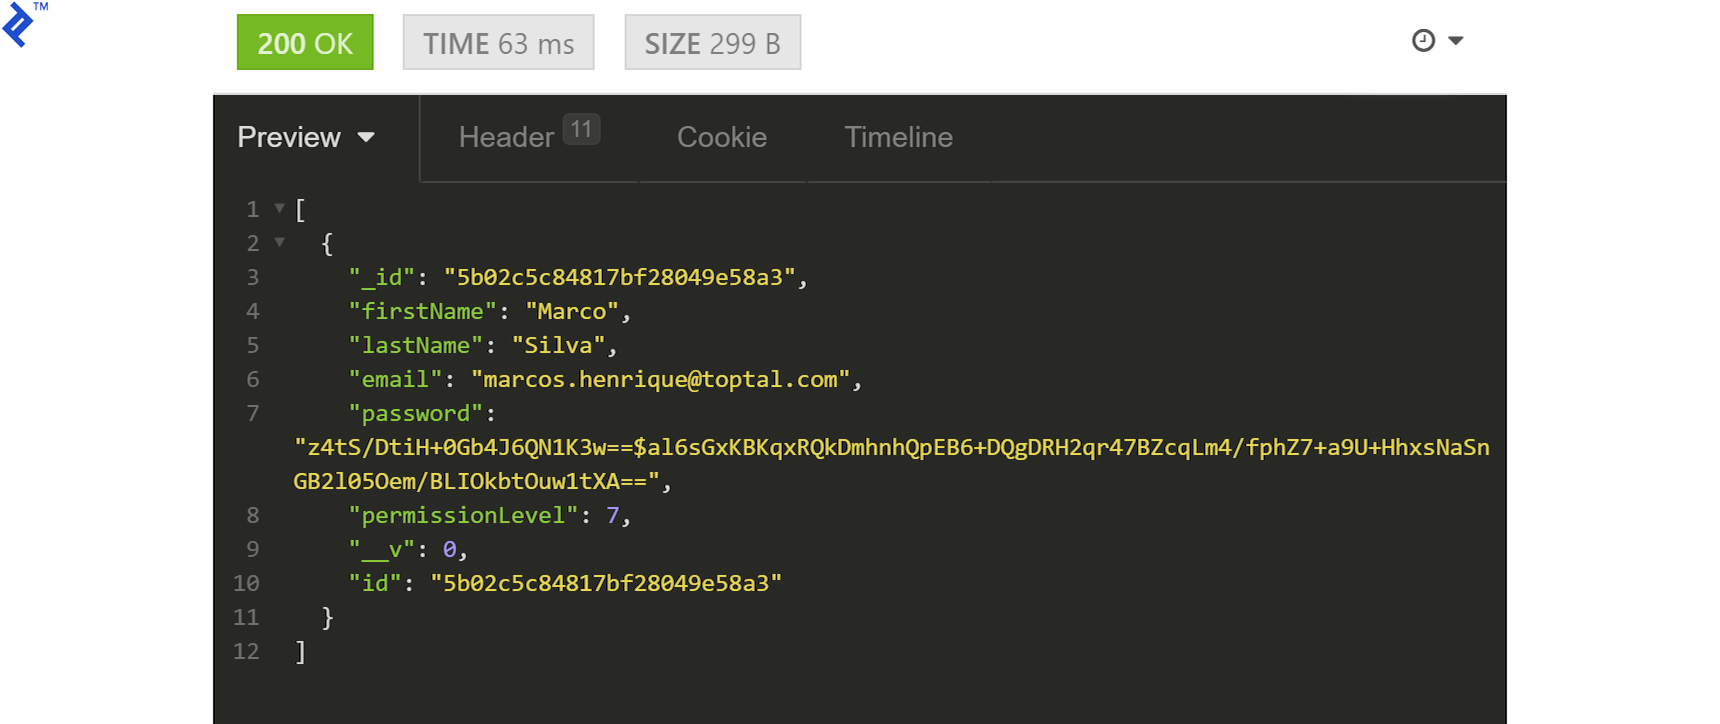
With the updated token, the request should succeed:
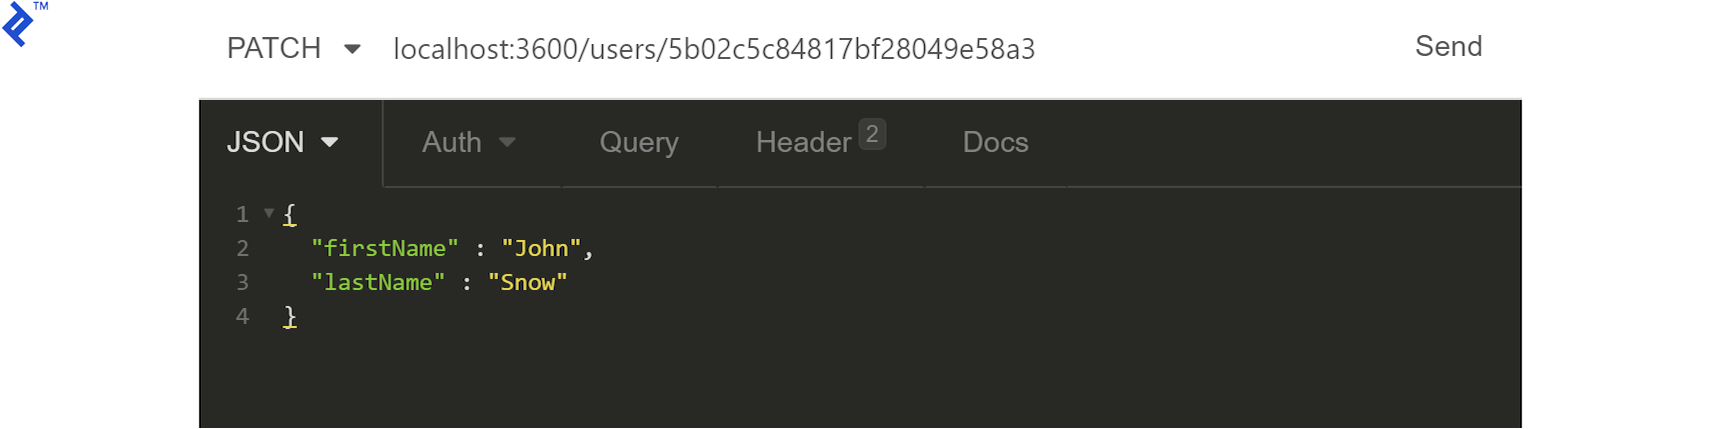
Test the update functionality by sending a PATCH request with modified fields to /users/:userId:
Expect a 204 response, confirming a successful update. You can verify by requesting the user again:
Finally, let’s delete a user. Create a new user (note the ID) and obtain an admin JWT. Set the new user’s permissions to 2053 (2048 for ADMIN plus 5 from earlier) to enable deletion. Update the Authorization header with the new JWT:
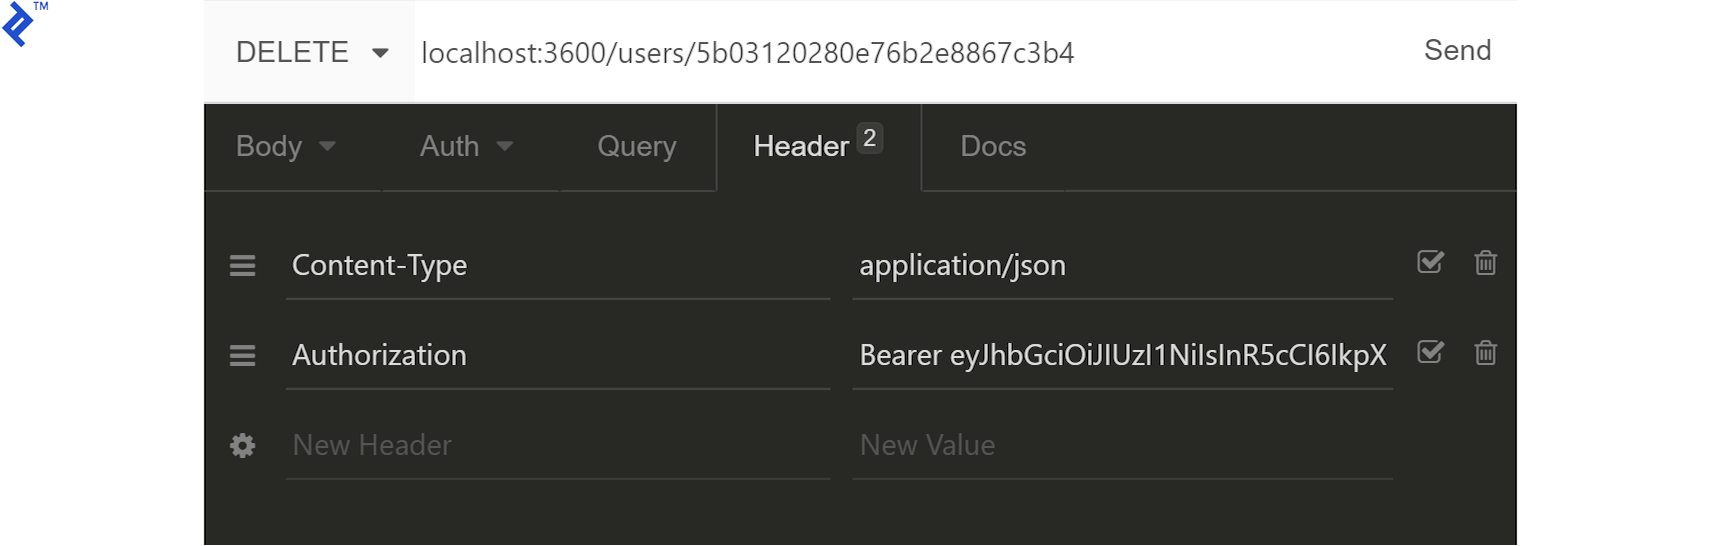
Sending a DELETE request to /users/:userId should result in a 204 response. Verify by listing all users from the /users/ endpoint.
Node.js API Server Tutorial: What’s Next?
You’re now equipped to build simple, secure Node.js REST APIs. Remember to incorporate best practices omitted for brevity:
- Implement thorough validations (e.g., ensure unique email addresses).
- Include unit tests and robust error reporting.
- Prevent users from modifying their own permission levels.
- Disallow admins from deleting their own accounts.
- Protect sensitive information (e.g., never expose hashed passwords).
- Store the JWT secret securely, preferably outside the repository and environment configurations, in a secret distribution mechanism.
As a final exercise, consider converting the Node.js API server codebase from promises to the async/await syntax.
For those interested in taking their JavaScript REST APIs further, we have a TypeScript version of this Node.js API tutorial project available.
); let salt = passwordFields[0]; let hash = crypto.createHmac(‘sha512’, salt) .update(req.body.password) .digest(“base64”); if (hash === passwordFields[1]) { req.body = { userId: user[0]._id, email: user[0].email, permissionLevel: user[0].permissionLevel, provider: ’email’, name: user[0].firstName + ’ ’ + user[0].lastName, }; return next(); } else { return res.status(400).send({errors: [‘Invalid email or password’]}); } } }); };
| |
While token refreshing is omitted in this tutorial, the controller is structured to facilitate its implementation later.
Create the Express.js route and invoke the middleware in /authorization/routes.config.js:
| |
The response will contain the JWT in the accessToken field:
| |
Include this token in the Authorization header of subsequent requests using the format Bearer ACCESS_TOKEN.
Implementing Permissions and Validations Middleware
Let’s define access control for the users resource:
- Public access for user creation (registration). JWT is not required here.
- Private access for the logged-in user and admins to update the user.
- Private access for admins only to delete user accounts.
We need middleware to validate the user’s JWT for all protected routes. This middleware in /common/middlewares/auth.validation.middleware.js can be implemented as:
| |
We’ll use HTTP error codes for handling request errors:
- HTTP 401 (Unauthorized) for an invalid request
- HTTP 403 (Forbidden) for a valid request with an invalid token or insufficient permissions
Bitwise AND (bitmasking) helps manage permissions. By representing each permission as a power of 2, each bit in a 32-bit integer acts as a flag. An admin with all permissions would have a value of 2147483647, granting access to all routes. A user with a permission value of 7 would have permissions corresponding to bits 0, 1, and 2 (2^0, 2^1, 2^2).
The middleware for this would look like:
| |
This generic middleware checks for overlapping bits between the user’s and required permission levels. If a match exists, the result is non-zero, and the action proceeds; otherwise, HTTP 403 is returned.
Add the authentication middleware to the user routes in /users/routes.config.js:
| |
Our basic secure Node.js REST API is complete. Now, let’s test it.
Running and Testing with Insomnia
Insomnia is a robust REST client with a capable free tier. While proper error reporting and integrated code tests are ideal, third-party clients are valuable for testing and integration, especially when debugging or error reporting is limited. We’ll simulate application behavior using Insomnia to gain insight into our API.
To create a user, send a POST request with the required data to the /users endpoint. Note the generated ID for later use.
The API should respond with the user ID:
Generate a JWT using the /auth/ endpoint:
The response should be a token:
Copy the accessToken, prepend Bearer (with a space), and add it to the request headers under Authorization:
Without this token, all requests (except registration) would return HTTP 401 due to the permissions middleware. With a valid token, requesting /users/:userId should yield:
Remember, displaying all fields, including the password, is for demonstration only. Sensitive data should never be exposed in responses.
Now, try listing users:
You’ll encounter a 403 response:
The current user lacks sufficient permissions. Modify the user’s permissionLevel from 1 to 7 (or even 5, representing free and paid permissions as 1 and 4, respectively) directly in MongoDB’s interactive prompt:
| |
Generate a new JWT.
With the updated token, the request should succeed:
Test the update functionality by sending a PATCH request with modified fields to /users/:userId:
Expect a 204 response, confirming a successful update. You can verify by requesting the user again:
Finally, let’s delete a user. Create a new user (note the ID) and obtain an admin JWT. Set the new user’s permissions to 2053 (2048 for ADMIN plus 5 from earlier) to enable deletion. Update the Authorization header with the new JWT:
Sending a DELETE request to /users/:userId should result in a 204 response. Verify by listing all users from the /users/ endpoint.
Node.js API Server Tutorial: What’s Next?
You’re now equipped to build simple, secure Node.js REST APIs. Remember to incorporate best practices omitted for brevity:
- Implement thorough validations (e.g., ensure unique email addresses).
- Include unit tests and robust error reporting.
- Prevent users from modifying their own permission levels.
- Disallow admins from deleting their own accounts.
- Protect sensitive information (e.g., never expose hashed passwords).
- Store the JWT secret securely, preferably outside the repository and environment configurations, in a secret distribution mechanism.
As a final exercise, consider converting the Node.js API server codebase from promises to the async/await syntax.
For those interested in taking their JavaScript REST APIs further, we have a TypeScript version of this Node.js API tutorial project available.