The principle of breaking down code into reusable components, known as modularization, is fundamental to most modern programming languages. JavaScript, however, hasn’t had a standardized way to achieve this until the release of ECMAScript ES6.
Node.js, a widely used JavaScript framework, utilizes module bundlers to enable the loading of NPM modules within web browsers. Furthermore, component-based libraries like React actively promote and simplify the modularization of JavaScript code.
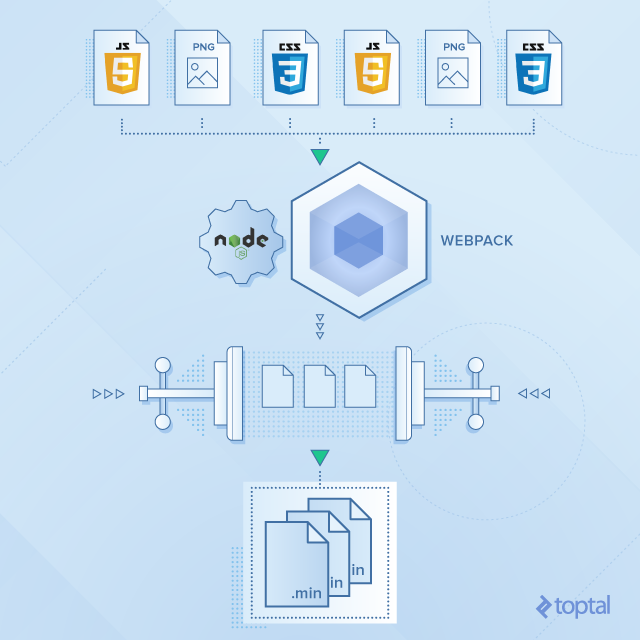
Webpack](https://webpack.github.io/) is a popular module bundler that not only processes JavaScript but also handles static assets such as stylesheets, images, and fonts, combining them into a single bundled file. This processing can encompass various tasks for managing and optimizing Webpack bundle dependencies, including compilation, merging files, minification, and compression.
Despite its benefits, configuring Webpack and its dependencies can be challenging and intricate, especially for those new to it.
This blog post aims to provide clear instructions and examples on how to set up Webpack for different scenarios. It also highlights common pitfalls encountered when bundling project dependencies using Webpack.
We’ll begin by exploring how to simplify the definition of Webpack dependencies in your project. Next, we’ll delve into configuring code splitting for both multi-page and single-page applications. Finally, we’ll discuss how to integrate third-party libraries into your project using Webpack.
Configuring Aliases and Relative Paths
While not directly related to dependencies, relative paths are used when defining them in Webpack. In projects with complex file structures, resolving module paths can become difficult. One of Webpack’s key advantages is its ability to simplify the use of relative paths.
Consider the following project structure:
| |
We can reference dependencies using relative paths to the required files. For instance, importing components into containers would look like this:
Home.js
| |
Modal.js
| |
This approach requires knowing the current directory and the relative path to the desired import every time. As you can imagine, this can quickly become unwieldy in large projects or during refactoring.
Webpack’s resolve.alias option provides a solution by allowing us to define aliases. These aliases map a directory or module name to its location, eliminating the need for relative paths in our source code.
webpack.config.js
| |
Now, in Modal.js, importing the datepicker is much simpler:
| |
Code Splitting
There are situations where we need to add a script to the final bundle, split it into multiple bundles, or load specific bundles on demand. Configuring Webpack for these scenarios can be tricky.
The Entry option in Webpack specifies the starting point for bundling. It accepts String, Array, or Object data types.
For a single starting point, any of these formats will yield the same result.
To include multiple independent files, we can use an Array. For example, to append analytics.js after bundle.js:
webpack.config.js
| |
Managing Multiple Entry Points
In a multi-page application with multiple HTML files, such as index.html and admin.html, we can generate separate bundles by using an Object as the entry point. This configuration generates two JavaScript bundles:
webpack.config.js
| |
index.html
| |
admin.html
| |
To share common libraries and components between these bundles, we can leverage the CommonsChunkPlugin. This plugin identifies shared modules across entry chunks and creates a separate bundle that can be cached and reused by multiple pages.
webpack.config.js
| |
Remember to include <script src="build/common.js"></script> before the bundled scripts.
Note: Webpack’s approach to managing shared dependencies has evolved. It’s recommended to explore SplitChunksPlugin and ModuleFederationPlugin in newer versions for potential benefits unless restricted to an older Webpack version.
Enabling Lazy Loading
Webpack allows splitting assets into smaller chunks, offering more flexibility compared to simple concatenation. For large single-page applications (SPAs), concatenating everything into one bundle is inefficient as it leads to slow initial loading times. Users typically don’t need all dependencies for every view.
We’ve seen how to split an application into multiple bundles and leverage browser caching for shared dependencies. While effective for multi-page applications, SPAs require a different approach.
Ideally, we should only load assets necessary for the current view. Client-side routers are well-suited for handling code splitting in SPAs. When a user navigates to a route, we can load only the required dependencies for that view. Alternatively, we can implement loading on demand as the user scrolls.
Functions like require.ensure or System.import can be used for this purpose, which Webpack can statically analyze. This allows Webpack to generate separate bundles based on these split points and load them when needed.
Let’s consider an example with two React containers: an admin view and a dashboard view.
admin.jsx
| |
dashboard.jsx
| |
When the user visits either /dashboard or /admin, only the corresponding JavaScript bundle is loaded. Below are examples with and without a client-side router.
index.jsx
| |
index.jsx
| |
Extracting Styles Into Separate Bundles
In Webpack, loaders, such as style-loader and css-loader, process stylesheets and embed them into the JavaScript bundle. However, this can sometimes lead to the Flash of unstyled content (FOUC).
We can prevent FOUC by using the ExtractTextWebpackPlugin. This plugin extracts all styles into separate CSS bundles instead of embedding them in the JavaScript.
webpack.config.js
| |
Handling Third-party Libraries and Plugins
Often, we rely on third-party libraries, plugins, or external scripts to avoid reinventing the wheel. However, many legacy tools might not be actively maintained, lack support for JavaScript modules, and expect dependencies to be globally available.
Let’s look at some examples involving jQuery plugins and how to configure Webpack to handle them effectively.
ProvidePlugin
Many third-party plugins depend on specific global dependencies. jQuery plugins, for instance, rely on the $ or jQuery variable being defined. They are typically used like this: $(‘div.content’).pluginFunc().
Webpack’s ProvidePlugin allows us to prepend var $ = require("jquery") whenever it encounters the global $ identifier.
webpack.config.js
| |
During processing, Webpack replaces occurrences of $ with a reference to the global dependency without explicitly importing the module specified by require.
Imports-loader
Some jQuery plugins might assume $ to be in the global namespace or rely on this being the window object. The imports-loader plugin helps us inject global variables into modules.
example.js
| |
We can inject the $ variable into the module using imports-loader:
| |
This effectively prepends var $ = require("jquery"); to example.js.
Here’s another use case:
webpack.config.js
| |
The => symbol (not to be confused with the ES6 Arrow functions) lets us set arbitrary variables. The last value redefines the global this to point to the window object, similar to wrapping the file’s content with (function () { ... }).call(window);.
Libraries using CommonJS or AMD module formats can also be required:
| |
Some libraries support multiple module formats.
In this example, we have a jQuery plugin using both AMD and CommonJS and has a jQuery dependency:
jquery-plugin.js
| |
webpack.config.js
| |
We can control which module format Webpack uses for a specific library. Setting define to false prevents parsing in AMD format, while setting exports to false does the same for CommonJS.
Expose-loader
The expose-loader plugin comes in handy when we need to expose a module to the global context. This is useful when dealing with external scripts not managed by Webpack or browser plugins that require access to a global symbol.
webpack.config.js
| |
Configuring External Webpack Dependencies
When including modules from externally hosted scripts, we need to define them in the Webpack configuration. Otherwise, Webpack won’t be able to generate the final bundle.
The externals configuration option allows us to configure external scripts. This is helpful when using a library from a CDN via a separate <script> tag while still declaring it as a dependency in our project.
webpack.config.js
| |
Supporting Multiple Instances of a Library
NPM is a valuable tool for managing third-party libraries. However, issues can arise when multiple versions of the same library are present, especially if they are incompatible.
This can happen with React, for instance, where a different version might be installed as part of another package. Consider the following structure:
| |
Components within react-plugin use a different React instance than the rest of the project. This can lead to conflicts, especially if the versions differ. How do we ensure consistency in such cases?
Webpack aliases offer a solution by ensuring a single version of React throughout the project.
webpack.config.js
| |
Now, when react-plugin tries to require React, it will use the version from the project’s node_modules.
Focus on Development, Not Webpack Configuration
This post only scratches the surface of Webpack’s capabilities.
Numerous other Webpack loaders and plugins can help optimize and simplify JavaScript bundling.
Even as a beginner, this guide provides a solid foundation for leveraging Webpack, allowing you to focus more on development and less on configuration intricacies.
] }
| |
Configuring External Webpack Dependencies
When including modules from externally hosted scripts, we need to define them in the Webpack configuration. Otherwise, Webpack won’t be able to generate the final bundle.
The externals configuration option allows us to configure external scripts. This is helpful when using a library from a CDN via a separate <script> tag while still declaring it as a dependency in our project.
webpack.config.js
| |
Supporting Multiple Instances of a Library
NPM is a valuable tool for managing third-party libraries. However, issues can arise when multiple versions of the same library are present, especially if they are incompatible.
This can happen with React, for instance, where a different version might be installed as part of another package. Consider the following structure:
| |
Components within react-plugin use a different React instance than the rest of the project. This can lead to conflicts, especially if the versions differ. How do we ensure consistency in such cases?
Webpack aliases offer a solution by ensuring a single version of React throughout the project.
webpack.config.js
| |
Now, when react-plugin tries to require React, it will use the version from the project’s node_modules.
Focus on Development, Not Webpack Configuration
This post only scratches the surface of Webpack’s capabilities.
Numerous other Webpack loaders and plugins can help optimize and simplify JavaScript bundling.
Even as a beginner, this guide provides a solid foundation for leveraging Webpack, allowing you to focus more on development and less on configuration intricacies.