Beginning programmers often embark on their coding journey with the traditional “Hello World” program. As they progress, they encounter increasingly complex tasks, each revealing a crucial principle:
The more extensive the project, the greater the complexity.
It quickly becomes evident that both individual and team projects demand a structured approach. Code sustainability is paramount, as it may require maintenance over extended periods. Relying on the original programmer’s availability for every modification is impractical and undesirable.
Software design patterns address this challenge by establishing clear rules for structuring projects. They guide programmers in dividing large projects into manageable components and organizing them systematically. This standardization simplifies code comprehension and navigation, particularly when encountering unfamiliar sections.
Adhering to these patterns enhances maintainability and streamlines the addition of new code. Time spent on planning development methodology is reduced. As problems are diverse, there is no one-size-fits-all design pattern. Selecting the most effective one requires careful consideration of their strengths and weaknesses in relation to the task at hand.
This tutorial shares my insights on employing the widely-used Unity game development platform and Model-View-Controller (MVC) patterns in game development. Throughout my seven years of experience tackling intricate game development projects, this design pattern has consistently delivered well-structured code and accelerated development cycles.
We’ll begin by outlining Unity’s fundamental architecture, the Entity-Component pattern. Subsequently, we’ll explore how MVC complements it and illustrate its application using a mock project.
Why This Matters
Software development boasts a wide array of design patterns. While they provide guidelines, developers often adapt them to address specific challenges.
This adaptability underscores the absence of a single, definitive approach to software design. Therefore, this article presents not a universal solution, but rather, the advantages and applications of two prominent patterns: Entity-Component and Model-View-Controller.
The Entity-Component Pattern
The Entity-Component (EC) pattern entails defining the application’s element hierarchy (Entities) before outlining their features and data (Components). In programming terms, an Entity acts as an object potentially containing an array of Components. Let’s visualize an Entity like this:
| |
Here’s a straightforward example of an EC tree.
| |
EC effectively mitigates the complexities of multiple inheritance. In intricate class structures, issues like the diamond problem can arise. This occurs when a class (D) inheriting from two classes (B and C) that share a base class (A) encounters conflicts due to differing modifications made by B and C to A’s features.
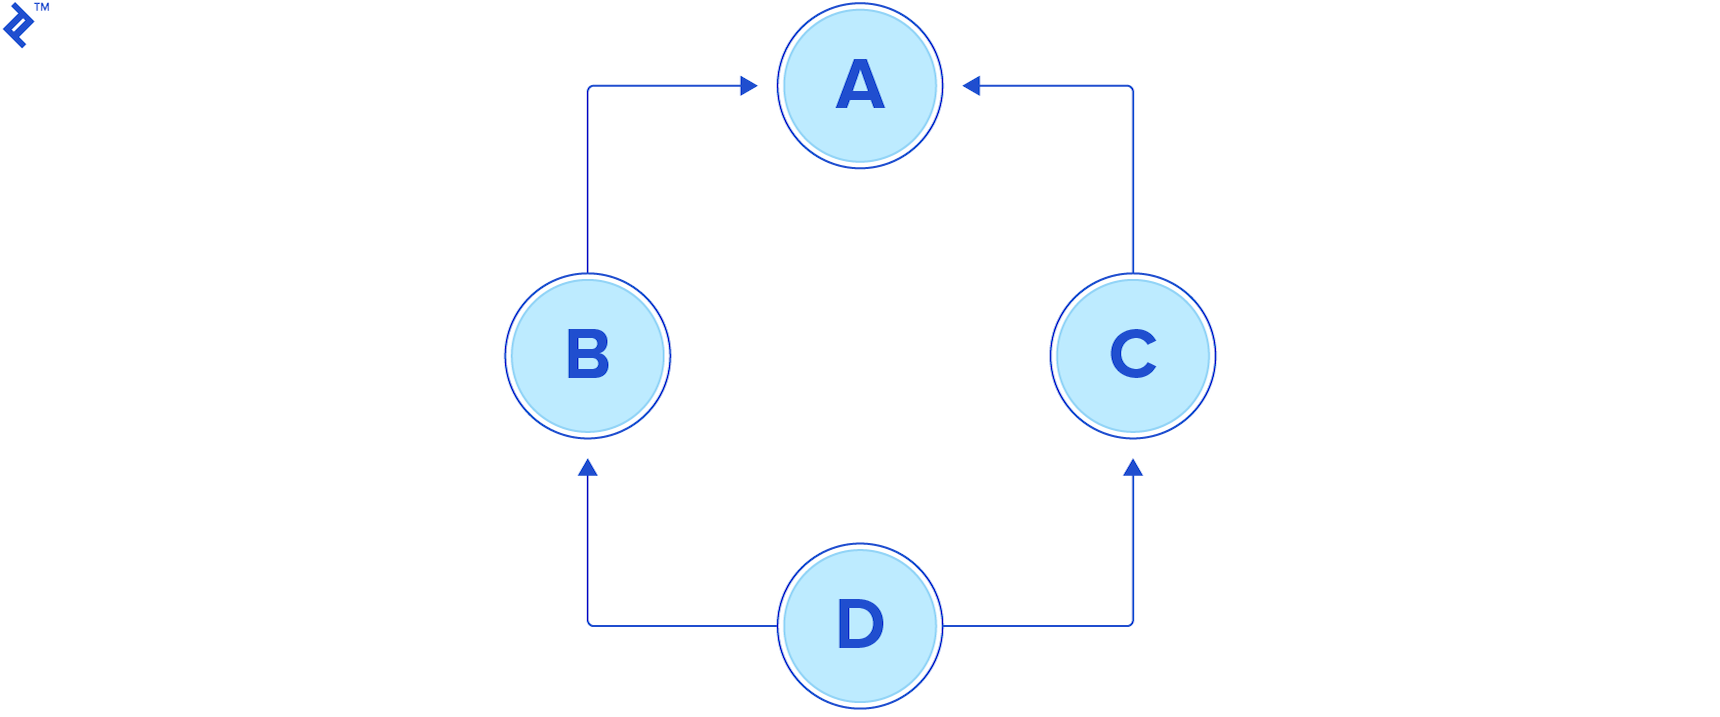
Such issues are prevalent in game development, where inheritance is extensively employed.
Dividing features and data handlers into smaller Components enhances reusability across different Entities. This eliminates dependency on multiple inheritance, a feature absent in Unity’s primary languages, C# and Javascript.
Limitations of Entity-Component
While EC surpasses OOP in code organization, large projects can still lead to a “feature overload.” Identifying appropriate Entities and Components and defining their interactions can become challenging due to the numerous possibilities for their assembly.
Imposing additional guidelines on top of Entity-Component can mitigate this issue. A helpful approach is categorizing software functions:
- Managing raw data: creation, reading, updating, deletion, searching (the CRUD principle).
- Interface elements: facilitating interaction, detecting events within their scope, triggering notifications.
- Decision-making elements: receiving notifications, applying business logic, determining data manipulation.
Fortunately, a pattern already embodies these principles.
The Model-View-Controller (MVC) Pattern
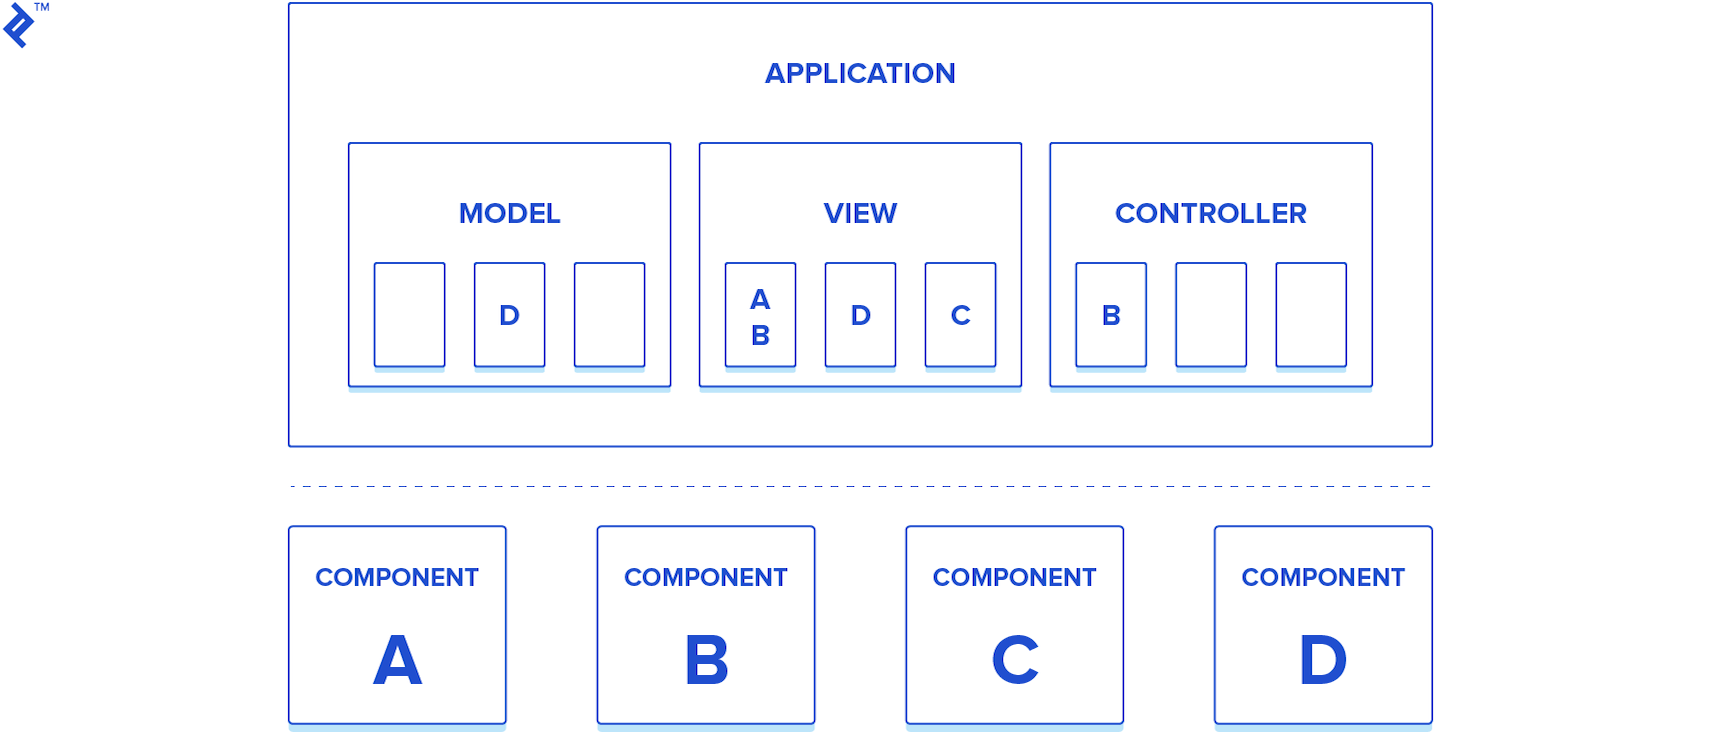
The Model-View-Controller pattern (MVC) pattern divides software into three primary components: Models (data management), Views (interface/detection), and Controllers (decision/action). MVC’s adaptability allows implementation alongside ECS or OOP.
Game and UI development typically involve responding to user inputs or trigger events. These interactions align seamlessly with MVC, where notifications are sent, appropriate responses are determined, and data is updated accordingly.
This methodology enhances software planning and navigation, especially for new programmers. Separating data, interface, and decisions reduces the number of source files to be examined when modifying functionality.
Unity and EC
Let’s delve into Unity’s inherent structure.
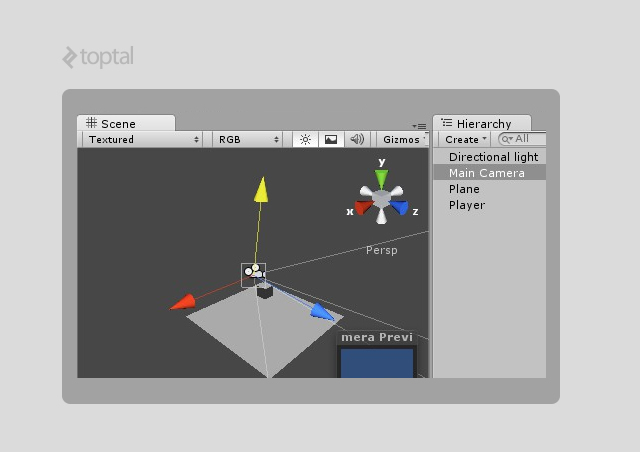
Unity’s development platform is rooted in EC, where GameObjects represent Entities, and Components provide functionalities like visibility, movement, and interactivity.
The Unity editor’s Hierarchy and Inspector panels empower developers to assemble applications, attach Components, configure their initial states, and bootstrap games with minimal code.
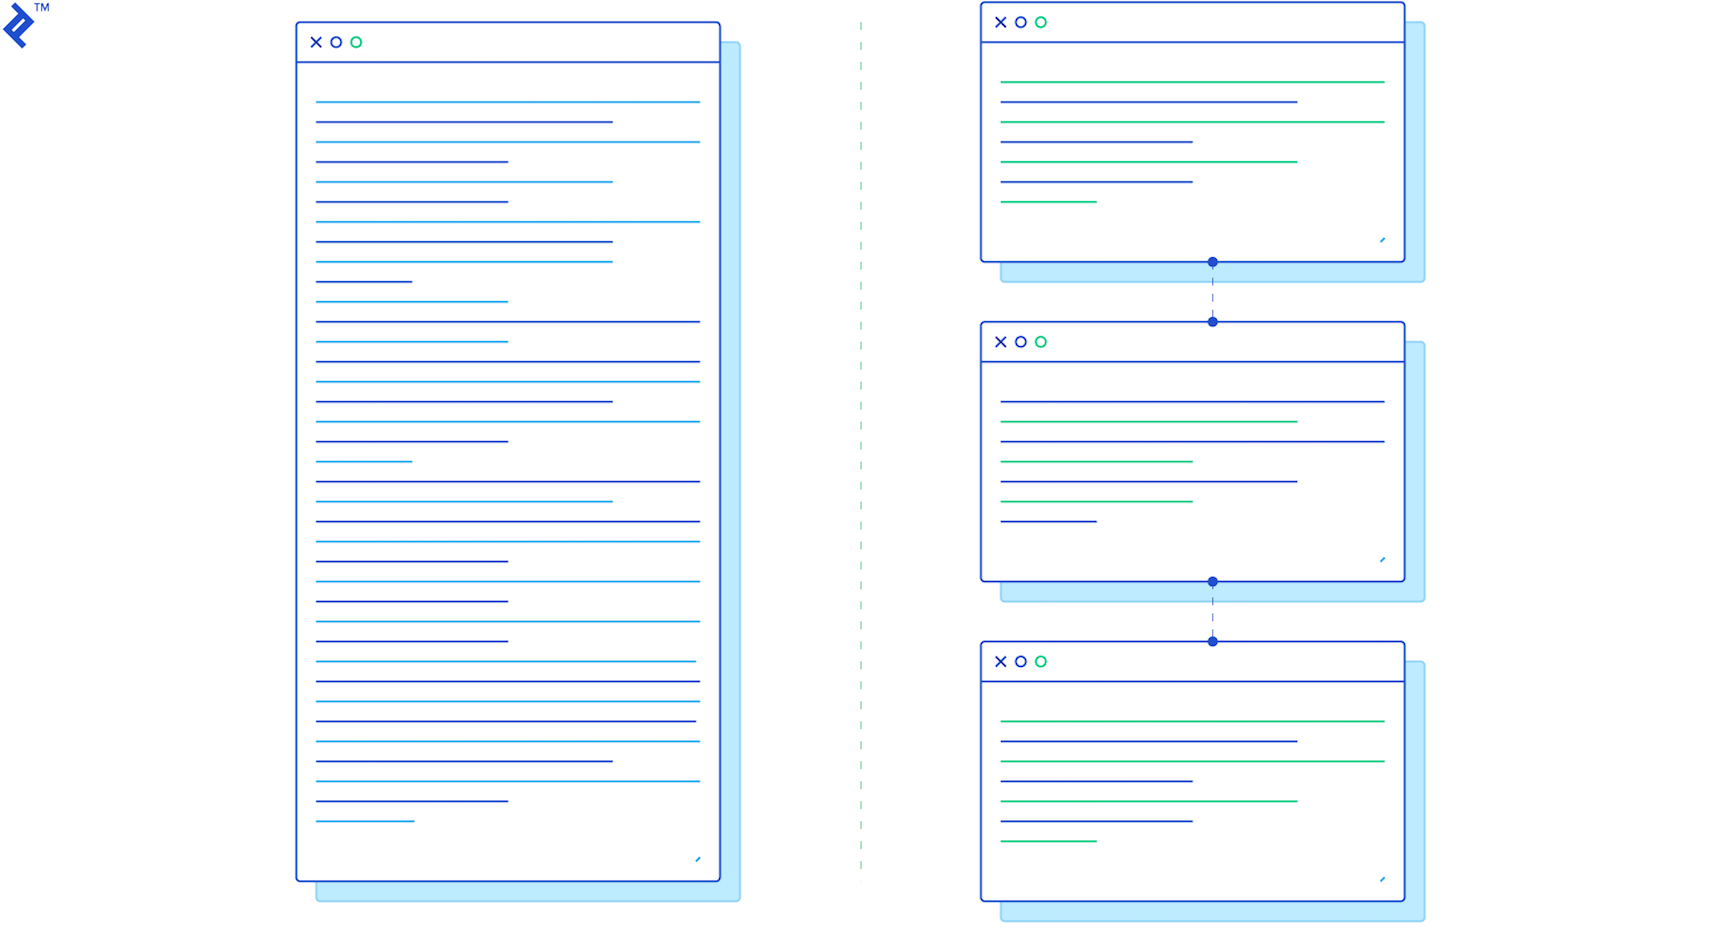
However, even with these tools, large projects can still encounter feature clutter within the hierarchy, complicating development.
Adopting the MVC approach and organizing elements based on their functions can establish a structured application:

Adapting MVC for Game Development
Two slight modifications can enhance MVC’s suitability for Unity projects:
- Centralized Access: MVC class references scattered throughout the code can lead to reference errors, especially after crashes. Introducing a single root reference object provides a central access point to all instances.
- Reusable Components: Certain functionalities transcend MVC’s core categories and are best categorized as Components. These reusable elements, akin to Entity-Component Components, act as helpers within the MVC framework. Example: a
RotatorComponent handling rotation without notifications, storage, or decision-making.
These modifications result in the AMVCC (Application-Model-View-Controller-Component) pattern.
- Application: Single entry point and container for critical instances and application data.
- MVC: The familiar trio.
- Component: Reusable, self-contained scripts.
This modified pattern has proven highly effective in my projects.
Example: The “10 Bounces” Game
Let’s illustrate AMVCC with a simple game: 10 Bounces.
The game consists of a falling Ball with a SphereCollider and a Rigidbody, a Cube representing the ground, and five scripts embodying AMVCC.
Hierarchy
Before coding, outlining the class and asset hierarchy is crucial, adhering to the AMVCC structure.
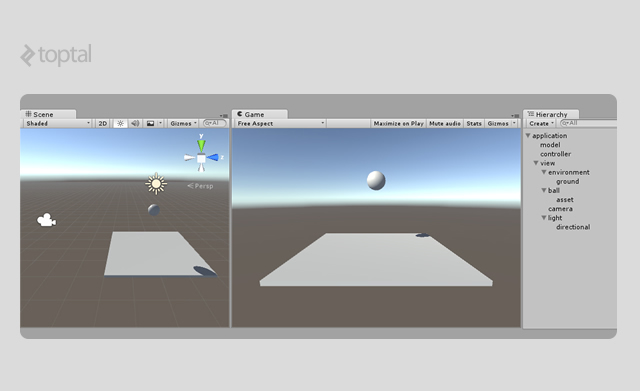
The view GameObject encompasses visual elements and related scripts. In smaller projects, the model and controller GameObjects typically house only their respective scripts. Larger projects may include GameObjects with more specialized scripts within them.
This structure provides a clear path for accessing specific functionalities:
- Data:
application > model > ... - Logic/Workflow:
application > controller > ... - Rendering/Interface/Detection:
application > view > ...
Consistent adherence to these rules ensures maintainability even in legacy projects.
Note the absence of a Component container, as Components offer flexibility in attachment.
Scripting
Note: The following scripts are simplified for clarity. For a comprehensive implementation, refer to my Unity MVC framework, here’s the link. It provides core classes implementing the AMVCC structure.
Let’s examine the scripts for 10 Bounces.
A brief overview of Unity’s workflow: Components (Entity-Component) are represented by the MonoBehaviour class. They are instantiated during runtime either by dragging their source files onto GameObjects (Entities) or using the AddComponent<YourMonobehaviour>() command.
We start by defining the Application class (“A” in AMVCC) as the central container for all game elements. An Element helper base class provides access to the Application instance and its MVC children.
The Application class (single instance) houses three variables: model, view, and controller, serving as access points to MVC instances during runtime. These variables are MonoBehaviours with public references to their respective scripts.
The Element base class provides access to the Application instance, enabling communication between all MVC classes.
Both classes extend MonoBehaviour and are attached to GameObjects as Components.
| |
The BounceElement serves as the foundation for the MVC core classes. BounceModel, BounceView, and BounceController act as containers for specialized instances. In this example, only the View has a nested structure due to its simplicity.
| |
| |
| |
| |
With the scripts defined, we can attach and configure them.
The hierarchy should resemble:
| |
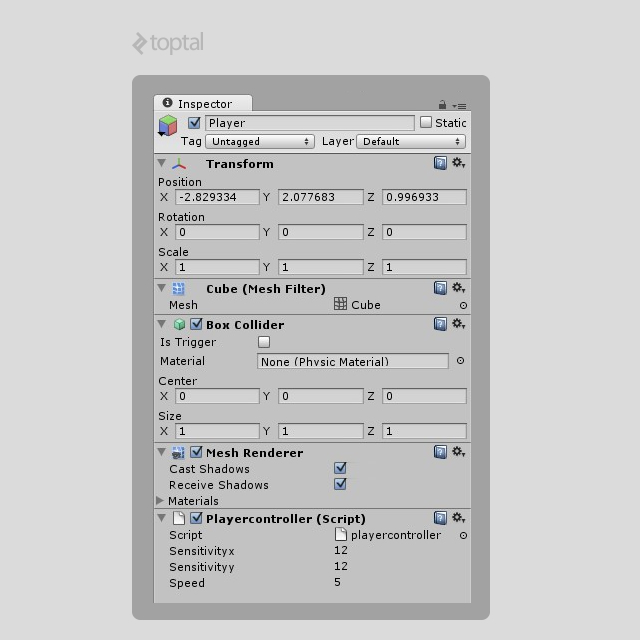
The Unity editor view of BounceModel:
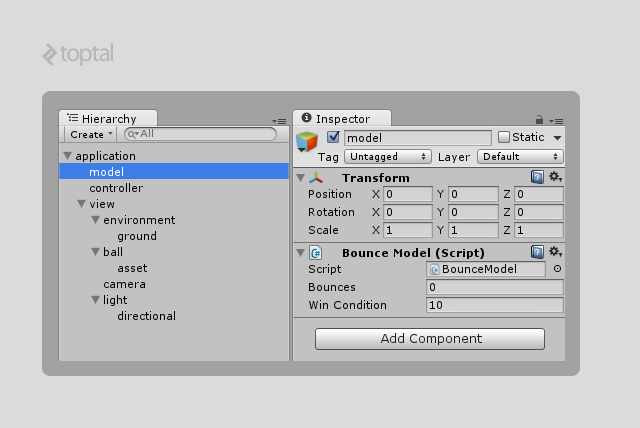
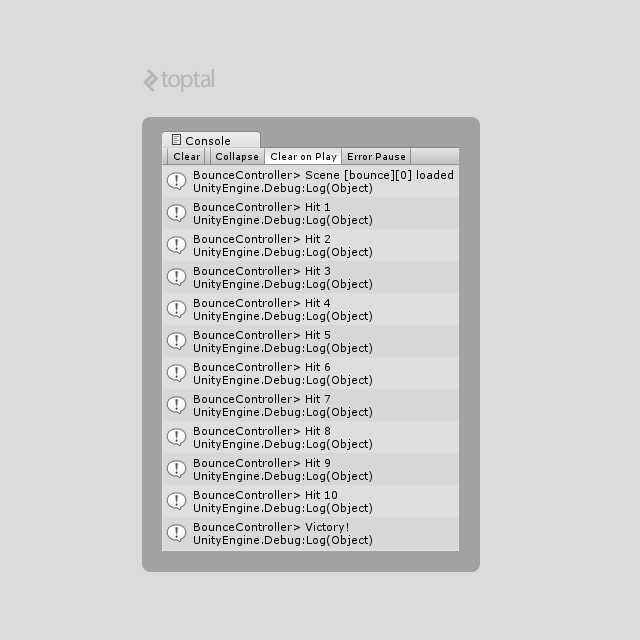
BounceModel with the bounces and winCondition fields.Running the game should produce this output in the Console Panel:
Notifications
In the example, BallView calls the app.controller.OnBallGroundHit() method upon collision. While functional, a centralized notification system within the Application class improves organization.
We’ll modify the BounceApplication:
| |
A new script will contain the names of all notification events:
| |
This approach enhances code readability by providing a central location to understand the application’s event-driven behavior.
Adapting BallView and BounceController to this new system:
| |
| |
For larger projects with numerous notifications, dedicated controllers for different notification scopes can prevent overly complex switch-case structures.
Real-World AMVCC
This example demonstrates a basic AMVCC implementation. Mastering the categorization of elements into Models, Views, and Controllers, along with visualizing entities within a hierarchy, are crucial skills.
More complex scenarios in larger projects might raise questions about classification or the need for further class separation.
Practical Guidelines
While a universal guide doesn’t exist, these rules can help determine MVC classification and class splitting.
Class Classification
Models
- Store application’s core data (e.g., player health, ammo).
- Handle data serialization, deserialization, and type conversion.
- Manage data loading/saving (local/web).
- Notify Controllers of operation progress.
- Store the Game State for the Game’s Finite State Machine.
- Never directly access Views.
Views
- Retrieve data from Models for presenting the current game state to the user.
- Refrain from modifying Models directly.
- Strictly adhere to their defined functionalities (e.g., a
PlayerViewshould not handle input or modify game state). - Act as black boxes with interfaces, notifying of significant events.
- Avoid storing core data (e.g., speed, health).
Controllers
- Do not store core data.
- May filter notifications from specific Views.
- Update and utilize Model data.
- Manage Unity’s scene workflow.
Class Hierarchy
Overly prefixed variables or multiple variations of the same element indicate a need for class splitting (e.g., numerous Player classes or Gun types).
Example: A single Model for Player data with many playerDataA, playerDataB variables, or a Controller handling Player notifications with OnPlayerDidA, OnPlayerDidB methods.
Nesting elements simplifies code and allows switching between data variations.
| |
| |
| |
| |
| |
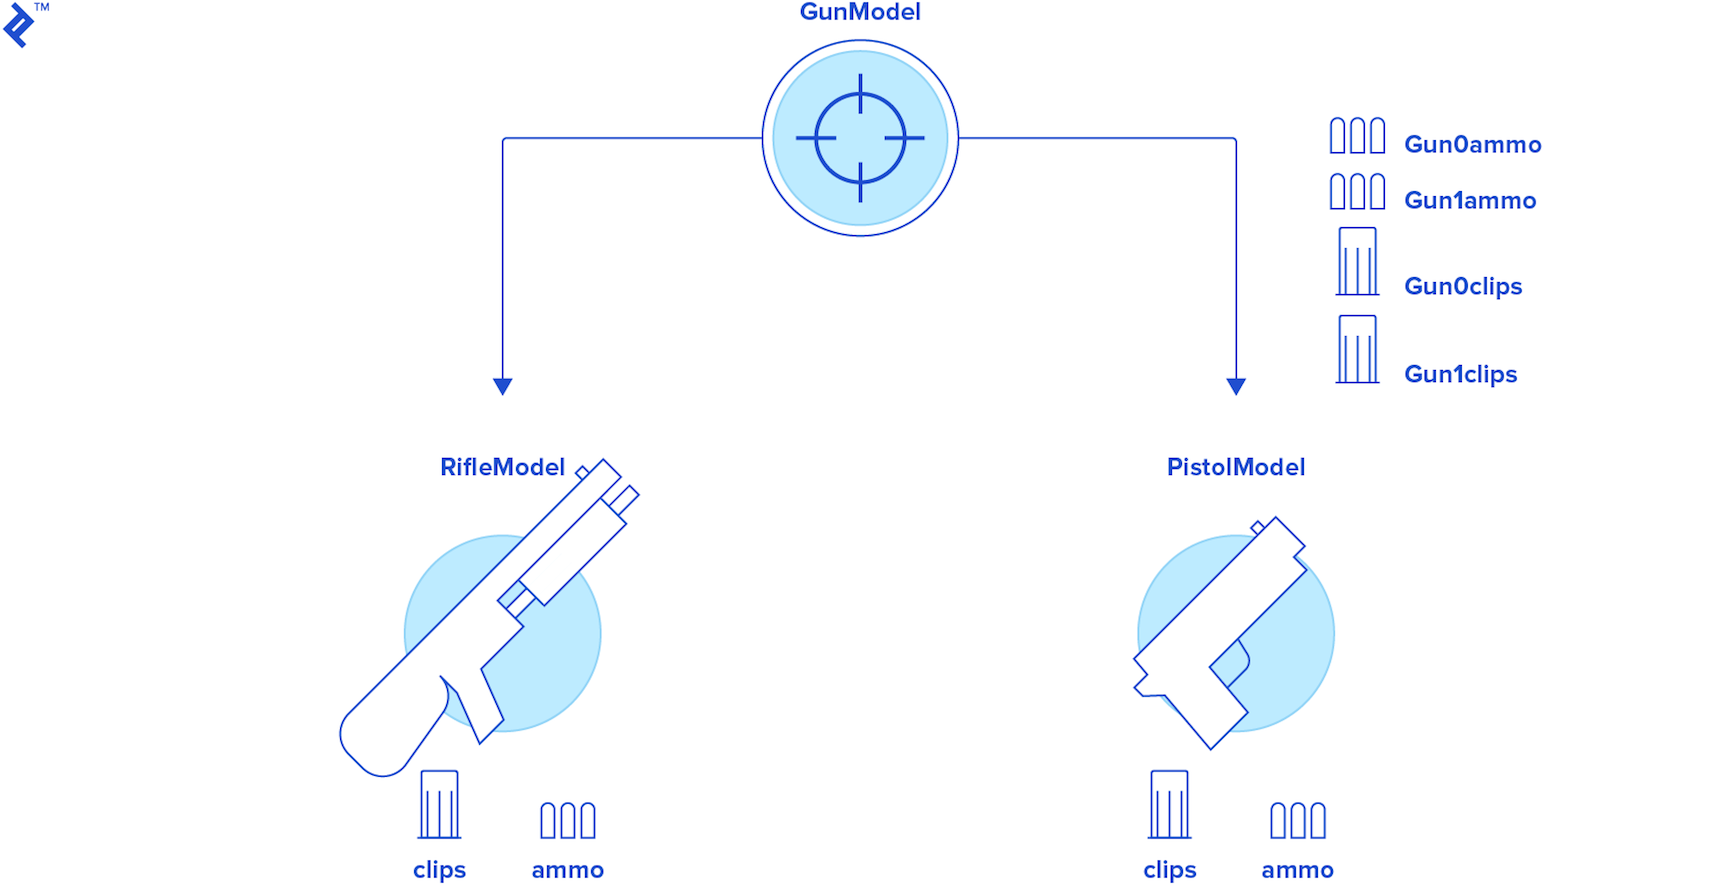
This structure enables intuitive navigation through source code. For instance, in a first-person shooter with diverse weapons, containing GunModel within a class allows creating and storing a list of Prefabs for each category.
Storing all gun information together (e.g., gun0Ammo, gun1Ammo) within a single GunModel would complicate data storage and highlight the need for a separate GunModel.
As always, balance is key. Avoid excessive compartmentalization that increases complexity. Experience is crucial for determining the optimal MVC structure for your project.
Wrapping Up
Countless software patterns exist. This article showcases one that has proven invaluable in my experience. Embrace new knowledge while critically evaluating its suitability.
Exploration of various patterns is encouraged to discover the best fit for your needs. this Wikipedia article provides a comprehensive list of patterns and their characteristics.
For those interested in AMVCC, my library, Unity MVC, offers the essential core classes to get started.