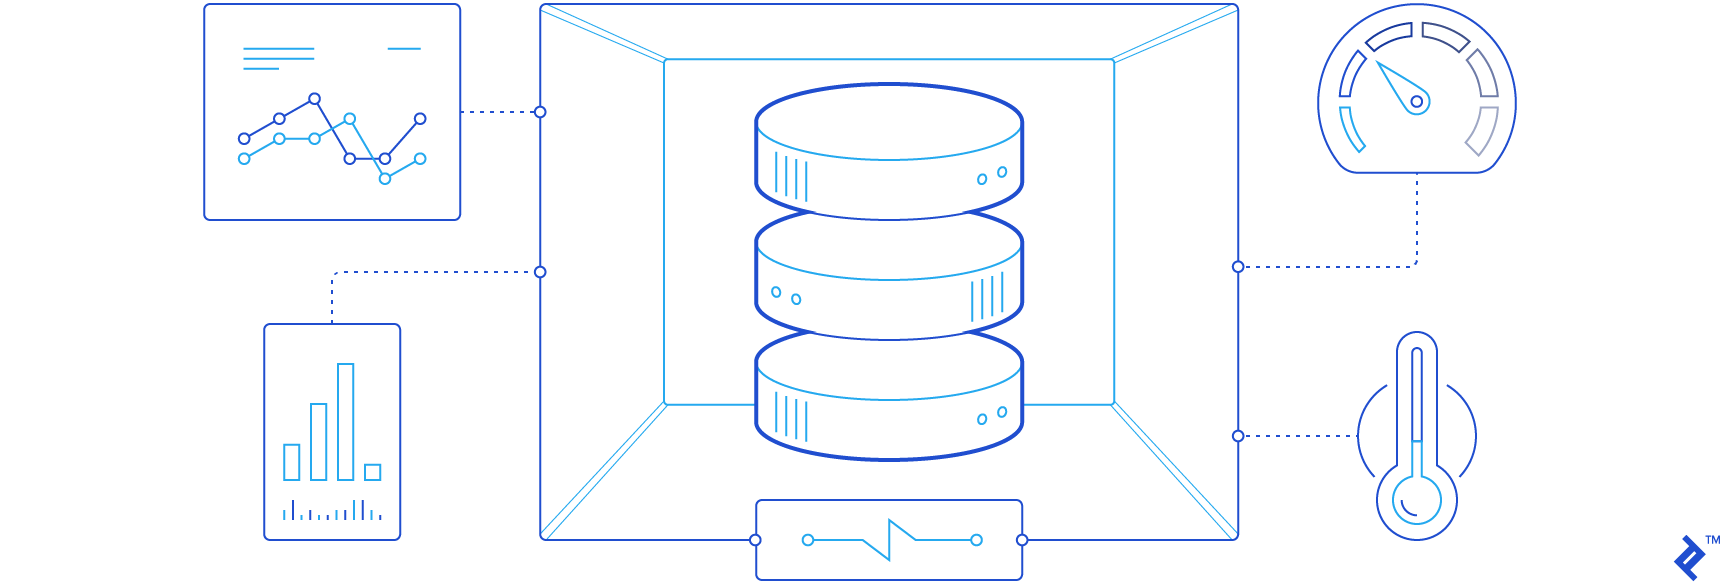
Ecto is a language specifically designed for crafting database queries and interactions within the Elixir language environment. Its current iteration, version 2.0, offers support for both PostgreSQL and MySQL databases. Future releases are planned to include compatibility with MSSQL, SQLite, and MongoDB. If you’re new to Elixir or haven’t had much experience with it, I suggest giving Kleber Virgilio Correia’s “Getting Started with Elixir Programming Language” a read.
Ecto’s architecture is centered around four primary components:
- Ecto.Repo: Repositories act as intermediaries for data stores, providing an abstraction layer to simplify interactions. They enable operations like data insertion, creation, deletion, and querying. To facilitate communication with the database, an adapter and corresponding credentials are necessary.
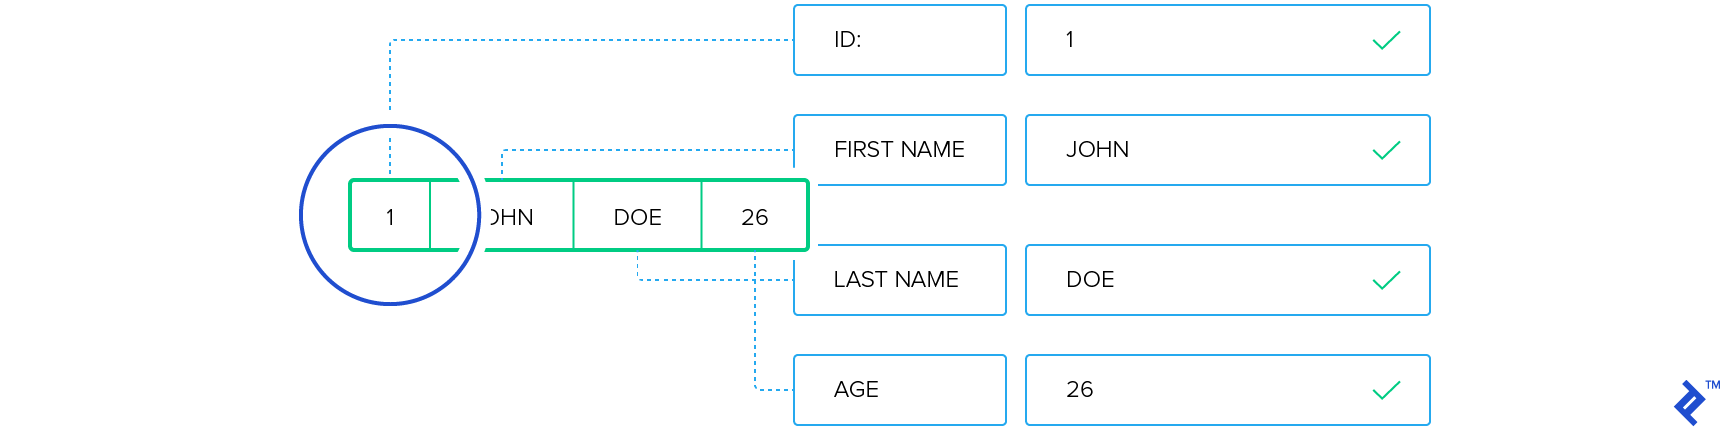
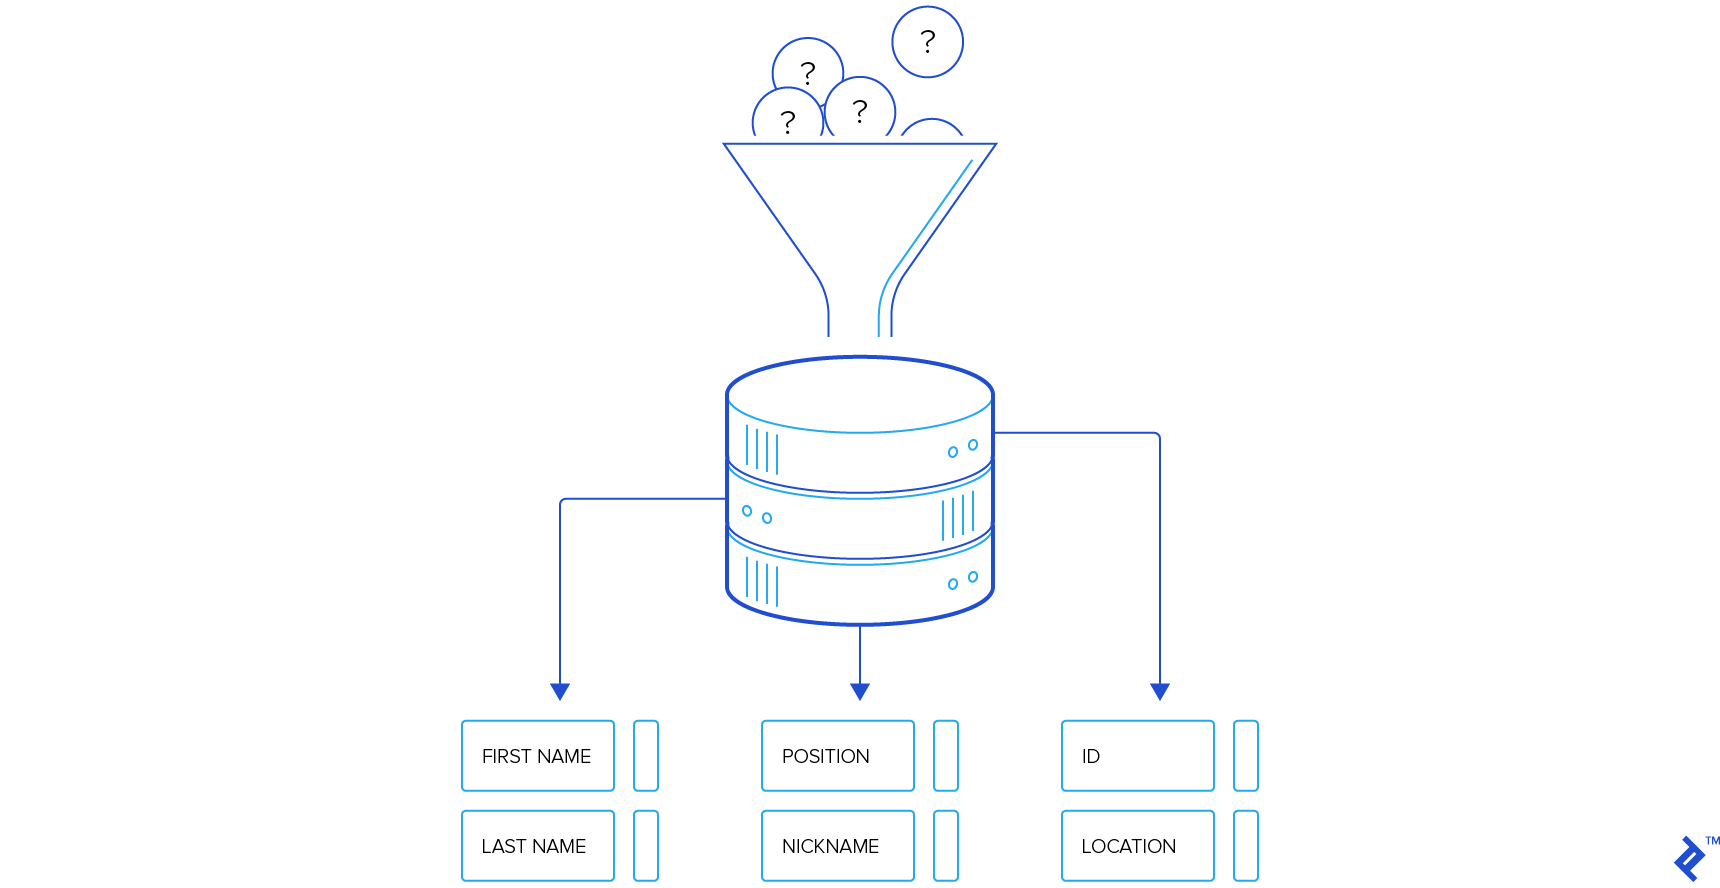
- Ecto.Schema: Schemas are the bridge between data sources and Elixir structs, defining how data is mapped and represented within the application.
- Ecto.Changeset: Changesets serve as a mechanism for filtering, casting, tracking, and validating external parameters before they are applied to the data, ensuring data integrity.
- Ecto.Query: This component offers a domain-specific language (DSL) resembling SQL for retrieving data from a repository. Ecto’s query structure prioritizes security, mitigating vulnerabilities like SQL injection. The composable nature of these queries allows developers to construct them incrementally, fostering clarity and maintainability.
To follow along with this tutorial, you’ll need the following:
- Elixir installed (installation guide for version 1.2 or above)
- PostgreSQL installed
- A database user with permissions to create databases (For this tutorial, we’ll use the user “postgres” with the password “postgres” as an example.)
Installation and Configuration
Our first step is to generate a new application with a supervisor using Mix. Mix is Elixir’s built-in build tool, equipped with tasks for project creation, compilation, testing, dependency management, and much more.
| |
This command will create a directory named “cart” populated with the initial project files:
| |
We’re including the --sup option to incorporate a supervisor tree, which will be responsible for maintaining the database connection. Next, navigate to the “cart” directory (cd cart) and locate the mix.exs file. Replace its contents with the following:
| |
Within the def application do block, we include :postgrex and :ecto as applications to make them accessible within our application. These are then added as dependencies in the defp deps do block. Postgrex serves as our database adapter, while ecto provides the core functionality. After saving the changes to mix.exs, execute the following command in your console:
| |
This command will fetch and install all the necessary dependencies, generating a mix.lock file that records the specific versions of installed packages and their sub-dependencies (comparable to Gemfile.lock in Ruby’s Bundler).
Ecto.Repo
Next, we’ll define a repository within our application. It’s worth noting that an application can have multiple repositories, enabling connections to multiple databases. Database configuration resides in the config/config.exs file:
| |
Here, we are providing the essential configuration to proceed. The line :cart, cart_repos: [Cart.Repo] associates the Cart.Repo module as our repository. This flexible setup allows for multiple repositories, facilitating connections to various databases.
Now, execute the following command:
| |
| |
This command instructs Ecto to generate the repository structure. The output will suggest adding a supervisor and a repo to your application. Let’s begin by modifying the supervisor in lib/cart.ex:
| |
In this file, we define the supervisor as supervisor(Cart.Repo, []) and adding it to the children list (in Elixir, lists are similar to arrays). We define the children supervised with the strategy strategy: :one_for_one which means that, if one of the supervised processes fails, the supervisor will restart only that process into its default state. You can learn more about supervisors here). Examining lib/cart/repo.ex` reveals that Ecto has already generated this file for us, providing a functional repository for our application.
| |
Now, let’s refine the configuration in config/config.exs:
| |
With our database configuration in place, we can proceed to create the database:
| |
This command will set up the database, effectively completing our configuration. We’re now ready to start developing our application logic, but let’s first outline the scope of our application.
Building an Invoice System with Inline Items
Our demonstration application will center around a streamlined invoicing tool. Our schemas (models) will consist of Invoice, Item, and InvoiceItem. InvoiceItem will have relationships with both Invoice and Item. The diagram below illustrates the relationships between our schemas:
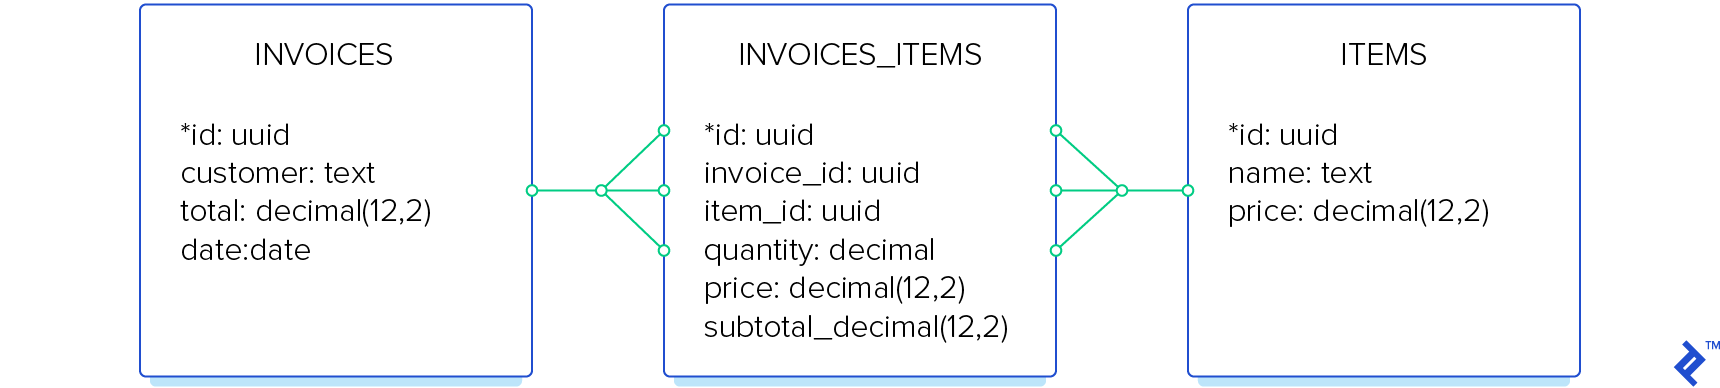
This straightforward diagram outlines the structure. The invoices table maintains a one-to-many relationship with invoice_items, capturing the invoice details. Similarly, the items table has a one-to-many relationship with invoice_items. The use of UUIDs for invoice_id and item_id in the invoice_items table offers benefits such as route obfuscation if the application exposes an API, and it simplifies synchronization by removing reliance on sequential identifiers. Let’s proceed to create the necessary tables using Mix tasks.
Ecto.Migration
Migrations are specialized files designed to manage changes to the database schema. Ecto.Migration equips you with methods for table creation, index management, constraint definition, and other schema-related operations. Migrations ensure consistency between your application’s code and the database structure. Let’s create a migration script for our first table:
| |
This command generates a file similar to priv/repo/migrations/20160614115844_create_invoices.exs, where we’ll define our migration logic. Open the generated file and replace its content with the following:
| |
Within the def change do function, we specify the schema, which will be translated into SQL statements for the database. create table(:invoices, primary_key: false) do initiates the creation of the invoices table. We’ve set primary_key: false because we’ll manually add an ID field of type UUID. We define fields for the customer (text type) and the invoice date (date type). The timestamps macro conveniently generates inserted_at and updated_at fields, which Ecto automatically populates with timestamps indicating record creation and modification times. Now, head over to your console and execute the migration:
| |
This creates the invoices table with the defined fields. Let’s move on to the items table:
| |
Open the newly generated migration script:
| |
Here, we introduce the decimal field type, accommodating numbers with 12 digits, including 2 decimal places. Run the migration:
| |
The items table is now in place. Finally, let’s create the invoice_items table:
| |
Modify the migration script:
| |
This migration introduces some new concepts. add :invoice_id, references(:invoices, type: :uuid, null: false) creates the invoice_id field and enforces a database constraint referencing the invoices table. The same pattern is applied to the item_id field. Index creation is accomplished using create index(:invoice_items, [:invoice_id]), generating the index invoice_items_invoice_id_index.
Ecto.Schema and Ecto.Changeset
Ecto has deprecated Ecto.Model in favor of Ecto.Schema, so we’ll refer to our modules as schemas. Let’s define the changesets, beginning with the simplest, Item, in the file lib/cart/item.ex:
| |
We use use Ecto.Schema to inject code into the changeset and import Ecto.Changeset to incorporate changeset functionality. While we could import specific functions, we’ll keep it concise for now. alias Cart.InvoiceItem simplifies references to InvoiceItem within the changeset, as we’ll see shortly.
Ecto.Schema
@primary_key {:id, :binary_id, autogenerate: true} designates our primary key as auto-generated. Since we are using UUIDs, we define the schema with schema "items" do and define fields and relationships within this block. We set name as a string and price as a decimal, mirroring our migration. The macro has_many :invoice_items, InvoiceItem establishes a relationship with InvoiceItem. Conventionally naming the foreign key item_id in the invoice_items table removes the need for explicit foreign key configuration. Finally, the timestamps macro sets up the inserted_at and updated_at fields.
Ecto.Changeset
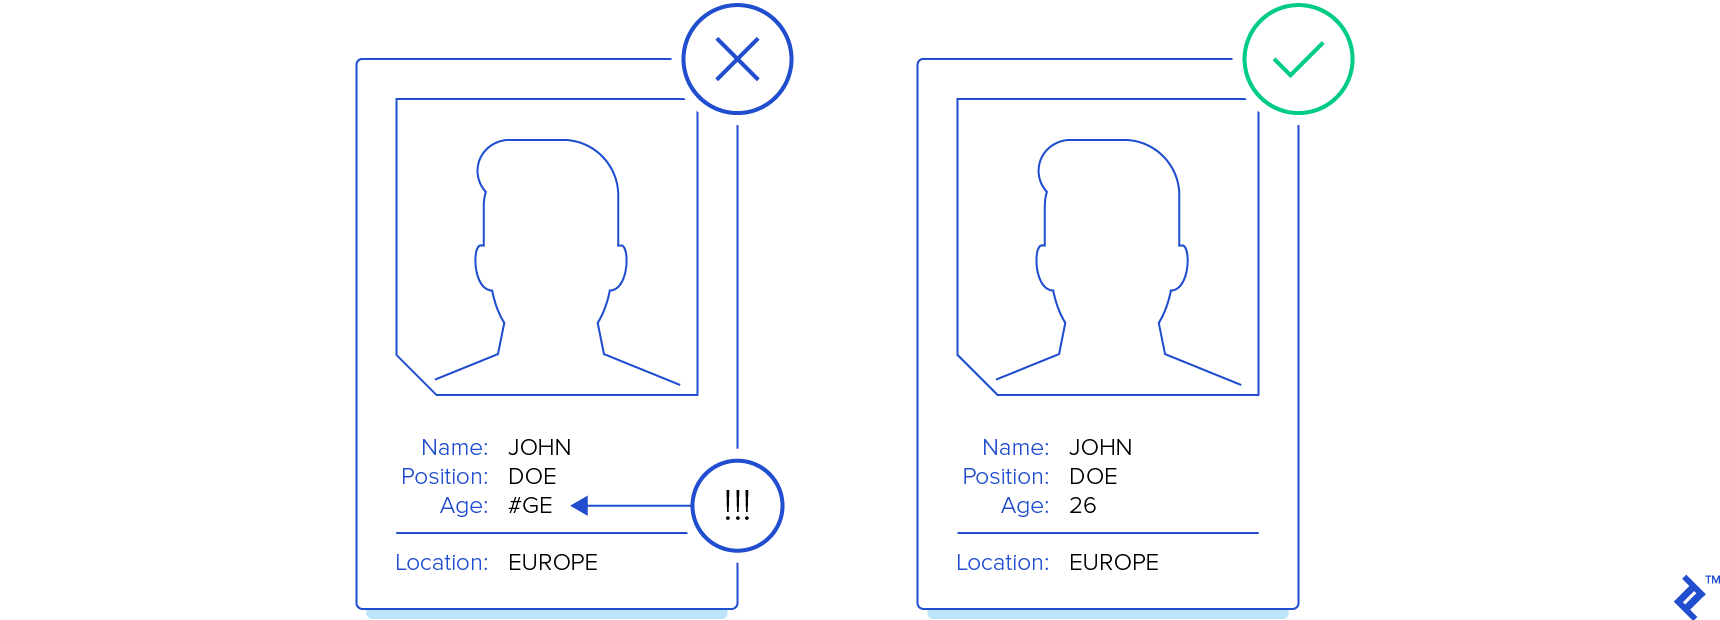
The def changeset(data, params \\ %{}) do function receives an Elixir struct and parameters, which we will pipe through various functions. cast(params, @fields) ensures that values are cast to the appropriate types defined in the schema. For instance, if you provide strings as parameters, they will be converted to the corresponding types defined in the schema. validate_required([:name, :price]) enforces the presence of the name and price fields. validate_number(:price, greater_than_or_equal_to: Decimal.new(0)) ensures that the price is greater than or equal to zero, represented here as Decimal.new(0).
Let’s illustrate these concepts in the console. Execute the following to start the console:
| |
The -S mix flag loads your current project into the interactive Elixir shell (iex).
| |
This creates a valid Ecto.Changeset struct with no errors. Let’s save it:
| |
We’ll skip displaying the generated SQL for brevity. In this case, it returns the Cart.Item struct with populated values. Notice that inserted_at and updated_at contain timestamps, and the id field holds a UUID. Let’s experiment with other scenarios:
| |
This time, we create the “Scissors” item differently, directly setting the price as %Cart.Item{price: Decimal.new(20)}. Specifying the correct type is essential. While we could have passed a float, which would be cast to a decimal, providing an incorrect type like %Cart.Item{price: 12.5} would result in an exception during insertion.
| |
You can exit the console with Ctrl+C twice. Our validations work as expected, ensuring that the price is greater than or equal to zero. We’ve now defined the schema (Ecto.Schema), outlining the module’s structure, and the changeset (Ecto.Changeset), handling validations and casting. Let’s proceed to create the Cart.InvoiceItem changeset in lib/cart/invoice_item.ex:
| |
This changeset is more extensive but should look familiar. belongs_to :invoice, Cart.Invoice, type: :binary_id defines the relationship with Cart.Invoice, which we will create soon. Similarly, belongs_to :item establishes a relationship with the items table. We define @zero Decimal.new(0), acting as a module-level constant. The changeset function introduces new elements. foreign_key_constraint(:invoice_id, message: "Select a valid invoice") customizes the error message for constraint violations, replacing the default exception. The set_subtotal method calculates the subtotal, returning a new changeset with the calculated subtotal if both price and quantity are available.
Finally, let’s create Cart.Invoice in lib/cart/invoice.ex:
| |
Cart.Invoice has a few key differences. Within the schema definition, has_many :invoice_items, InvoiceItem, on_delete: :delete_all configures a cascading delete behavior. When an invoice is deleted, associated invoice_items are also removed. However, remember that this is not a database-level constraint.
To solidify our understanding, let’s experiment with creating data in the console. If you haven’t already, create the items “Paper” and “Scissors”:
| |
We fetch all items using Cart.Repo.all and extract the item.id using Enum.map, assigning the first and second item IDs to id1 and id2, respectively:
| |
This creates an invoice along with its associated invoice items. Now, we can retrieve all invoices:
| |
While this returns the invoice, it’s often useful to retrieve related invoice_items:
| |
The Repo.preload function efficiently fetches associated invoice_items. Note that this can involve concurrent queries. In this case, the generated query might look like this:
| |
Ecto.Query
We’ve seen how to create items and invoices with relationships, but let’s explore querying with Ecto.Query. To illustrate its capabilities, we’ll need more data.
| |
We now have 8 items, including a duplicate “Chocolate” entry. Let’s identify duplicate items using a query:
| |
This query returns a map containing item names and their respective counts in the items table. A more common scenario might involve identifying best-selling products. Let’s generate some invoices. For convenience, we’ll create a map to access item_id using item names:
| |
We’ve created a map using a comprehension for easy access.
| |
Creating invoices currently requires manually specifying the price for each invoice_item. Ideally, we’d provide the item_id and have the price fetched automatically. Let’s modify Cart.Invoice to achieve this:
| |
We’ve included Ecto.Query to enable querying within the module. The new function, defp items_with_prices(items) do, iterates through a list of items, retrieving and setting the price for each.
The function first extracts item_id from each item, handling both atom keys (:item_id) and string keys (“item_id”). The query q = from(i in Item, select: %{id: i.id, price: i.price}, where: i.id in ^item_ids) retrieves items matching the provided item_ids, returning a list of maps containing item.id and item.price. prices = Repo.all(q) executes the query. We then iterate through the original items, find the corresponding price using Enum.find(prices, fn(p) -> p[:id] == item_id end)[:price] || 0, and construct a new list including item_id, quantity, and price. With this modification, manually specifying the price for each invoice_item is no longer necessary.
Inserting More Invoices
Recall our items map, allowing us to access item_id using the item name (e.g., items["Gum"] returns “cb1c5a93-ecbf-4e4b-8588-cc40f7d12364”). This simplifies invoice_item creation. Let’s add more invoices. Start the console and execute the following:
| |
| |
We clear existing invoices and invoice items:
| |
Now we have 3 invoices: the first with 2 items, the second with 3, and the third with 6. Let’s determine the best-selling products based on quantity and subtotal (price x quantity) using a query.
| |
We import Ecto.Query and alias relevant modules for conciseness. The items_by_quantity function calls items_by, passing :quantity and executing the query using Repo.all. items_by_subtotal follows a similar pattern, passing :subtotal instead. Let’s break down the items_by function:
from i in Itemselects the Item module.join: ii in InvoiceItem, on: ii.item_id == i.idperforms a join based on the condition “items.id = invoice_items.item_id.”select: %{id: i.id, name: i.name, total: sum(field(ii, ^type))}constructs a map containing desired fields. It selects the ID and name from Item and calculates the sum using thesumoperator. Thefield(ii, ^type)macro dynamically accesses fields.group_by: i.idgroups the results by item ID.order_by: [desc: sum(field(ii, ^type))]orders the results in descending order based on the calculated sum.
While we’ve written the query in list form, it can also be expressed using the macro style:
| |
The list form often enhances readability, but both approaches achieve the same result.
Conclusion
This tutorial explored fundamental concepts and practical applications of Ecto. There’s much more to discover in the Ecto docs, but this provides a solid foundation. Ecto empowers you to build concurrent, fault-tolerant Elixir applications that scale effectively thanks to the robust Erlang VM. It offers the building blocks for data management in your applications, providing functions and macros to simplify data interactions.
We covered Ecto.Schema, Ecto.Changeset, Ecto.Migration, Ecto.Query, and Ecto.Repo, each contributing to different aspects of application development, promoting code clarity, maintainability, and understandability.
You can find the complete code for this tutorial on GitHub here.
If this piqued your interest, I encourage you to explore further. Phoenix provides a curated list of awesome Elixir projects. Awesome Elixir delves deeper into Ecto, while this talk offers a comparative analysis of ActiveRecord and Ecto.