
Introduction
My previous post detailed how to connect to a Unifi router using HTTPS, eliminating the “Your connection is not private” warning.
 However, that method relies on an external DNS server like CloudFlare to resolve your Unifi router’s address. This introduces latency and requires opening external ports, increasing potential security risks.
This post presents a solution for maintaining secure, external accessibility while also enabling local HTTPS access without opening external ports. This approach is particularly well-suited for a robust homelab environment.
The Solution: “Split-Brain DNS”
Split-Brain DNS utilizes two sets of DNS servers to accurately resolve traffic both internally and externally. This allows for the correct resolution of internal resources from both inside and outside the network.
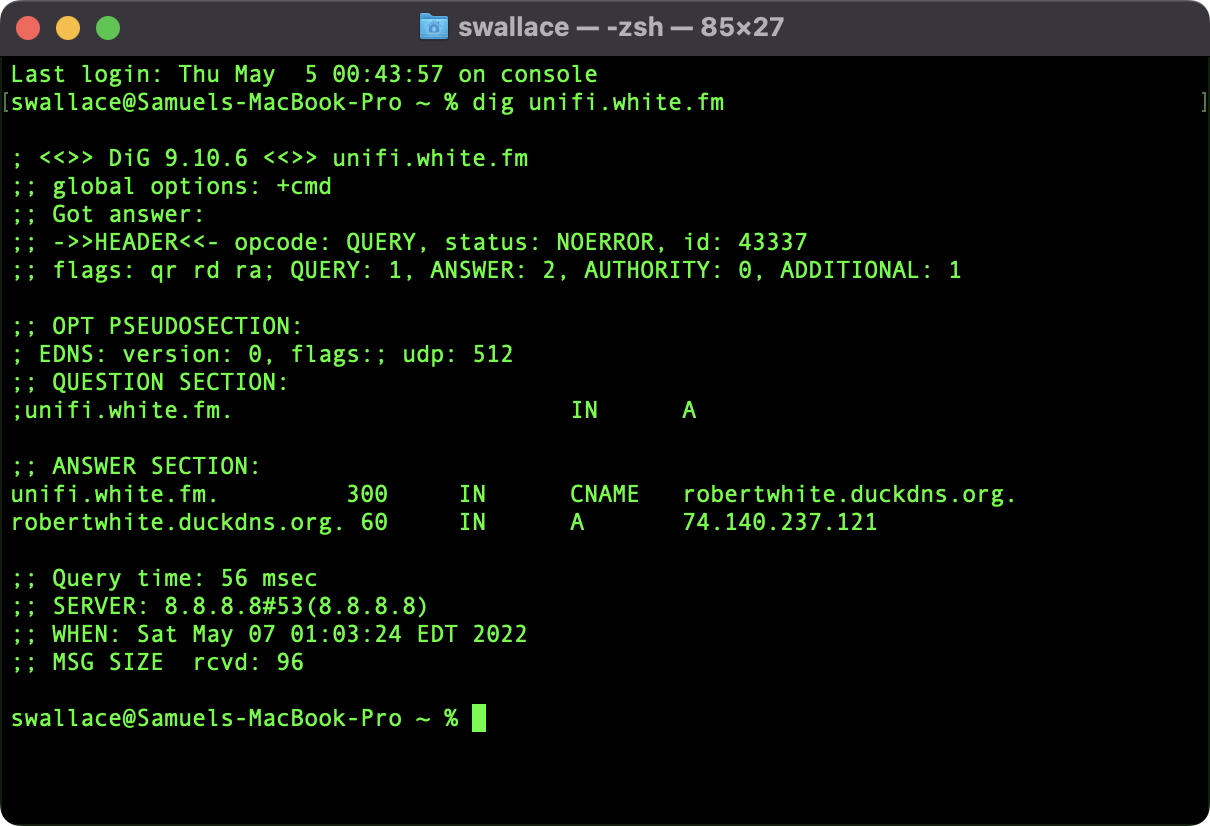
In my setup, PiHole acts as the internal DNS server, handling internal DNS requests for internal resources. CloudFlare manages external resolution for these internal resources. For instance, if my local network is 10.10.10.0/24 with my Unifi Dream Machine Pro (UDMP) at 10.10.10.1 and my MacBook Pro (MBP) at 10.10.10.50, requests from the MBP to the UDMP are resolved directly by PiHole (see the first Terminal image). However, if my MBP is on a different network, the external DNS server would direct traffic to my network’s public IP, which would then be routed by the reverse proxy to reach the UDMP (see the second Terminal image).
 First Image: Executing
 dig unifi.white.fm on an internal machine using PiHole as the DNS server resolves unifi.white.fm directly to the reverse proxy within my network.
 Second Image: Executing
 dig unifi.white.fm from an external machine resolves unifi.white.fm to my dynamic DNS host (DuckDNS), which points to my network’s public IP. Port forwarding rules would then direct the traffic to the reverse proxy and subsequently to the UDMP, if enabled.
In both scenarios, my browser establishes a secure HTTPS connection to my Unifi Machine using Let’s Encrypt certificates.

Before delving into the specific setup, let’s review the tools I employ to achieve this.
Tools
PiHole
PiHole serves as the internal DNS server in this setup. While there are various ways to implement PiHole within a network, my configuration involves multiple instances across different subnets and VLANs for granular control over resolution.
It’s important to note that PiHole isn’t the only DNS server capable of achieving this. Its appeal lies in its straightforward yet powerful DNS blocking features. If network-wide tracking and ad-blocking aren’t requirements, alternative tools might be more suitable. This tutorial will utilize PiHole for demonstration purposes.
Unnecessary Note: Each PiHole instance in my network is configured for anonymous resolution using Oblivious DNS Over HTTPS (ODOH). For containerized instances, I leverage the mschirrmeister/odoh-resolver container (for more details, see the GitHub repository).
Nginx Proxy Manager
PiHole is configured to resolve internal resource requests to Nginx Proxy Manager, which handles traffic routing to the desired resource and provides HTTPS protection through Let’s Encrypt certificates. My previous post provides a guide on setting up Nginx Proxy Manager with Docker.
Similar to PiHole, alternative reverse proxies can achieve this outcome. I opt for Nginx Proxy Manager due to its user-friendly nature.
Internal Routing
With at least one DNS server and a reverse proxy operational, we can establish the internal component of our split-brain DNS. In this tutorial, my network is 10.99.100.0/24, with an Nginx Proxy Manager instance at 10.99.100.10 and a CyberChef Docker container at 10.99.100.82 with a GUI accessible on port 3000 (i.e., http://10.99.100.82:3000).
Nginx Proxy Manager receives client communication on ports 80 and 443, forwarding traffic to a specified host and port. For CyberChef, this would be 10.99.100.82 on port 3000. The first step is configuring Nginx Proxy Manager to route traffic for the host cyberchef.white.fm, which we will define in our DNS server. In Nginx Proxy Manager, navigate to Hosts and click Add Proxy Host. Input your chosen domain (e.g., cyberchef.white.fm). In most cases, you’ll want to retain the default Scheme setting of http, as the initial traffic isn’t encrypted. Add the host’s IP address (e.g., 10.99.100.82) and the communication port (e.g., port 3000). While enabling Block Common Exploits and Websockets Support is recommended, these options should be explored and tested based on your specific host and requirements. The image below illustrates this page configured as described.

On the same page, navigate to SSL and select Request a new SSL Certificate from the dropdown menu. This automatically requests a certificate from Let’s Encrypt based on the hostname (e.g., cyberchef.white.fm) provided earlier. If you possess an existing certificate or prefer a wildcard certificate for all internal resources, those options are also available. Enable the options based on your host’s requirements. The image below provides an example configuration for this screen.

After the certificate request is finalized, click Save. A new Proxy Host will appear in your Nginx Proxy Manager.
In PiHole, select Local DNS from the left panel, then choose DNS Records. Under Domain, enter the intended domain target from Nginx Proxy Manager (e.g., cyberchef.white.fm) and the IP address of your Nginx Proxy Manager host (e.g., 10.99.100.10), which differs from the target host. Click Add. The image below depicts this configuration.

With these configurations saved, ensure your client utilizes PiHole (or your chosen DNS server) as its DNS server.
If you’re using Unifi with the latest User Interface, this setting is found under Settings > Networks > Name_of_Your_Network > DHCP > DHCP Service Management: Show options > DHCP DNS Server: Enable.
Enable this setting and enter your PiHole IP(s). After saving, renew your client’s DHCP lease (or reconnect if static) to utilize PiHole as its DNS server. You can also manually assign the DNS server on your client for a more localized change. The Unifi settings are shown in the image below.

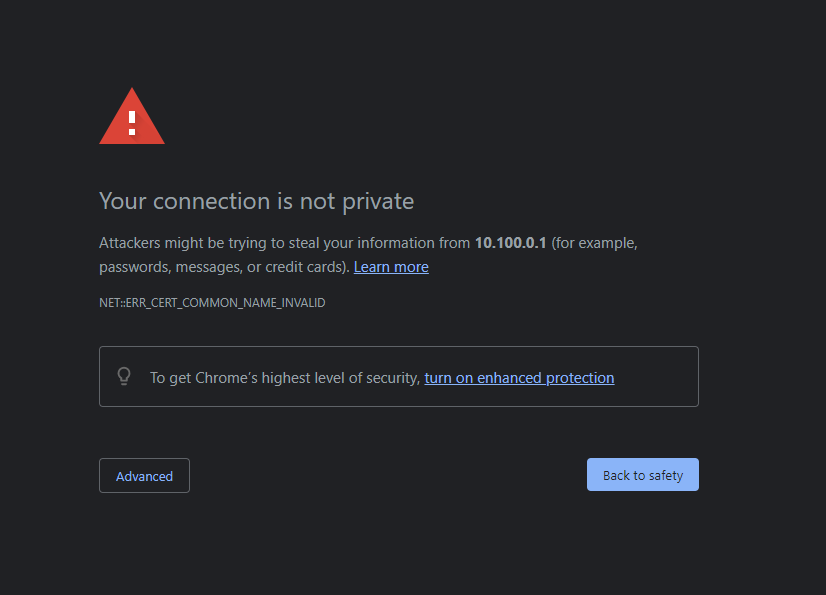
With the new DNS server(s) added, attempt to connect to your host via HTTPS (e.g., https://cyberchef.white.fm). A successful configuration results in the secure HTTPS connection indicator in your browser (see the image below).

A dig command on cyberchef.white.fm will resolve to the IP address of our Nginx Proxy Manager (IP 10.99.100.10). See the image below.

Attempting to capture data transmitted over HTTPS reveals encryption. The screenshot below shows a WireShark capture of data sent from my PC to an InfluxDB instance on my network using this method. All communication with InfluxDB is now encrypted. Various data sources, including Unifi Poller, Varken, and Home Assistant, now transmit data to InfluxDB over HTTPS as well. See the image below.

While this method of implementing HTTPS support is not a comprehensive security solution, it enhances privacy and reduces the likelihood of malicious actors on your network accessing sensitive information.
Excellent work! You’ve successfully configured the internal half of your “split-brain DNS.” Repeat these steps to add additional hosts to both Nginx Proxy Manager and PiHole. This setup extends to the Nginx Proxy Manager web page, Unifi router, PiHole web interface, ESXi servers, Proxmox servers, or any Docker containers running within your environment. The possibilities are vast.
External Routing
Prepare Your Domain
Note: This section is an excerpt from my post: Hosting Your Own Site with Traefik and Wordpress. This outlines the external half of the “split-brain DNS” and is optional if you don’t need external access to your services and Nginx Proxy Manager.
Add DNS records for your domain (e.g., whitematter.tech) that point to your server’s public IP address. A Dynamic DNS service like duckdns.org is recommended for automatically updating your changing public IP address if you lack a static IP. The image below demonstrates CloudFlare pointing my domain to my DuckDNS address (replace “Content” with your public IP if not using DuckDNS).

Add a CNAME record for each host you want to access externally. For example, a CNAME record for cyberchef would point cyberchef.white.fm to your dynamic DNS host or public IP.
Next, forward ports 80 and 443 to your Nginx Proxy Manager host. Consult your networking equipment’s documentation for instructions.
Once ports 80 and 443 are forwarded, any host added to CloudFlare (or your DNS service) will be externally accessible.