A few years back, I was developing an app called “BOG mBank - Mobile Banking” with my team, focusing on both iOS and Android platforms. The app had a core feature allowing users to top up their own or any contact’s prepaid phone balance using mobile banking.
During the development of this module, we stumbled upon an interesting observation: locating a specific contact was significantly smoother on the Android version compared to iOS. This disparity stemmed from the presence of T9 search in Android, a feature absent in Apple devices.
This begs the questions: What exactly is T9 searching? What about T9 dialing? This article delves into the world of T9, exploring its mechanics, the reasons behind its absence in iOS, and how iOS developers can integrate it if needed.
Demystifying T9
T9, short for Text on 9 keys, is a predictive text technology primarily designed for mobile phones equipped with a physical 3x4 numeric keypad. Those unfamiliar with the T9 era can get a taste of it through a demo of a T9-based predictive text emulator.
Originally conceived by Tegic Communications, T9’s journey to (or rather, absence from) iOS is an intriguing one. The smartphone revolution rendered T9 pad input obsolete, as touchscreens and full keyboards became the norm. Since Apple’s entry into the phone market coincided with the decline of physical keypads, the omission of T9 from iOS is understandable.
While T9 still finds its place in some budget-friendly phones without touchscreens (feature phones), its presence in the Android ecosystem is noteworthy. Despite most Android phones never featuring physical keypads, they support T9 input, allowing users to dial contacts by spelling their names.
On a numeric keypad phone, each press of a key (1-9) within a text field triggers the T9 algorithm. This algorithm attempts to predict the intended letters based on the keys pressed.
Consider the word “the”. Pressing 8, 4, and 3 sequentially would display “t”, “th”, and finally “the”. However, for a less frequent word like “fore” (3673), the algorithm might initially suggest “Ford”. Pressing the “next” key (usually “*”) could cycle through “dose” and ultimately land on “fore”. Once “fore” is selected, the same key sequence (3673) would prioritize it in future predictions. For a word like “Felix” (33549), the display might show “E”, “De”, “Del”, “Deli”, and finally “Felix”.
This dynamic prediction and letter changing during word input illustrate the core functionality of T9.
Integrating T9 in iOS Programmatically
Let’s shift gears and create a basic T9 input example for iOS. We’ll start by setting up a new Xcode project.
The prerequisites are minimal: a Mac with Xcode and its build tools installed.
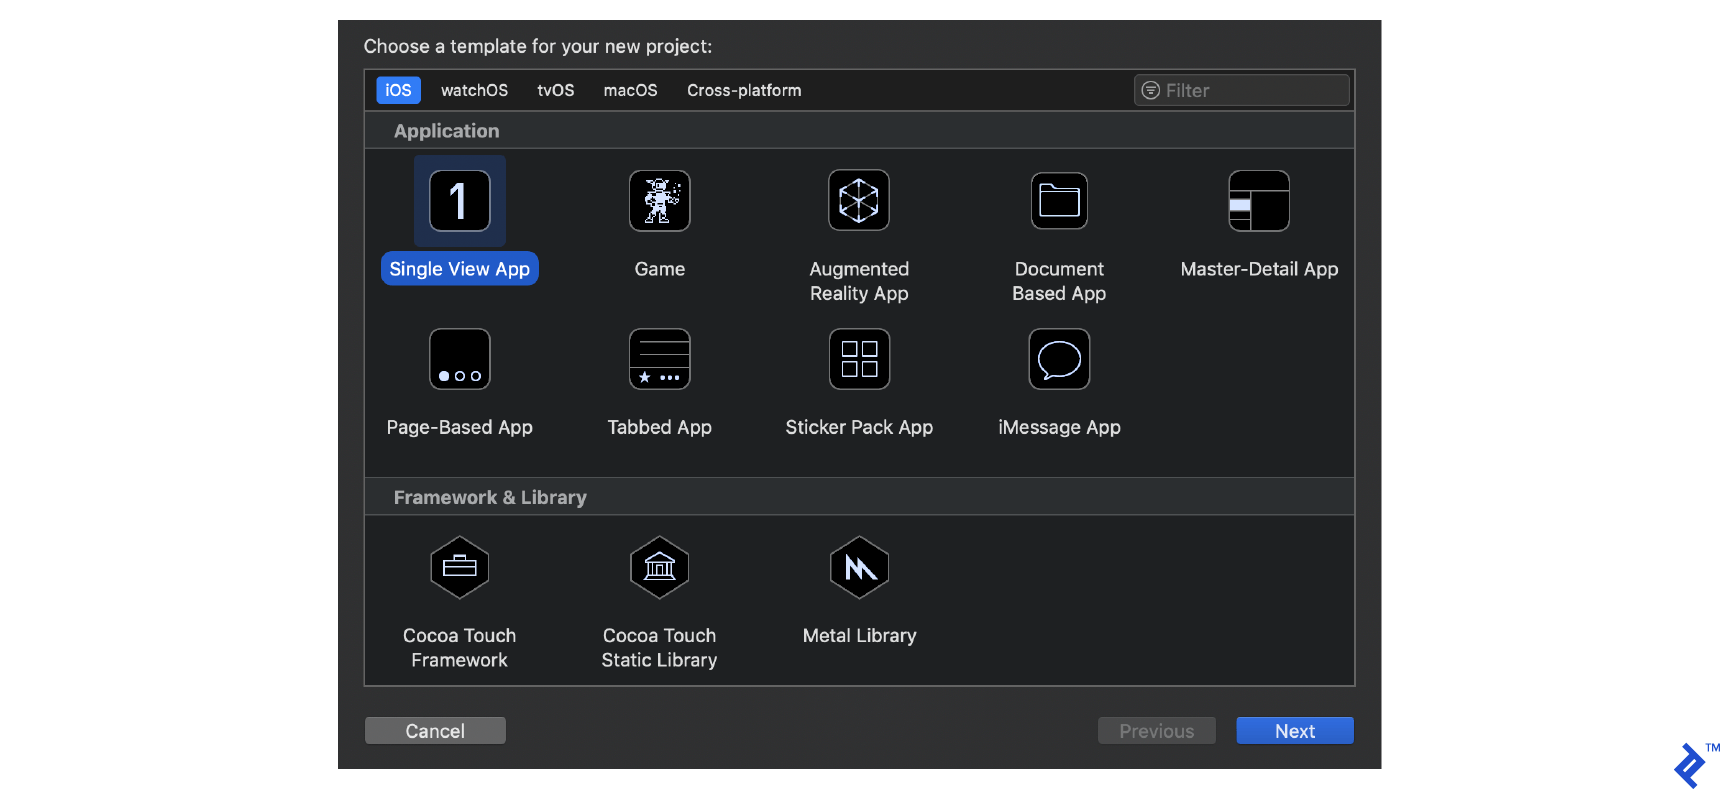
To initiate a new project, launch Xcode and choose “Create a new Xcode project.” Assign a name to your project and select the application type as “Single View App” before hitting “Next.”
The next screen prompts you for specific information:
- Product Name: I opted for “T9Search.”
- Team: Running the app on an actual device necessitates a developer account. If you lack one, using the Simulator is an option.
- Organization Name: I went with “Toptal.”
- Organization Identifier: “com.toptal” in my case.
- Language: Swift is our language of choice.
- Uncheck the boxes for “Use Core Data,” “Include Unit Tests,” and “Include UI Tests.”
Proceed by clicking “Next,” and we’re ready to dive in.
A Straightforward Architecture
Creating a new app provides you with the MainViewController class and Main.Storyboard. We’ll utilize this controller for our testing purposes.
Before delving into design, let’s set up the required classes and files to ensure a smooth transition to the UI phase.
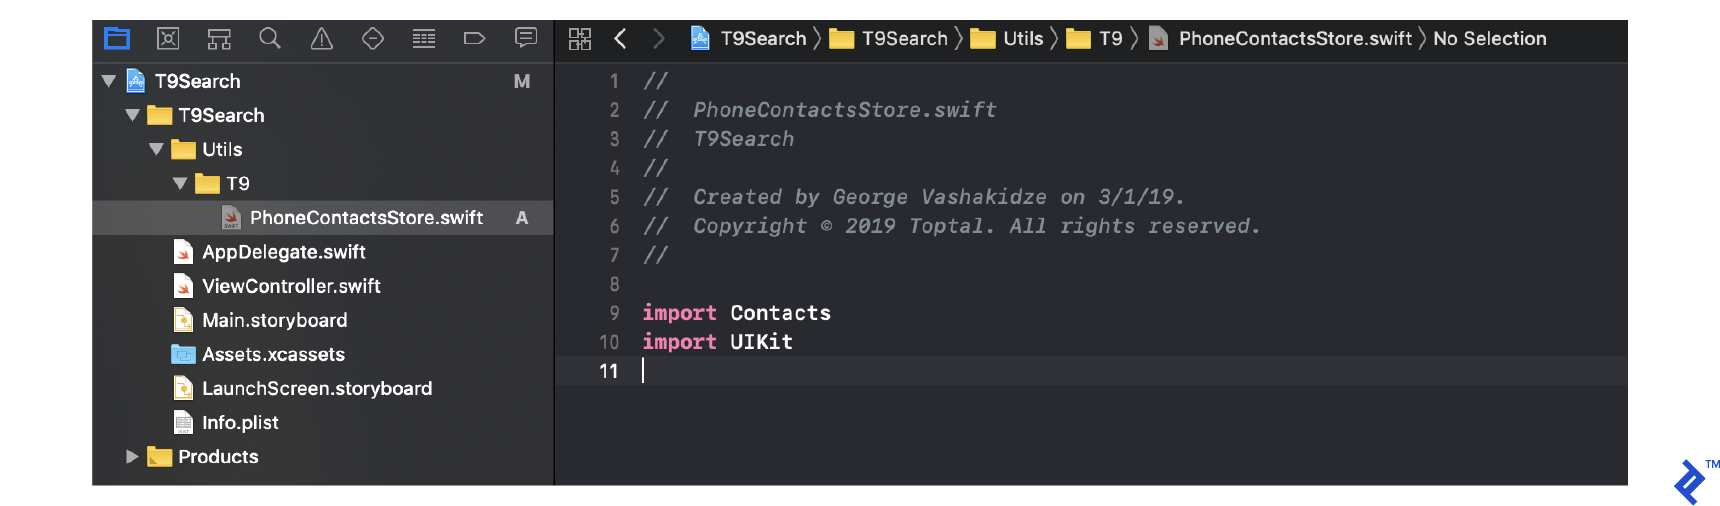
Within your project, create a new file named “PhoneContactsStore.swift”.
Our initial step involves crafting a map to encompass all variations of numeric keypad input.
 1
 2
 3
 4
 5
 6
 7
 8
 9
10
11
| import Contacts
import UIKit
fileprivate let T9Map = [
" " : "0",
"a" : "2", "b" : "2", "c" : "2", "d" : "3", "e" : "3", "f" : "3",
"g" : "4", "h" : "4", "i" : "4", "j" : "5", "k" : "5", "l" : "5",
"m" : "6", "n" : "6", "o" : "6", "p" : "7", "q" : "7", "r" : "7",
"s" : "7", "t" : "8", "u" : "8", "v" : "8", "w" : "9", "x" : "9",
"y" : "9", "z" : "9", "0" : "0", "1" : "1", "2" : "2", "3" : "3",
"4" : "4", "5" : "5", "6" : "6", "7" : "7", "8" : "8", "9" : "9"
]
|
With the complete map of input variations ready, let’s define our first class, “PhoneContact”.
Your file should resemble this structure:
The first order of business is incorporating a Regex filter for A-Z and 0-9 characters within this class.
private let regex = try! NSRegularExpression(pattern: "[^ a-z()0-9+]", options: .caseInsensitive)
Next, we ensure the availability of default user properties for display purposes:
 1
 2
 3
 4
 5
 6
 7
 8
 9
10
11
| var firstName : String!
var lastName : String!
var phoneNumber : String!
var t9String : String = ""
var image : UIImage?
var fullName: String! {
get {
return String(format: "%@ %@", self.firstName, self.lastName)
}
}
|
Override the hash and isEqual methods to implement custom logic for list filtering.
Additionally, we need a replace method to filter out any non-numeric characters from the string.
 1
 2
 3
 4
 5
 6
 7
 8
 9
10
11
12
13
14
15
16
17
18
19
20
21
| override var hash: Int {
get {
return self.phoneNumber.hash
}
}
override func isEqual(_ object: Any?) -> Bool {
if let obj = object as? PhoneContact {
return obj.phoneNumber == self.phoneNumber
}
return false
}
private func replace(str : String) -> String {
let range = NSMakeRange(0, str.count)
return self.regex.stringByReplacingMatches(in: str,
options: [],
range: range,
withTemplate: "")
}
|
Now, let’s add a method called calculateT9 to locate contacts based on either fullname or phonenumber.
1
2
3
4
5
6
7
8
9
| func calculateT9() {
for c in self.replace(str: self.fullName) {
t9String.append(T9Map[String(c).localizedLowercase] ?? String(c))
}
for c in self.replace(str: self.phoneNumber) {
t9String.append(T9Map[String(c).localizedLowercase] ?? String(c))
}
}
|
With the PhoneContact object in place, we need a storage mechanism for our contacts. For this, I’ll introduce a new class named PhoneContactStore.
This class will house two local properties:
fileprivate let contactsStore = CNContactStore()
And:
fileprivate lazy var dataSource = Set<PhoneContact>()
The use of Set here prevents duplicates while populating this data source.
 1
 2
 3
 4
 5
 6
 7
 8
 9
10
| final class PhoneContactStore {
fileprivate let contactsStore = CNContactStore()
fileprivate lazy var dataSource = Set<PhoneContact>()
static let instance : PhoneContactStore = {
let instance = PhoneContactStore()
return instance
}()
}
|
This PhoneContactStore is a Singleton class, meaning it resides in memory throughout the app’s runtime. For deeper insights into Singletons and design patterns, refer to here.
We’re now on the cusp of finalizing our T9 search implementation.
Piecing It All Together
Before accessing contacts on iOS, requesting user permission is crucial.
 1
 2
 3
 4
 5
 6
 7
 8
 9
10
11
12
13
14
15
16
17
18
19
20
21
22
23
24
25
26
| class func hasAccess() -> Bool {
let authorizationStatus = CNContactStore.authorizationStatus(for: CNEntityType.contacts)
return authorizationStatus == .authorized
}
class func requestForAccess(_ completionHandler: @escaping (_ accessGranted: Bool, _ error : CustomError?) -> Void) {
let authorizationStatus = CNContactStore.authorizationStatus(for: CNEntityType.contacts)
switch authorizationStatus {
case .authorized:
self.instance.loadAllContacts()
completionHandler(true, nil)
case .denied, .notDetermined:
weak var wSelf = self.instance
self.instance.contactsStore.requestAccess(for: CNEntityType.contacts, completionHandler: { (access, accessError) -> Void in
var err: CustomError?
if let e = accessError {
err = CustomError(description: e.localizedDescription, code: 0)
} else {
wSelf?.loadAllContacts()
}
completionHandler(access, err)
})
default:
completionHandler(false, CustomError(description: "Common Error", code: 100))
}
}
|
Once authorized to access contacts, we can implement the method to fetch the contact list from the system.
 1
 2
 3
 4
 5
 6
 7
 8
 9
10
11
12
13
14
15
16
17
18
19
20
21
22
23
24
25
26
27
28
29
30
31
32
33
34
35
| fileprivate func loadAllContacts() {
if self.dataSource.count == 0 {
let keys = [CNContactGivenNameKey, CNContactFamilyNameKey, CNContactThumbnailImageDataKey, CNContactPhoneNumbersKey]
do {
let request = CNContactFetchRequest(keysToFetch: keys as [CNKeyDescriptor])
request.sortOrder = .givenName
request.unifyResults = true
if #available(iOS 10.0, *) {
request.mutableObjects = false
} else {} // Fallback on earlier versions
try self.contactsStore.enumerateContacts(with: request, usingBlock: {(contact, ok) in
DispatchQueue.main.async {
for phone in contact.phoneNumbers {
let local = PhoneContact()
local.firstName = contact.givenName
local.lastName = contact.familyName
if let data = contact.thumbnailImageData {
local.image = UIImage(data: data)
}
var phoneNum = phone.value.stringValue
let strArr = phoneNum.components(separatedBy: CharacterSet.decimalDigits.inverted)
phoneNum = NSArray(array: strArr).componentsJoined(by: "")
local.phoneNumber = phoneNum
local.calculateT9()
self.dataSource.insert(local)
}
}
})
} catch {}
}
}
|
With the contact list loaded into memory, we can proceed to write two straightforward methods:
findWith - t9StringfindWith - str
 1
 2
 3
 4
 5
 6
 7
 8
 9
10
11
12
13
14
15
16
17
18
19
20
21
22
| class func findWith(t9String: String) -> [PhoneContact] {
return PhoneContactStore.instance.dataSource.filter({ $0.t9String.contains(t9String) })
}
class func findWith(str: String) -> [PhoneContact] {
return PhoneContactStore.instance
.dataSource.filter({ $0.fullName.lowercased()
.contains(str.lowercased()) })
}
class func count() -> Int {
let request = CNContactFetchRequest(keysToFetch: [])
var count = 0;
do {
try self.instance.contactsStore.enumerateContacts(
with: request, usingBlock: {(contact, ok) in
count += 1;
})
} catch {}
return count
}
|
And with that, the core logic is complete.
Now, let’s integrate the T9 search functionality within our UIViewController.
 1
 2
 3
 4
 5
 6
 7
 8
 9
10
11
12
13
14
15
16
17
18
19
20
21
22
23
24
25
26
27
28
29
30
31
32
| fileprivate let cellIdentifier = "contact_list_cell"
final class ViewController: UIViewController {
@IBOutlet weak var tableView: UITableView!
@IBOutlet weak var searchBar: UISearchBar!
fileprivate lazy var dataSource = [PhoneContact]()
fileprivate var searchString : String?
fileprivate var searchInT9 : Bool = true
override func viewDidLoad() {
super.viewDidLoad()
self.tableView.register(
UINib(
nibName: "ContactListCell",
bundle: nil
),
forCellReuseIdentifier: "ContactListCell"
)
self.searchBar.keyboardType = .numberPad
PhoneContactStore.requestForAccess { (ok, err) in }
}
func filter(searchString: String, t9: Bool = true) {
}
func reloadListSection(section: Int, animation: UITableViewRowAnimation = .none) {
}
}
|
Here’s the implementation of our filter method:
 1
 2
 3
 4
 5
 6
 7
 8
 9
10
11
12
13
14
15
16
| func filter(searchString: String, t9: Bool = true) {
self.searchString = searchString
self.searchInT9 = t9
if let str = self.searchString {
if t9 {
self.dataSource = PhoneContactStore.findWith(t9String: str)
} else {
self.dataSource = PhoneContactStore.findWith(str: str)
}
} else {
self.dataSource = [PhoneContact]()
}
self.reloadListSection(section: 0)
}
|
And the implementation for the list reloading method:
1
2
3
4
5
6
7
8
| func reloadListSection(section: Int, animation: UITableViewRowAnimation = .none) {
if self.tableView.numberOfSections <= section {
self.tableView.beginUpdates()
self.tableView.insertSections(IndexSet(integersIn:0..<section + 1), with: animation)
self.tableView.endUpdates()
}
self.tableView.reloadSections(IndexSet(integer:section), with: animation)
}
|
Finally, let’s round off our tutorial with the UITableView implementation:
 1
 2
 3
 4
 5
 6
 7
 8
 9
10
11
12
13
14
15
16
17
18
19
20
21
22
23
24
25
26
27
28
29
30
31
32
33
34
35
36
| extension ViewController: UITableViewDelegate, UITableViewDataSource, UISearchBarDelegate {
func tableView(_ tableView: UITableView, cellForRowAt indexPath: IndexPath) -> UITableViewCell {
return tableView.dequeueReusableCell(withIdentifier: "ContactListCell")!
}
func numberOfSections(in tableView: UITableView) -> Int {
return 1
}
func tableView(_ tableView: UITableView, numberOfRowsInSection section: Int) -> Int {
return self.dataSource.count
}
func tableView(_ tableView: UITableView, willDisplay cell: UITableViewCell, forRowAt indexPath: IndexPath) {
guard let contactCell = cell as? ContactListCell else { return }
let row = self.dataSource[indexPath.row]
contactCell.configureCell(
fullName: row.fullName,
t9String: row.t9String,
number: row.phoneNumber,
searchStr: searchString,
img: row.image,
t9Search: self.searchInT9
)
}
func tableView(_ tableView: UITableView, heightForRowAt indexPath: IndexPath) -> CGFloat {
return 55
}
func searchBar(_ searchBar: UISearchBar, textDidChange searchText: String) {
self.filter(searchString: searchText)
}
}
|
In Conclusion
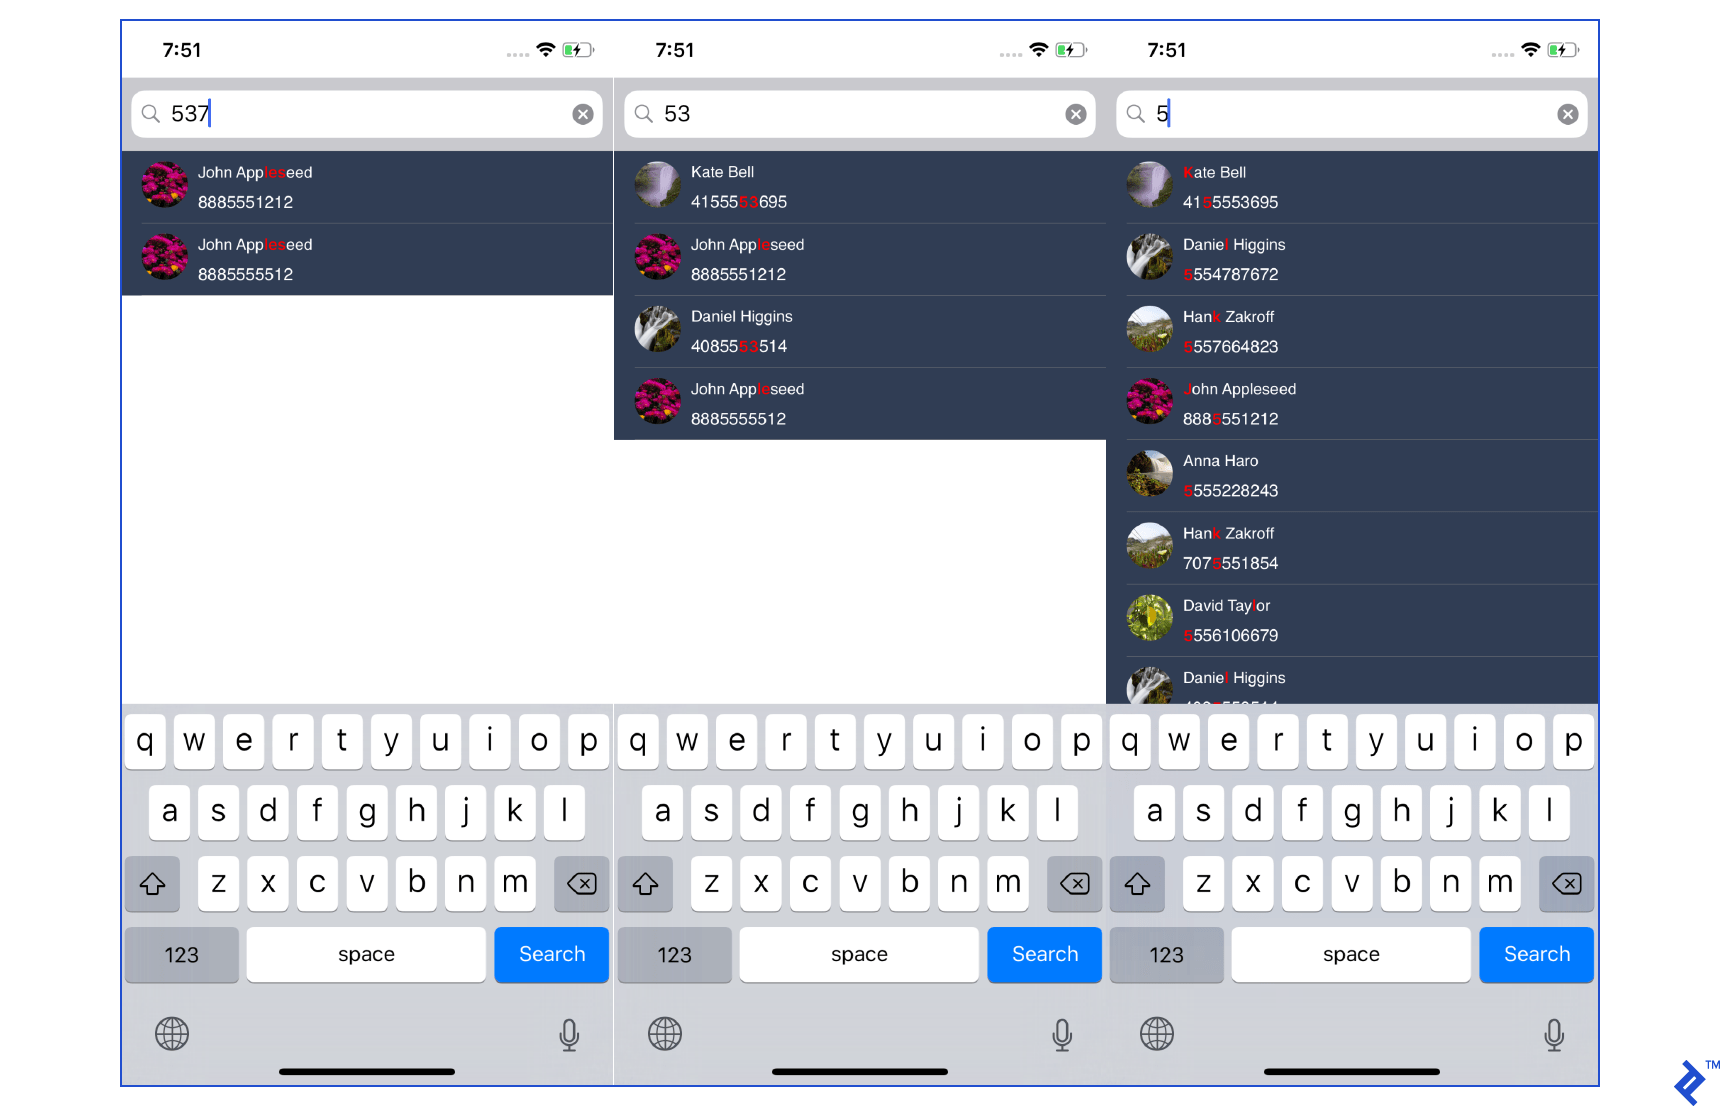
This wraps up our T9 search implementation tutorial for iOS. Hopefully, you found the process intuitive and easy to follow.
But why bother with T9 in the first place, especially given its absence in iOS by default? As highlighted earlier, T9 is far from a killer feature on modern smartphones. It serves more as a nostalgic reminder of simpler phones with physical keypads.
Nevertheless, implementing T9 search can be justified in specific scenarios. It can ensure consistency across platforms, enhance accessibility, or simply improve user experience. And for those who appreciate a touch of nostalgia, tinkering with T9 input might evoke fond memories.
You can find the complete source code for this T9 implementation on my GitHub repo.