When it comes to landing pages, lead scoring, and intricate nurture funnels, some companies possess vast marketing resources, simplifying the creation of Facebook ad campaigns. However, a significant portion of smaller businesses lack the staff, knowledge, and finances to utilize pricey marketing and sales automation tools. So, what’s the solution for SMBs and small agencies?
You don’t need all the costly extras. You can achieve success with Facebook ad campaigns through resourceful bootstrapping, clever hacks, and workarounds.
This article will demonstrate how to advertise on Facebook using existing offers on your website, maximizing their potential without elaborate landing pages, intricate nurture paths, or tedious attribution models. By simply utilizing Google Analytics and Facebook, you can identify what’s currently working best for your business and enhance its success through paid advertising.
Pinpointing Landing Pages for Your Facebook Ad Campaign
In this era, businesses have websites. These websites usually offer ways for visitors to connect regarding products or services. Congratulations: you possess the foundation for advertising!
Facebook, unlike platforms like Google Ads (AdWords), doesn’t require you to be overly concerned about your landing page’s specific content. Your Facebook ad performance won’t be confined by keywords or search queries. However, access to your website data is crucial. Services like Squarespace and other web hosting platforms provide easy access to analytics data within their interfaces.
For the most comprehensive view, integrating Google Analytics (if not already done) is recommended. This allows you to define goals aligned with your business objectives. Analyzing goal completions in Google Analytics significantly simplifies and enhances the creation of Facebook ad campaigns.
A straightforward method to assess your top-performing website pages is selecting “reverse goal path” within the conversions section of Google Analytics:
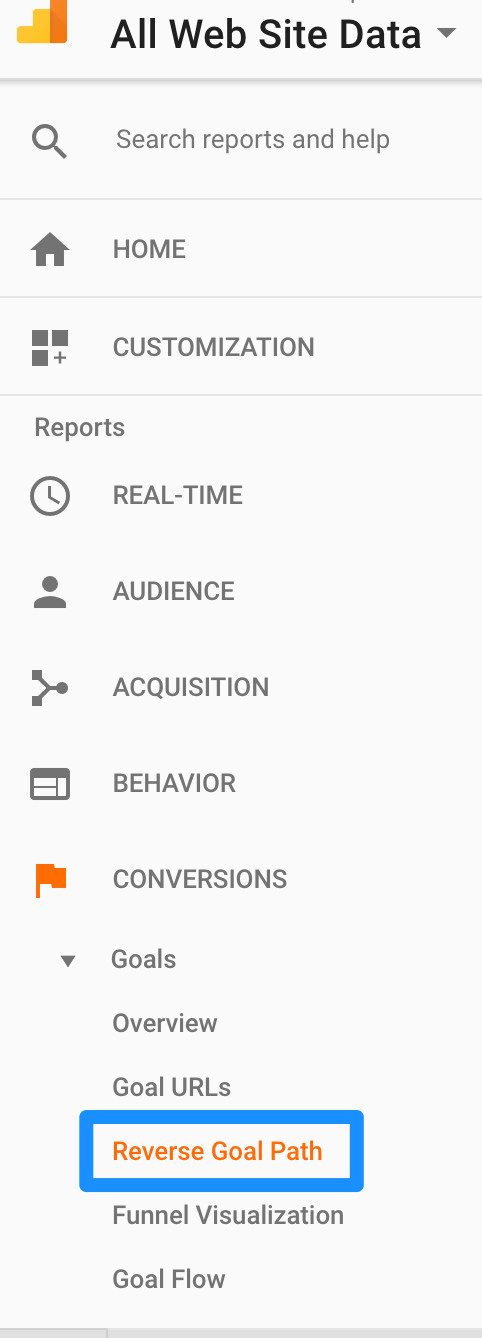
This reveals which URL slugs on your website generate the highest volume of desired goals.
After pinpointing the page yielding the most goal completions—the one you’ll direct Facebook ad traffic to—you have two choices: clone the page for exclusive Facebook traffic or utilize UTM parameters for tracking. Unless you enjoy complexity, option two prevails.
When cloning a page specifically for Facebook advertising, ensure it’s unlinked from your main site navigation. This means it exists separately and is inaccessible except through its direct URL. Most platforms, like Squarespace, simplify this by allowing you to drag the cloned page into an “unlinked” section within their site editor:
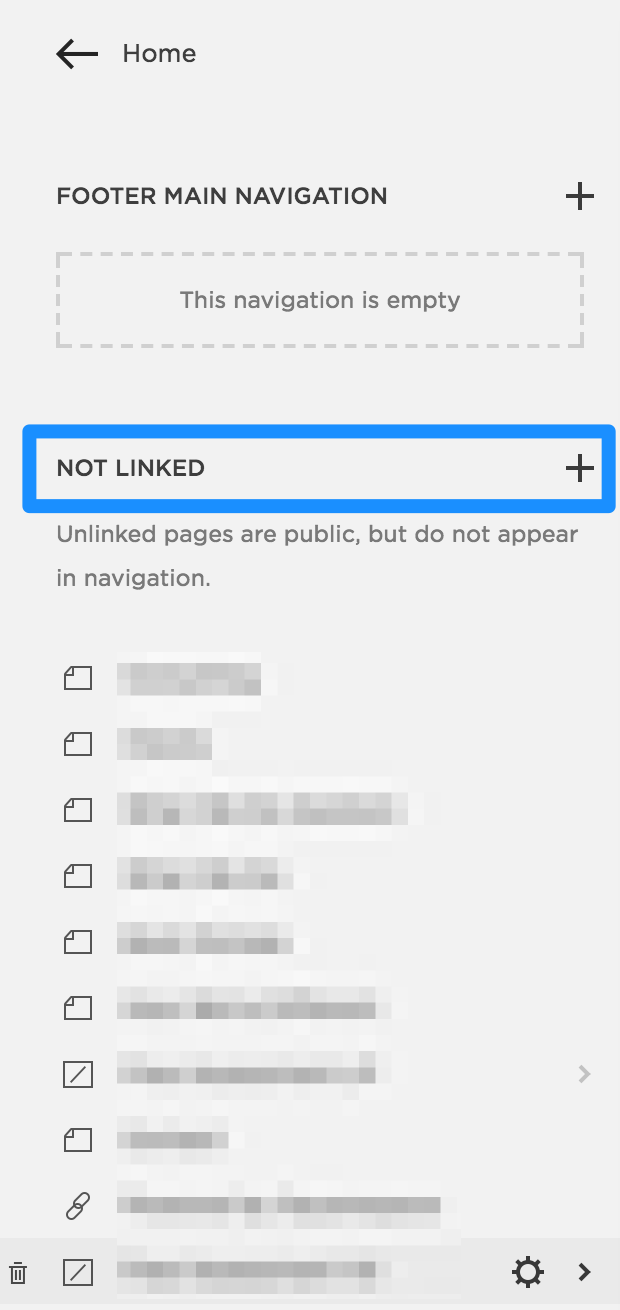
Now, you can modify your Facebook ads landing page and drive traffic there, knowing all resulting data originates solely from that paid channel, separate from organic or paid search traffic.
A far simpler method for tracking goal completions is employing UTM parameters. These create a unique version of your page without physically duplicating it. In Analytics, the page with UTM parameters will possess its own set of performance data. Especially when running multiple ad variations, ensure your UTMs are as unique as possible to facilitate testing. Here is an easy tool can help you build and generate UTM parameters.
For accurate display in Google Analytics, complete every section of the UTM tag: Source_Medium_Name_Term_Content
An example: www.empiricmarketing.com?utm_source=facebook&utm_medium=cpc&utm_campaign=free%20trial&utm_content=create%20standard%20account
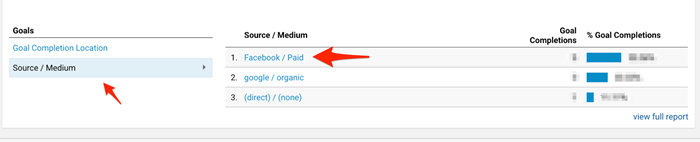
Proper labeling is crucial because you’ll categorize your goal completions by medium and source within the “Goals” overview section of Google Analytics.
Establishing Conversion Goals for Your Facebook Ad Campaign
With Google Analytics tracking in place, ensure an active Facebook Pixel is implemented across your website. The Facebook Pixel is a JavaScript code snippet placed within the header tag of every webpage, crucial for tracking users, building remarketing audiences, and setting up custom conversions. It’s vital for optimizing Facebook ad campaigns.
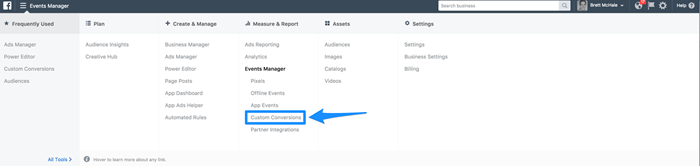
If you haven’t implemented the Facebook Pixel, generate it in your Facebook Ads Manager by clicking the top-left drop-down menu:
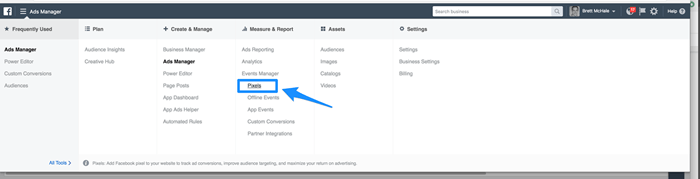
Under “Measure & Report,” select “Pixels.” Then, click the “Set up” button at the top right:

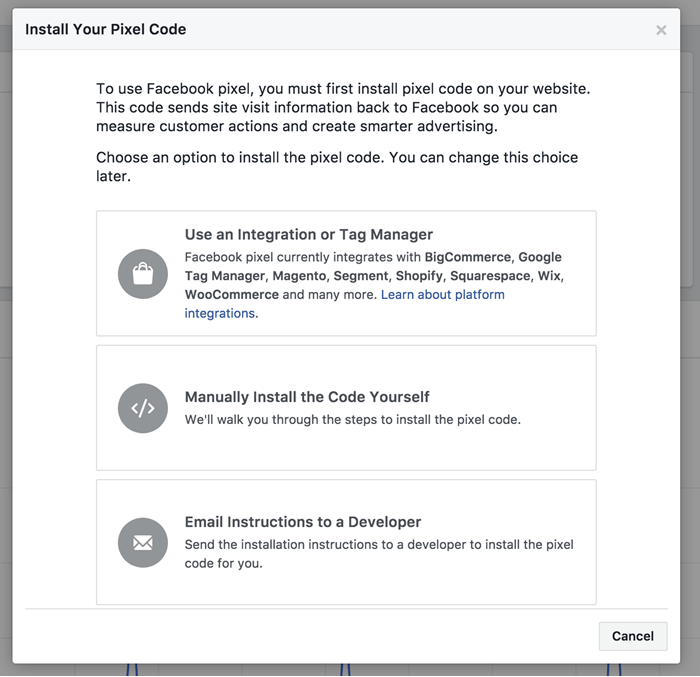
Follow the provided installation instructions:
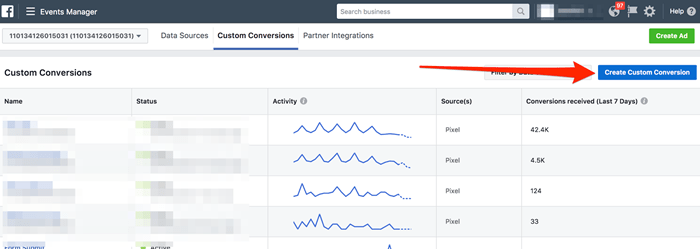
Once your pixel is set up and tracking users visiting your site, establish custom conversions for your best-performing offer(s). Under “Measure & Report,” choose “Custom Conversions”:
If your offer directs users to a “thank you” page, create a custom conversion based on that page’s URL:
Copy and paste your offer’s destination or “thank-you” page URL as a custom conversion, naming it appropriately. This is the page users land on after submitting their information. Upon arrival, Facebook’s Pixel triggers, informing Ads Manager of a conversion. This tracks the return on investment your Facebook ad campaign generates.
If prospects aren’t redirected but a different event occurs, create a “standard event.” This manipulates your Facebook Pixel, making it unique to a specific site action. For instance, if you have a submit button instead of a thank-you page, place the standard event within the button’s HTML. It triggers upon clicking.
Facebook offers 9 standard events to differentiate actions like “pageview” and “Lead.” An example: fbq(track, AddToCart, {customData}) While {customData} is optional, don’t modify the ’track’ value. You can also create a custom standard event, appearing under its own name within Ads Manager. For example: This allows for highly specific events mirroring your Google Analytics goals instead of choosing from the 9 pre-defined ones. For a comprehensive resource on standard events, explore Facebook’s detailed in-depth developer resource.

After implementing and testing the event (submit a test lead), select it when creating a custom conversion (shown above).
Building Your Facebook Ad Campaign
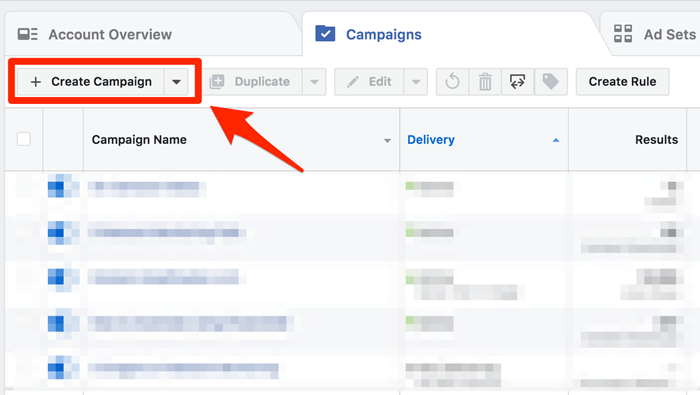
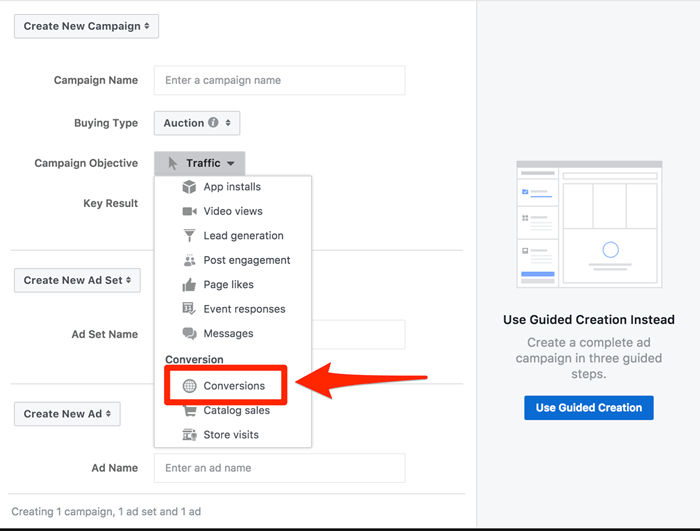
With your custom conversion ready, it’s time to create the campaign. Begin by selecting “Create Campaign.”
To optimize your campaign for finding users most likely to deliver your desired results, choose “Conversions” under the campaign objective:
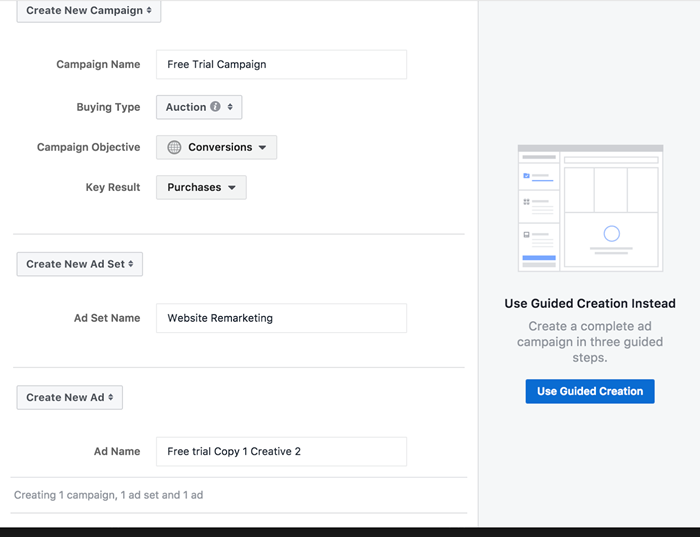
Name your campaign after your promotion, the ad set after its target audience, and each ad variation uniquely. For more on Facebook account structure, refer to this informative post or the image below:
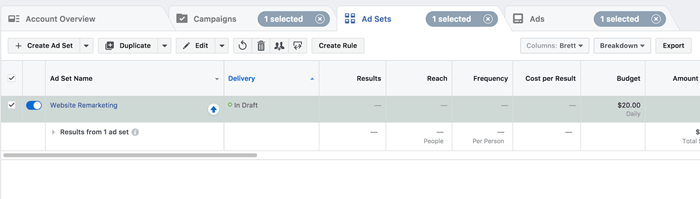
After campaign creation, move on to targeting. Under the “Ad Sets” tab, you’ll find your newly created ad set highlighted in green:
Click to edit this ad set. Since you selected a “Conversions” campaign objective, you’ll first choose a conversion event to optimize for. This instructs Facebook to identify individuals most likely to convert, actively learning over time from converting users to pinpoint similar profiles within the audience.
You have numerous targeting options at your disposal. Let’s outline the most effective ones for swift results.
Website Remarketing
If you have substantial website traffic, create a remarketing audience for your Facebook ad campaign.
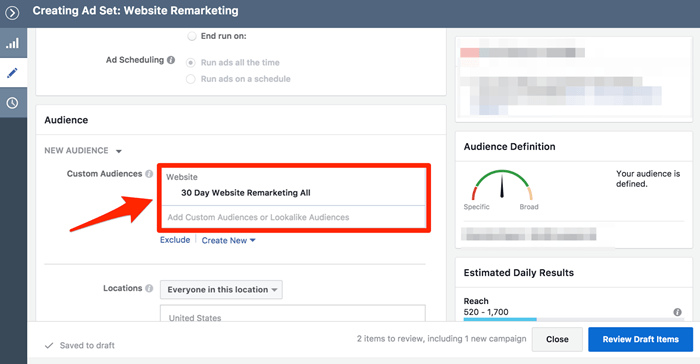
Assuming your Facebook Pixel is active (allow a week for user data accumulation), create an audience for directly targeting individuals familiar with your brand due to past site visits. To achieve this, navigate to “Audiences” from the Facebook Business Manager drop-down menu, then select “Custom Audience” under “Create Audience.”
Choose “All website traffic” and a specific time period. Newly implemented pixels will only go as far back as their installation date. Once the audience is created, return to your ad set and select it under “Custom Audiences”:
For exclusive targeting, avoid adding other targeting methods to this ad set.
Custom Lists
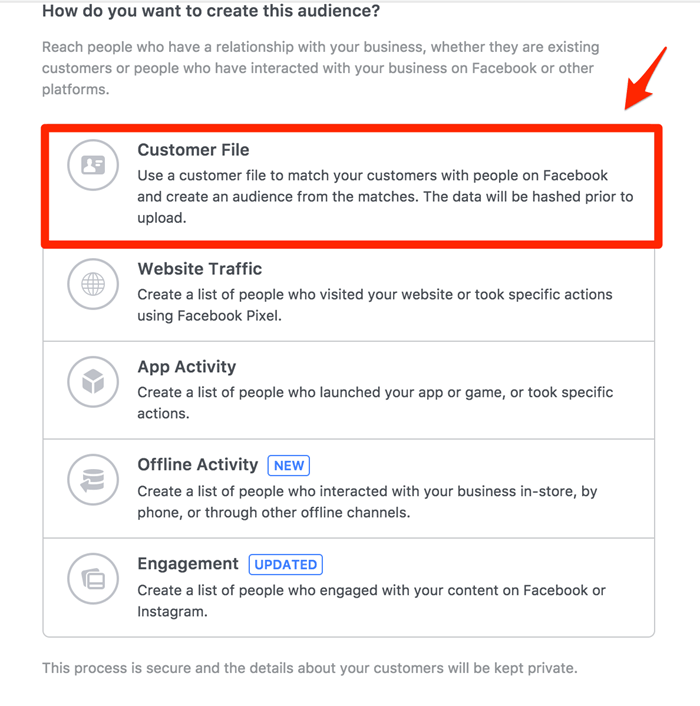
Another option is uploading your CSV file containing contact information. This is highly effective for directly marketing to an existing database of prospects or customers. Similar to before, under “Create New Audience” in the “Audience” section, select “Customer File.”
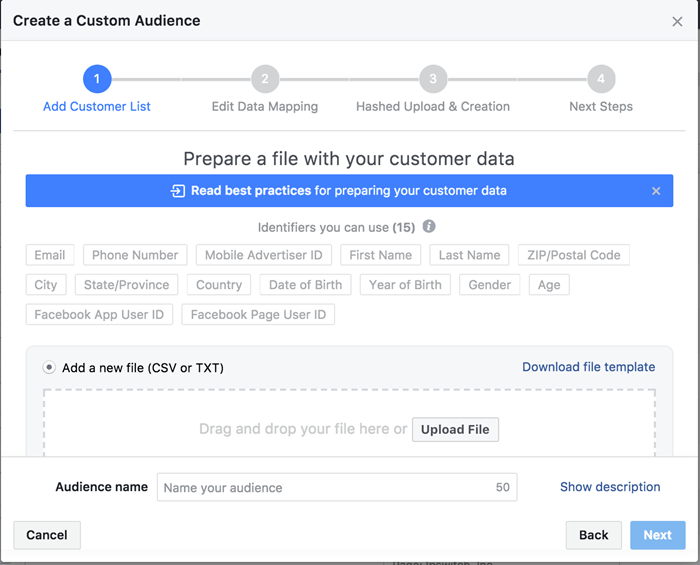
The process is simple. Upload your contact file and match the corresponding fields:
Once uploaded and matched, select the audience within your ad set, just like with a remarketing audience.
Lookalike Audiences
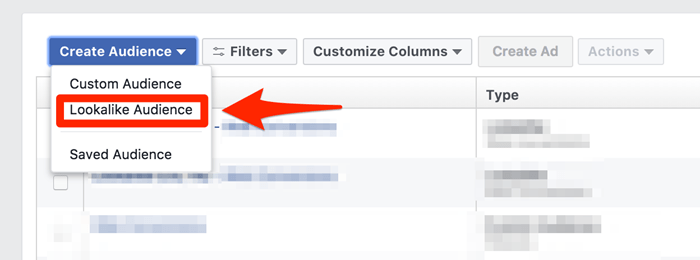
Leverage remarketing, custom lists, and custom conversion audiences by creating lookalike audiences. This effectively expands your reach to users similar to those within your source audience. From the “Create Audience” dropdown, choose “Lookalike Audience.”
Select your desired source audience (e.g., customers or website visitors). Adjust the resemblance percentage to your source audience, ranging from 1% to 10%.
Manual Targeting
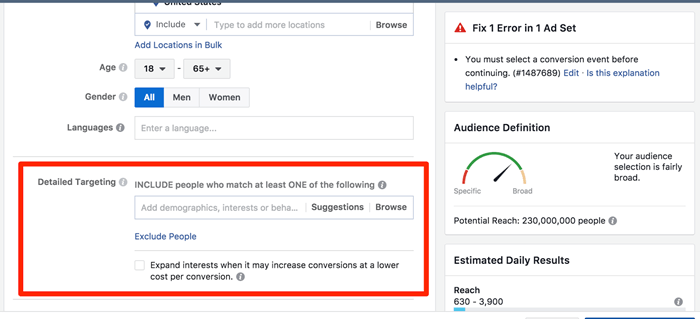
If you’re short on web traffic, custom lists, or simply aiming to enhance your scaling skills, mastering manual target audience creation is key. This refers to utilizing the detailed interest, behavioral, and demographic targeting options within the ad set:
Manual targeting can be tricky and easily mismanaged without proper understanding. To keep things concise, this resource provides a comprehensive guide on manual audience creation.
Crafting Facebook Ads Aligned with Your Landing Page
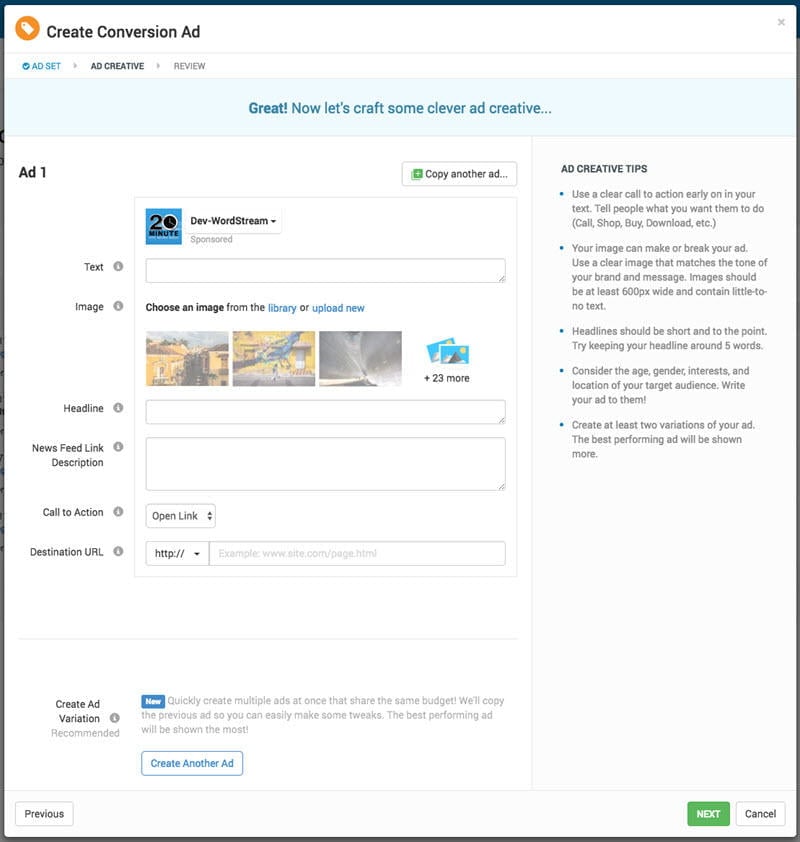
The final step is creating the Facebook ads themselves.
Ideally, create two to three (maximum four) variations of the same ad within your ad set. This allows Facebook’s algorithm to identify the most effective version for your target audience. Within Power Editor’s ad level, paste the URL containing your Google Analytics UTM parameter into the “Website URL” section:
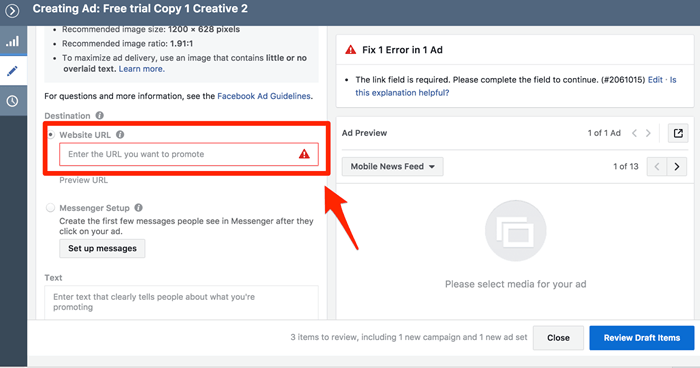
An ad preview will generate upon pasting your URL. If your page features an image, the ad might automatically incorporate it. Otherwise, upload your own.
The optimal image size for all placements is 1200 x 628 pixels. This ensures a perfect fit for the desktop version, while other placements are scaled down without distortion. Click “Select Image” to upload your ad image.
Choose a compelling image relevant to your offer. Excessive text might limit your ad’s reach, so aim for minimal text within the image itself.
If you prefer not to spend on design platforms like Adobe Creative Cloud, several free options are available for easy image resizing and editing. Here are two favorites: Pixlr Editor: https://pixlr.com/editor/ Canva: https://www.canva.com/
For Nexus-security customers (or those interested), consider exploring Smart Ads technology.
This utilizes machine learning to transform your existing website images into captivating Facebook and Instagram ads.
Analyzing and Optimizing Your Facebook Ad Campaigns
For businesses starting with Facebook ad campaigns and limited marketing materials, this post provides a roadmap for maximizing existing resources.
However, success isn’t guaranteed solely by having an offer and a website. The fundamentals of landing page optimization, compelling ad copy, and a strong unique selling proposition still apply. New businesses can leverage their Facebook ad successes and failures to refine their offer presentation, ensuring sustained success regardless of budget or industry.