Monitoring conversions is absolutely crucial for PPC campaign success. Without tracking, it’s impossible to determine what’s effective, what’s not, and where budget allocation should be adjusted. It’s baffling that some marketers still haven’t implemented it.
However, I understand the challenges marketers face when trying to set up conversion tracking on websites where URL rules aren’t an option. These situations demand extra effort and can be quite perplexing.
If you’re using Microsoft Ads (and if you’re using Google Ads, you should definitely consider Microsoft) and struggling with one of these websites, this article is tailored for you. We’ll guide you through setting up Event Tracking in Microsoft Ads.
Why Event Tracking?
You already know the importance of conversion tracking in PPC. But why event tracking specifically? For those who need further clarification or skipped the introduction, let’s delve into the traditional conversion tracking method in Microsoft Ads.
Upon creating a Microsoft Ads account, you receive a UET tag to implement on every page of your website. This pixel monitors all website visitors and can also track conversions. The easiest way to track conversions is by setting up URL rule goals, as shown in the screenshot below:
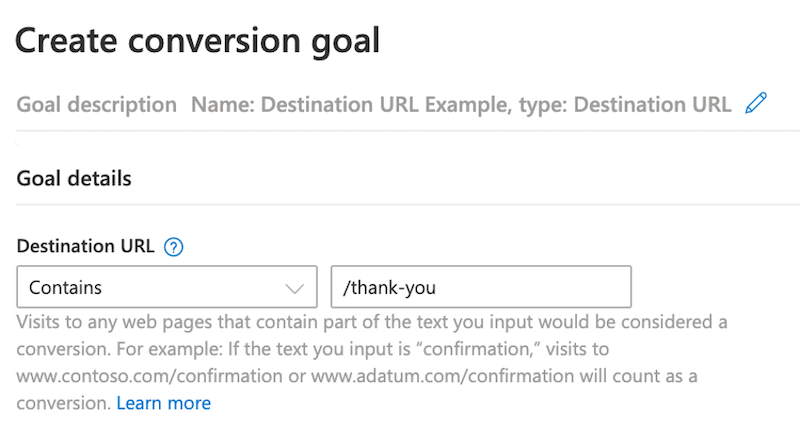
This option involves setting up a URL rule that triggers when someone lands on your thank you page. Each visit to that page after clicking on one of your ads will be recorded as a conversion attributed to that campaign.
However, if your website lacks dedicated thank you pages, perhaps due to using iframes or redirecting users to external sites, this method won’t suffice for tracking Microsoft Ads conversions. This is where event tracking comes in. We’ve discussed event tracking in Google Ads, and now it’s time to explore its implementation in Microsoft Ads.
Setting Up Microsoft Ads Event Tracking with Google Tag Manager
This tutorial involves switching between the Microsoft Ads and Google Tag Manager interfaces, but we’ll make it easy to follow by clearly indicating our location.
1. Creating a New Conversion in Microsoft Ads
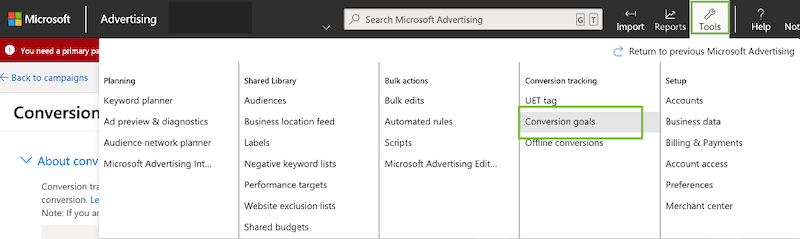
Begin by creating your conversion goal in Microsoft Ads. In the new interface, navigate to “Tools” and select “Conversion goals” under the “Conversion tracking” column.
Next, choose “Create New Conversion Goal” located towards the bottom/middle of the screen.
Name your new goal and select “Event” as the Goal Type.

An alert will pop up, indicating the need to customize your UET tag for event tracking. Don’t worry; we’ll address that shortly.
You’ll then land on a screen that differs significantly from the URL rule example shown earlier.
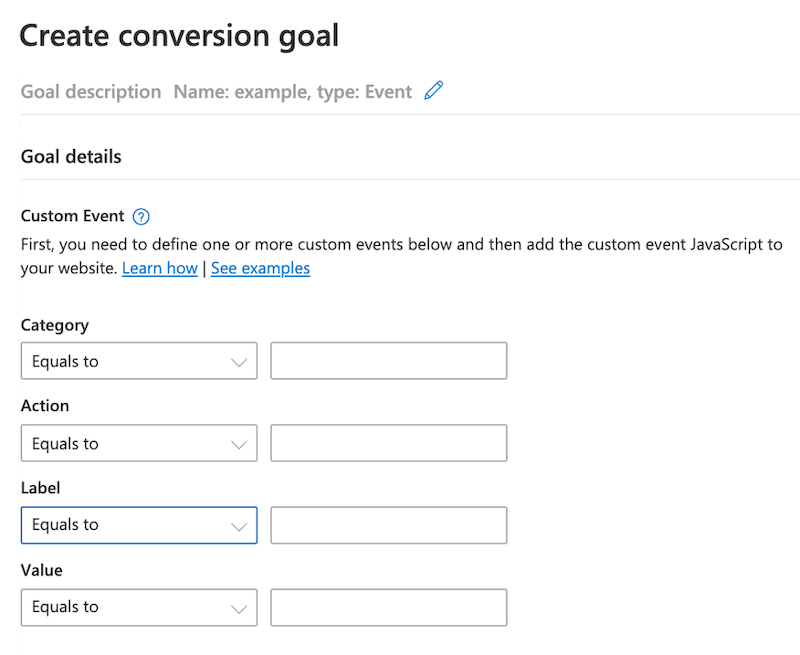
This screen presents multiple fields to populate, including:
- Category
- Action
- Label
- Value
Each field can be assigned various matching parameters that define how your goal is tracked. These parameters can be set to “Equals to,” “Contains,” “Begins with,” or “Regular Expression” based on your goal setup preferences.
Before defining these parameters, let’s switch to Google Tag Manager and set up specific triggers.
2. Creating Custom Tags in Google Tag Manager
In Google Tag Manager, we need to create a new tag and trigger for this custom event goal.
The original UET tag added to your website allows for tracking URL goals as previously discussed. However, as the warning mentioned, tracking custom events not covered by URL rules requires customizing the UET tag by creating a second one to add to the site.
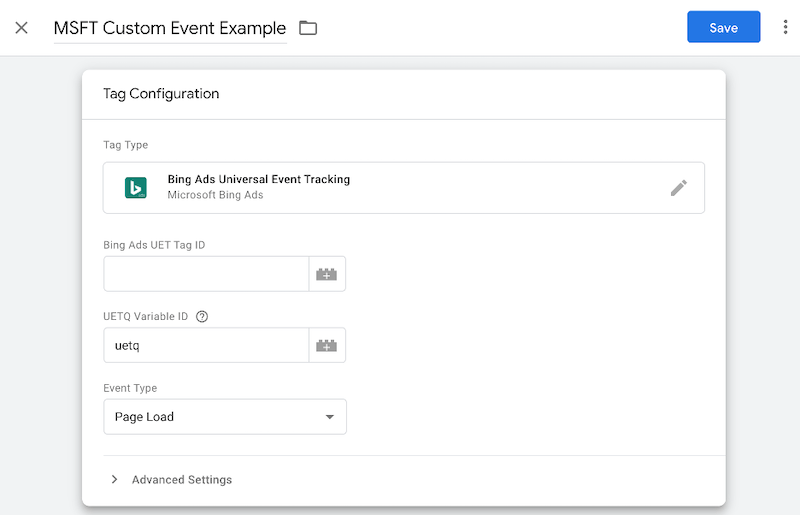
Start by creating a new tag in Google Tag Manager, then choose “Bing Ads” from the integrations list.

Next, obtain your Bing Ads UET Tag ID from the Microsoft Ads interface (found in the UET Tag section of the conversion tracking navigation) and paste it into the designated field.
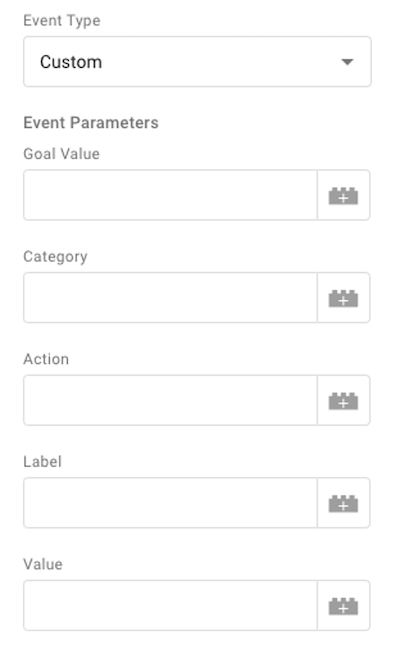
Finally, change the “Event Type” from “Page Load” to “Custom.” This unlocks the fields for adding the Event Category, Action, and Labels seen in Microsoft Ads. We’ll fill these out shortly, but first, let’s create the trigger for the custom event action we aim to track.
3. Creating Custom Triggers in Google Tag Manager
Below the tag setup, you’ll find the “Triggering” section. Clicking it prompts you to choose the trigger type you want to set up in Tag Manager.
Google Tag Manager offers a wide range of triggers. Explore them and select the one that aligns with your tracking needs.
For this demonstration, we’ll track on-site video views, but feel free to choose any trigger relevant to you.
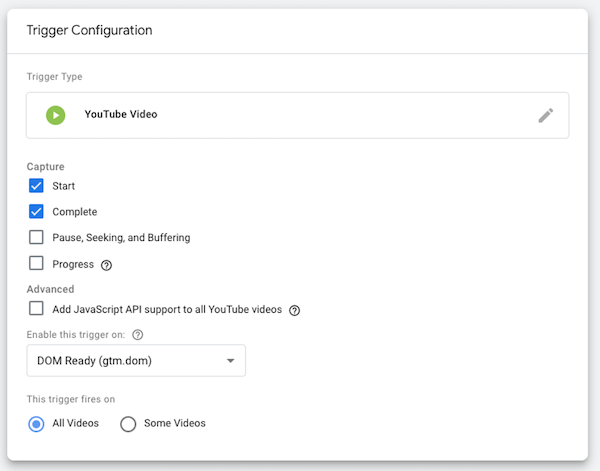
In the image above, “YouTube Video” is chosen as the trigger, and the parameters are configured accordingly.
4. Adding Event Parameters to Your GTM Trigger
With the trigger in place, let’s set the event parameters for our tag.
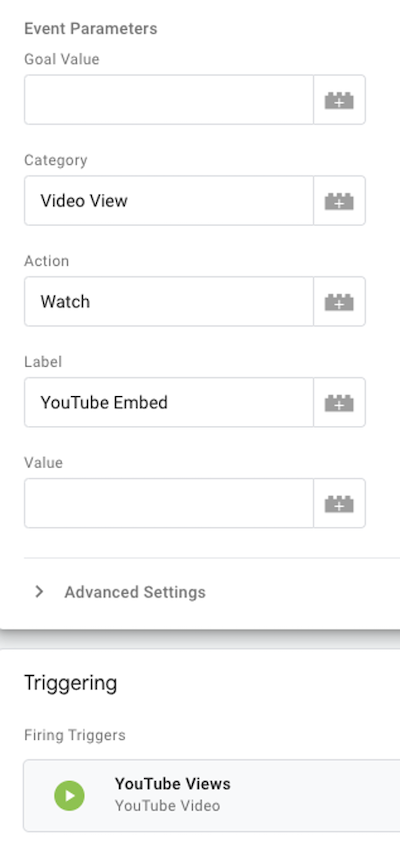
The added parameters are: Category - “Video View,” Action - “Watch,” and Label - “YouTube Embeds.”
Now, save both the tag and trigger in GTM. It’s recommended to jot down your parameters for the next step in Microsoft Ads.
5. Adding Event Parameters to Your Microsoft Ads Custom Event Goal
Here’s how the event parameters appear in Microsoft Ads:
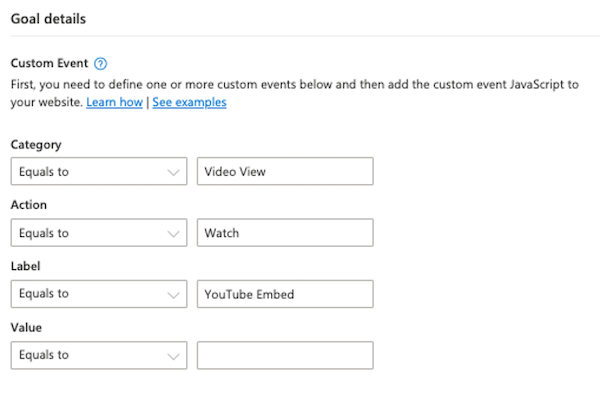
Notice that they match the ones set in Google Tag Manager.
Important note: Each parameter value narrows down the tracked goal.
For instance, if you have multiple triggers in Google Tag Manager firing for the “Video View” Event Category but only a few sharing the same Action and Label, your goal setup might look like this:

This setup tracks all events with “Video View” as the Event Category, irrespective of their Action or Label.
Depending on your trigger setup and desired goal specificity, only include the parameter values you want to track.
Finally, choose your Goal Category, Revenue Value, Count, and Conversion Window. Save your goal, and you’re all set!
Optimizing Microsoft Ads Campaigns with Event Tracking
While URL rules are straightforward, they aren’t always sufficient for tracking specific website actions. Leveraging Google Tag Manager empowers us to track almost any on-site action and optimize Microsoft Ads campaigns accordingly.
Want more insights? Discover how to set up and track events in Google Analytics 4.