This guide provides a comprehensive overview of the WordPress navigation menu system, outlining the fundamental steps involved in utilizing the built-in menu editor to construct a menu for your website.
nexus-security WordPress themes add spacial and advanced menu layout and customization features to this native WordPress tool.
Defining a WordPress Menu
Before populating a WordPress menu with items, you must first define it.
- Begin by logging in to the WordPress Dashboard.
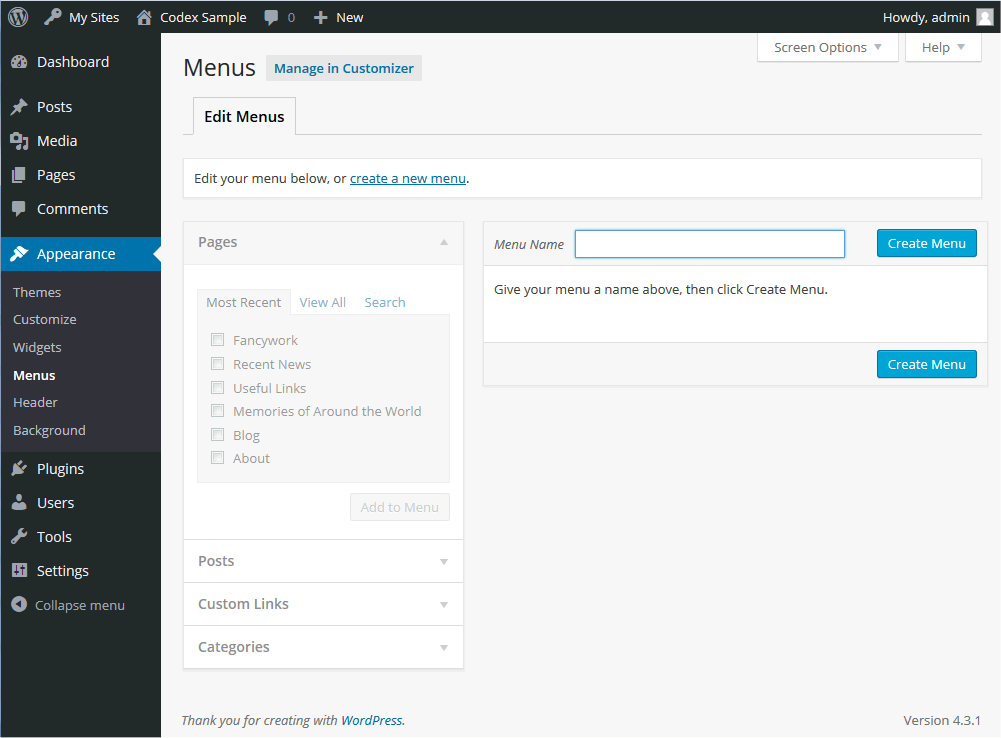
- Next, navigate to the ‘Appearance’ menu located on the left side of the Dashboard and select the ‘Menus’ option. This will open the Menu Editor.
- At the top of the page, choose the “Create a new menu” option.
- Assign a name to your new menu by entering it in the “Menu Name” field.
- To finalize the creation process, click the “Create Menu” button.
Your newly created custom menu is now defined.
Populating Your Menu: A Guide to WordPress Menu Building
You have the flexibility to incorporate various link types into your menu. These options are organized into panes situated to the left of the menu you are currently editing.
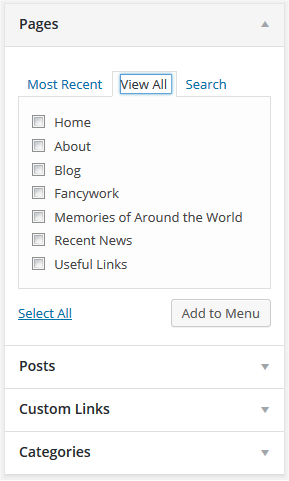
- Start by locating the pane labeled “Pages.”
- Within this pane, click the ‘View All’ link to reveal a comprehensive list of all published pages on your site.
- To select the desired pages for addition, simply click the checkbox adjacent to each page title.
- To incorporate your selection(s) into the menu created in the preceding step, click the “Add to Menu” button located at the bottom of this page section.
- Once you have included all desired menu items, click the “Save Menu” button.
Your customized menu is now saved.
Note The Screen Options allow you to choose which items you can use to add to a menu. Certain things, like Tags, are hidden by default.
Removing a Menu Item
- Begin by identifying the menu item you wish to delete within the menu editor window.
- Next, expand the menu item/box by clicking on the arrow icon located in its top right-hand corner.
- Click on the ‘Remove’ link. The menu item/box will be instantly deleted.
- Lastly, save the changes you’ve made by clicking the “Save Menu” button.
Customizing Menu Items: A WordPress Guide
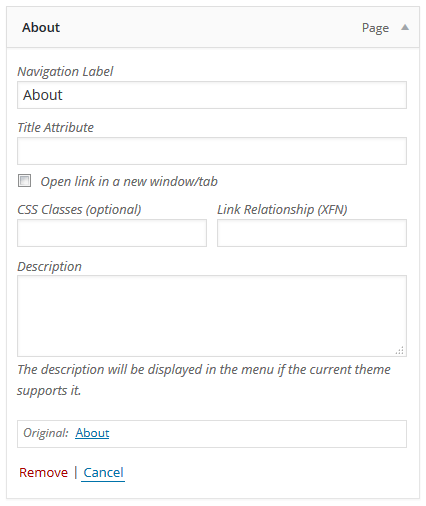
Navigation Label
This field determines the title of the item as it appears on your custom menu, visible to your visitors when they browse your site/blog.
Original
This provides a direct link to the source of the menu item, such as a link to view the corresponding post or page.
The following items are concealed by default but can be revealed using Screen Options to display the necessary fields.
Title Attribute
This field allows you to specify the menu item’s alternative ("Alt") text, which becomes visible when a user hovers their mouse over a menu item. For instance, you can select “Same window or tab” or “New window or tab” from the dropdown menu as the link target.
CSS Classes
This field provides the option to define CSS classes for the menu item’s link relationship (XFN). This enables the automatic generation of XFN attributes, allowing you to convey your relationship with the authors/owners of the site you are linking to.
Refer to Link Relationship for further information. Additionally, a description for this link can be provided, which will appear within the menu if supported by the current theme.
- To customize a menu item, click the arrow located in its top right-hand corner to expand it.
- Input the desired values for the fields you wish to assign to the item.
- Finally, click the “Save Menu” button to preserve your modifications. As a result, all site following the menu building WordPress guide.
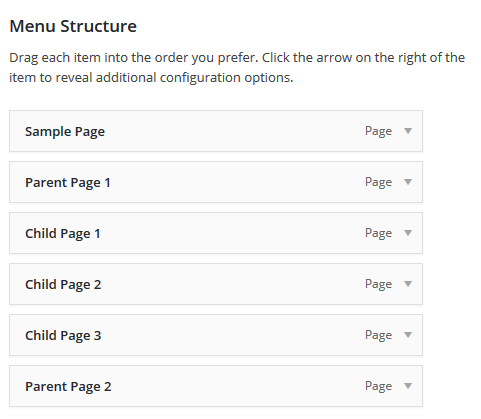
Constructing Multi-Level Menus
When devising your menu’s structure, it’s beneficial to envision each menu item as a heading within a formal report. In this context, main section headings (Level 1 headings) align closest to the left margin, sub-section headings (Level 2 headings) are indented slightly further to the right, and any further subordinate titles (Level 3, 4, etc.) within the section are indented progressively to the right.
The WordPress menu editor empowers you to create multi-level menus effortlessly through its intuitive drag-and-drop interface. You can rearrange the order of menu items by dragging them up or down, and establish sub-levels within your menu by dragging items left or right.
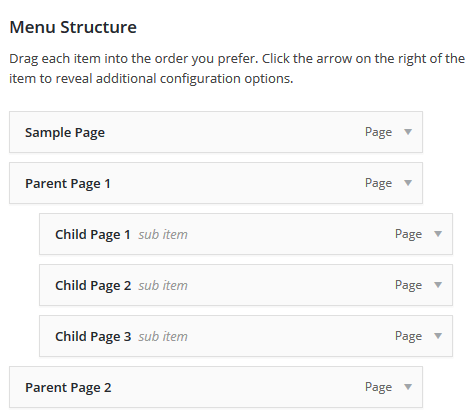
To designate one menu item as subordinate to another, simply position you need to position the ‘child’ item beneath its ‘parent’ and then slightly drag it to the right.
- Begin by hovering your mouse cursor over the ‘child’ menu item.
- While holding down the left mouse button, drag the item to the right.
- Release the mouse button.
- Repeat these steps for each sub-menu item.
- To save your changes, click the “Save Menu” button within the Menu Editor.
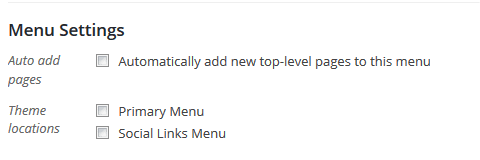
Integrating Your Menu into Your Site
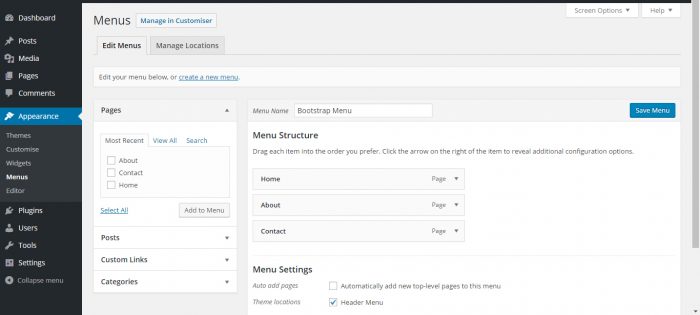
If your active theme provides support for custom menus, you can easily add your newly created menu to one of the designated Theme Locations.
- Scroll down to the bottom of the menu editor window.
- Within the section labeled ‘Theme locations’, click the checkbox corresponding to the location where you want your menu to appear.
- Once you’ve made your selection, click “Save menu”.
Should your current theme lack support for custom menus, you can incorporate your new menu by utilizing the Custom Menu widget, which is accessible through the Appearance Widgets screen.
Congratulations! Your newly crafted custom menu is now live on your site.