Conversational agents, frequently hailed as a technological breakthrough in user-business and user-technology interactions, boast a user-friendly interface compared to conventional applications. This simplicity stems from their chat-based interaction, theoretically enabling them to comprehend and execute user requests.
Numerous sectors are transitioning their customer service to chatbot platforms. This shift is driven by significant cost reductions compared to human representatives and the advantages of continuous availability and robustness. Chatbots provide a certain level of user assistance without incurring substantial extra expenses.
Currently, chatbots are utilized in various applications, from basic tasks like displaying weather and time information to more intricate operations such as rudimentary medical assessments and customer support/communication. You can design a chatbot to assist customers with product-related queries or create a personal assistant chatbot for managing simple tasks and sending meeting or gym reminders.
When it comes to chatbot deployment, there are numerous options available. Social media platforms are a popular choice due to their widespread usage, and instant messaging apps are another viable option, albeit with some considerations.
Telegram stands out as a popular IM platform, enabling cloud-based message storage and offering extensive multi-platform support, including Android, iOS, Windows, and web versions. Building a Telegram chatbot is remarkably straightforward, requiring minimal steps that can be completed swiftly. These chatbots seamlessly integrate into Telegram groups and channels, functioning effectively in both contexts.
This tutorial guides you through creating a Python Telegram bot that retrieves avatar images from Adorable Avatars. Our example utilizes Flask for bot development and deploys it on a complimentary Heroku server.
Prerequisites for this tutorial include Python 3](https://www.python.org/downloads/) and [Python coding skills. Also, a good understanding of how apps work would be a good addition, but not a must, as we will be going through most of the stuff we present in detail. You also need Git installed on your system.
Naturally, a free Telegram account is also necessary. You can create one here. Additionally, a free Heroku account is required, obtainable here.
Getting Started: Telegram Bot Creation
To bring a Telegram chatbot to life, you’ll need to interact with the BotFather, essentially a bot designed for creating other bots.
Initiate the process using the /newbot command, which guides you through these bot creation steps:
Your bot requires two defining attributes: a name and a username. The name is publicly displayed, while the username is used for mentions and sharing.
After deciding on your bot’s name and a username (ending with “bot”), you’ll receive a message containing your access token. It’s crucial to securely store both the access token and username for future use.
Chatbot Logic Implementation
This tutorial utilizes Ubuntu. While most commands should function seamlessly on Windows, any virtual environment setup issues can be addressed by referring to this link. Mac users should encounter no compatibility problems.
Start by establishing a virtual environment to isolate your project’s dependencies from your global Python setup.
1
| $ python -m venv botenv/
|
This creates a botenv/ directory to house all the Python libraries we’ll employ. Activate the virtualenv using:
1
| $ source botenv/bin/activate
|
Our bot relies on the following libraries:
Install them within the virtual environment using pip:
1
2
3
| (telebot) $ pip install flask
(telebot) $ pip install python-telegram-bot
(telebot) $ pip install requests
|
Let’s navigate to our project directory.
1
2
3
4
5
6
7
8
9
| .
├── app.py
├── telebot
│ ├── credentials.py
│ | .
│ | you can build your engine here
│ | .
│ └── __init__.py
└── botenv
|
Within the credentials.py file, define three variables:
1
2
3
| bot_token = "here goes your access token from BotFather"
bot_user_name = "the username you entered"
URL = "the heroku app link that we will create later"
|
Returning to app.py, let’s break down the code step by step:
1
2
3
4
| # import everything
from flask import Flask, request
import telegram
from telebot.credentials import bot_token, bot_user_name,URL
|
1
2
3
4
| global bot
global TOKEN
TOKEN = bot_token
bot = telegram.Bot(token=TOKEN)
|
This creates the bot object, which will handle all bot actions.
1
2
| # start the flask app
app = Flask(__name__)
|
Next, we need to associate functions with specific routes, instructing Flask on how to respond to calls to particular addresses. Comprehensive details about Flask and routing can be found here.
In our example, the route function handles /{token} URLs, which Telegram uses to fetch responses for messages sent to the bot.
1
2
3
4
5
6
7
8
9
10
11
12
13
14
15
16
17
18
19
20
21
22
23
24
25
26
27
28
29
30
31
32
33
34
35
36
| @app.route('/{}'.format(TOKEN), methods=['POST'])
def respond():
# retrieve the message in JSON and then transform it to Telegram object
update = telegram.Update.de_json(request.get_json(force=True), bot)
chat_id = update.message.chat.id
msg_id = update.message.message_id
# Telegram understands UTF-8, so encode text for unicode compatibility
text = update.message.text.encode('utf-8').decode()
# for debugging purposes only
print("got text message :", text)
# the first time you chat with the bot AKA the welcoming message
if text == "/start":
# print the welcoming message
bot_welcome = """
Welcome to coolAvatar bot, the bot is using the service from http://avatars.adorable.io/ to generate cool looking avatars based on the name you enter so please enter a name and the bot will reply with an avatar for your name.
"""
# send the welcoming message
bot.sendMessage(chat_id=chat_id, text=bot_welcome, reply_to_message_id=msg_id)
else:
try:
# clear the message we got from any non alphabets
text = re.sub(r"\W", "_", text)
# create the api link for the avatar based on http://avatars.adorable.io/
url = "https://api.adorable.io/avatars/285/{}.png".format(text.strip())
# reply with a photo to the name the user sent,
# note that you can send photos by url and telegram will fetch it for you
bot.sendPhoto(chat_id=chat_id, photo=url, reply_to_message_id=msg_id)
except Exception:
# if things went wrong
bot.sendMessage(chat_id=chat_id, text="There was a problem in the name you used, please enter different name", reply_to_message_id=msg_id)
return 'ok'
|
While a straightforward approach involves calling this function every second to check for new messages, we’ll opt for a more efficient method. We’ll utilize Webhook, allowing the bot to notify our server upon receiving a message, eliminating the need for a resource-intensive server-side loop.
Let’s create a function we’ll call once during bot creation to activate Telegram’s Webhook. This informs Telegram to call a specific link when a new message arrives. If your app link changes, rerun this function with the updated link.
The route here is arbitrary, as you’ll be the one calling it:
1
2
3
4
5
6
7
8
9
10
| @app.route('/setwebhook', methods=['GET', 'POST'])
def set_webhook():
# we use the bot object to link the bot to our app which live
# in the link provided by URL
s = bot.setWebhook('{URL}{HOOK}'.format(URL=URL, HOOK=TOKEN))
# something to let us know things work
if s:
return "webhook setup ok"
else:
return "webhook setup failed"
|
With everything in place, let’s create a simple homepage to confirm the engine is operational.
1
2
3
4
5
6
7
| @app.route('/')
def index():
return '.'
if __name__ == '__main__':
# note the threaded arg which allow
# your app to have more than one thread
app.run(threaded=True)
|
Let’s review the complete app.py code:
1
2
3
4
5
6
7
8
9
10
11
12
13
14
15
16
17
18
19
20
21
22
23
24
25
26
27
28
29
30
31
32
33
34
35
36
37
38
39
40
41
42
43
44
45
46
47
48
49
50
51
52
53
54
55
56
57
58
59
60
61
62
63
64
65
| import re
from flask import Flask, request
import telegram
from telebot.credentials import bot_token, bot_user_name,URL
global bot
global TOKEN
TOKEN = bot_token
bot = telegram.Bot(token=TOKEN)
app = Flask(__name__)
@app.route('/{}'.format(TOKEN), methods=['POST'])
def respond():
# retrieve the message in JSON and then transform it to Telegram object
update = telegram.Update.de_json(request.get_json(force=True), bot)
chat_id = update.message.chat.id
msg_id = update.message.message_id
# Telegram understands UTF-8, so encode text for unicode compatibility
text = update.message.text.encode('utf-8').decode()
# for debugging purposes only
print("got text message :", text)
# the first time you chat with the bot AKA the welcoming message
if text == "/start":
# print the welcoming message
bot_welcome = """
Welcome to coolAvatar bot, the bot is using the service from http://avatars.adorable.io/ to generate cool looking avatars based on the name you enter so please enter a name and the bot will reply with an avatar for your name.
"""
# send the welcoming message
bot.sendMessage(chat_id=chat_id, text=bot_welcome, reply_to_message_id=msg_id)
else:
try:
# clear the message we got from any non alphabets
text = re.sub(r"\W", "_", text)
# create the api link for the avatar based on http://avatars.adorable.io/
url = "https://api.adorable.io/avatars/285/{}.png".format(text.strip())
# reply with a photo to the name the user sent,
# note that you can send photos by url and telegram will fetch it for you
bot.sendPhoto(chat_id=chat_id, photo=url, reply_to_message_id=msg_id)
except Exception:
# if things went wrong
bot.sendMessage(chat_id=chat_id, text="There was a problem in the name you used, please enter different name", reply_to_message_id=msg_id)
return 'ok'
@app.route('/set_webhook', methods=['GET', 'POST'])
def set_webhook():
s = bot.setWebhook('{URL}{HOOK}'.format(URL=URL, HOOK=TOKEN))
if s:
return "webhook setup ok"
else:
return "webhook setup failed"
@app.route('/')
def index():
return '.'
if __name__ == '__main__':
app.run(threaded=True)
|
This concludes the coding portion of our tutorial. Next, we’ll deploy our app on Heroku.
Heroku Deployment
Before proceeding, a couple of things need to be addressed.
Since Heroku needs to be informed about your project’s library dependencies, we utilize the requirements.txt file for this purpose (beware of typos!). Generate this file using pip:
1
| pip freeze > requirements.txt
|
Your requirements file is now prepped.
Create a Procfile, instructing Heroku on where our app starts, and add the following:
Optional: Include a .gitignore file in your project to prevent unused files from being uploaded to the repository.
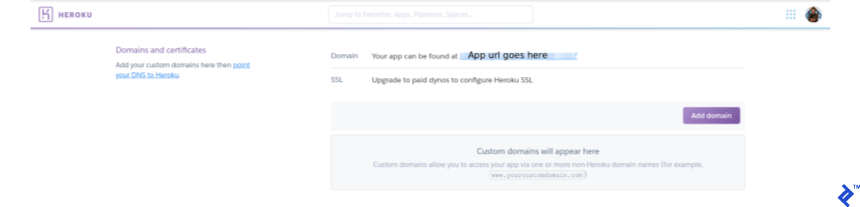
From your Heroku dashboard, create a new app. You’ll be directed to the Deploy page. In a new window, navigate to the Settings tab and copy the app’s domain (e.g., https://appname.herokuapp.com/). Paste this into the URL variable within credentials.py.
Return to the Deploy tab and follow these steps:
Note: For Windows and macOS users, detailed steps are available here.
Log in to Heroku:
If you encounter a “waiting for login” hang, try logging in with:
Initialize a Git repository within our directory:
1
2
| $ git init
$ heroku git:remote -a {heroku-project-name}
|
Deploy the app:
1
2
3
| $ git add .
$ git commit -m "first commit"
$ git push heroku master
|
Your terminal should display the build progress. Successful completion is indicated by a message similar to:
1
2
3
4
5
| remote: -----> Launching...
remote: Released v6
remote: https://project-name.herokuapp.com/ deployed to Heroku
remote:
remote: Verifying deploy... done.
|
Navigate to the app page (the copied domain link) and append /setwebhook to it (e.g., https://appname.herokuapp.com/setwebhook). A “webhook setup ok” message confirms your readiness!
Time to Chat!
Final Touches, Tips, and Enhancements
Congratulations on your operational, always-on Telegram bot! Now, let’s enhance its realism by incorporating a “typing” status and sending a photo status.
Consider this code snippet from the respond() function:
 1
 2
 3
 4
 5
 6
 7
 8
 9
10
11
12
13
14
15
16
17
18
19
20
21
22
23
24
25
| if text == "/start":
# print the welcoming message
bot_welcome = """
Welcome to coolAvatar bot, the bot is using the service from http://avatars.adorable.io/ to generate cool looking avatars based on the name you enter so please enter a name and the bot will reply with an avatar for your name.
"""
# send the welcoming message
bot.sendChatAction(chat_id=chat_id, action="typing")
sleep(1.5)
bot.sendMessage(chat_id=chat_id, text=bot_welcome, reply_to_message_id=msg_id)
else:
try:
# clear the message we got from any non alphabets
text = re.sub(r"\W", "_", text)
# create the api link for the avatar based on http://avatars.adorable.io/
url = "https://api.adorable.io/avatars/285/{}.png".format(text.strip())
# reply with a photo to the name the user sent,
# note that you can send photos by url and telegram will fetch it for you
bot.sendChatAction(chat_id=chat_id, action="upload_photo")
sleep(2)
bot.sendPhoto(chat_id=chat_id, photo=url, reply_to_message_id=msg_id)
except Exception:
# if things went wrong
bot.sendMessage(chat_id=chat_id, text="There was a problem in the name you used, please enter different name", reply_to_message_id=msg_id)
|
This snippet introduces a typing action before sending textual bot information and includes a photo upload action for a more realistic feel. Additional actions can be found here.
For a more welcoming bot persona, customize the bot image and description in the BotFather channel.
The python-telegram-bot GitHub page offers a plethora of simple telegram bot examples.
Expand upon our bot’s capabilities by integrating your logic within the respond() function. For instance, separate your logic into a module and call it within respond() like so:
1
2
3
4
5
6
7
8
9
10
| .
├── app.py
├── telebot
│ ├── credentials.py
│ ├──ai.py
│ | .
│ | you can build your engine here
│ | .
│ └── __init__.py
└── botenv
|
Inside ai.py:
1
2
3
| def generate_smart_reply(text):
# here we can do all our work
return "this is a smart reply from the ai!"
|
Import it into app.py:
1
2
3
4
5
6
| import re
from time import sleep
from flask import Flask, request
import telegram
From telebot.ai import generate_smart_reply
from telebot.credentials import bot_token, bot_user_name,URL
|
Finally, call it within the respond() code:
1
2
3
4
5
6
7
8
9
10
11
12
13
14
| def respond():
# retrieve the message in JSON and then transform it to Telegram object
update = telegram.Update.de_json(request.get_json(force=True), bot)
chat_id = update.message.chat.id
msg_id = update.message.message_id
# Telegram understands UTF-8, so encode text for unicode compatibility
text = update.message.text.encode('utf-8').decode()
# for debugging purposes only
print("got text message :", text)
# here call your smart reply message
reply = generate_smart_reply(text)
bot.sendMessage(chat_id=chat_id, text=reply, reply_to_message_id=msg_id)
|
Unleash your creativity and empower your bot to achieve remarkable things!
We trust you’ve enjoyed learning about Python Telegram bot creation.
Further Exploration