Building Applications with Python and Nameko
The microservices architectural style is steadily gaining traction due to its adaptability and resilience. Tools like Kubernetes have made it easier than ever to build applications using this approach.
According to a classic article by Martin Fowler, the core idea behind microservices is:
In essence, the microservice architectural style structures a single application as a collection of small services. Each service operates independently within its own process and communicates with others using lightweight mechanisms, typically an HTTP resource API. These services are designed around specific business capabilities and can be deployed independently through fully automated processes.
In simpler terms, a microservices application consists of multiple self-contained, dynamic services that interact through a communication protocol. While HTTP (and REST) are common choices, other options like RPC (Remote Procedure Call) over AMQP (Advanced Message Queuing Protocol) can also be utilized.
Microservices can be seen as a specialization of SOA (service-oriented architecture). However, SOA often relies on ESBs (enterprise service buses) for inter-service communication, which tend to be complex and feature-rich. Microservices, on the other hand, generally favor a “smart endpoints and dumb pipes” philosophy. This means that services encapsulate the majority of the business logic (high cohesion), while the connections between them remain as straightforward as possible (high decoupling). As a result, services don’t need to be aware of the other services they communicate with, achieving a clear separation of concerns at the architectural level.
Another advantage of microservices is the freedom to choose different technologies for different services. This allows teams within an organization to work independently on various services, using their preferred tech stacks and even management methodologies. This focus on individual business capabilities contributes to a more agile organizational structure.
Exploring Python Microservices
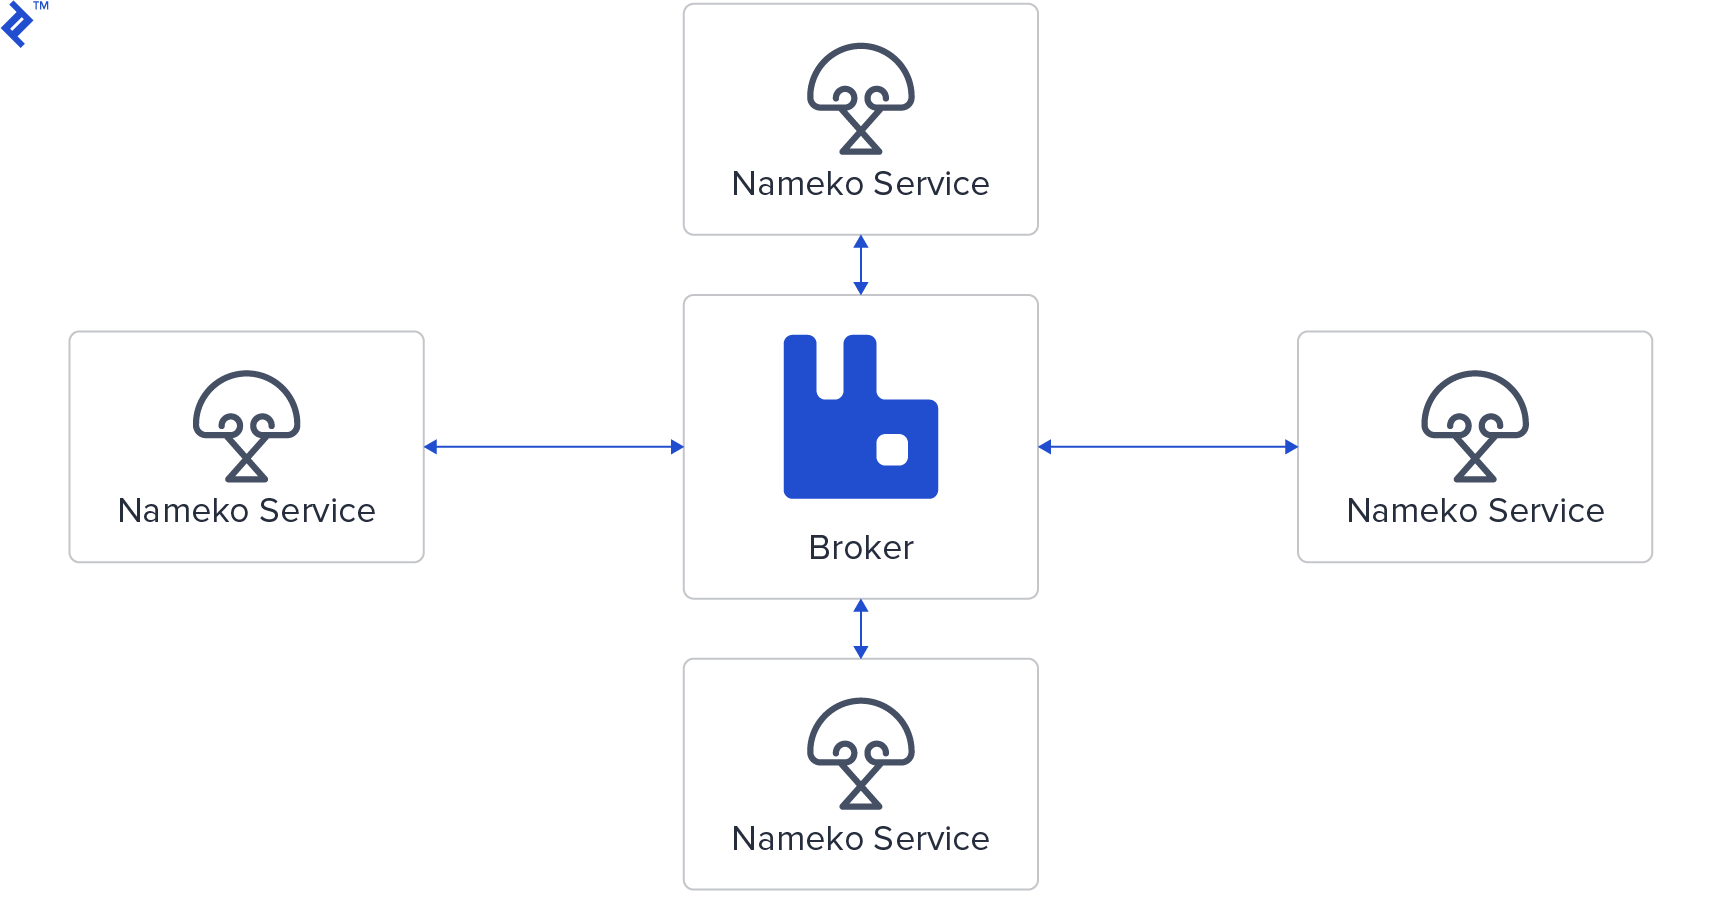
With these principles in mind, we’ll develop a proof-of-concept microservices application using Python and Nameko, a dedicated Python microservices framework. This framework comes with built-in support for RPC over AMQP, simplifying inter-service communication. It also offers a basic interface for HTTP requests, which we’ll employ in this tutorial. However, for more sophisticated HTTP-based microservices, alternative frameworks like Flask are recommended. For integrating Flask with Nameko’s RPC mechanism, flask_nameko provides a seamless solution.
Setting Up the Environment
Our journey begins with the most basic example from the Nameko documentation, which we’ll adapt for our purposes. You’ll need Docker installed](https://docs.docker.com/install/) and Python 3 set up on your system. Create a Python [virtual environment and install Nameko using $ pip install nameko.
Nameko relies on the RabbitMQ message broker for service communication. Thanks to Docker, we can bypass local installation and use a pre-configured image.
Let’s launch a RabbitMQ container with $ docker run -p 5672:5672 --hostname nameko-rabbitmq rabbitmq:3 (sudo might be needed). This command downloads the latest RabbitMQ version 3 image and makes it accessible on port 5672.
Microservices Hello World
Now, create a file named hello.py with the following code:
| |
Nameko services are defined as classes. These classes expose entry points, implemented as extensions. Nameko’s extensions enable the creation of entry points representing RPC methods, event listeners, HTTP endpoints, or timers. Additional community extensions are available for interacting with databases like PostgreSQL, Redis, and more. Moreover, developers have the flexibility to write your own extensions.
To execute our example, ensure RabbitMQ is running on the default port and run $ nameko run hello. Nameko will automatically discover and connect to the RabbitMQ instance. In a separate terminal, launch the Nameko interactive shell using $ nameko shell. This shell connects to the same RabbitMQ instance, and with Nameko’s automatic service discovery through RPC over AMQP, it can directly invoke methods on running services.

Within the Nameko shell, you’ll notice the n object, which enables event dispatching and RPC calls. To make an RPC call to our service, execute:
| |
Handling Concurrent Calls
In Nameko, service classes are instantiated upon method invocation and destroyed afterward, ensuring statelessness. This means you shouldn’t store any state within the object or class between calls. This inherent statelessness allows Nameko to achieve concurrency using eventlet greenthreads. Service instances, referred to as “workers,” can run concurrently, with a configurable maximum limit.
Let’s modify our code to introduce a sleep within the procedure call, simulating a time-consuming operation:
| |
Despite using the blocking sleep function from the time module, Nameko automatically patches it to yield when running services with nameko run.
We expect a response time of approximately 5 seconds for a procedure call. Now, let’s observe the behavior of the following code snippet in the Nameko shell:
| |
Nameko provides the non-blocking call_async method for RPC entry points, returning a proxy object representing the future result. Calling result on this proxy blocks until the actual response is available.
As anticipated, this snippet executes in around 5 seconds. Each worker blocks during the sleep call, but this doesn’t prevent other workers from starting. Replacing this sleep with a real blocking I/O operation, like a database query, demonstrates how Nameko achieves fast and efficient concurrency.
By default, Nameko creates up to 10 workers. Exceeding this limit, for example by changing range(5) to range(20) in the previous snippet, will cause some calls to wait:
| |
While increasing the worker limit via a config file might seem like a solution, it can be detrimental if the bottleneck lies in resource-intensive operations, like database queries. In such scenarios, scaling the service itself is a more effective approach.
Scaling the Service
Up to this point, we’ve been running everything on a single server. In production, scaling involves distributing the service across multiple nodes, potentially alongside a RabbitMQ cluster for a more robust message broker.
We can simulate scaling by launching another instance of our service in a separate terminal using $ nameko run hello. This creates another service instance, potentially adding ten more workers. Running the range(20) snippet again should now take approximately 5 seconds, as Nameko distributes calls among available instances using a round-robin approach.
Nameko is built to handle such scenarios gracefully. To test its robustness, interrupt one of the running service instances (using Ctrl+C twice) while the snippet is executing. Nameko will seamlessly reallocate calls to the remaining instances.
In real-world deployments, tools like Docker for containerization and orchestration systems like Kubernetes are used to manage distributed containerized services and their dependencies. Kubernetes, for instance, facilitates the creation of robust, distributed systems capable of handling traffic spikes and enables zero-downtime deployments.
When designing services, backward compatibility is crucial, as multiple versions of the same service might coexist during deployment, especially when using Kubernetes. To demonstrate this, let’s modify our service:
| |
Run this modified version in a separate terminal, and you’ll have two versions running concurrently. Executing the test snippet now will show both versions responding:
| |
Building with Multiple Instances
With a good grasp of Nameko and its scaling capabilities, let’s leverage docker-compose to manage our services. While this approach is still limited to a single server, it provides a more realistic setup. For a truly distributed environment, orchestration tools like Kubernetes are recommended. If you haven’t already, go ahead and install docker-compose.
Our simplified setup will use a single RabbitMQ instance accessible to all services. The complete source code for this example is available in this GitHub repository.
We’ll create a basic travel application with airport and trip registration functionality. Each airport is represented by its name, while trips store the IDs of origin and destination airports. Here’s a schematic representation of our system’s architecture:
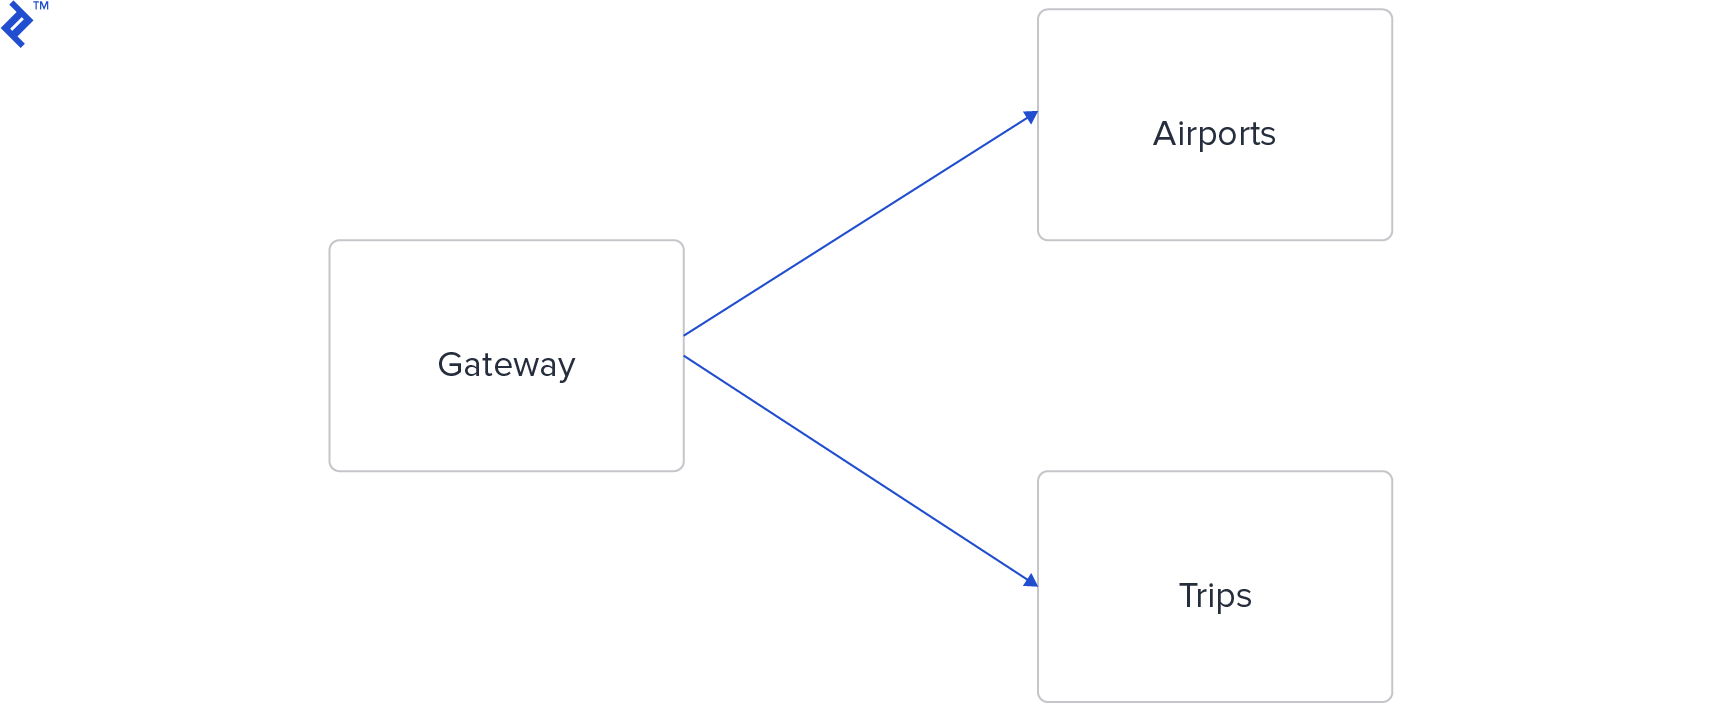
Ideally, each microservice should have its own database. However, for this demonstration, both the Airports and Trips microservices will share a single Redis database. The Gateway microservice acts as an intermediary, handling HTTP requests through a REST-like API and communicating with the Airports and Trips services via RPC.
Let’s start with the Gateway microservice:
| |
The Gateway’s structure is familiar, resembling frameworks like Flask. It defines two endpoints, each supporting GET and POST methods.
Moving on to the Airports service:
| |
This service exposes two RPC methods: get retrieves an airport by ID from the Redis database, while create generates a random ID, stores the airport information, and returns the generated ID.
Note the use of the nameko_redis extension. Refer to the community-contributed extensions list for more details. Extensions in Nameko follow a pattern utilizing dependency injection. Nameko manages the initialization of these extension objects for each worker.
The Trips microservice closely resembles the Airports service:
| |
The Dockerfile for each service is straightforward. Besides nameko, the Airports and Trips services also require nameko-redis, which is specified in their respective requirements.txt files. Here’s the Dockerfile for the Airports service:
| |
The only difference for other services is the source file (e.g., gateway.py or trips.py).
Each service also includes a run.sh script that waits for the necessary dependencies (RabbitMQ and Redis) to become available before starting. Here’s an example for the Airports service:
| |
Replace airports with gateway or trips accordingly for other services.
Now, let’s bring our services online:
$ docker-compose up
We can test our system by creating an airport:
| |
The last line displays the generated airport ID. Verify its creation:
| |
With two airports, we can create a trip:
| |
As before, the last line shows the generated trip ID. Let’s confirm its successful insertion:
| |
In Conclusion
We’ve explored Nameko by creating a local RabbitMQ instance and performing various tests. We then applied our knowledge to build a simple yet realistic microservices-based system.
Although simple, our system closely mirrors a production-ready deployment. In a real-world scenario, you might opt for dedicated HTTP frameworks like Falcon or Flask. Both are excellent choices for building additional HTTP-based microservices, potentially breaking down the Gateway service further. While Flask benefits from an existing Nameko plugin, nameko-proxy can be directly integrated into any framework.
Testing Nameko services is straightforward. While not covered in detail here, be sure to check out Nameko’s Nameko’s testing documentation for more information.
With the inherent complexity of microservices architectures, robust logging is essential. Refer to Python Logging: An In-Depth Tutorial by Son Nguyen Kim, a fellow Toptaler and Python Developer, for comprehensive guidance on this topic.