When creating a WordPress post, you’ll find basic formatting options like bold, italics, and strikethrough in the editor. But what about changing the color and size of your text?
While there’s no obvious solution within the editor itself, I’ll guide you through some workarounds using simple HTML. Don’t worry if you’re a beginner; you can copy and paste the examples provided.
This method works best for modifying a few words within your post. If you’d like to change the overall text appearance on your blog, it’s more efficient to install a new theme with your preferred font, size, and color.
Customizing WordPress Text Color
Finding a straightforward way to change text color might seem impossible initially, as this feature is somewhat hidden by design. Here’s how to get to it:
- Access your WordPress dashboard, navigate to the “Posts” section, and select the post you wish to edit.
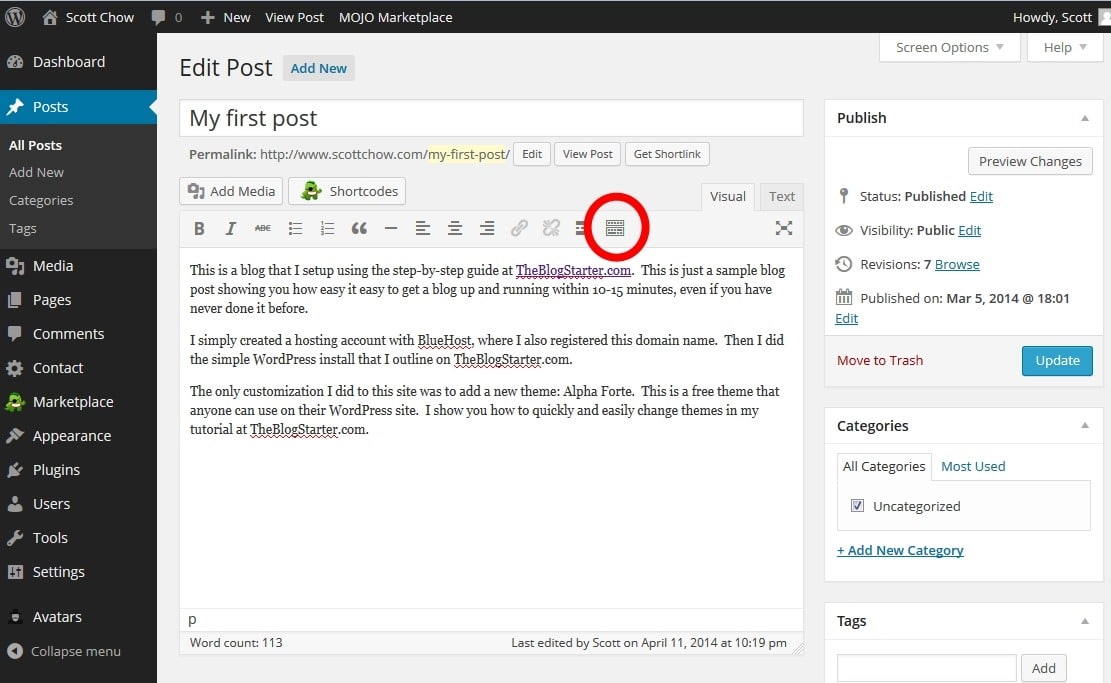
- On the post editor screen, locate and click the “Toolbar Toggle” button positioned above your post (highlighted with a red circle below).
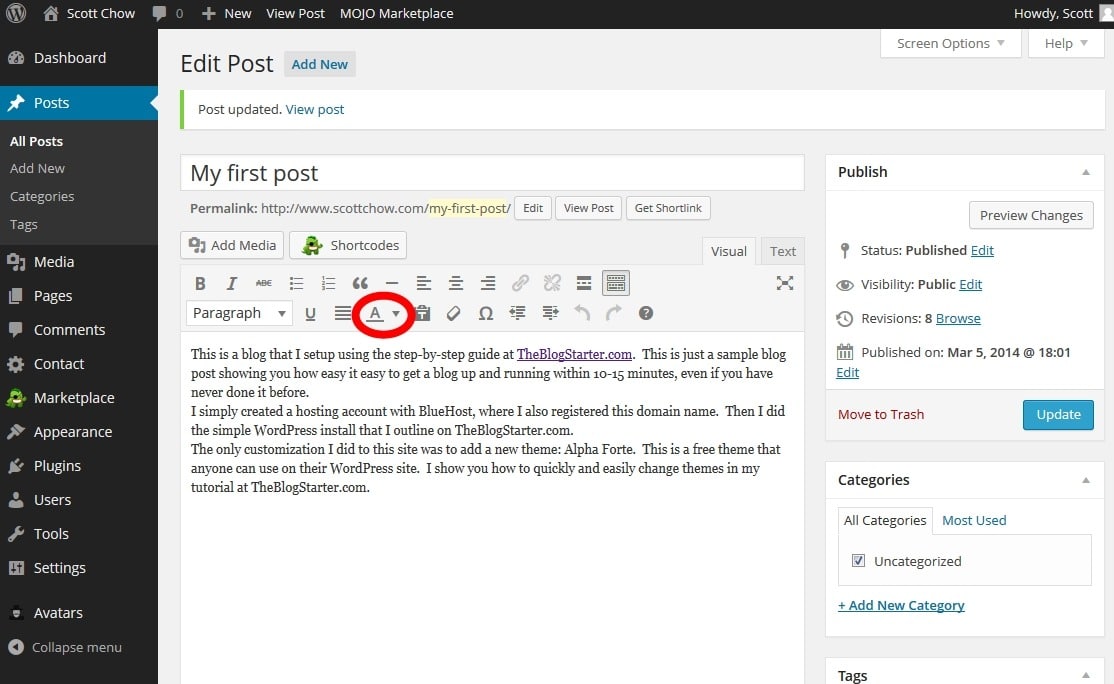
- This action reveals additional options in the toolbar above your post, including a “Text color” drop-down menu.
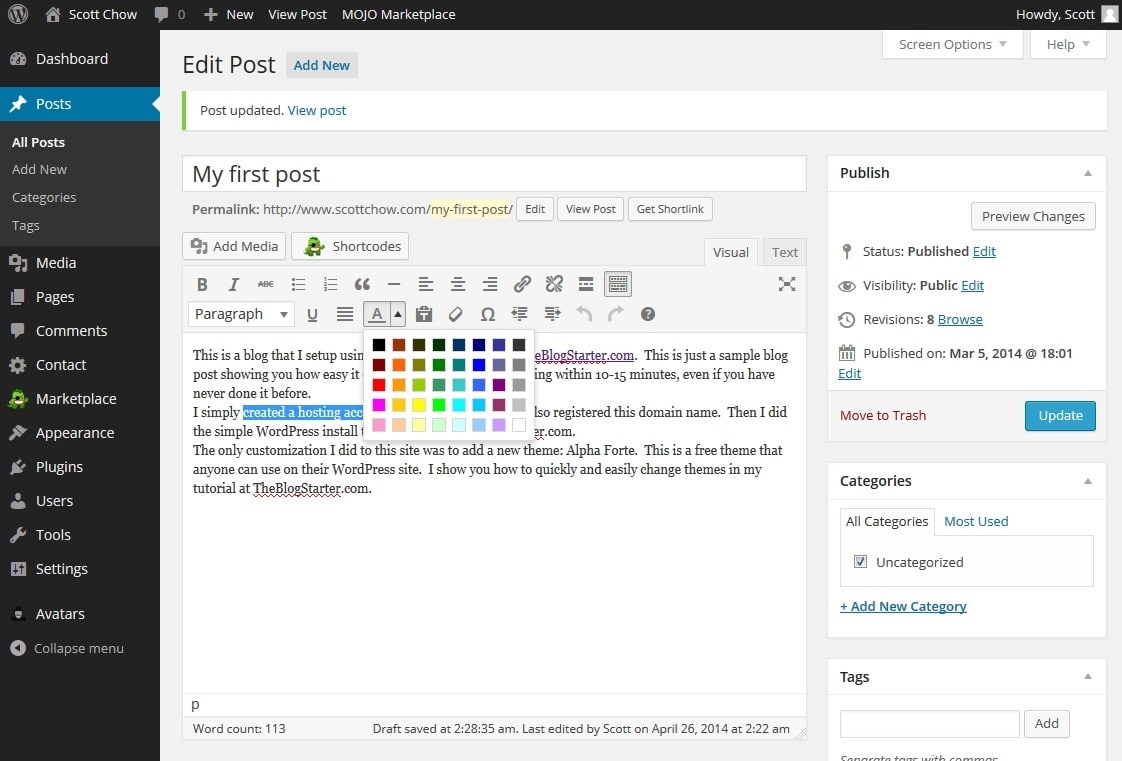
- Highlight the text you want to modify, then click the “Text color” drop-down menu and choose your desired color.
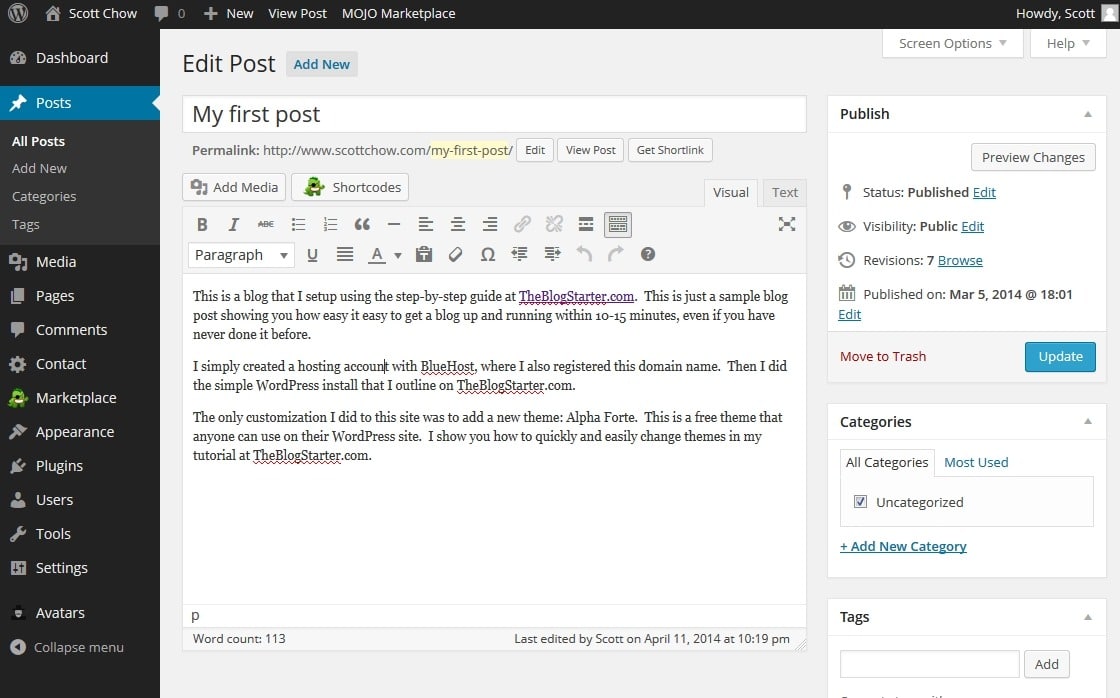
- After selecting a color, click the blue “Update” button on the right-hand located on the side to save your changes.
Changing Text Size
Adjusting text size involves a similar process to changing color, though slightly more complex. Follow these steps:
In your WordPress dashboard, go to the “Posts” section and click on the post you want to edit.
On the post editor screen, click the “Toolbar Toggle” button (circled in red below) to access the WordPress color and size options.
This will bring up some extra options within the toolbar above your post. Among these options is a drop-down menu labeled “Paragraph”.
- Select the text you want to resize, then click the “Paragraph” drop-down menu and choose “Heading 3” for this example.
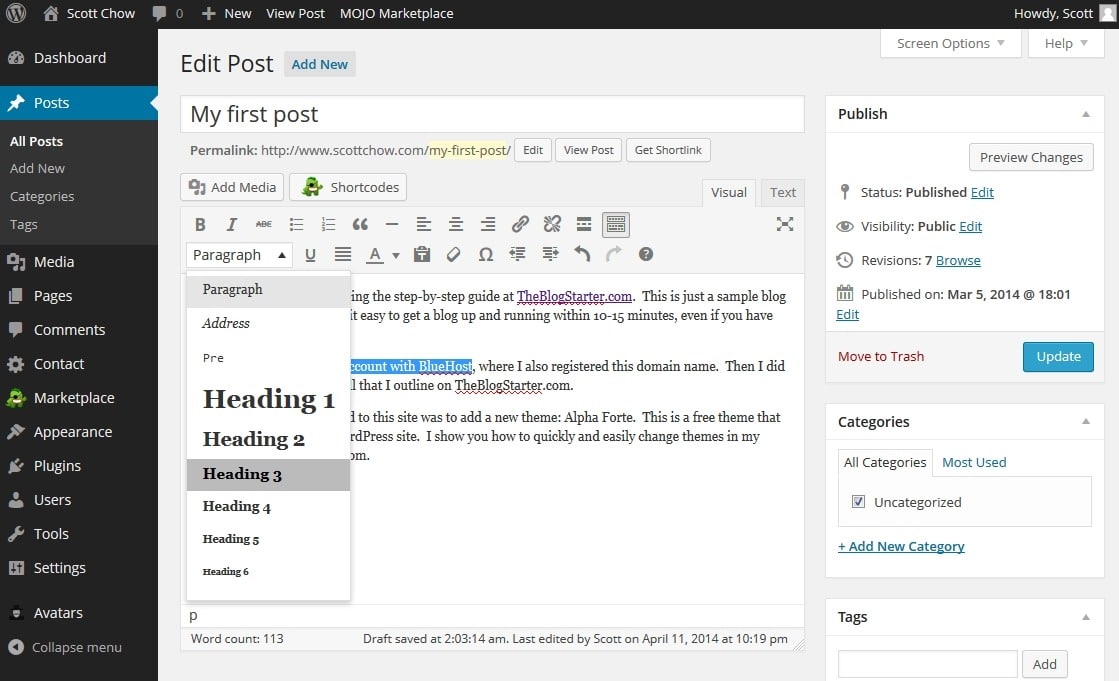
- You’ll notice that selecting a text size affects not only the highlighted text but the entire paragraph.
Further Customizing WordPress Text Size
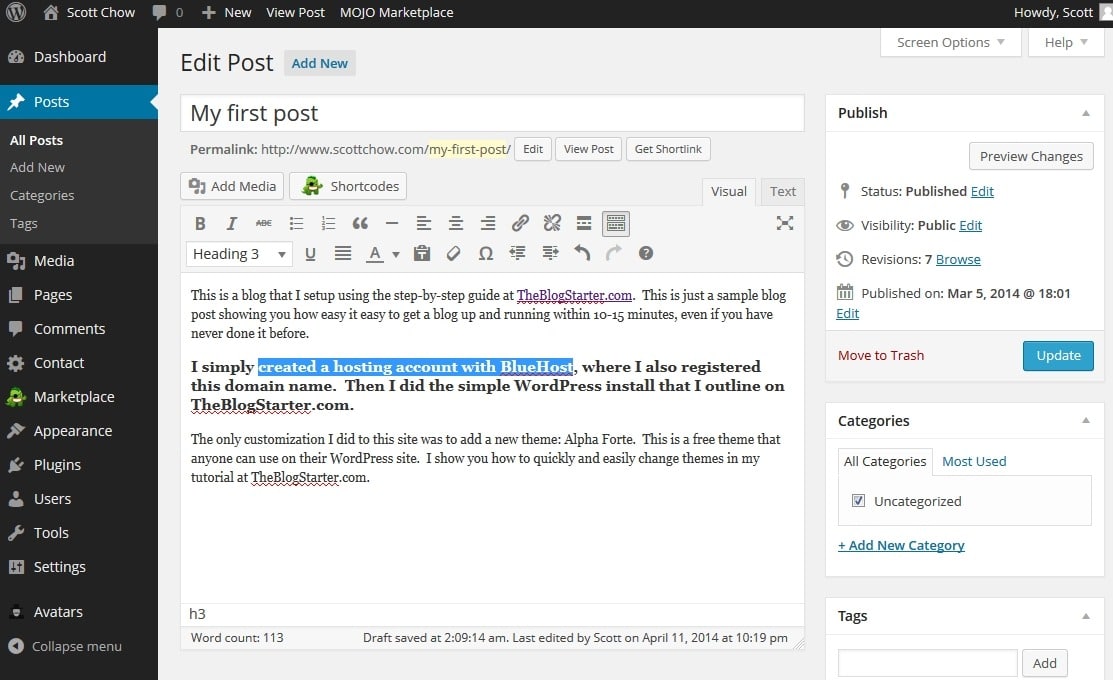
- To address this, we’ll work directly within the HTML code of the post. Click the “Text” tab (circled below).
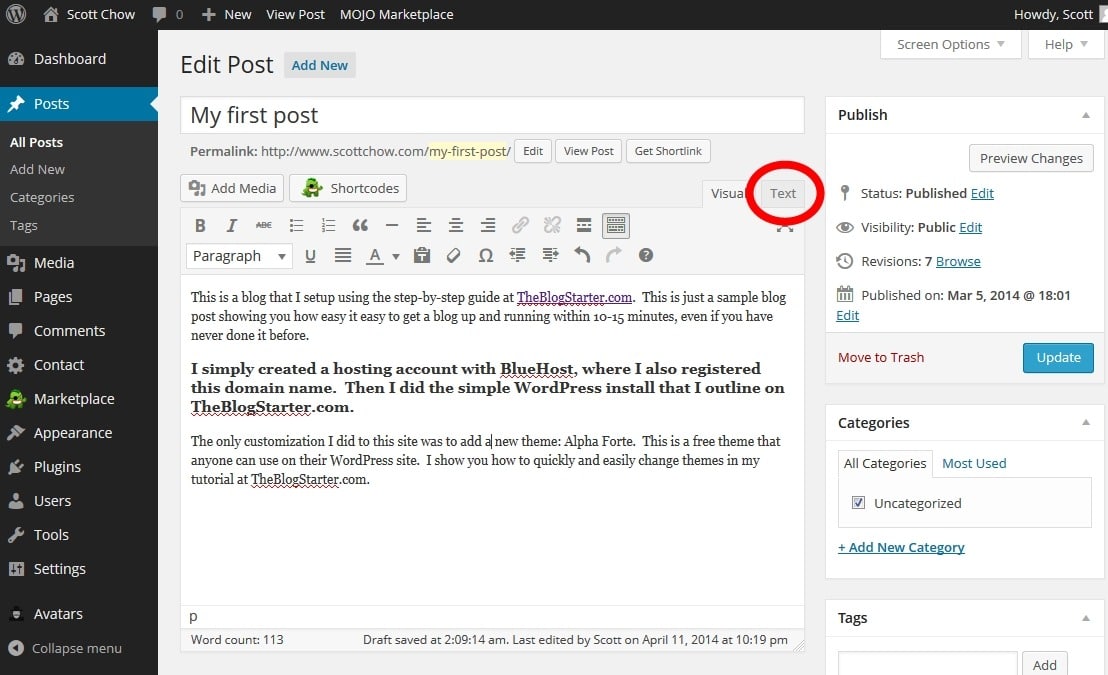
- The “Text” view displays both your post’s content and the underlying code controlling elements like text size. In the paragraph where we modified the text size, you’ll see the following before the paragraph:
And this after the paragraph:
These codes indicate the start and end points of Heading 3 (the size chosen in step #4). To customize this and resize only the desired text, we need to reposition these codes. Refer to the screenshots below for guidance:
Before:
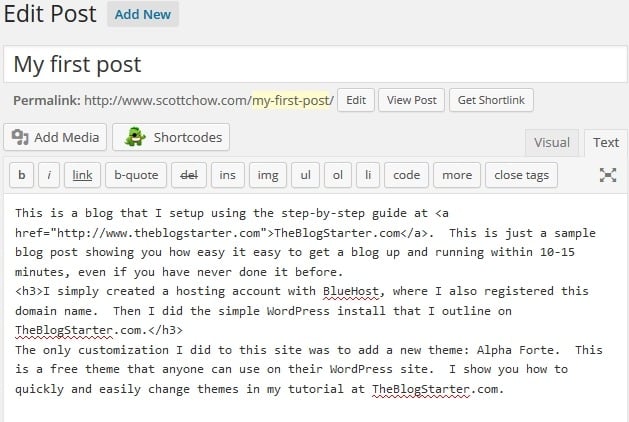
After:
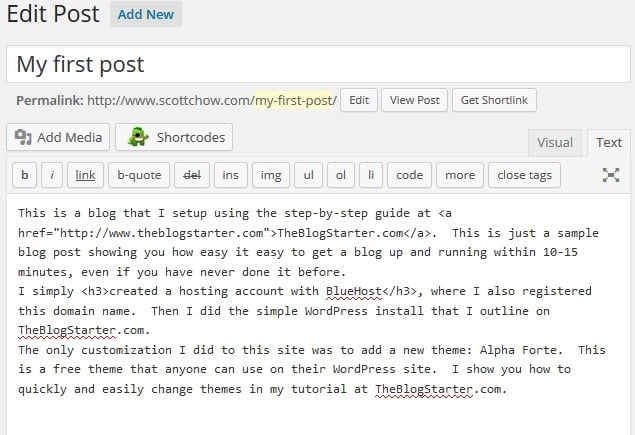
- Simply copy and paste the codes to enclose the text you want to resize. Once done, save your changes by clicking the blue “Update” button on the right-hand side.
Important note: This tutorial is designed for WordPress.org blogs. If you’re using WordPress.com, the process might be slightly different. To unlock the full potential of WordPress, consider migrating your blog from WordPress.com to WordPress.org.
Besides changing text size and color, the “Toggle Toolbar” button unveils other useful features such as underlining and indentations. Remember this button whenever you need to utilize these formatting options.
Our WordPress themes offer even more text editing possibilities, including a wider array of WordPress text color options, allowing for greater design flexibility.