Horizontally scalable web applications often depend on load balancing nodes to evenly distribute incoming traffic among available web servers. This approach offers a significant advantage: increasing the application’s capacity simply by adding more nodes and letting the load balancers adjust.
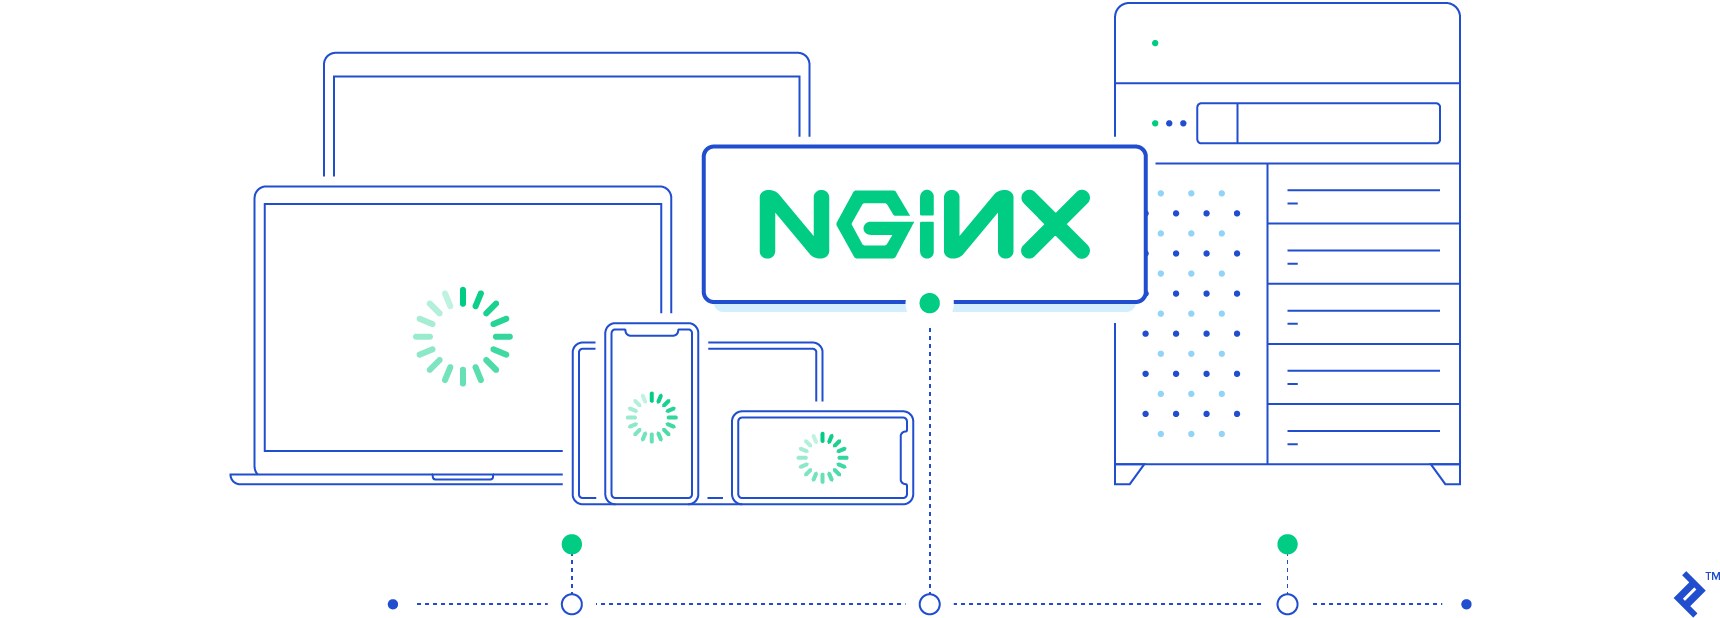
NGINX, a renowned web server, excels in high-performance load balancing alongside its other capabilities. While some advanced features require a subscription, the open-source version remains powerful, offering essential load balancing features out-of-the-box.
This tutorial delves into a tool called experimental tool. This tool simplifies NGINX configuration for load balancing, hiding the complexities of configuration files behind a user-friendly web interface. Our aim is to demonstrate the ease of building such a tool, drawing inspiration from Linode’s NodeBalancers.
NGINX, Servers, and Upstreams
Reverse-proxying client requests to web server applications is a common use case for NGINX. While languages like Node.js and Go can function as web servers independently, a reverse-proxy offers several benefits. A basic NGINX configuration for this scenario might look like:
| |
Here, NGINX listens on port 80 for requests directed at example.com and forwards them to a web application running at 192.168.0.51:5000. We could also use the local loopback address if the application ran locally. Note that this snippet omits some common reverse-proxy configurations for brevity.
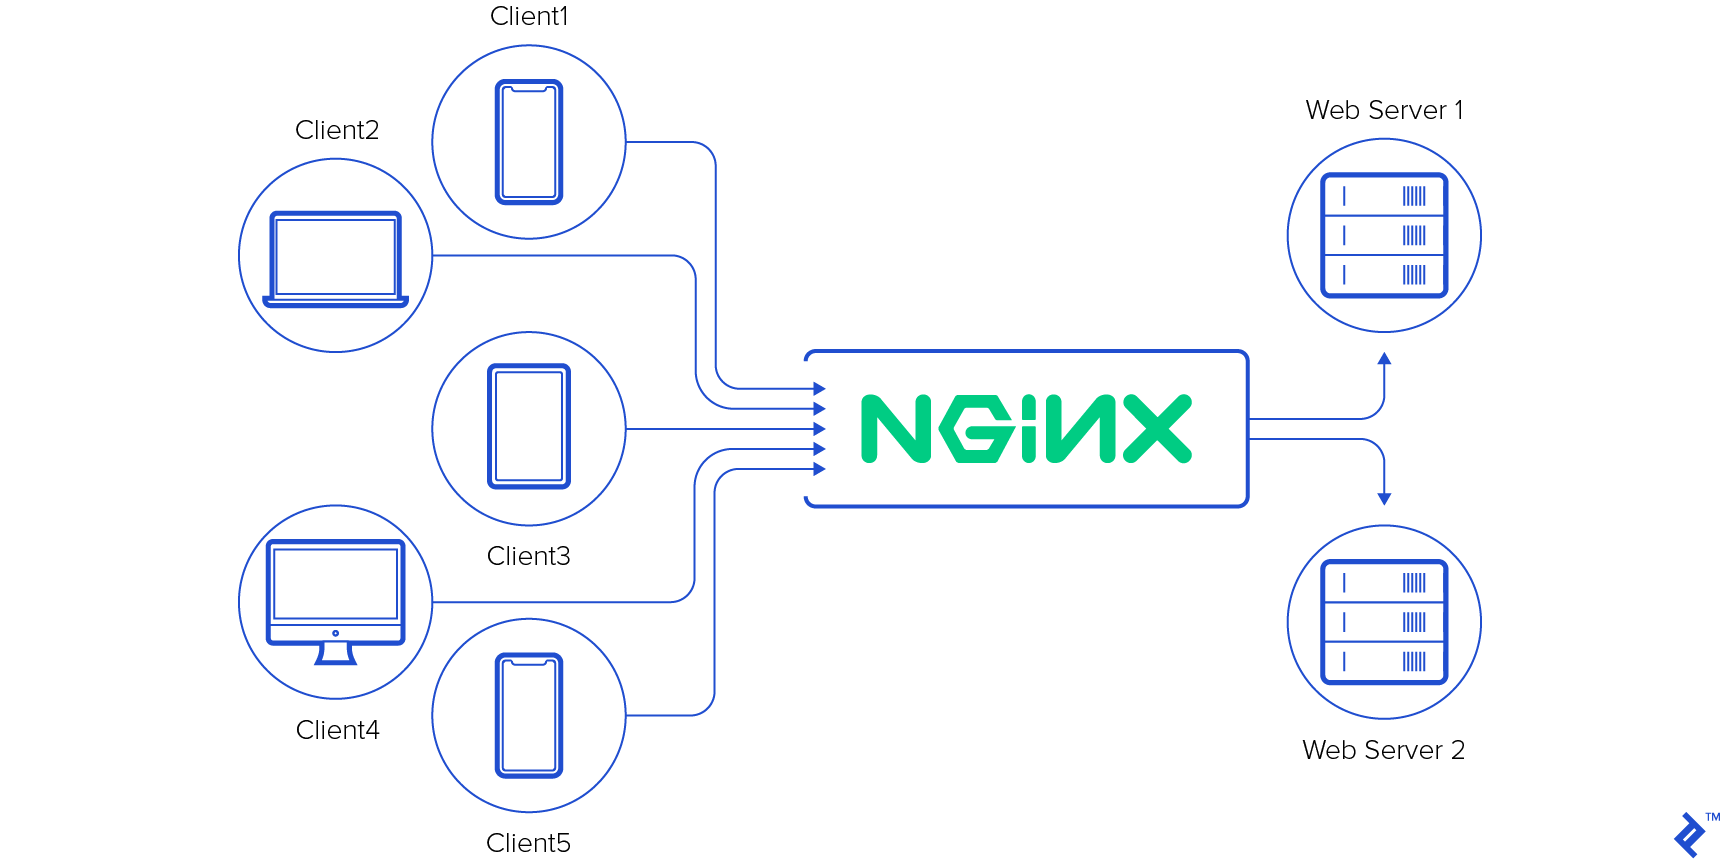
What if we want to distribute requests between two instances of the same application? This is where NGINX’s “upstream” directive comes in. It allows defining multiple backend nodes for request balancing. For example:
| |
We’ve defined an “upstream” block named “nodes” with two servers, each identified by IP address and port. This basic setup turns NGINX into a load balancer, distributing requests in a round-robin fashion by default.
However, NGINX’s load balancing capabilities go far beyond this. It allows setting server weights, marking servers as temporarily unavailable, choosing different balancing algorithms (like IP hash-based), and more. These features and directives are all extensively documented nicely documented at nginx.org. Additionally, NGINX permits on-the-fly configuration reloads with minimal disruption.
NGINX’s adaptability and simple configuration files make it a versatile tool. Countless tutorials already exist are readily available to guide you through setting up NGINX as a load balancer.
Loadcat: NGINX Configuration Tool
There’s a certain elegance in programs that, instead of performing tasks themselves, configure other tools to do so. They primarily take user input and generate files, leveraging the true power of the underlying tools. While setting up a load balancer, the idea struck: why not simplify NGINX load balancing configuration?
That’s how Loadcat was born!
Built with Go](https://golang.org), Loadcat is in its early stages, focusing on NGINX load balancing and SSL termination. It provides a user-friendly web-based GUI. Rather than listing features, let’s peek under the hood. However, those comfortable with manual NGINX configuration might find limited use for such a tool.
Go was chosen for its compiled binaries, allowing easy distribution and deployment without dependency headaches. It assumes a pre-installed NGINX with a systemd unit file.
Even without Go expertise, the implementation is straightforward.
Structure
Go’s build tools provide a flexible structure. We’ve organized Loadcat into packages based on purpose:
- cfg: handles configuration loading, parsing, and access.
- cmd/loadcat: main package, entry point, compiles to the binary.
- data: contains data models and uses an embedded key/value store for persistence.
- feline: core functionality, including configuration generation and reload mechanisms.
- ui: houses templates, URL handlers, and other UI components.
Within the “feline” package, NGINX-specific code resides in the “feline/nginx” subpackage. This separation enables future support for other load balancers (like HAProxy) without affecting core logic.
Entry Point
The main package (“cmd/loadcatd”) contains the application’s entry point. The main function performs three primary tasks:
| |
For clarity, error handling code is omitted from these snippets.
The code loads the configuration file based on the “-config” flag (defaulting to “loadcat.conf”). It then initializes the core “feline” package and the database before starting a web server for the GUI.
Configuration
Configuration loading and parsing are straightforward. We utilize TOML for encoding configuration data with the help of Go’s TOML parsing package. Loadcat requires minimal user configuration, often relying on sensible defaults. The configuration file structure is represented by this struct:
| |
A typical “loadcat.conf” file might look like this:
| |
The TOML configuration file mirrors the struct structure. The configuration package sets default values for specific fields and then parses the configuration file. If the file is not found, it’s created with default values.
| |
Data and Persistence
Enter Bolt, a pure Go embedded key-value store. It features a simple API, transactional support, and impressive speed.
Inside the “data” package, structs represent each entity. For example:
| |
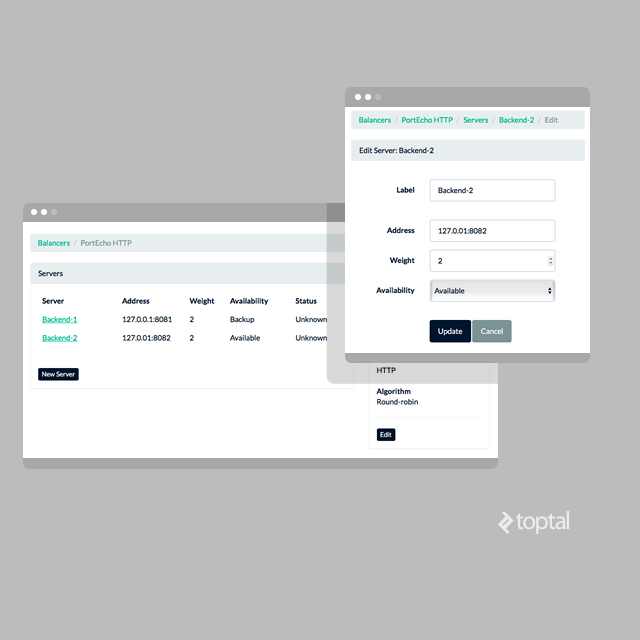
Here, a Balancer instance represents a single load balancer. Loadcat can manage multiple web application load balancers through a single NGINX instance. Each balancer can have multiple backend servers.
Since Bolt is a key-value store without advanced query support, we implement application-side logic. Given that Loadcat isn’t designed for massive configurations, this approach suffices. Bolt uses byte slices for keys and values, requiring us to BSON-encode structs before storage. Retrieving a list of Balancer structs is done as follows:
| |
ListBalancers starts a read-only transaction, iterates through the “balancers” bucket, decodes values into Balancer instances, and returns an array.
Storing a balancer is similarly simple:
| |
Put assigns default values, parses SSL certificates (for HTTPS), starts a transaction, encodes the struct, and stores it in the “balancers” bucket.
During certificate parsing, standard package encoding/pem extracts DNS names and the fingerprint, storing them in SSLOptions under the Settings field.
We also have a function to retrieve servers associated with a balancer:
| |
This function highlights the simplicity. It reads the entire “servers” bucket and filters results, returning the relevant array. Again, this approach works efficiently for Loadcat’s intended scale.
The Put function for servers is less complex than its Balancer counterpart, requiring fewer defaults and computations.
Controlling NGINX
Before using Loadcat, configure NGINX to load the generated configurations. Loadcat creates an “nginx.conf” for each balancer in a directory named after the balancer’s ID (a short hexadecimal string). These directories reside under an “out” directory at the current working directory. To instruct NGINX to load these files, add an “include” directive within the “http” block of your main NGINX configuration file:
Edit /etc/nginx/nginx.conf and append the following line within the “http” block:
| |
This tells NGINX to scan directories under “/path/to/out/,” locate “nginx.conf” files within them, and load them.
In the core “feline” package, we define a Driver interface. Any struct implementing Generate and Reload functions with the correct signatures qualifies as a driver:
| |
For instance, the Nginx struct within “feline/nginx”:
| |
Generate takes the output directory path and a Balancer instance. It leverages Go’s text templating to generate the final NGINX configuration based on the balancer’s settings. The template includes an “upstream” block followed by a “server” block:
| |
Reload triggers an NGINX configuration reload. The default mechanism assumes NGINX runs as a systemd service (nginx.service) and executes [sudo] systemd reload nginx.service would work. However instead of executing a shell command, it establishes a connection to systemd through D-Bus using the package github.com/coreos/go-systemd/dbus.
Web-based GUI
With these components in place, a simple Bootstrap interface ties everything together.
Basic GET and POST route handlers manage these functionalities:
| |
Detailed route explanations are omitted here, but you can explore the package ui code to understand their implementation.
Each handler either:
- Retrieves data from the datastore and responds with rendered templates (populated with data).
- Parses form data, updates the datastore, and triggers configuration regeneration through the “feline” package.
For example:
| |
ServeServerNewForm fetches a balancer and renders the TplServerList template, which lists relevant servers using the balancer’s Servers function.
Conversely, HandleServerCreate parses the POST request, creates a new Server instance, persists it, and initiates NGINX configuration regeneration.
Page templates are located in “ui/templates.go,” with corresponding HTML files under “ui/templates.”
Trying It Out
Deploying Loadcat is straightforward. For 64-bit Linux, pre-built binaries are available on the repository’s Releases section. Alternatively, clone the repository and compile the code yourself (although the simplicity might be underwhelming). Arch Linux users have it even easier - a package is available. Just download it and install it using your package manager. Detailed instructions are available in the project’s README.md file.
Once Loadcat is running, navigate your browser to “http://localhost:26590” (assuming it’s running locally on port 26590). Create a balancer, add servers (ensuring they listen on the defined ports), and witness NGINX effortlessly load balance requests between them.
What’s Next?
Loadcat is a work in progress. It doesn’t yet encompass all of NGINX’s features. For instance, configuring asset caching at the NGINX layer still requires manual configuration edits.
But that’s the exciting part! There’s ample room for improvement, including support for more advanced load balancing features - both basic and those offered by NGINX Plus.
Give Loadcat a try! Explore the code, fork it, modify it, experiment. And if you’ve built or used similar configuration tools, share your experiences in the comments.