The performance, adaptability, and user-friendliness of a web application are critical factors that heavily influence its success and widespread adoption.
In today’s fast-paced digital landscape, users have little patience for slow-loading applications. This challenge is particularly relevant for web apps handling video processing, an inherently resource-intensive task. Despite this, users demand high-quality videos that load quickly, even on devices with limited resources like smartphones and tablets.
Furthermore, users are increasingly intolerant of web applications that lack cross-platform compatibility or struggle with diverse data formats. This poses a significant hurdle for developers aiming to integrate video support, considering the wide array of video formats in use.
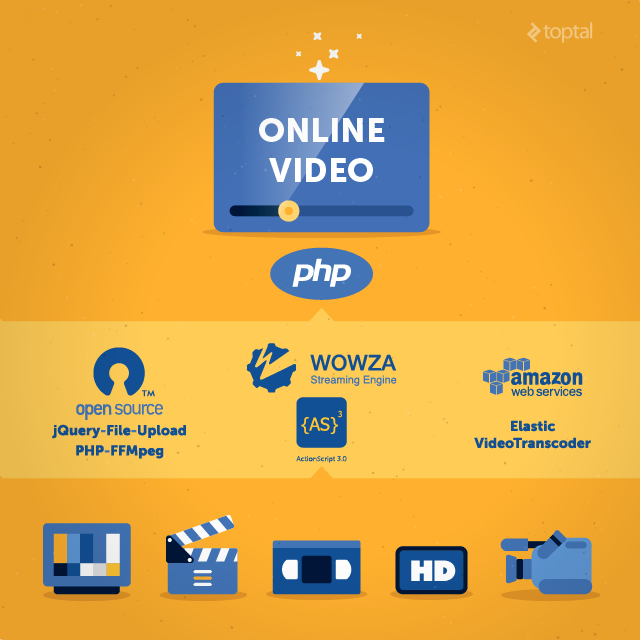
This article outlines my approach to incorporating video capabilities into a PHP-based web app using open-source technologies and cloud-based services.
Use Case
Our team was tasked with developing a platform similar to YouTube, where registered users could upload and share videos.
A key requirement was the ability for users to upload videos in various formats, with the system handling the conversion to a standard format (MP4). We also needed to generate thumbnails and an image collage for the video player’s progress bar.
Adding to the complexity, client constraints prohibited the use of Content Delivery Networks (CDNs) or transcoding APIs, requiring us to build a custom solution from the ground up.
Video Upload
Since the upload process was not video-specific, we opted for an existing open-source solution for a user-friendly file upload feature instead of building one. jQuery-File-Upload was our choice, primarily due to its support for an upload progress bar and chunked uploads.
Chunked uploading was crucial for accommodating video files of any size, especially high-definition videos. This approach involved splitting the file into smaller “chunks” on the front-end and uploading them individually with metadata like chunk number and total file size. The complete video was then reconstructed on the back-end. Notably, including the chunk number in the metadata proved vital as certain browsers tended to send chunks out of order.
Online Video Processing
Video processing can range from simple frame capturing to intricate tasks like image enhancement and video stabilization. Our requirements involved extracting video codecs and metadata, as well as generating thumbnails and an image collage for the video player’s progress bar.
FFmpeg, a popular and freely available open-source library, proved invaluable in meeting these requirements. FFmpeg offers a comprehensive, cross-platform solution for recording, converting, and streaming audio and video files. It can also handle video conversion and basic editing tasks like trimming, cutting, and watermarking.
We utilized FFmpeg to divide videos into ten sections and capture a thumbnail from each, fulfilling our functional requirements.
However, the lack of native PHP bindings for FFmpeg meant we had to interact with it through command-line system calls. Two primary methods for utilizing FFmpeg in PHP emerged:
- libav. Libav is an open-source project, forked from FFmpeg in 2011, that provides libraries and tools for multimedia data management. On Ubuntu, for instance, it can be installed using the command
sudo apt-get install libav-tools. Libav commands are compatible with FFmpeg and avconv. PHP requires command-line access toffmpeg/avconvfor programmatic usage. - PHP-FFMpeg. PHP-FFMpeg acts as an object-oriented PHP driver for the FFMpeg binary. It can be installed easily with the command
composer update "php-ffmpeg/php-ffmpeg".
We opted for PHP-FFMpeg due to its straightforward access to the desired FFmpeg functionalities. For example, the FFProbe class allows retrieval of codec information or video duration like this:
| |
FFmpeg also simplifies saving video frames:
| |
You can find more detailed code samples here.
Important Note: Patent laws restrict FFmpeg’s ability to process all codecs, and some formats may not be fully or properly supported. For example, a few years back, I encountered difficulties with the .3gp format when support for feature phones was essential.
Queuing
After obtaining video metadata and codecs, we added the video to a FIFO (First In, First Out) conversion queue. This queue was implemented using a basic cron script that periodically selected a set number of unprocessed videos and passed them to a conversion utility (sample source code is available here).
The conversion utility used FFMpeg to convert the videos and marked them as processed.
Additionally, we developed a simple wait time estimation mechanism that calculated the average processing time for one minute of video. This average allowed us to provide users with an estimated processing time remaining after upload, based on the length of their video.
Video Format Conversion
While universally supported formats like JPEG and GIF exist for images, no such standard has emerged for videos.
Our project required converting various formats to a common MPEG-4 format, optimized for streaming to mobile devices.
Utilizing the cloud-based Amazon Elastic Transcoder proved to be the most efficient solution for our video format conversion needs. Besides its user-friendliness, this transcoding service handles optimization and encoding settings. An AWS SDK for PHP further simplified its integration with our PHP code.
Note: While convenient for a quick setup, relying on cloud-based services like Amazon Elastic Transcoder can lead to significant expenses, especially if your client’s business model involves extensive use of large videos. It’s crucial to ensure alignment between the service’s Terms of Service and your client’s videos and business model.
Amazon leverages its core storage and compute services, S3 (Simple Storage Service) and EC2 (Elastic Compute Cloud), along with Auto Scaling and SNS (Simple Notification Service), to enable rapid and seamless scaling capabilities.
Installing aws-sdk is straightforward thanks to Amazon’s Composer-installable package. Adding "aws/aws-sdk-php": "2.*" to your composer.json file and running composer update is all it takes.
Access to Amazon Elastic Transcoder requires an Amazon account, so setting one up is necessary if you (or your client) don’t have one.
Our implementation involved uploading video files to an S3 bucket and using the transcoder job to decode and generate thumbnails. Upon completion, the transcoder would send an HTTP request to a specified address. This setup requires some configuration within the AWS panel, but Amazon provides clear documentation to guide you.
Feel free to use our transcoder bundle, which streamlines integration for Symfony 2. It includes usage instructions and a controller for implementing a notification service from Amazon, providing information about the processed video. A usage example is available here.
Furthermore, an example controller for handling Amazon notifications, including subscription address confirmation, is provided here. The service will initially send a request to the provided URL to validate it as a notification receiver. After confirmation, the process simply involves marking the video as processed, allowing you to utilize the transcoded video stored in the cloud.
Streaming
Video streaming demands high performance. User expectations for seamless streaming are high, with little tolerance for latency. This challenge is often amplified by the need to stream to multiple clients concurrently in real-time.
Our project required supporting individual user channels for broadcasting. We achieved this through a three-component solution:
- Dashboard. An application serving as a streamer’s control panel for managing video streams.
- Viewer. A video client responsible for receiving and displaying the video stream.
- Streaming Engine. A cloud-based service for video streaming.
Besides the evolving nature of Video on Demand (VOD) technology, we faced limitations with camera access, which primarily offered P2P connections. Our goal was to provide online broadcasting for multiple concurrent users. However, support for the getUserMedia/Stream API (previously envisioned as the <device> element) remained inconsistent across browsers. Considering these factors, Flash technology emerged as the most viable choice. Both applications (Dashboard and Viewer) were developed using Flex and ActionScript.
We chose Wowza for our streaming engine. Although non-commercial options like Red5 (marketed as a Wowza replacement) were available, commercial product support was crucial for our project. Additionally, Wowza’s documentation was superior at the time (Note: Wowza offers a free 30-day trial and a 180-day developer trial, though with limitations like a two-client streaming limit and restricted connections).
Wowza Streaming Engine
We opted for the LiveStream application included with Wowza. For configuration, keep applications/app_name empty and copy the Application.xml file from the conf directory to conf/app_name. Edit the file to configure the <Streams> section as follows:
| |
The crucial parameter is <StreamType>live</StreamType>, which designates this as a live video feed (e.g., from a camera). Remember to restart Wowza after saving changes to this file.
Flash (Flex/ActionScript) Applications
Flash offers a comprehensive system for connecting cameras and microphones to a Wowza streaming server. This is especially beneficial if you have limited experience with ActionScript.
The core of the application relies on interaction between these objects:
- NetConnection. The NetConnection class establishes a two-way connection between client and server. The client can be Flash Player or an AIR application, while the server can be a web server, Flash Media Server, an application server running Flash Remoting, or Adobe Stratus.
- Camera. The Camera class captures video from the client’s camera.
- Microphone. The Microphone class handles audio monitoring or capture from a microphone.
- NetStream. The NetStream class opens a one-way streaming channel over a NetConnection.
The first step involves connecting to the Wowza streaming server using the NetConnection instance and attaching an event listener to monitor network connection status changes:
| |
Below is a minimal example of an event listener that connects the camera and microphone to the streaming server:
| |
The client-side code is similar, focusing on displaying the video input. This is achieved by connecting the stream to a Video object, as demonstrated in this simple example:
| |
Wrap up
Live streaming and video content will likely become increasingly integral to mobile and web applications. It’s crucial for web developers to familiarize themselves with video transcoding, processing, and streaming. Numerous tools, libraries, and services are available today to incorporate these capabilities into web applications. This article showcased how we successfully leveraged and integrated these technologies to build a basic YouTube-like website with relative ease.