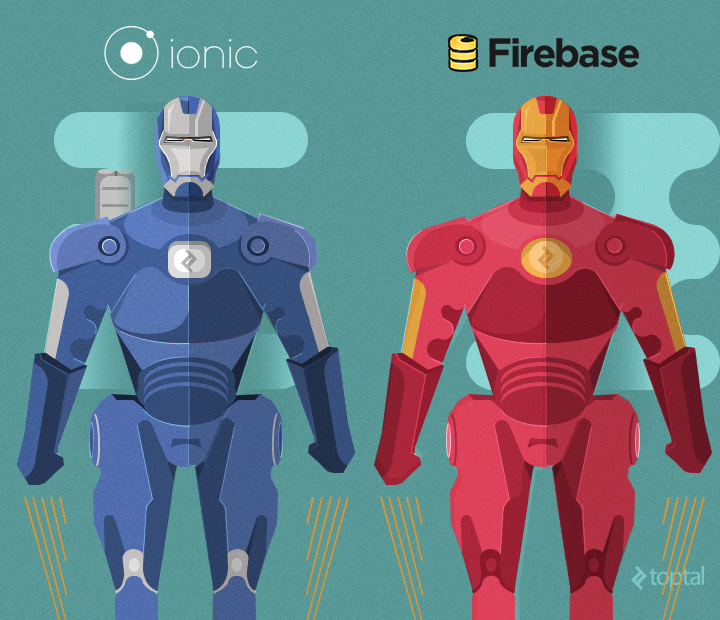
Building native applications for multiple platforms poses a significant challenge for companies due to the escalating costs. Although front-end developers have explored various hybrid platforms to tackle this issue, Ionic Framework and Firebase emerge as a powerful combination. Together, they offer remarkable flexibility for creating real-time smartphone applications using JavaScript and HTML5.
This tutorial delves into the capabilities of these cross-platform mobile development tools and provides practical Ionic and Firebase examples.
(Note: This article assumes a basic understanding of the AngularJS framework. For those new to AngularJS, this introductory post provides a great starting point.)
Introduction to the Ionic Framework
The Ionic Framework comprises three primary elements:
- A SASS-based UI framework optimized for mobile user interfaces.
- An AngularJS front-end JavaScript framework designed for rapid development of scalable and high-performance applications.
- A compiler (Cordova or PhoneGap) for creating native mobile applications using CSS, HTML, and JavaScript.
Ionic also comes equipped with a rich set of lots of useful CSS components ready to use.
Ionic deserves praise for its comprehensive documentation, examples, and starter videos, which streamline the learning process and enable developers to quickly get started.
Introduction to Firebase
Firebase is a backend-as-a-service, schema-less database that facilitates real-time data synchronization without requiring any manual coding. It simplifies backend development, significantly reducing multiplatform development time.
Here are some of its key features and advantages:
- Code-less data changes: Any data modification is instantly reflected on client devices without the need for backend code changes.
- Wide range of adapters: Firebase provides well-supported and documented adapters for all major JavaScript frameworks and mobile platform SDKs. (This article utilizes AngularFire, the AngularJS binding for Firebase.)
- Simplified authentication: Firebase authentication is incredibly easy, regardless of the method used. It supports email/password, Google, Facebook, Twitter, and GitHub logins.
- Offline capabilities: Firebase data is accessible offline, allowing applications to remain fully or partially operational even when disconnected. Synchronization occurs automatically upon reconnection.
- Intuitive configuration dashboard: Firebase offers a user-friendly dashboard for configuring various aspects, including security rules.
- JSON-centric approach: Firebase stores and retrieves data exclusively in JSON format.
Furthermore, Firebase provides cloud services for hosting front-end code, which can streamline deployment and maintenance processes.
It’s worth noting that Firebase’s acquisition by Firebase was acquired by Google in October has significantly boosted its prominence and awareness.
Illustrative Use Case: Expense Tracking
Roommates often share expenses and rely on each other financially. Let’s create an application that helps them track shared expenses and simplify monthly reconciliation.
To enhance this further, we’ll develop a cross-platform mobile application with real-time updates, enabling roommates to monitor expenses as they happen.

With a clear objective and the necessary tools at our disposal, let’s dive into building our application!
Getting Started with Ionic and Firebase
The first step is to install Ionic. Detailed installation instructions can be found on the Ionic Getting Started page. Keep in mind that Ionic depends on NodeJS; the instructions will guide you through its installation if it’s not already present on your system.
The AngularFire 5-minute tutorial provides an excellent starting point for familiarizing yourself with Firebase. If you prefer a hands-on approach, consider cloning my implementation from GitHub and experimenting with the code directly.
Building Our Cross-Platform Application
For this tutorial, we’ll leverage the sample tabs app included in the Ionic installation as the foundation for our roommate expense tracker. (Execute the command ionic start myApp tabs to run the sample app).
Open the tabs app in your preferred IDE (this tutorial uses Webstorm) and let’s tailor it to our needs.
Our Ionic and Firebase app requires three screens:
 |  |  |
Before creating these screens, let’s remove the default “Friends detail screen” from the sample app:
- Delete the
www/templates/friend-detail.htmlfile. - In
www/js/app.js, remove or comment out the state associated withfriend-detail.html. - In
www/js/controllers.js, delete theFriendDetailCtrlcontroller referenced in the state we just removed.
Now, let’s update the icons and labels for the tab selectors at the bottom of our screen:

This can be achieved by making the following changes in www/templates/tabs.html:
| |
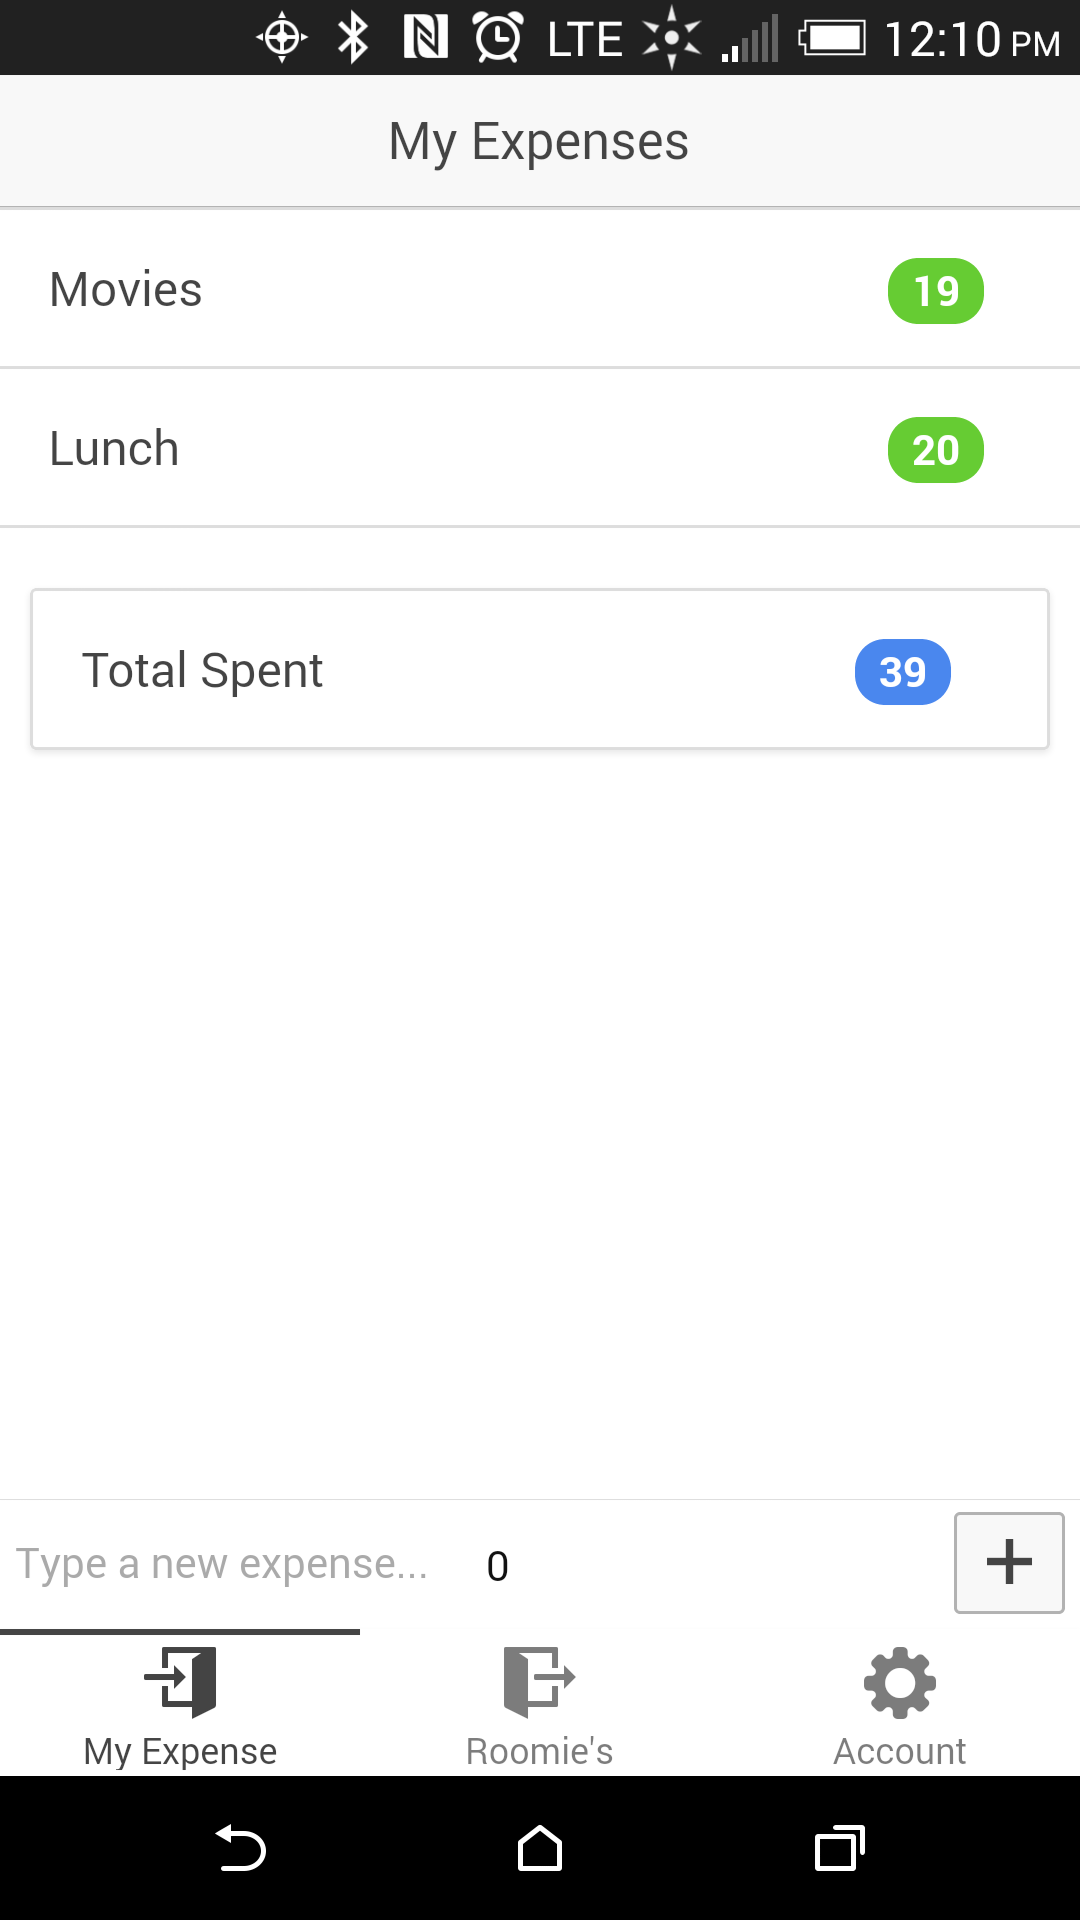
Before integrating Firebase, let’s create a list and bind it to an array named expenses by adding the following code to www/templates/tab-dash.html:
| |
The expenses array will store our expense items, addExpense() will add new expenses to this array, and getTotal() will calculate the total expenses.
We need to apply similar modifications to tab-friends.html. Try implementing this yourself. For reference or if you encounter difficulties, check out the code on my implementation on GitHub.
Integrating Firebase
You’ll need a Firebase account. Sign up here for a free “Hacker Plan”.
Upon signing up, you’ll receive your root URL, resembling https://<yourfirebase>.firebaseio.com.
Enabling Firebase in our app requires two minor adjustments.
First, include the Firebase scripts in your app’s www/index.html:
| |
Second, add the Firebase module to your AngularJS ‘starter’ module:
| |
Firebase is now integrated like any other AngularJS module.
The AngularFire 5 minute tutorial explains how to create data references within controllers. For our app, we’ll store these references in a separate service for easier maintenance, especially if the root URL changes. Create this service by adding the following code to www/js/services.js:
| |
This code defines three reference URLs: one for the root and two for collections named ’expenses’ and ‘room-mates’.
Adding new collections in Firebase is straightforward. Append the collection name to your root URL. For our ’expenses’ collection:
https://<yourfirebase>.firebaseio.com/expenses
This creates the expenses collection, ready to store our expense objects.
Now, let’s connect the Firebase ’expenses’ collection, replacing our previous placeholder array. Modify the DashCtrl in www/js/controllers.js:
| |
Similar modifications are required for FriendsCtrl. Again, attempt this independently, referring to my implementation on GitHub for assistance or verification.
To test the integration, run the app on two devices. Add a new expense and observe if it appears on both devices. Success! You’ve successfully linked your Ionic app with Firebase!
Test your multiplatform app on different devices by connecting them to your system and running ‘ionic run android’ or ‘ionic emulate ios’. Consult the Ionic documentation for more details on testing your app.
Account Management and Security with Firebase
While the core functionality is operational, our app lacks security. Anyone can access your expenses without logging in. Let’s address this.
Firebase offers a robust and user-friendly authentication framework based on “rules.” The Firebase Rules Language provides extensive control (refer to the Firebase security documentation for detailed information).
For our app, we’ll implement a basic rule to restrict unauthorized access. Navigate to your Firebase root URL, click “Security & Rules” in the left sidebar, paste the code below, and save:
| |
Running your app now will show no data. Inspecting network requests reveals an authorization error in your console.
User Account Creation and Login Functionality
Firebase allows authentication via custom email/password combinations or existing Google, Facebook, Twitter, or GitHub credentials. For email/password authentication, Firebase provides comprehensive API methods for password changes, resets, etc. For more information on authentication using Firebase, consult the Firebase guide.
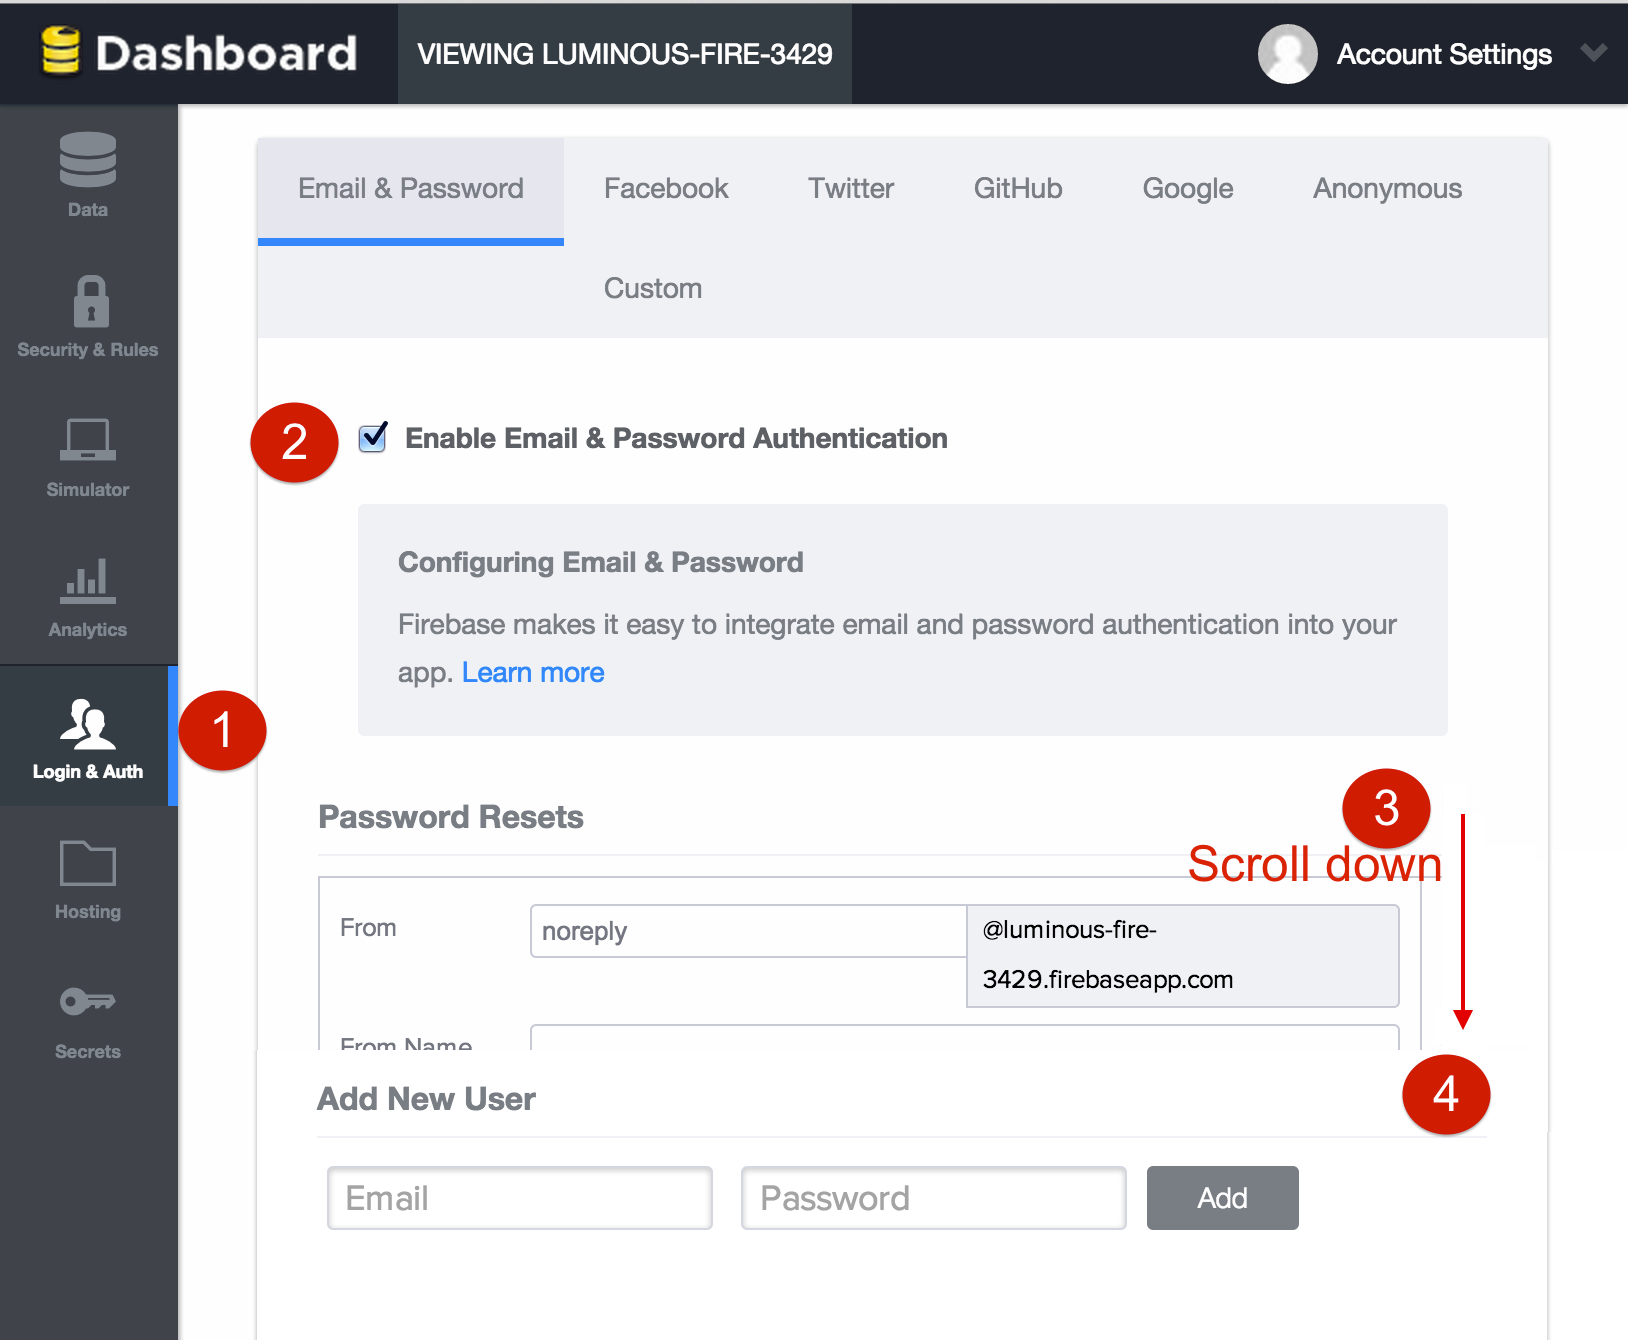
For our demo, we’ll create two user accounts via the Firebase interface:
- Go to your Firebase root URL.
- Click “Login & Auth” in the left sidebar.
- Enable “Email & Password Authentication.”
- Locate the “Add New Accounts Form.”
- Add your accounts using “Add New User.”
To incorporate the login interface, first add the following to ‘www/templates/tab-account.html’:
| |
Then, add this to AccountCtrl in ‘www/controller.js’:
| |
For enhanced security, remember that Firebase logins persist by default. To require login on each app start, adjust the Firebase configuration. Once after successful login, execute:
| |
(You can include this in the account controller after login or run it in your console inspector after setting a breakpoint).
User-Specific Data Filtering
Our app still needs to differentiate your expenses from your roommate’s. We’ll use our newly created accounts to filter data in the views.
Modify ‘dashCtrl’ in ‘www/js/controllers.js’ to: (a) fetch the current user’s data into $scope and (b) save new expenses under the current user:
| |
Next, add a filter to ‘www/templates/tab-dash.html’ to display only the current user’s expenses:
| |
Now, the Home screen is customized. Users see and add only their expenses.
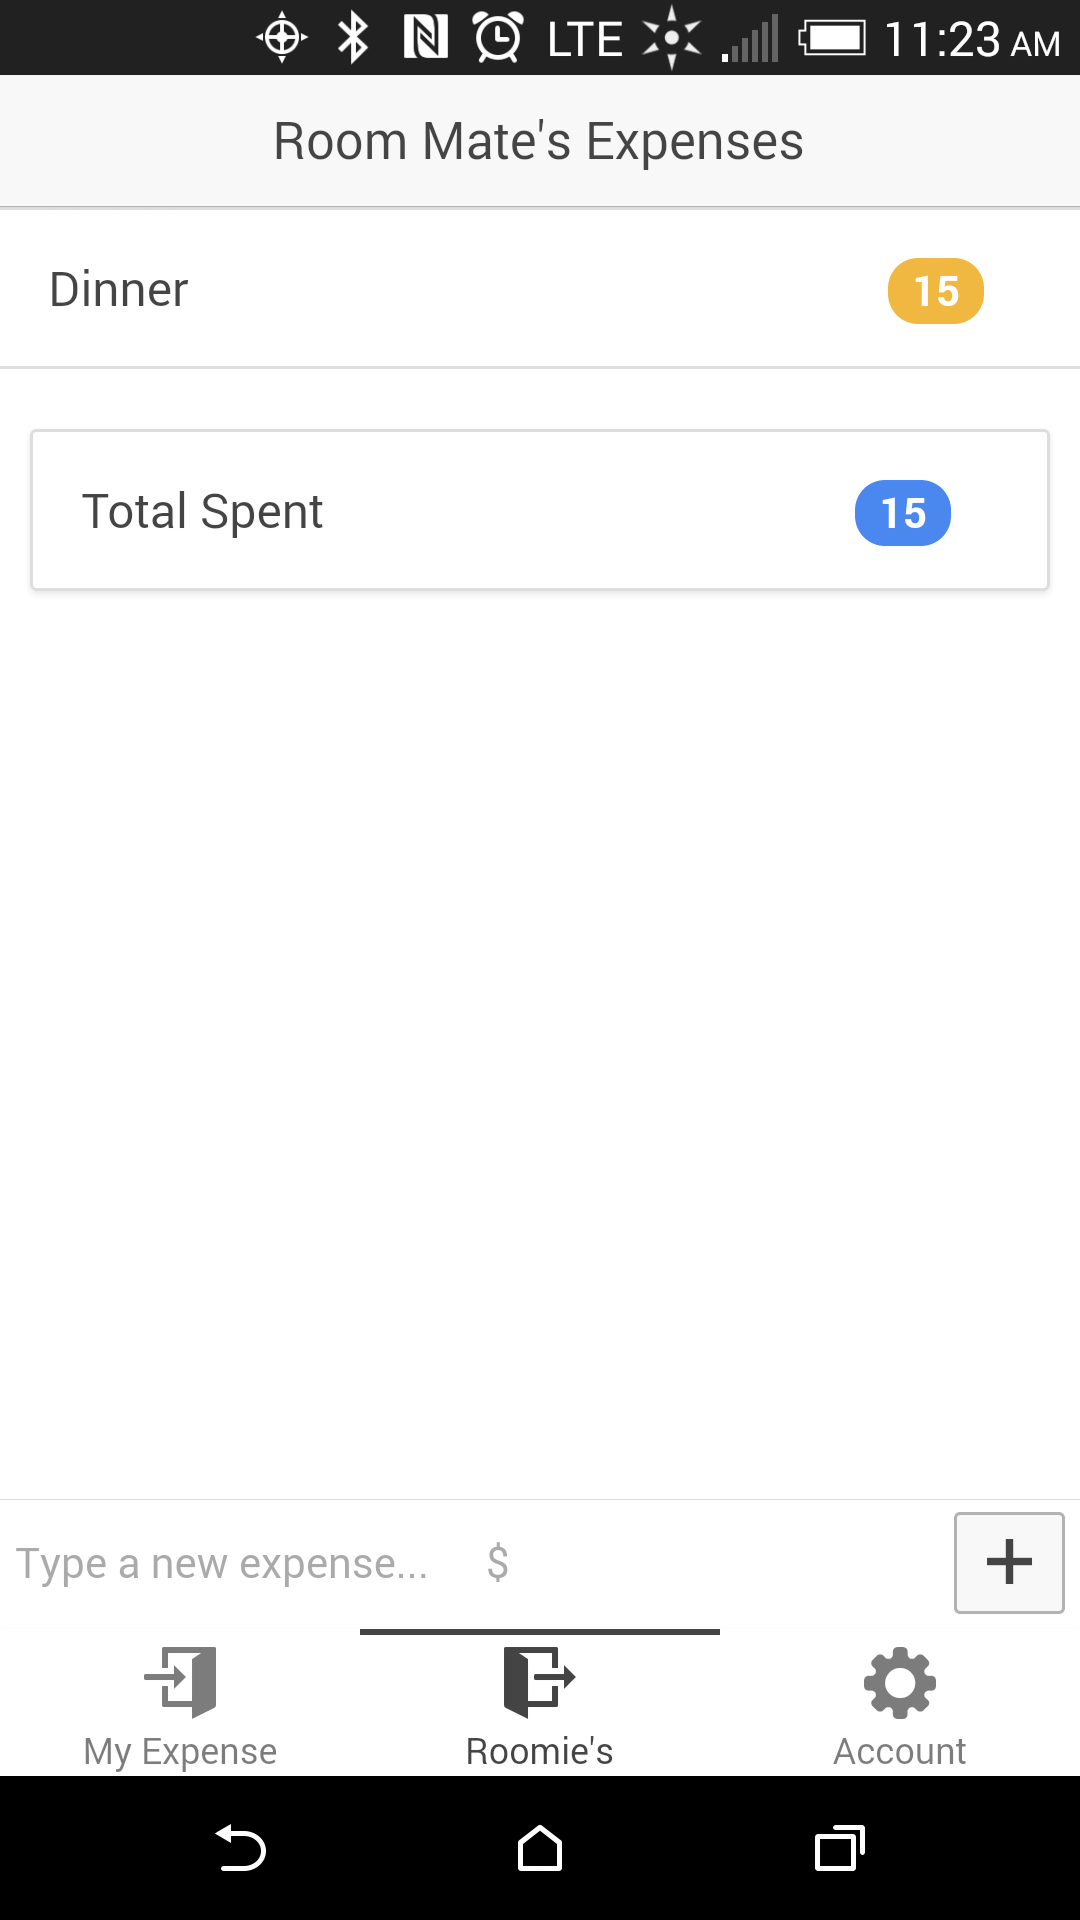
Finally, enable sharing the entire expense list between roommates. Modify ‘www/templates/tab-friends.html’:
| |
And update FriendsCtrl in ‘www/controllers.js’:
| |
That’s it! Install or update the app on both devices, and you’re good to go!
Conclusion
This simple example merely scratches the surface of what Ionic and Firebase can achieve. They offer a powerful synergy for creating real-time, cross-platform smartphone applications using JavaScript and HTML5.
/>
| |
The expenses array will store our expense items, addExpense() will add new expenses to this array, and getTotal() will calculate the total expenses.
We need to apply similar modifications to tab-friends.html. Try implementing this yourself. For reference or if you encounter difficulties, check out the code on my implementation on GitHub.
Integrating Firebase
You’ll need a Firebase account. Sign up here for a free “Hacker Plan”.
Upon signing up, you’ll receive your root URL, resembling https://<yourfirebase>.firebaseio.com.
Enabling Firebase in our app requires two minor adjustments.
First, include the Firebase scripts in your app’s www/index.html:
| |
Second, add the Firebase module to your AngularJS ‘starter’ module:
| |
Firebase is now integrated like any other AngularJS module.
The AngularFire 5 minute tutorial explains how to create data references within controllers. For our app, we’ll store these references in a separate service for easier maintenance, especially if the root URL changes. Create this service by adding the following code to www/js/services.js:
| |
This code defines three reference URLs: one for the root and two for collections named ’expenses’ and ‘room-mates’.
Adding new collections in Firebase is straightforward. Append the collection name to your root URL. For our ’expenses’ collection:
https://<yourfirebase>.firebaseio.com/expenses
This creates the expenses collection, ready to store our expense objects.
Now, let’s connect the Firebase ’expenses’ collection, replacing our previous placeholder array. Modify the DashCtrl in www/js/controllers.js:
| |
Similar modifications are required for FriendsCtrl. Again, attempt this independently, referring to my implementation on GitHub for assistance or verification.
To test the integration, run the app on two devices. Add a new expense and observe if it appears on both devices. Success! You’ve successfully linked your Ionic app with Firebase!
Test your multiplatform app on different devices by connecting them to your system and running ‘ionic run android’ or ‘ionic emulate ios’. Consult the Ionic documentation for more details on testing your app.
Account Management and Security with Firebase
While the core functionality is operational, our app lacks security. Anyone can access your expenses without logging in. Let’s address this.
Firebase offers a robust and user-friendly authentication framework based on “rules.” The Firebase Rules Language provides extensive control (refer to the Firebase security documentation for detailed information).
For our app, we’ll implement a basic rule to restrict unauthorized access. Navigate to your Firebase root URL, click “Security & Rules” in the left sidebar, paste the code below, and save:
| |
Running your app now will show no data. Inspecting network requests reveals an authorization error in your console.
User Account Creation and Login Functionality
Firebase allows authentication via custom email/password combinations or existing Google, Facebook, Twitter, or GitHub credentials. For email/password authentication, Firebase provides comprehensive API methods for password changes, resets, etc. For more information on authentication using Firebase, consult the Firebase guide.
For our demo, we’ll create two user accounts via the Firebase interface:
- Go to your Firebase root URL.
- Click “Login & Auth” in the left sidebar.
- Enable “Email & Password Authentication.”
- Locate the “Add New Accounts Form.”
- Add your accounts using “Add New User.”
To incorporate the login interface, first add the following to ‘www/templates/tab-account.html’:
| |
Then, add this to AccountCtrl in ‘www/controller.js’:
| |
For enhanced security, remember that Firebase logins persist by default. To require login on each app start, adjust the Firebase configuration. Once after successful login, execute:
| |
(You can include this in the account controller after login or run it in your console inspector after setting a breakpoint).
User-Specific Data Filtering
Our app still needs to differentiate your expenses from your roommate’s. We’ll use our newly created accounts to filter data in the views.
Modify ‘dashCtrl’ in ‘www/js/controllers.js’ to: (a) fetch the current user’s data into $scope and (b) save new expenses under the current user:
| |
Next, add a filter to ‘www/templates/tab-dash.html’ to display only the current user’s expenses:
| |
Now, the Home screen is customized. Users see and add only their expenses.
Finally, enable sharing the entire expense list between roommates. Modify ‘www/templates/tab-friends.html’:
| |
And update FriendsCtrl in ‘www/controllers.js’:
| |
That’s it! Install or update the app on both devices, and you’re good to go!
Conclusion
This simple example merely scratches the surface of what Ionic and Firebase can achieve. They offer a powerful synergy for creating real-time, cross-platform smartphone applications using JavaScript and HTML5.