Magento 2 empowers store administrators with widgets, enabling the integration of static or dynamic content into CMS pages and blocks. This enhances functionality and simplifies implementation. Essentially reusable components, widgets can be incorporated into any CMS block within Magento 2.
Consequently, Magento 2 developers and store administrators can introduce interactive elements and features to the front-end without requiring extensive programming knowledge. However, familiarity with Magento is still necessary for widget creation.
This article aims to guide you through the process of creating widgets in Magento 2, with a particular focus on custom widgets.
Magento 2 Widgets
As the latest iteration of Magento, a leading eCommerce platform, Magento 2 leverages widgets for enhanced functionality. Beyond user-side enhancements, Magento widgets empower administrators to incorporate static or dynamic content into CMS pages and blocks.
From a technical standpoint, what constitutes a Magento widget?
Essentially, a Magento 2 widget is a Magento extension equipped with advanced configuration options. Offering greater flexibility and control, they facilitate the delivery of information and marketing content through the Magento Administrator panel. Notably, Magento 2 widgets can be invoked from any location on the site.
Furthermore, widgets enable administrators to integrate interactive interfaces and features into the Magento front-end without the need for coding expertise.
Magento 2 Offers Multiple Types of Widgets
Before delving into implementation, let’s explore the standard widget offerings in Magento 2:
- Recently Compared Products: Frequently encountered on e-commerce sites, this widget showcases recently viewed or compared products in the sidebar of a catalog page or elsewhere, depending on the theme. Notably, the number of displayed products is configurable.
- Orders and Returns: An indispensable widget in online shopping, it provides swift access to orders and returns. Users can review their order history by providing details like Order ID, Billing Date, Email, etc.
- Catalog Products List: Commonly employed for showcasing “featured products” on the home page, this widget highlights specific products with details like price, features, and options such as “add to cart,” “add to wishlist,” and “add to comparison.”
- Catalog Product Link: This widget facilitates the management of product links, encompassing related products, cross-sells, upsells, and grouped products. The catalog product link page presents various catalog categories, each with sub-links for managing assignments, attributes, removals, types, and more.
- Catalog Category Link: Abundant on product-based eCommerce websites, this widget plays a crucial role in navigation.
- Custom Block Widget: Combining blocks, widgets, and custom pages allows for the display of catalog sections or other pertinent information.
These widgets enhance user experience and augment store functionality. Blocks and widgets, integral elements of most eCommerce websites, empower content generation and control, enabling tasks such as:
- Integrating dynamic/informational blocks in sidebars
- Incorporating banners into CMS pages
- Implementing custom menus
- Adding interactive user interfaces
The Case for Magento 2 Custom Widgets
Engaging user experiences are paramount in eCommerce. Custom Magento 2 widgets address this need by providing tailored functionality and engagement.
Concise code snippets, widgets can be seamlessly integrated into the store, utilizing links to dynamic code to present tailored information that enhances the visitor experience. While off-the-shelf widgets offer convenience, custom solutions provide unmatched flexibility.
Magento 2’s Custom Widget functionality empowers us to craft bespoke widget templates, offering an unparalleled approach to content management within CMS blocks or pages.
Before we delve into custom widgets, let’s examine a common use case for widgets in Magento 2:
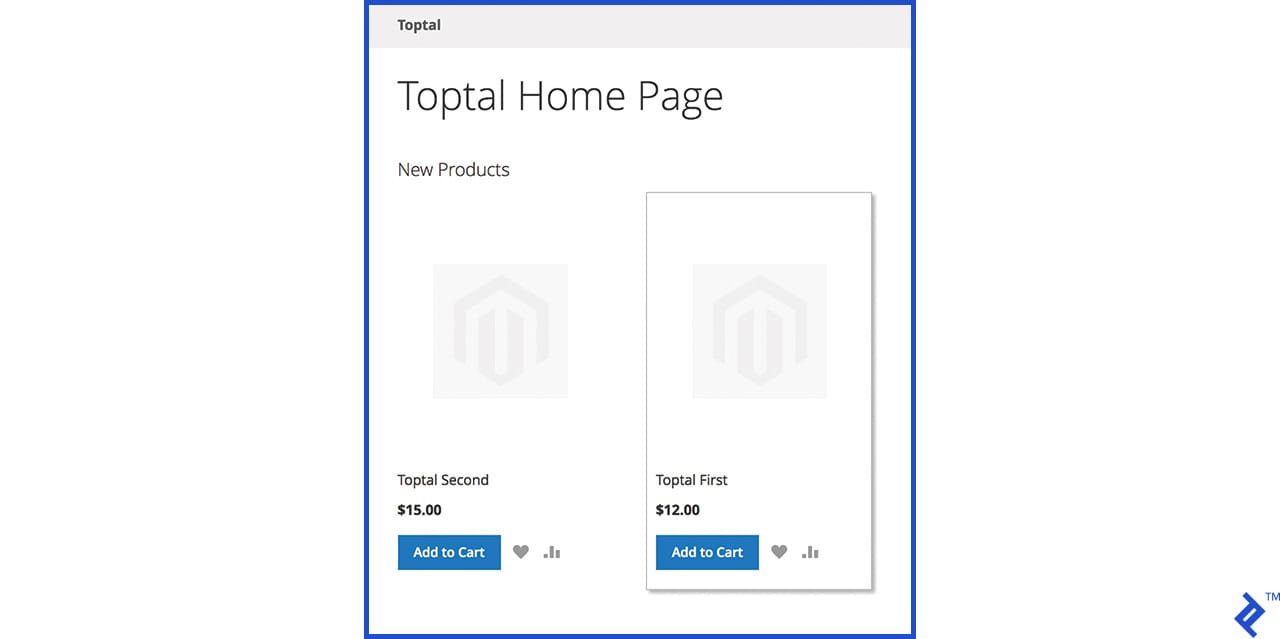
How to Add a New Product List to the Homepage Using a Widget
This straightforward widget enables the addition of a new product list anywhere on the website, offering various display options for new products in Magento 2.
Adding a Magento product list to the homepage is a simple process:
- Access the Magento 2 admin panel and navigate to Content > Widget

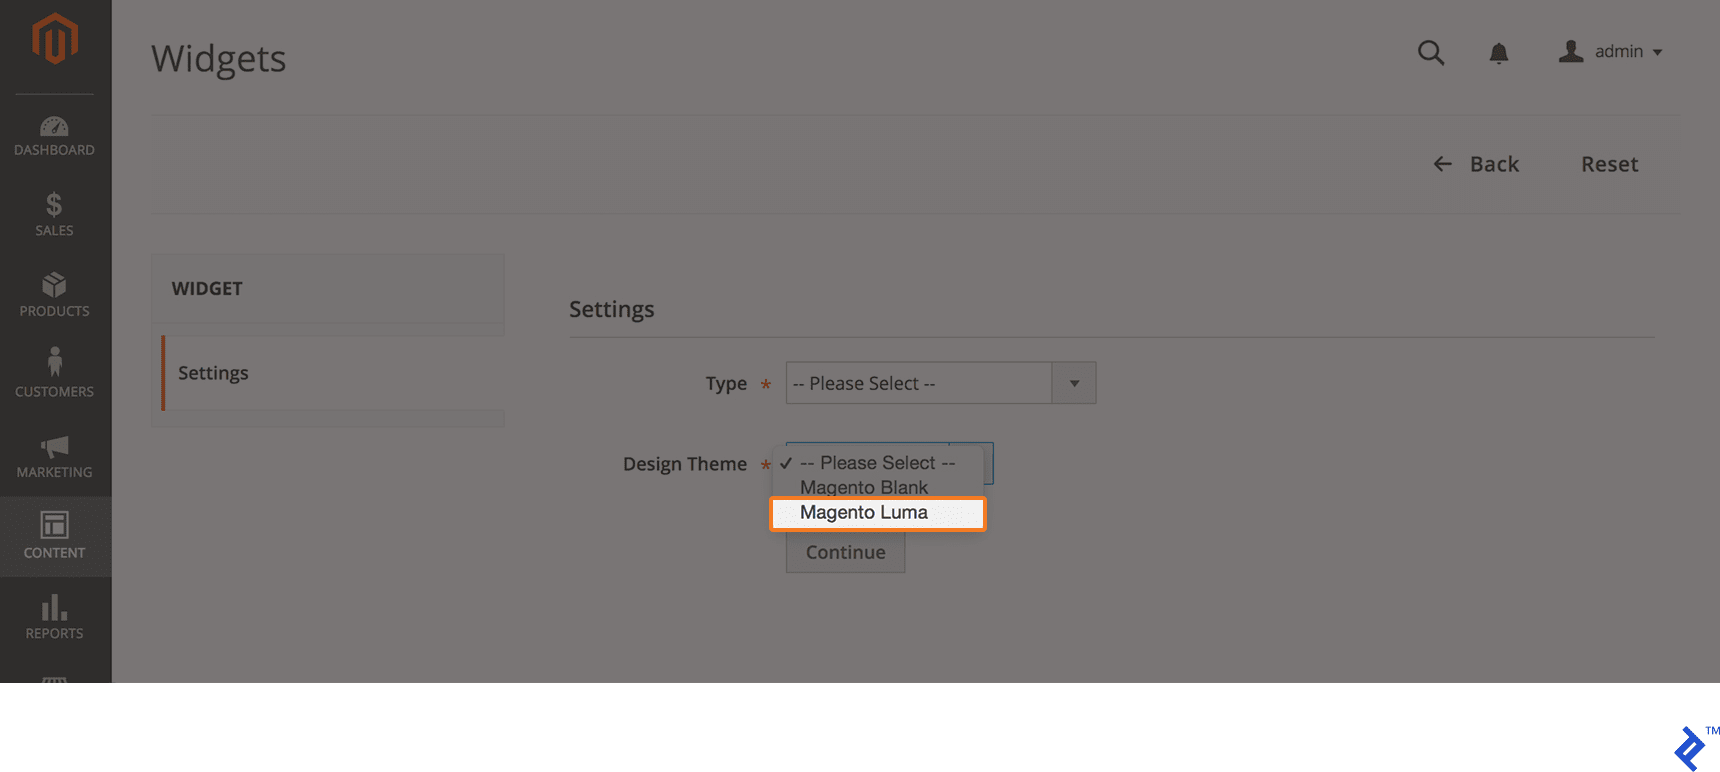
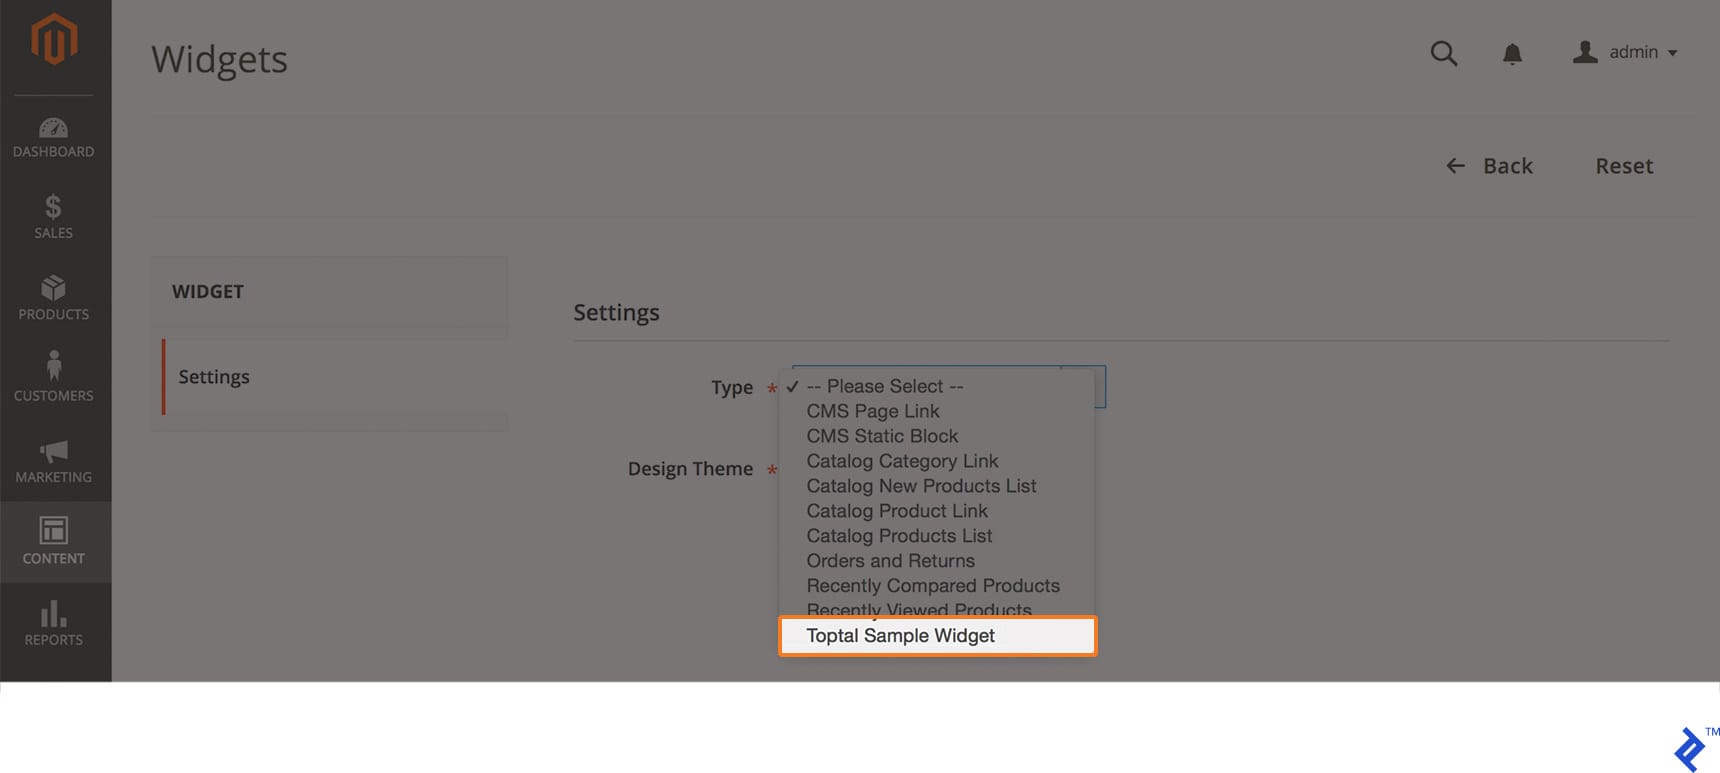
Click the Add Widget button. You’ll be directed to the Settings tab, where you can select the desired Type and Design options and themes.
The screenshot below illustrates the selection of the Catalog New Product List for front-end display.

- We opted for LUMA as the Design Theme.
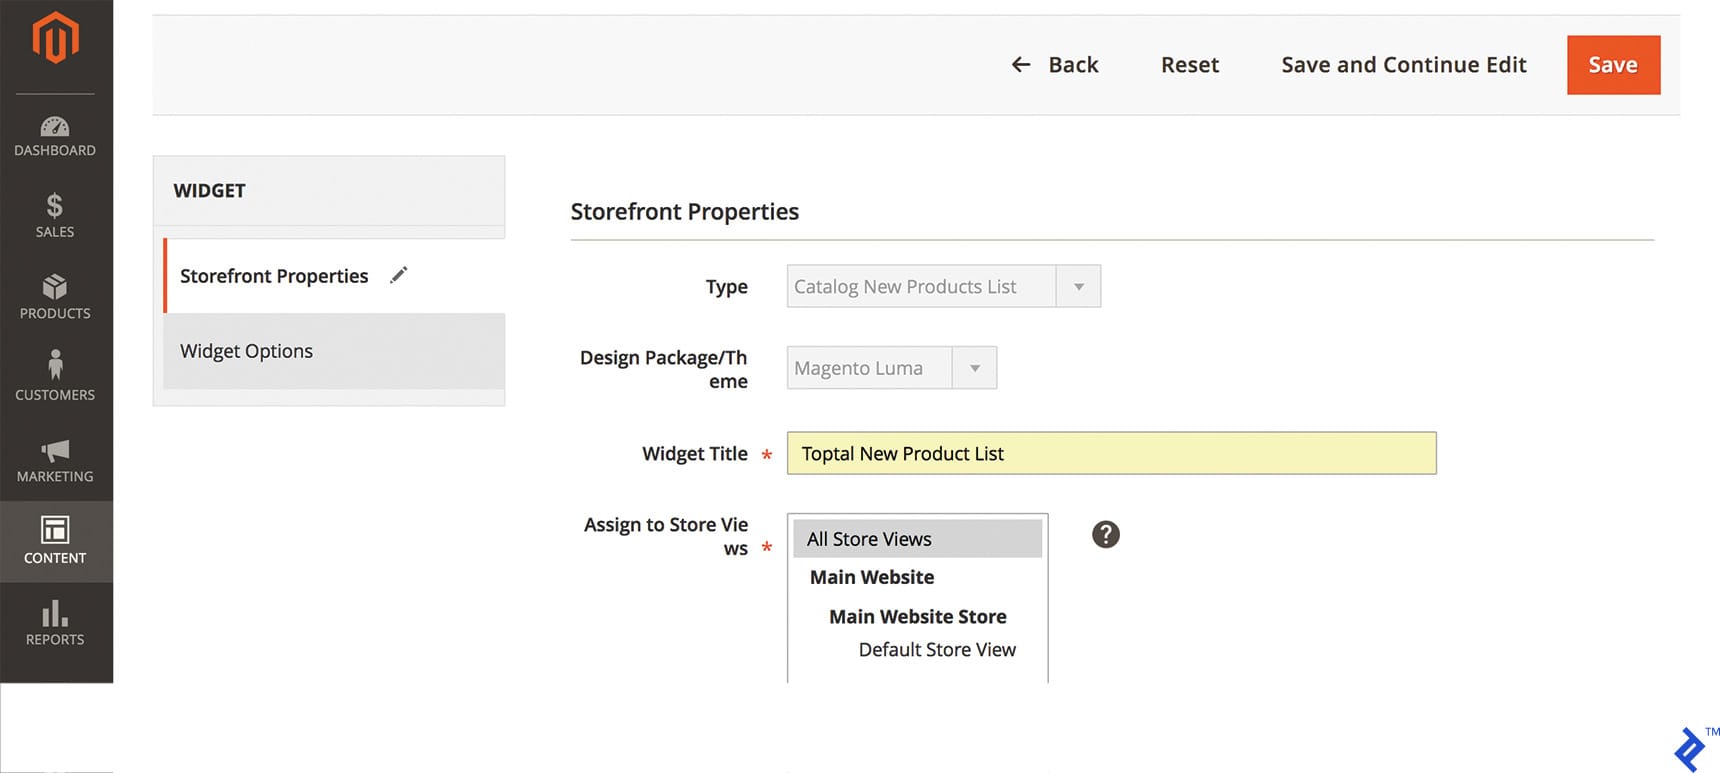
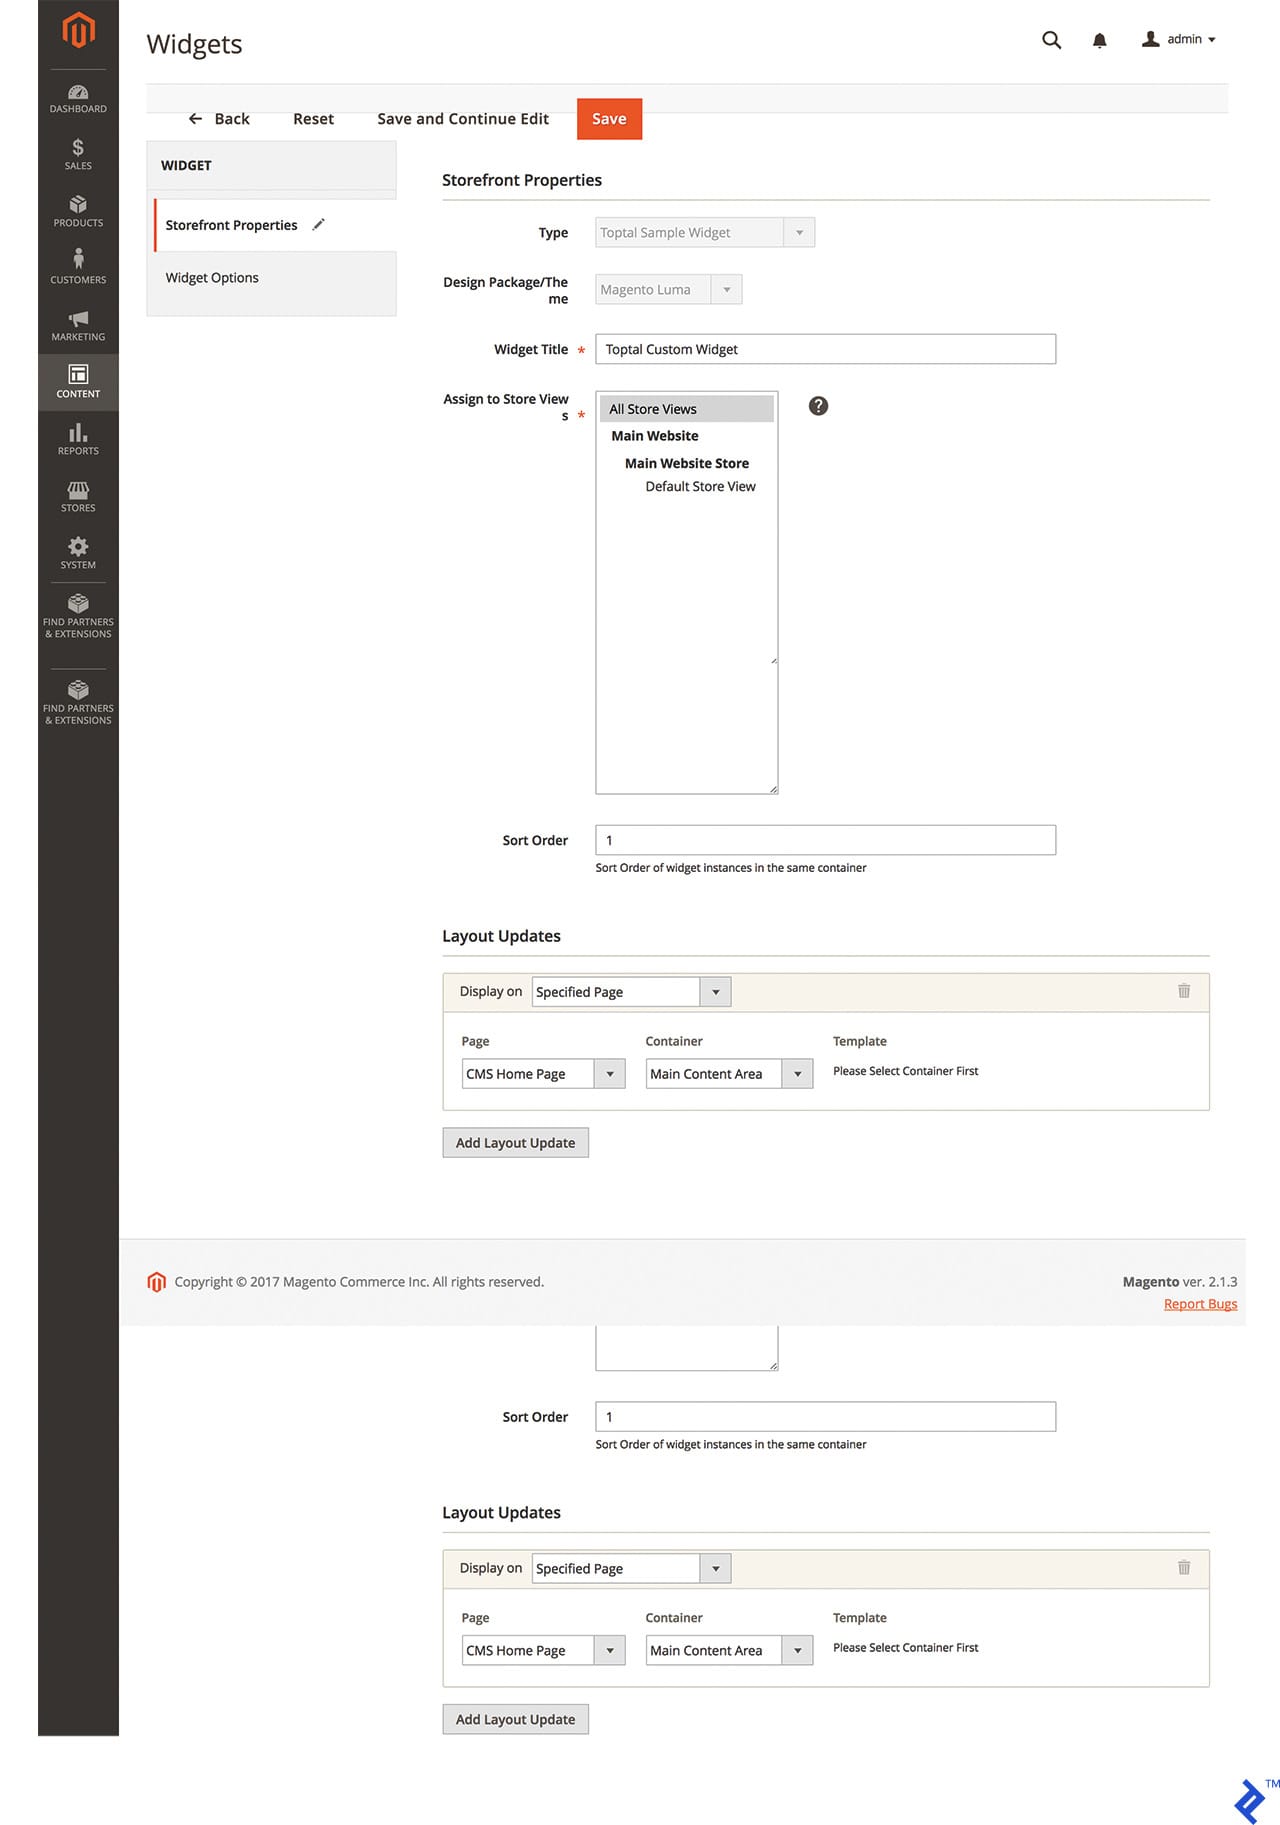
- Next, we configure storefront properties by providing a Widget Title and selecting the desired Store View. In this case, we’ll use “Toptal New Product List” and “All Store Views.”
- The Layout Updates section is crucial, dictating the widget’s location (e.g., home page, listing page, checkout page) and the specific area within the layout (e.g., below header, above footer, footer).
Layout Updates settings encompass the following options:
- Display On: Specified Page or All pages.
- Page: CMS Home Page
- Container: Main Content Area
- Template: Choose between Grid or List mode for product display.
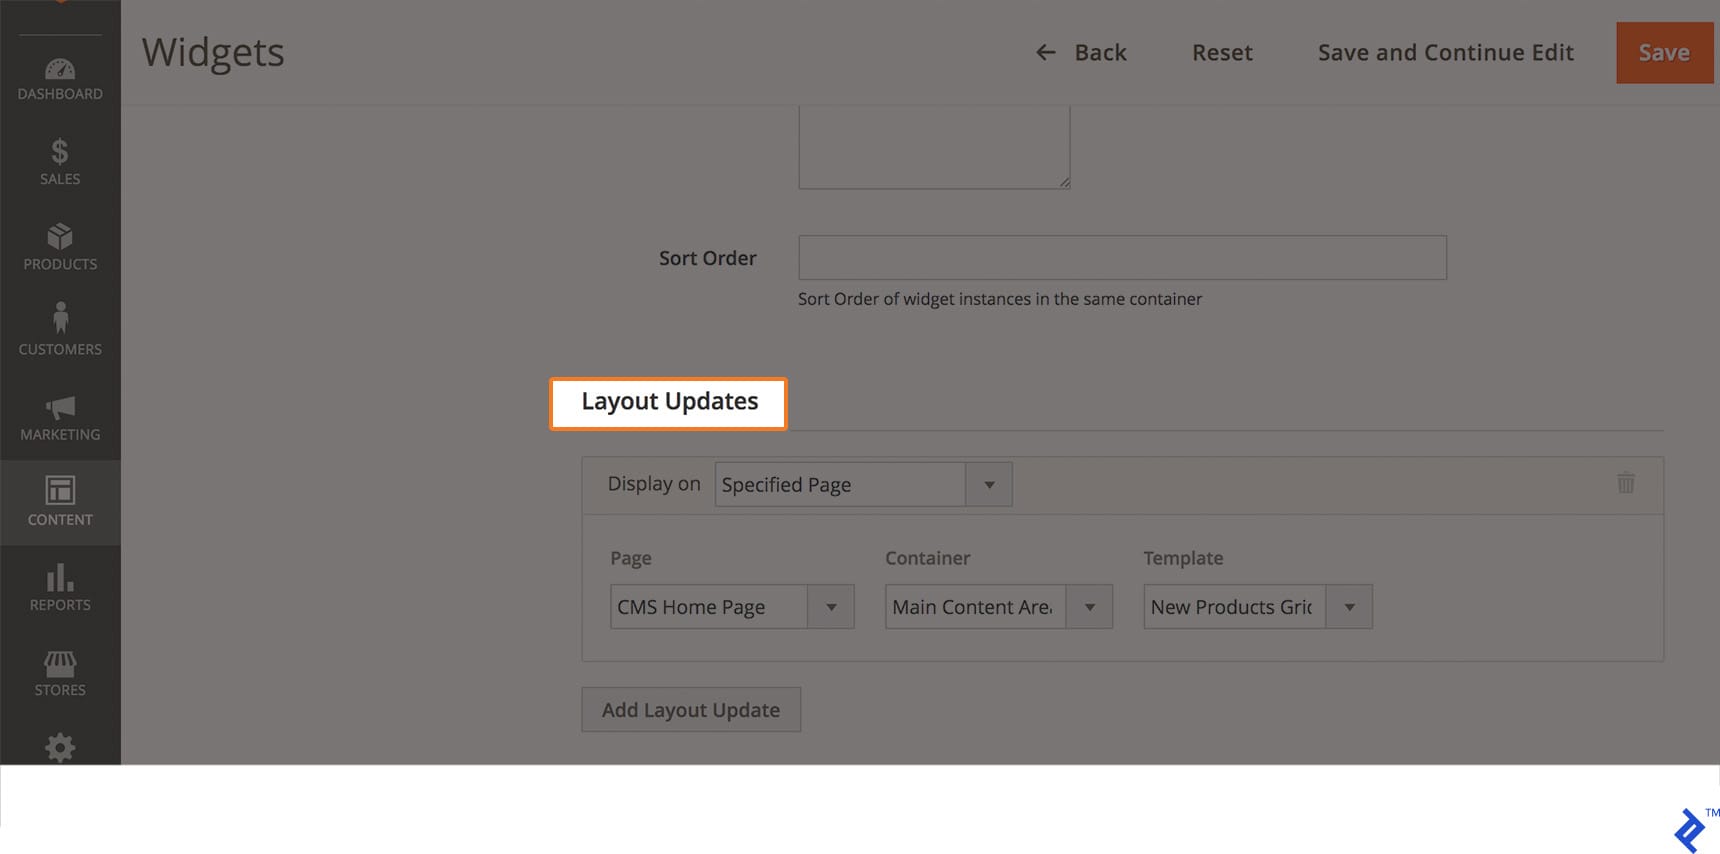
Upon selecting Specified Page, we can specify the display location using the Page dropdown. In this case, we’ll choose “CMS Home Page.” Next, we select the desired container and template for widget presentation.
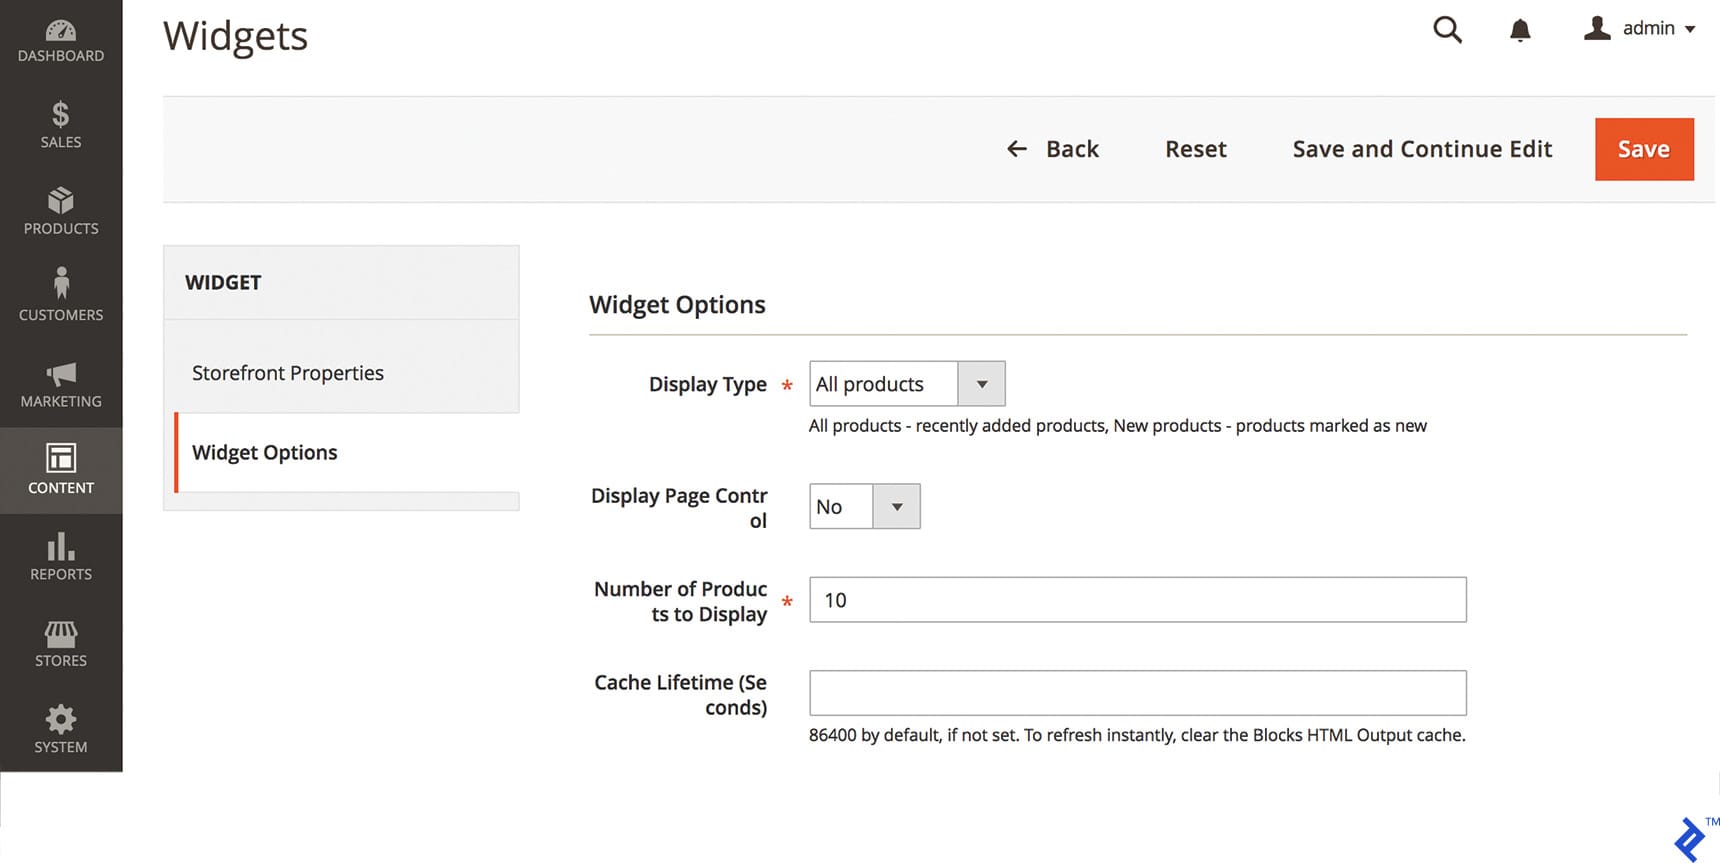
The final tab houses widget options, including Condition settings to filter displayed products and limit the number of products shown.
Selecting “All Products” will display the most recently added products. Choosing “New Products” will restrict the display to products marked as “New.” Enabling Display Page Control provides customers with navigation control for multiple lists, requiring the specification of the number of products per list in the Number of Products to Display field. Additionally, the Cache Lifetime can be adjusted as needed.
After saving the widget, flush the Magento 2 cache either through the admin panel or the command line:
php bin/magento cache:clean and php bin/magento cache:flush
The new products should now be visible on the homepage.
How to Create a Custom Widget in Magento 2
Let’s dive into creating custom widgets for Magento 2, offering the ultimate flexibility in content addition and editing within CMS blocks or pages.
Starting with the fundamentals, let’s create a new module. If you’re unfamiliar with custom module creation in Magento 2, numerous resources are available online.
Our example will use “Toptal” as the namespace and “CustomWidget” as the module name. We’ll begin with the standard files: “composer.json,” “registration.php,” and “etc/module.xml.”
“app/code/Toptal/CustomWidget/composer.json”
This file is processed by Composer every time it’s run, even though Composer isn’t directly used in our module.
Next, we register the module with Magento by creating “register.php” at the following location: “app/code/Toptal/CustomWidget/registration.php.”
| |
Now, let’s create the final registration file, “module.xml.”
“app/code/Toptal/CustomWidget/etc/module.xml”
| |
With registration complete, we move on to creating the “widget.xml” configuration file.
“app/code/Toptal/CustomWidget/etc/widget.xml”
| |
In the code above, “Title” and “Content” are defined as parameters for display wherever the widget is invoked. The "" tag specifies the block class “Toptal\CustomWidget\Block\Widget\Samplewidget,” which resides in “Block/Widget/Samplewidget.php” and dictates the template used by our widget.
The following code snippet defines the widget’s block, where we set the template:
“app/code/Toptal/CustomWidget/Block/Widget/Samplewidget.php”
| |
“Toptal\CustomWidget\Block\Widget\Samplewidget” is declared in the code above. We assign a custom template file to the “$_template” variable.
Let’s examine the widget template:
“app/code/Toptal/CustomWidget/Block/view/frontend/templates/widget/samplewidget.phtml”
| |
Retrieving values from widget parameters is straightforward:
“$this->getData(‘widgettitle’);”
and
“$this->getData(‘widgetcontent’);”
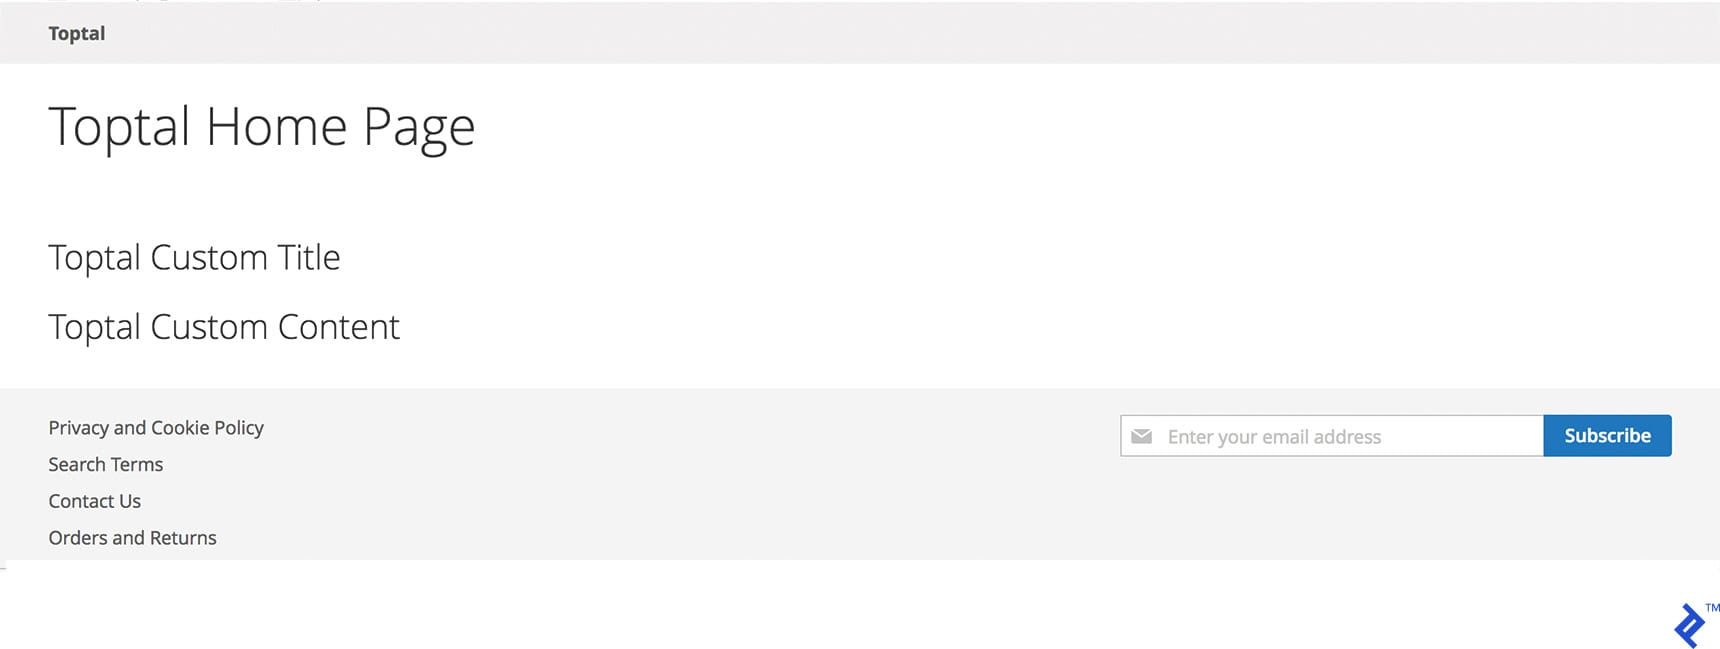
The end result in Magento Admin looks like this:

As before, save the widget and flush the cache either through the admin panel or the command line using:
php bin/magento cache:clean and php bin/magento cache:flush
You can download this simplified module here as a learning resource. While not a complete Magento 2 widget template, it serves as a valuable starting point. For those seeking more comprehensive resources, official Magento 2 documentation is an excellent starting point.
For further learning, I recommend these informative personal dev blogs: Alan Storm, offering excellent Magento learning content, and Alan Kent’s blog.
Widgets: A Crucial Part of the Big Picture
This article aimed to guide you through widget creation in Magento 2, providing a step-by-step tutorial on Magento 2 widget development and custom widget creation. Custom solutions offer greater flexibility and functionality.
Magento widgets provide vital front-end functionality, and well-crafted custom widgets can elevate your next Magento project. They empower developers with greater creative freedom, enabling the implementation of enhanced functionality, diverse homepage elements, and more.

Beyond user experience and conversion optimization, Magento widgets offer administrative benefits by saving time and effort. Clients always appreciate streamlined workflows.
However, delving into ROI and marketing aspects is beyond the scope of this technical overview. My goal was to provide a concise technical guide and a user-friendly Magento 2 widget tutorial.