WordPress, a widely used open source platform for blogging and content management, powers a significant portion of the internet. A substantial number of websites, potentially up to 25%, utilize WordPress, resulting in a high demand for WordPress development services.
Many users appreciate WordPress for its adaptability and customization options, unlike other content management systems. Taxonomies, a fundamental feature of WordPress, enable users to structure content according to their specific needs. While WordPress includes default taxonomies, it allows for the addition of numerous custom taxonomies as desired.
However, achieving the exact behavior desired from taxonomies may involve working with undocumented methods.

This article will guide you through defining exclusive custom taxonomies in WordPress. These taxonomies function similarly to categories rather than tags, enabling stricter categorization of posts compared to the default settings.
Understanding Taxonomies
The WordPress codex defines a taxonomy as:
A method for grouping items together.
To illustrate, various fruit types can be categorized based on specific attributes and assigned group names.
WordPress utilizes taxonomies to group posts, pages, and custom post types.
Terms refer to the names given to distinct groupings within a taxonomy. Using the fruit example, if categorized by color, the color names represent the terms.
WordPress comes equipped with four default taxonomies: category, tag, link category, and post format. For more information on these default taxonomies, refer to here.
Among these, categories and tags share similarities but differ significantly in exclusivity: Categories allow a maximum of one selection per post, while multiple tags can be assigned to each post.
Furthermore, categories are generally predefined, whereas tags can be created on the fly.
Creating Custom Taxonomies
The register_taxonomy() function allows for custom taxonomy definition. Further details about this function can be found here.
To illustrate its functionality, let’s define a custom taxonomy for posts featuring scenic photographs.
| |
This snippet defines a new post taxonomy named view.
This taxonomy can be used to categorize photos based on the type of view they depict, such as mountain, lake, or forest.
Posts associated with specific terms within this taxonomy will be listed under /view/{view_name}.
The capabilities line in the code snippet is optional. If omitted, WordPress assigns default capabilities to the same users as posts. In this example, users with the custom capability “edit_guides” can assign the taxonomy to posts, while those with the “publish_guides” capability can create new taxonomy items.
According to official documentation, four capabilities can be defined:
Taxonomy capabilities encompass
assignterms,editterms,manageterms(which displays the taxonomy in the admin navigation), anddeleteterms.
Utilizing Taxonomies
In your code, the wp_set_object_terms() function adds terms to objects using the taxonomy. The the_terms() function lists existing terms, and the wp_tag_cloud() function generates a term cloud for your custom taxonomy. For more details on these functions, refer to here.
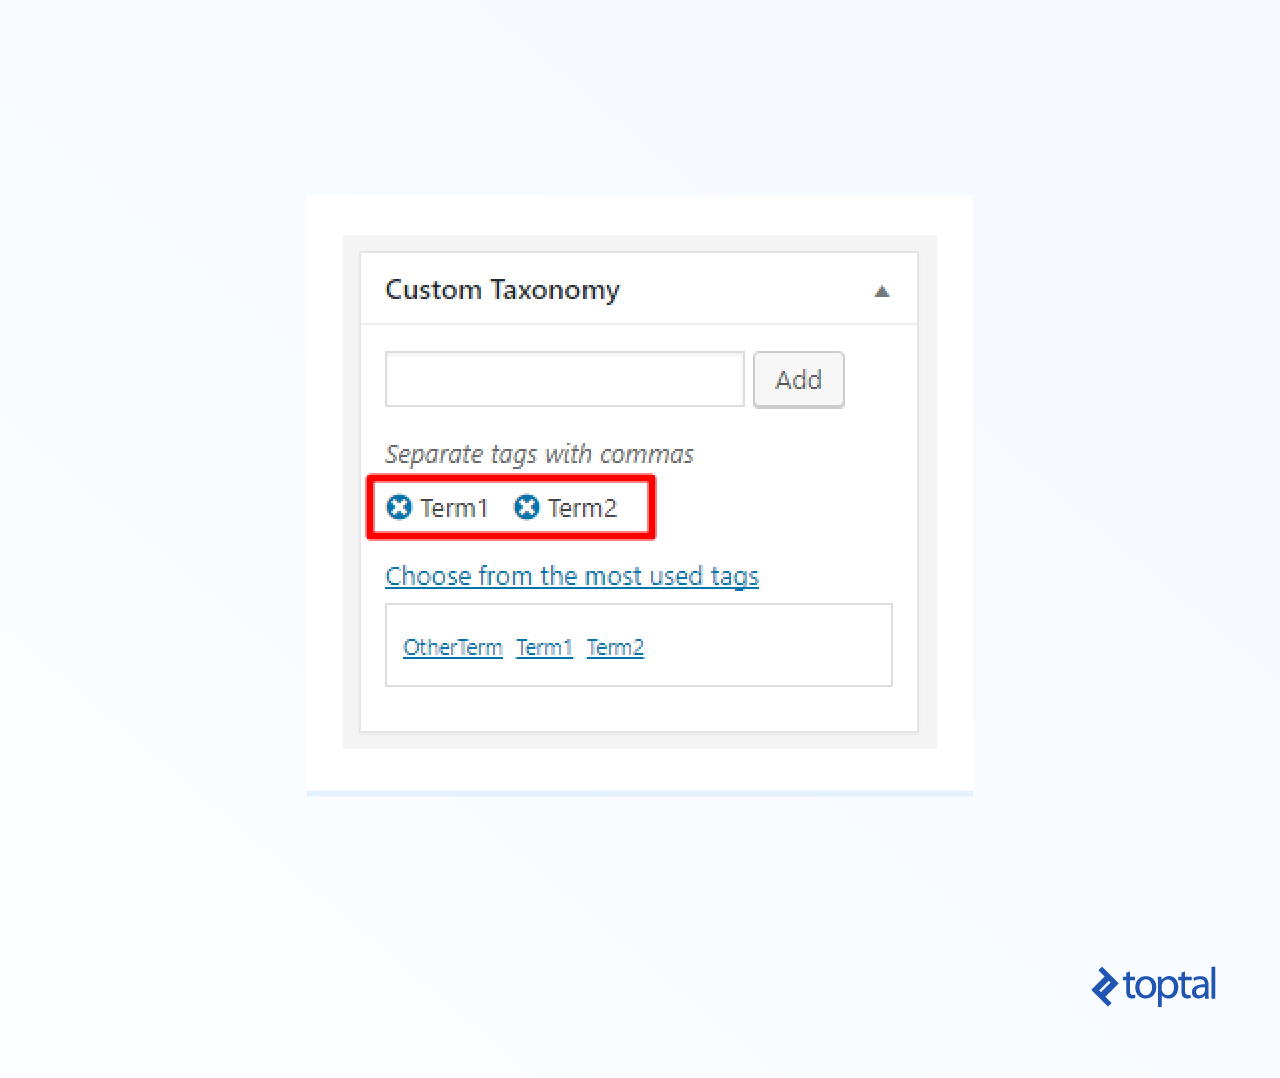
On the user interface, WordPress generates a new meta box for each taxonomy within posts. Similar to the Tags meta box, it allows linking one or more terms to a post. While this is the default WordPress behavior, making a taxonomy exclusive can alter this, making the custom taxonomy function like the category taxonomy.
Enforcing Exclusivity in Taxonomies
When using the register_taxonomy() method to create a custom taxonomy, WordPress includes a meta box with multiple item selection on the post editing page:
This meta box enables users to select any number of existing terms and add new terms using the text box.
To establish a category-like taxonomy, limiting each post to a maximum of one category from a predefined set, adjustments to WordPress are necessary:
- Conceal the default WordPress meta box.
- Introduce a custom meta box on the post editing page for single item selection.
- Save the taxonomy value upon post saving.
Let’s break down each step.
Concealing the Default WordPress Meta Box
To achieve this, set both show_in_quick_edit and meta_box_cb options to false when calling register_taxonomy.
The first option removes the taxonomy from the quick/bulk edit panel, while the second hides it on the post edit page:
| |
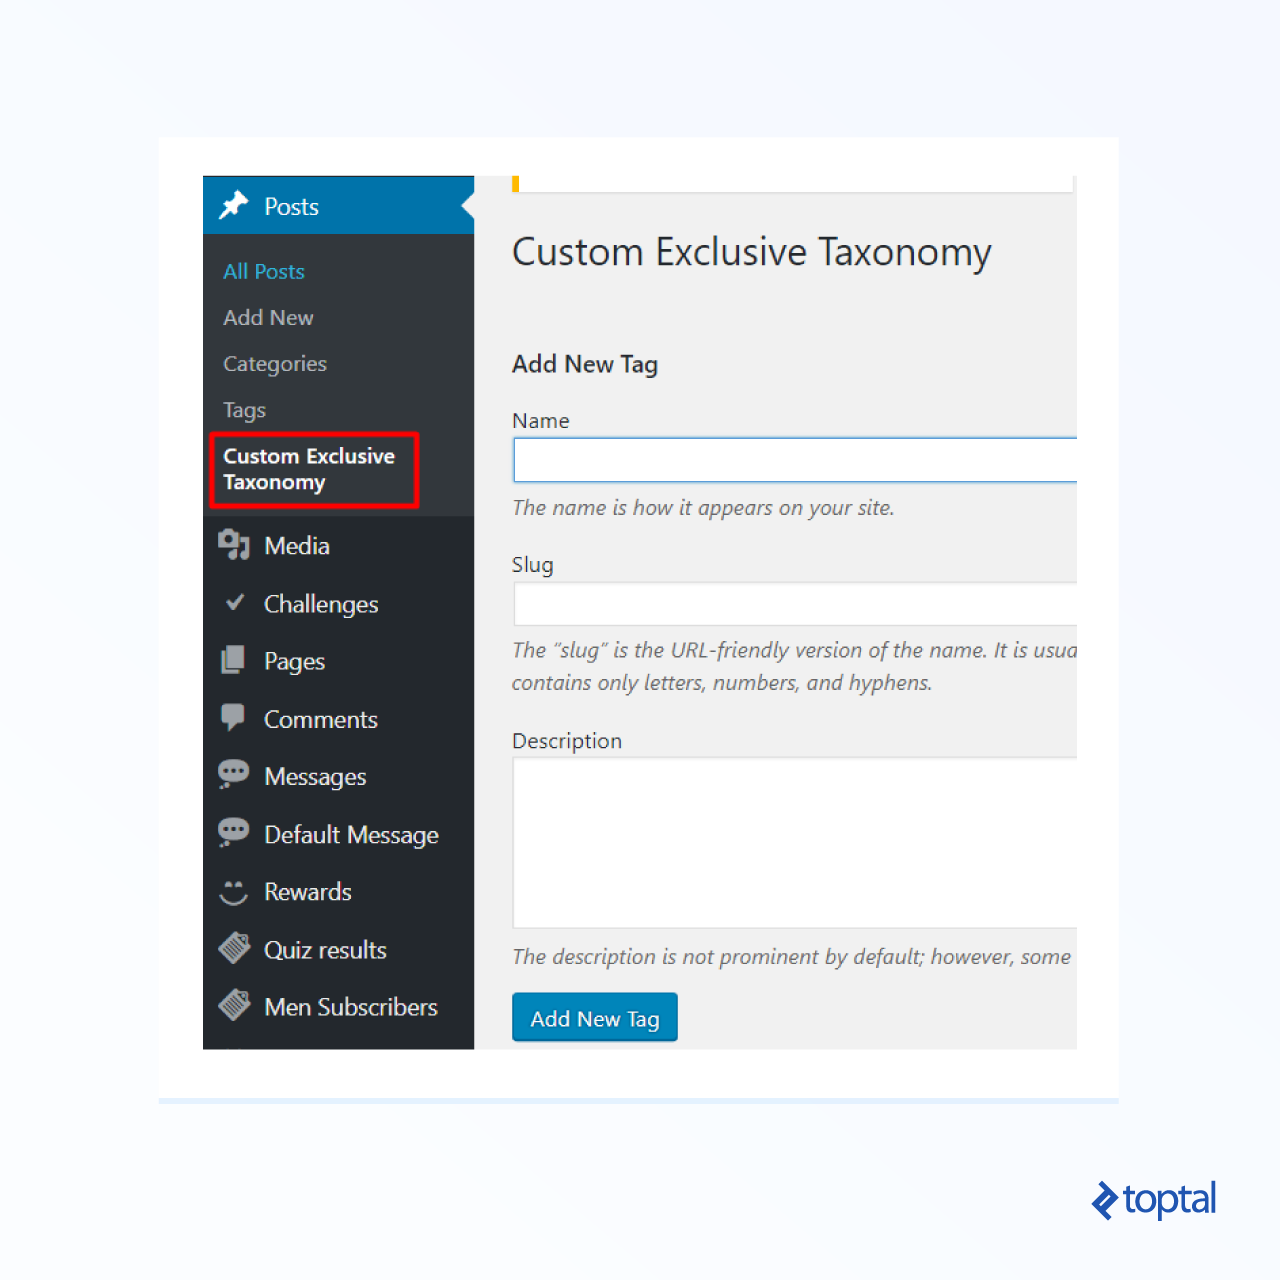
When the default meta box is hidden, new terms can be added to the available taxonomy terms through the taxonomy management page:
Creating a Custom Meta Box on the Post Editing Page
The add_meta_boxes WordPress hook can be employed to create a custom meta box. Learn more about this hook here.
| |
We invoke the add_meta_box method with the following arguments:
taxonomy_box– The meta box ID.__('Custom Exclusive Taxonomy')– The meta box title.fill_custom_meta_box_content– The function to populate the meta box content.post– Indicates the meta box should appear on the post editing page.side– Specifies the meta box’s insertion point.
Note that taxonomy_box serves as the ID. However, the function in the third parameter dictates the box’s content.
Now, let’s implement the fill_custom_meta_box_content function:
| |
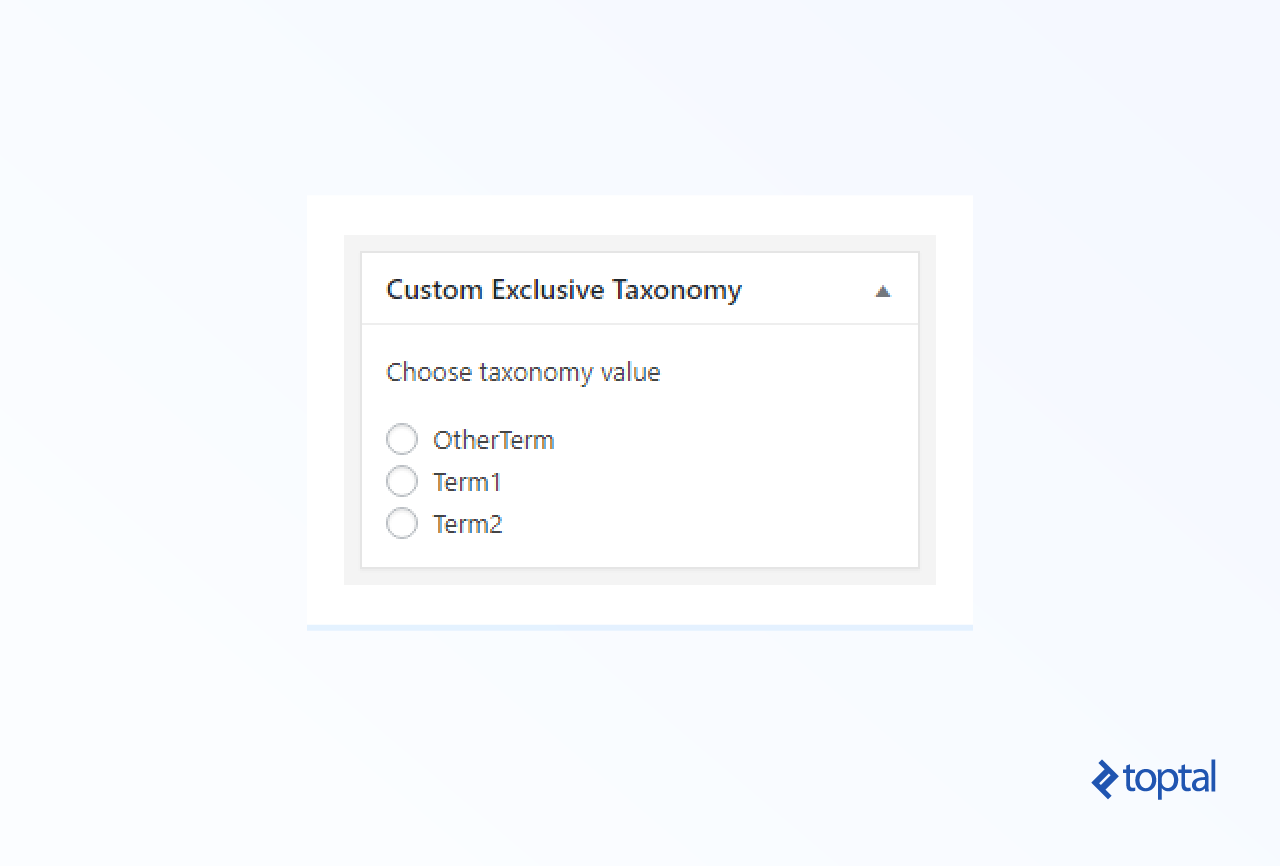
Initially, we retrieve all existing terms (values) of the taxonomy. These will be used to display a list of radio button controls.
Subsequently, the currently selected taxonomy term is retrieved using the get_the_terms() function, ensuring the corresponding radio button is selected.
Since this function returns an array (as posts can have multiple associated terms), and we assume a maximum of one term per post, we access the first array element. An empty array will result in null as the current value, leaving all radio buttons unselected.
The HTML generation code employs custom_taxonomy as the name for the radio buttons, using corresponding term IDs as values. Radio button ID attributes are solely for linking to label tags. This results in the following custom meta box:
Saving the Taxonomy Value Upon Post Saving
Lastly, we must ensure the taxonomy value persists when the post is saved. The save_post hook serves this purpose:
| |
And that concludes the process!
You now possess the knowledge to define custom taxonomies that emulate the behavior of the built-in category taxonomy.
Note: WordPress has a pending feature request to simplify toggling exclusivity for custom taxonomies. However, there hasn’t been much activity on it lately.
In Conclusion
Taxonomies are a robust and valuable feature in WordPress. While lacking the default capability for strict post categorization, like most aspects of WordPress, taxonomies and related functionalities offer extensive customization. This allows us to implement this frequently required capability with a few steps.
The approach outlined here can be further extended to create even more tailored user interface elements for taxonomy term selection on post editing pages.
Hopefully, this concise tutorial on defining exclusive custom taxonomies has proven beneficial!