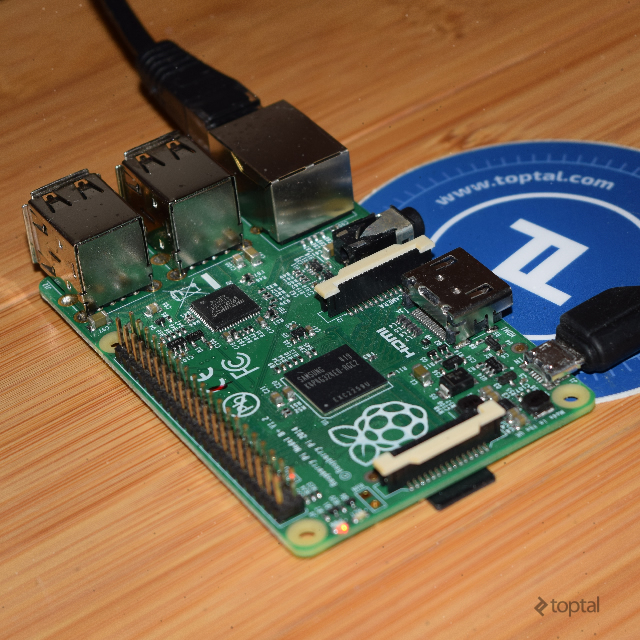
A Raspberry Pi](https://www.raspberrypi.org/) is an affordable computer capable of running various software and supporting diverse projects. This guide explains how to turn it into a home development server for deploying a full-stack JavaScript application accessible outside your network. This setup is excellent for a remote workspace or controlling development hardware.
Requirements for a Raspberry Pi Home Server
While focusing on the Raspberry Pi 3, this tutorial should be compatible with models back to the first generation. Feedback on older models or the Raspberry Pi Zero is welcome in the comments.
Beyond the Raspberry Pi, you’ll need:
- Micro USB charger
- Ethernet cable
- MicroSD card (8GB minimum, up to 32GB recommended)
These are helpful for initial setup:
- USB keyboard
- HDMI cable and monitor
Raspberry Pi OS: Raspbian
Installing an OS on a Raspberry Pi is straightforward. Use your computer to install the boot image on a microSD card, insert it into the Pi, and boot.
Raspbian, a Linux distribution based on Debian 7.0 (Wheezy), is the official Raspberry Pi OS, optimized for its architecture. While other OS options exist, Raspbian’s simplicity makes it our choice.
This tutorial is updated for Raspbian version (or later):
| |
To install Raspbian, visit the official download page and download the latest version’s zip file.
Insert the microSD card into your computer. Depending on your OS ( Linux, Mac OS, or Windows), follow the instructions on Raspberry Pi’s website.
Eject the SD card and insert it into the Raspberry Pi. Connect the Pi to your router with the Ethernet cable and plug in the Micro USB charger to boot it up.
For initial configuration:
- Direct Connection:
- Connect a USB keyboard and HDMI monitor to the Pi.
- The Pi should recognize them automatically.
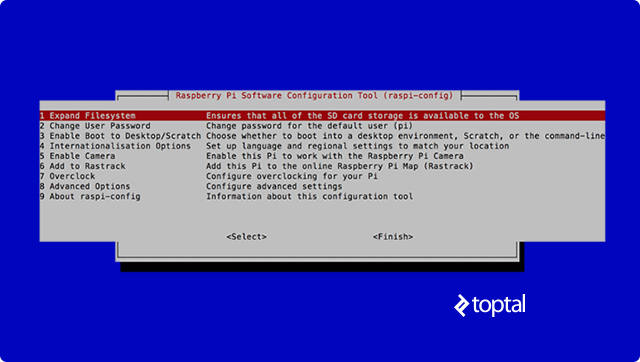
- The first boot runs
raspi-configautomatically. Subsequent boots require runningsudo raspi-configmanually.
- SSH Connection:
- Find your Pi’s IP address on your local network using connecting to your router’s admin page, or by using a network tool like
nmap. - Connect via SSH from your terminal (or Putty on Windows). The default user is
pi, password israspberry. For IP address 192.168.1.16, runssh pi@192.168.1.16and enter the password. - Once connected, run
sudo raspi-config.
- Find your Pi’s IP address on your local network using connecting to your router’s admin page, or by using a network tool like
raspi-config guides you through the setup. Configure any options, but prioritize: expanding the filesystem for full SD card utilization, and changing the default user’s password for server security.
Installing Nginx Web Server
Next, install the web server. Nginx is preferred for its low memory footprint and compatibility with Node.js (which we’ll set up later). While alternatives like Apache or lighttpd exist, we’ll use Nginx.
Before installation, update your system:
| |
Install Nginx using apt-get:
| |
After installation, start the server:
| |
If you haven’t already, find your Pi’s local IP address using ifconfig. The eth0 section will show your ethernet adapter’s information, with the local IP address labeled inet addr.
Access your Pi’s default Nginx welcome message by entering its IP address in your browser.
Public Access: Port Forwarding
Skip this step if you don’t need external network access. Otherwise, let’s enable it.
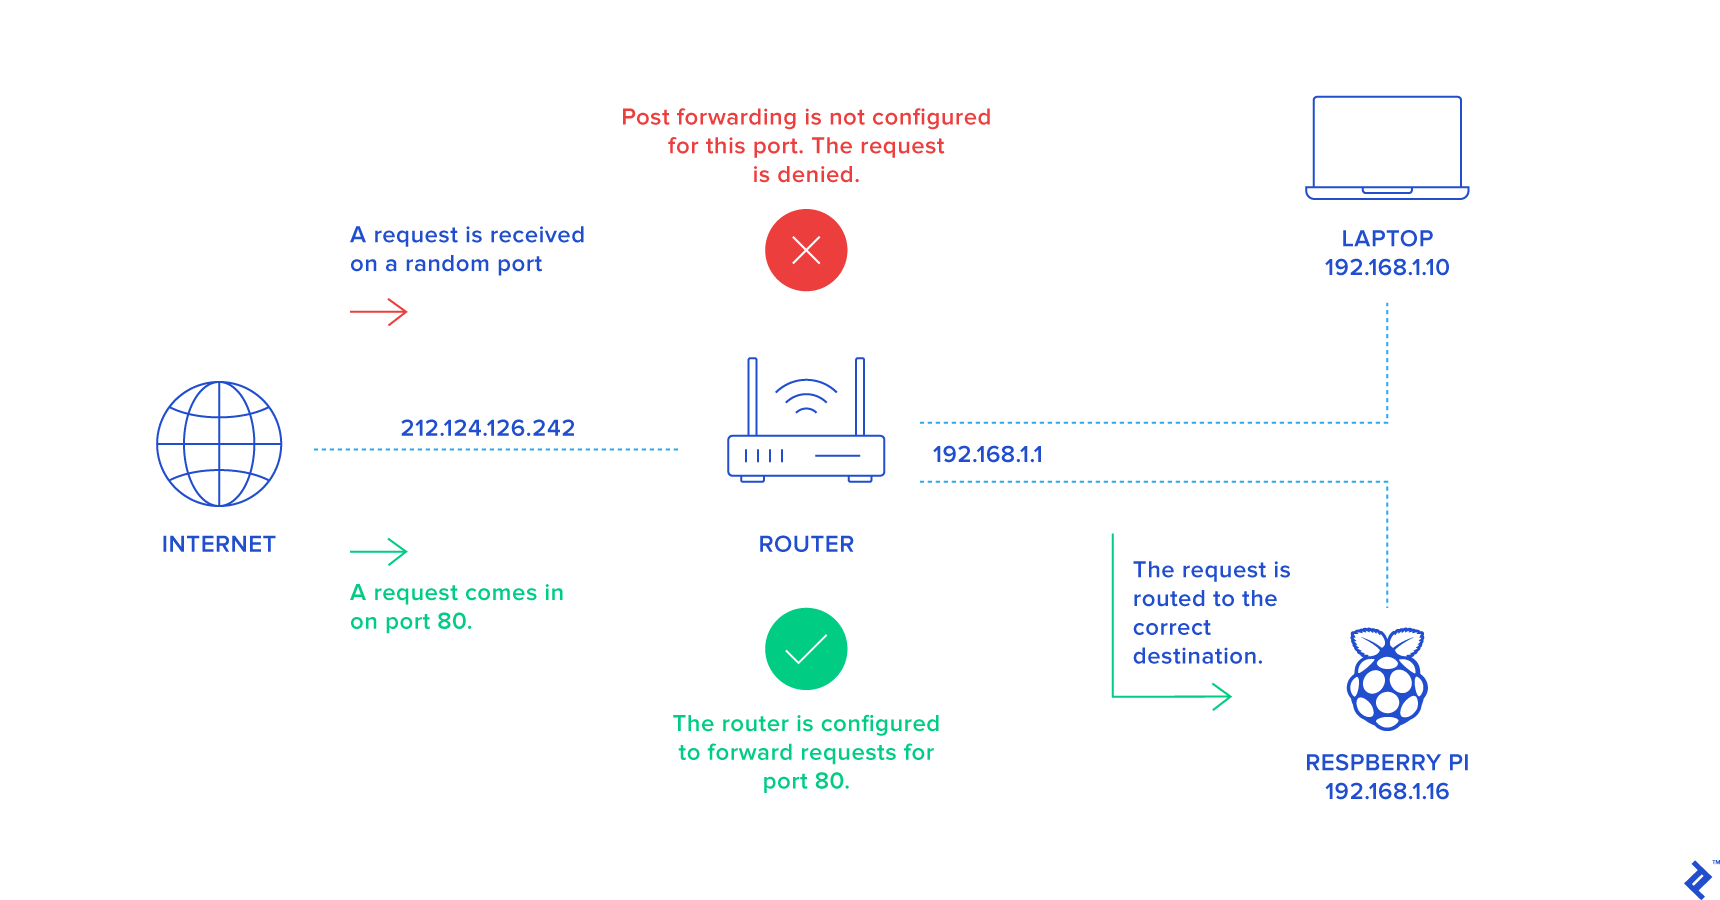
Typically, devices within a home network are invisible externally. Only your router, using its external IP, is reachable. It manages incoming traffic, allowing responses to initiated connections but blocking unsolicited ones for security.
To connect to your Pi externally, use port forwarding. Configure your router to forward incoming traffic on specific ports to your Pi. Usually, HTTP uses port 80, SSH uses 22. Open these on your router for application access and secure server management.
Port forwarding configuration varies depending on your internet provider and router. Find the relevant options in your router’s admin page, often under “Forwarding,” “Port Forwarding,” or “Network Address Translation.”
Open one port for HTTP and another for SSH. Forward data sent to these external ports to your Pi: web traffic to port 80 (Nginx) and SSH traffic to port 22 (SSH server). Example configuration:
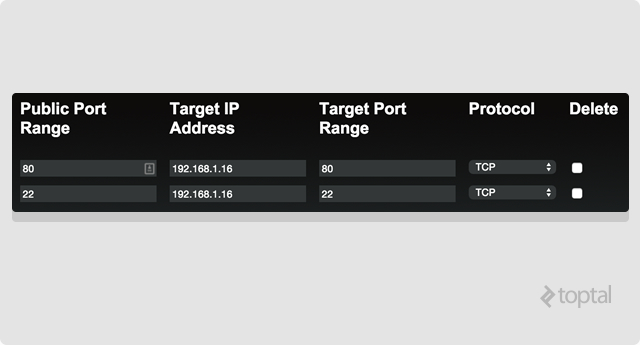
192.168.1.16. All incoming traffic bound for ports 80 or 22 are forwarded to this internal address.Find your router’s external IP by typing “what’s my ip address” into Google. Test port forwarding from outside your network: SSH with ssh pi@{external IP address}, HTTP by entering the external IP in your browser. Note: This allows anyone knowing your external IP to access your Pi on these ports.
For dynamic IPs, set up dynamic DNS via your router or Pi. While not covered here, resources are available BitPi.co has a good tutorial on the subject if needed.
Full-stack JavaScript Framework
While most web frameworks can run on Nginx, let’s go full-stack with JavaScript. Install Node.js and MongoDB.
Node.js is easily installed:
| |
Verify installation with node -v.
Install MongoDB:
| |
To prevent database corruption, shut down MongoDB before turning off your Pi:
| |
Deploying Your App
Develop locally and push changes to a BitBucket Git repository. Raspbian includes Git, allowing you to pull and run your code on the Pi.
Project Scaffolding
First, set up and push your application code. Among many methods, generator-angular-fullstack is great for scaffolding server and client code.
Install generator-angular-fullstack on your computer:
| |
Create your application directory:
| |
Scaffold the application:
| |
Repository Creation and Code Push
Create a BitBucket repository as described here and set up your local directory:
| |
Commit and push your code:
| |
The generator includes the grunt-build-control plugin for committing build code to a specific repository branch. Configure it for BitBucket in Gruntfile.js within your application’s root directory:
| |
Run:
| |
…to create the distribution folder, followed by:
| |
…to commit and push the code to the build branch in your repository.
SSH Key Generation
With your code hosted, generate an SSH key for your Pi and add it to BitBucket for deployment. For detailed instructions, see BitBucket guide.
On your Pi’s terminal, generate the key pair:
| |
Start the agent:
| |
Add the key:
| |
Output the public key content:
| |
…and copy-paste it into BitBucket.
In BitBucket, go to your profile, Manage account, SECURITY, SSH keys, and click Add key.
Repository Cloning
While there’s no strict convention, create a /var/www directory for your projects:
| |
Avoid using sudo for file placement in the webroot by changing ownership to your Pi user and the group to www-data (used by Nginx):
| |
Clone your repository’s build branch and install dependencies:
| |
Once done, start your app in production mode:
| |
Check if it works by browsing to the Pi’s IP address.
Nginx Reverse Proxy Configuration
One last step: While Nginx listens for HTTP requests on port 80, your Node app uses a different port (e.g., 8080). Configure Nginx as a reverse proxy to forward requests to Node.
Nginx stores application configuration files in sites-available:
| |
Copy and edit the default configuration:
| |
The final configuration should resemble this, with Nginx proxying to the Node.js server:
| |
Enable this configuration with a symlink in sites-enabled, where Nginx finds active configurations:
| |
Reload the service:
| |
Your application can now receive traffic for the my-app.dev domain (configured with server_name my-app.dev). To access it externally, match traffic to this domain. While domain purchase is possible, the hosts file provides a simpler alternative.
On your workstation, edit the hosts file to map your router’s external IP to the my-app.dev hostname. This directs traffic for my-app.dev to your router with the correct hostname.
On Windows, edit c:\windows\system32\drivers\etc\hosts as administrator using Notepad. On Linux/Mac, use sudo nano /etc/hosts or sudo nano /private/etc/hosts respectively.
| |
Next Steps
With everything set up, deploy multiple applications to your Pi. Install tools like forever or pm2 to manage your Node.js servers.
Remember, if anything goes wrong, simply wipe the SD card and start over!