In today’s digital landscape, web developers are highly influential, with JavaScript being a ubiquitous programming language. One of the earliest domains where JavaScript expanded its reach was mobile app development. Around a decade ago, PhoneGap emerged, enabling the installation of HTML and JavaScript-based apps on iOS and Android devices.
This technology has experienced both successes and challenges. While development was simplified, these apps differed noticeably from native apps. Vanilla HTML and browser-based JavaScript were designed for web browsers and couldn’t seamlessly transition to this new environment.
Even today, significant obstacles persist:
- Achieving native-like design and animation remains difficult.
- Implementing intricate screen transitions is complex.
- Handling touch events poses challenges.
- Performance issues arise with extensive lists.
- Positioning fixed elements accurately is tricky.
- Adapting to various screen sizes requires effort.
- Positioning native control elements (e.g., the iOS status bar) is not straightforward.
- Ensuring compatibility across different mobile browsers adds complexity.
Why Opt for a Framework with Cordova Apps?
Cordova technology often faces skepticism due to apps encountering the aforementioned issues. Frameworks aim to mitigate these problems and bridge the gap between HTML apps and native apps in terms of both aesthetics and performance.
Let’s examine some hybrid app examples built using two prominent frameworks that, alongside Onsen UI, are instrumental in empowering web developers in the contemporary world: Framework7 and Ionic.
Exploring the Ionic Framework
Developed by Drifty Co. in 2012, Ionic is grounded in Angular. It has undergone continuous development, attracting substantial investments and cultivating a vibrant developer community. The official website asserts that millions of apps have been built using Ionic.
As of this writing, the latest stable version is Ionic 3, which is based on Angular 5. Ionic 4, aiming for enhanced flexibility and Angular independence, is currently in early beta.
Beyond its UI engine, a remarkable component library, and an interface for accessing native device features, Ionic offers a suite of supplementary capabilities, services, and tools.
The Ionic CLI
Ionic’s command-line interface facilitates interactive project initialization (through a wizard), generates pages and components, and runs a development server for on-the-go app building with Live Reload functionality. It also integrates seamlessly with Ionic cloud services.
Lab and DevApp
Lab is an invaluable mini-service that emulates app behavior across different platforms within the Ionic developer’s browser. DevApp streamlines the deployment of apps to physical devices.
Packaging, Deploying, and Monitoring
Ionic comes equipped with a collection of web services that simplify and accelerate the building, debugging, testing, and updating of applications for both testers and end-users.
However, Ionic’s plans are subject to change. Some previously offered services—such as Auth, Push, Analytics, and View—have been discontinued, sparking concerns among subscribers.
Creator
This is Ionic’s visual editor, employing a drag-and-drop interface, for crafting functional user interfaces.
Delving into Framework7
This framework, the brainchild of Russian studio iDangero, emerged in 2014. Notably, a single developer has primarily driven the project, supplemented by a handful of contributors to the GitHub repository.
Initially, Framework7 comprised a set of UI components inspired by the then-newly-released iOS 7, hence its name. An Android theme was later introduced, and both themes have been updated to align with the latest iOS and Material Design guidelines.
Recently, the project has gained momentum, evolving from a collection of components into a comprehensive mobile application framework, integrating widely-used technologies and tools.
Framework7 has supported Vue.js since version 1, with version 3 extending support to React. This capability positions the project as a potential competitor to the more established Ionic, which exclusively supports Angular and TypeScript.
Installation and First Launch
Ionic
To embark on your Ionic journey, install it using NPM:
| |
Next, choose a template for your application. The official Ionic website offers multiple templates. Alternatively, you can select an empty template to build your app from scratch using ionic start myApp blank.
Let’s opt for a straightforward design. Execute the following command:
| |
When prompted by the installer with “Would you like integrate your new app with Cordova to target native iOS and Android?”, respond with “Yes”. This action automatically integrates your application with Cordova and readies it for deployment on mobile platforms.
In the subsequent step, the installer will inquire about connecting to the Ionic Pro SDK. For simplicity, decline this offer for now by answering “No”.
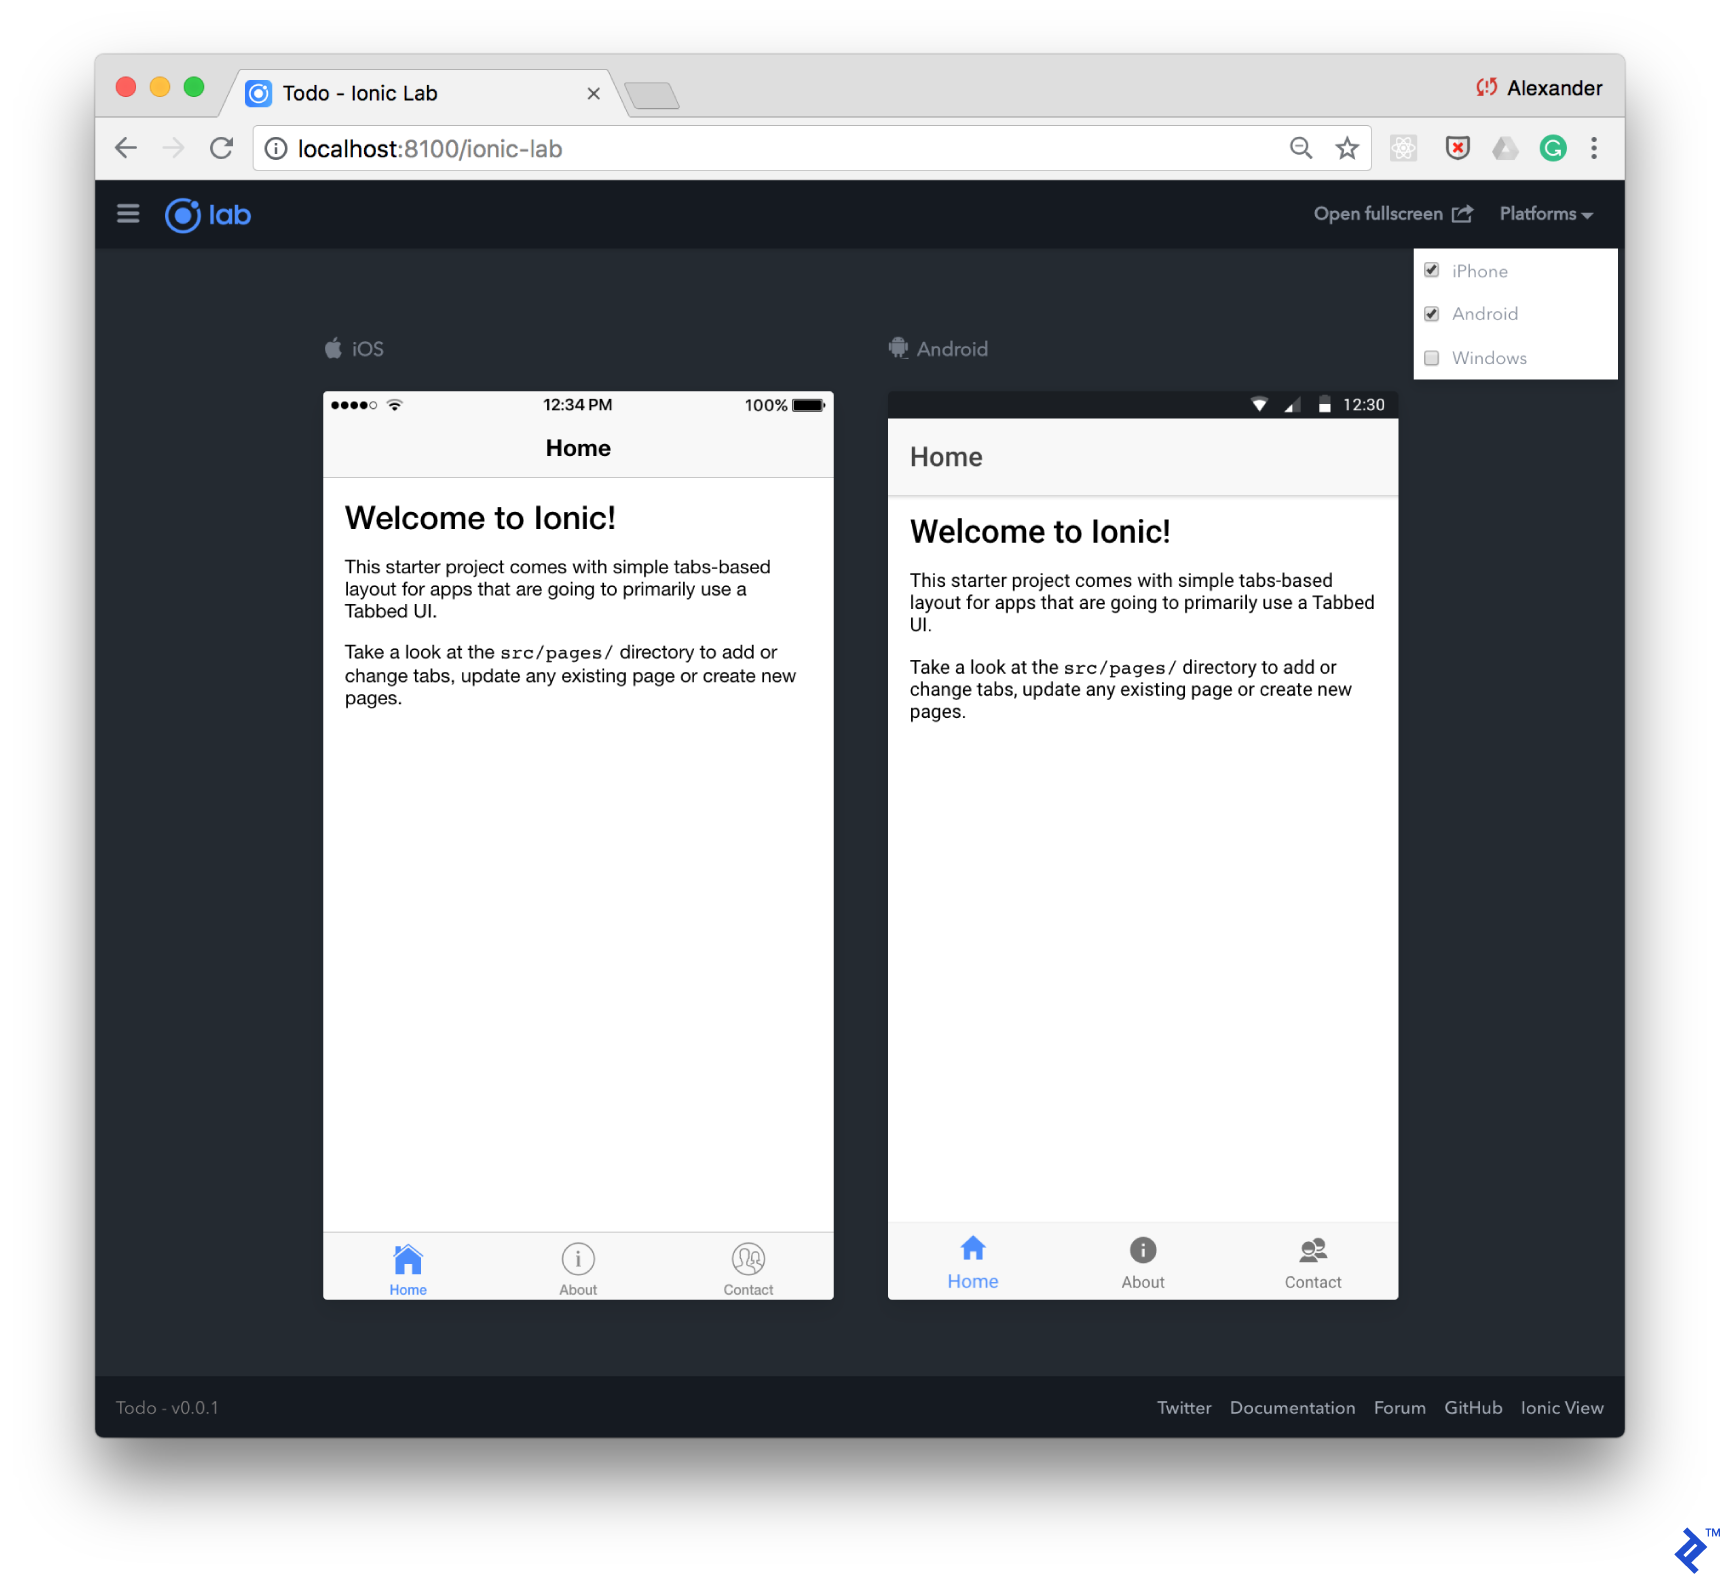
Install the supplementary @ionic/lab package to access the convenient debugging UI, which provides in-browser simulations of iOS, Android, and Windows devices:
| |
You can now launch your application in debug mode, enabling live development and debugging within your web browser:
| |
This will generate several useful addresses:
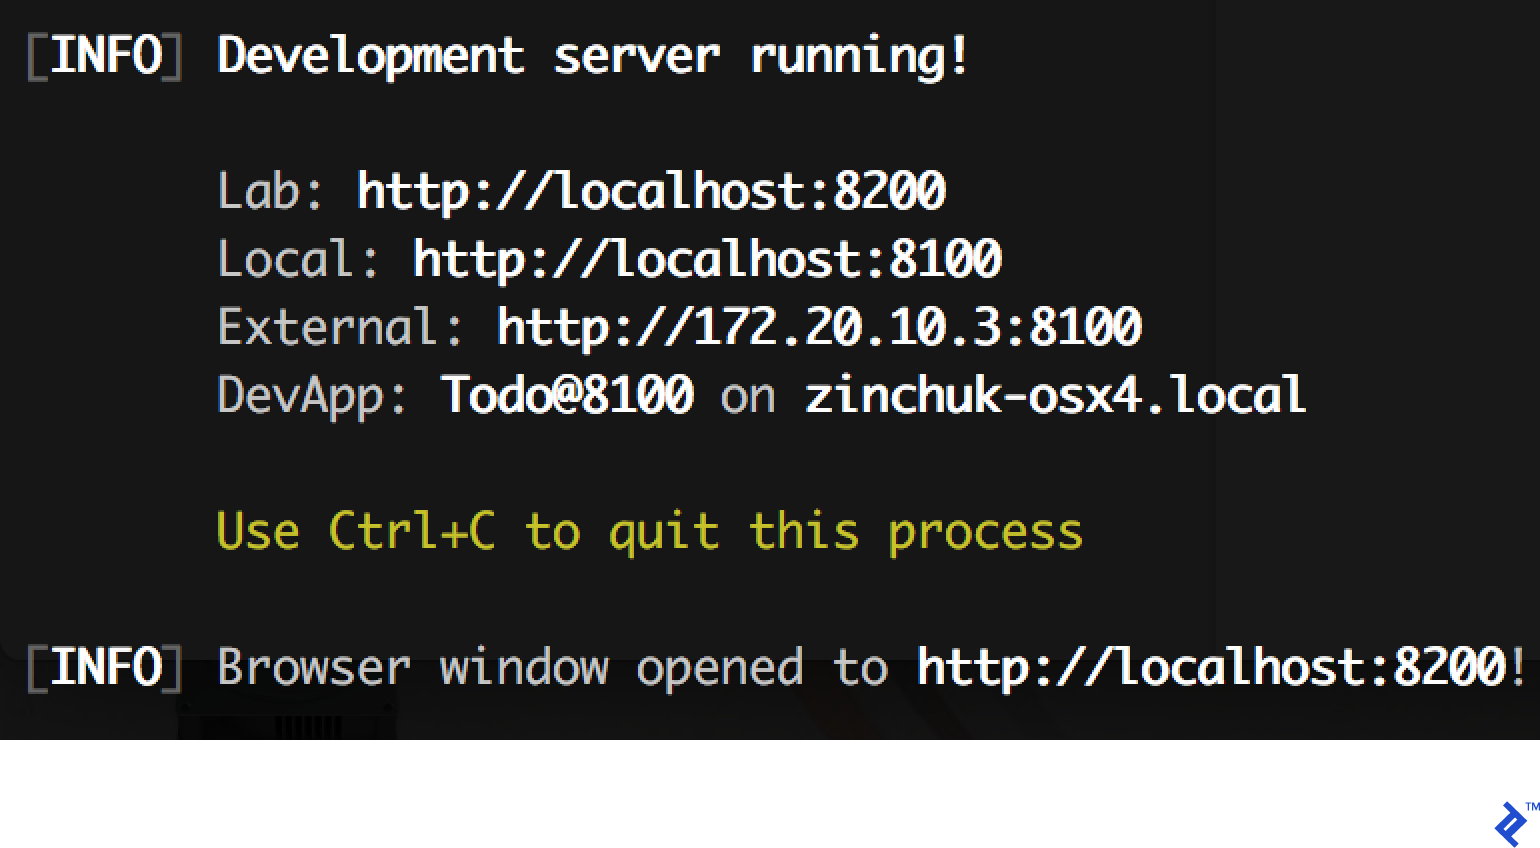
The Ionic Lab debugging service will be accessible on port 8200. Your application itself will run on port 8100, and the Open fullscreen link within Ionic Lab will direct you there. The browser window hosting Ionic Lab should open automatically.
Furthermore, Ionic provides the application address on your local network. This is immensely helpful, as it allows you to open the application in your mobile device’s browser, provided the device is connected to the same local network (e.g., via Wi-Fi). You can also utilize the Add to Home Screen button to reopen the application in fullscreen mode, offering the most expedient way to test your application on a device.
Another approach is to use the Ionic DevApp application, which can be installed on your mobile device and grants access to the application over the local network. It supports plugins (Ionic Native) to interact with native device functionalities and display logs.
Framework7
F7’s development tools are less mature compared to Ionic’s, and the automatic initialization CLI is not documented. However, the official website offers several GitHub repositories with template projects to kickstart your development process.
Similar to the Tabs template in Ionic, F7 provides Tabbed Views. However, we’ll utilize a more feature-rich template that integrates Framework7 with React. Support for React was introduced in version 3. To proceed, clone the template repository:
| |
Navigate to the project directory, download dependencies, and initiate the process:
| |
The output will resemble Ionic’s: You’ll receive a local link and a link accessible within your network for immediate access from a physical device:
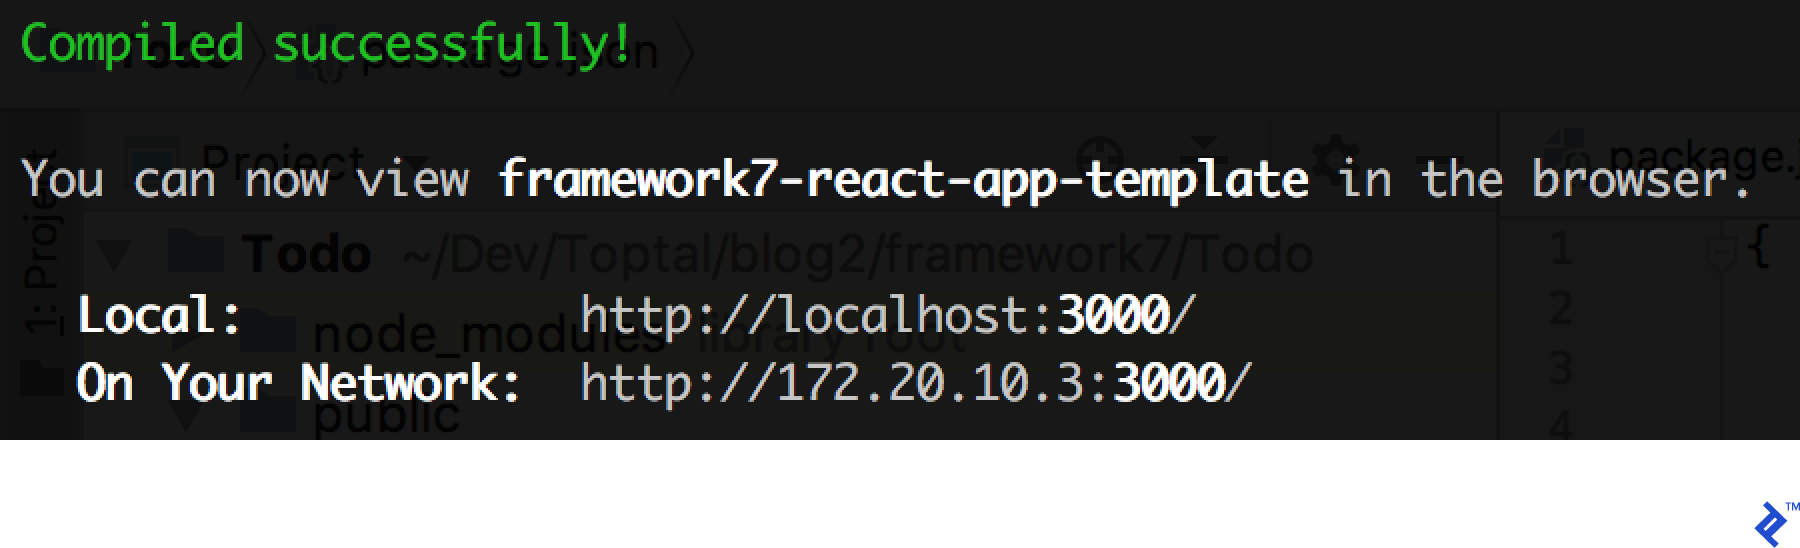
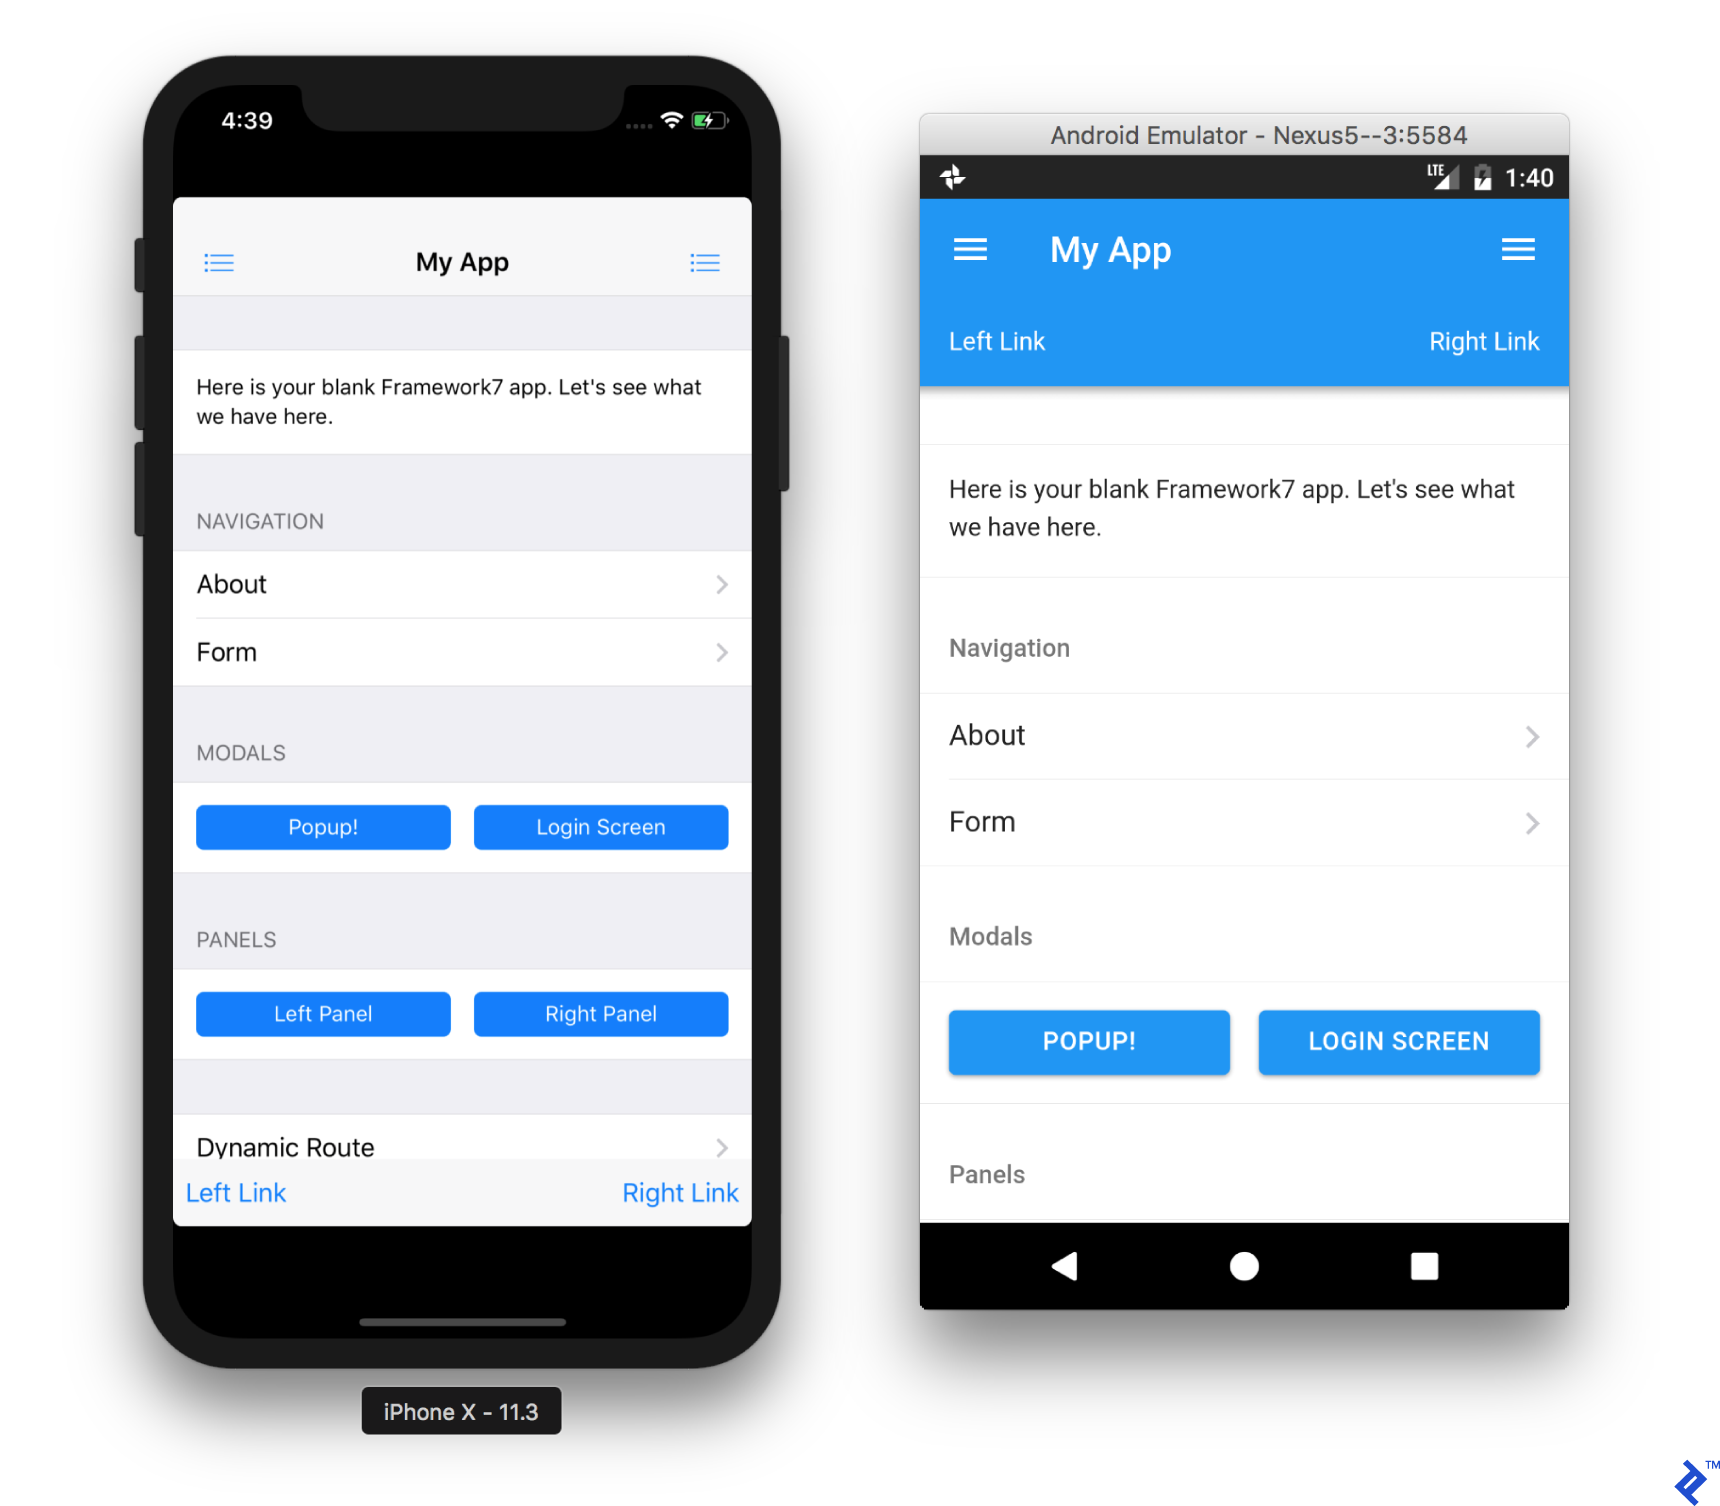
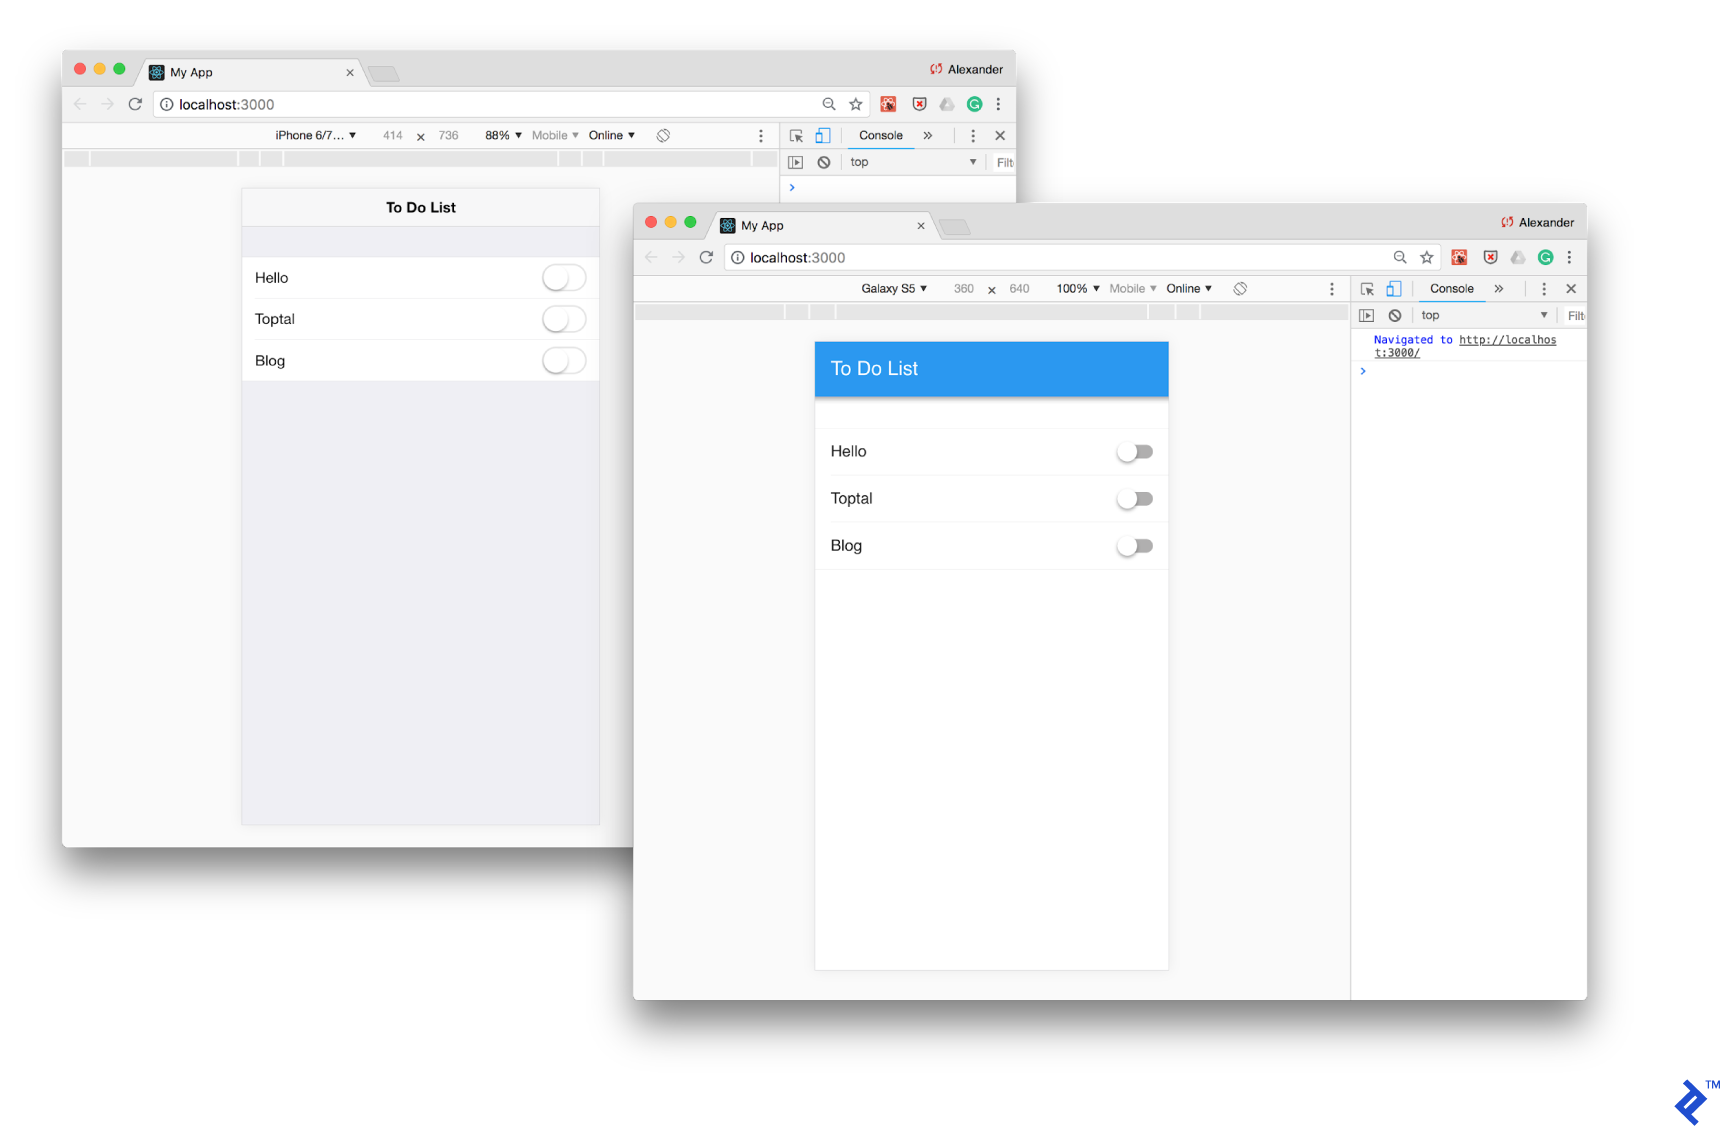
Now you can open http://localhost:3000/ in your browser. Framework7 lacks built-in device emulators, so we’ll leverage Chrome DevTools’ Device Mode to achieve a similar outcome:
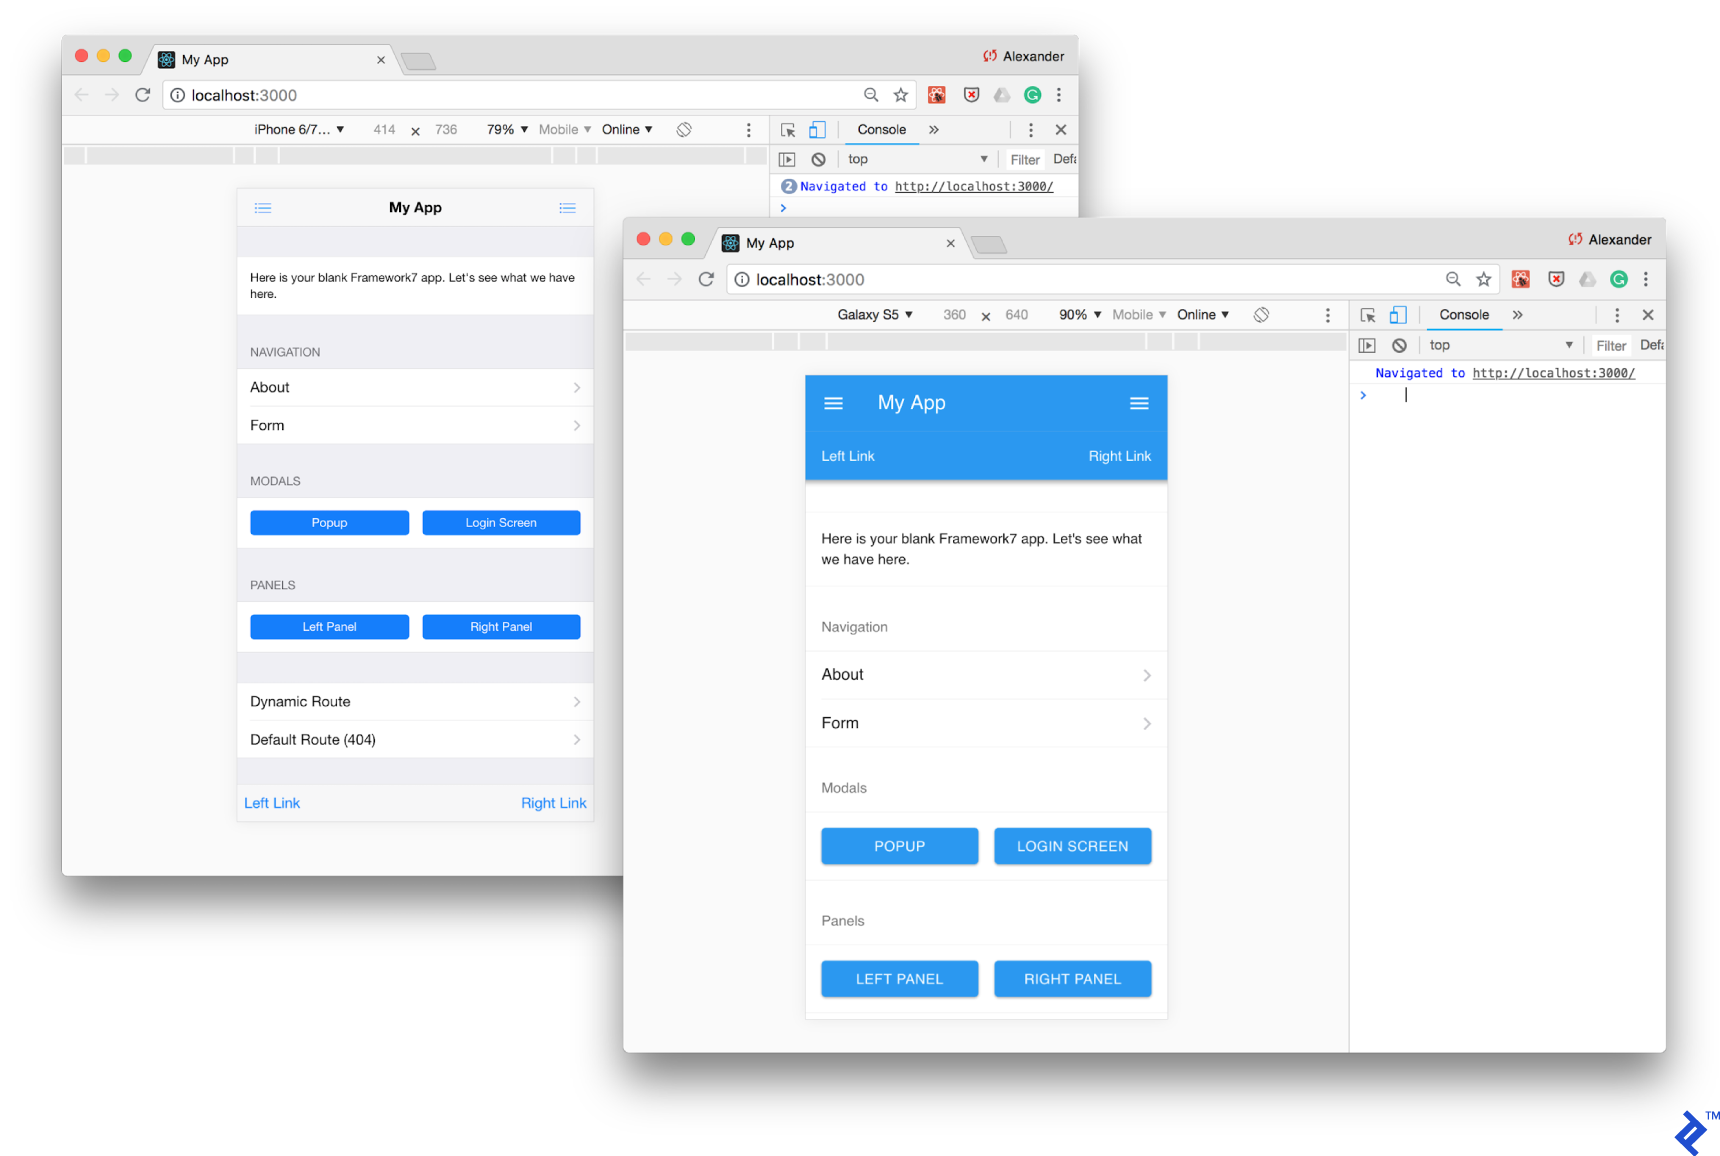
As you’ll observe, Framework7, like Ionic, offers iOS and Material Design as its two standard themes. The theme selection is based on the platform.
Unfortunately, unlike a comparable template with Vue.js support found in the official React templates, Webpack is not yet implemented, preventing us from utilizing Hot Module Replacement for swift application updates without requiring a full page reload. Nonetheless, you can utilize the default live-reload feature, which refreshes the page upon detecting changes in your source code.
Configuring Cordova
To install applications on devices and emulators using Cordova, you need to download and configure development tools for iOS and Android, as well as the Cordova CLI. Detailed instructions can be found in our previous article and on the official Cordova website in the iOS Platform Guide and Android Platform Guide sections.
Ionic
Experience has shown that browser-based debugging, supplemented with occasional tests on real devices, is sufficient for resolving the majority of Ionic issues.
While you’ve opted for iOS and Android integration, and Ionic has prepared the necessary settings in the config.xml file and resources within the resources folder, you still need to link both platforms to your application using Cordova:
| |
You can now launch your Cordova app in “real” emulators, install it on a mobile device, and even submit it to the App Store and Google Play.
The following command installs the application on your iOS device if it’s connected via USB. Otherwise, it will be installed on the iOS Simulator.
| |
Xcode Command Line Tools might prompt you to configure developer certificates. Open the project in Xcode and follow the necessary steps. This is a one-time setup, after which you can run your application using the Cordova CLI.
Occasionally, the iOS Simulator might not launch automatically. In such cases, launch it manually (e.g., through Spotlight).
The Android emulator can be started similarly:
| |
Note that the cordova run command launches and installs the already compiled application, which doesn’t utilize the ionic serve/ionic lab server. Therefore, Live Reload will not be functional. For live development and debugging, use the browser on your local network or install the Ionic DevApp application.
Experience suggests that browser-based debugging, coupled with periodic tests on physical devices, is adequate for addressing most Ionic-related issues.
Framework7
The “React” Framework7 template we selected earlier doesn’t automate Cordova setup, so you’ll need to add platforms manually. Create a Cordova project within the cordova subfolder of your project directory:
| |
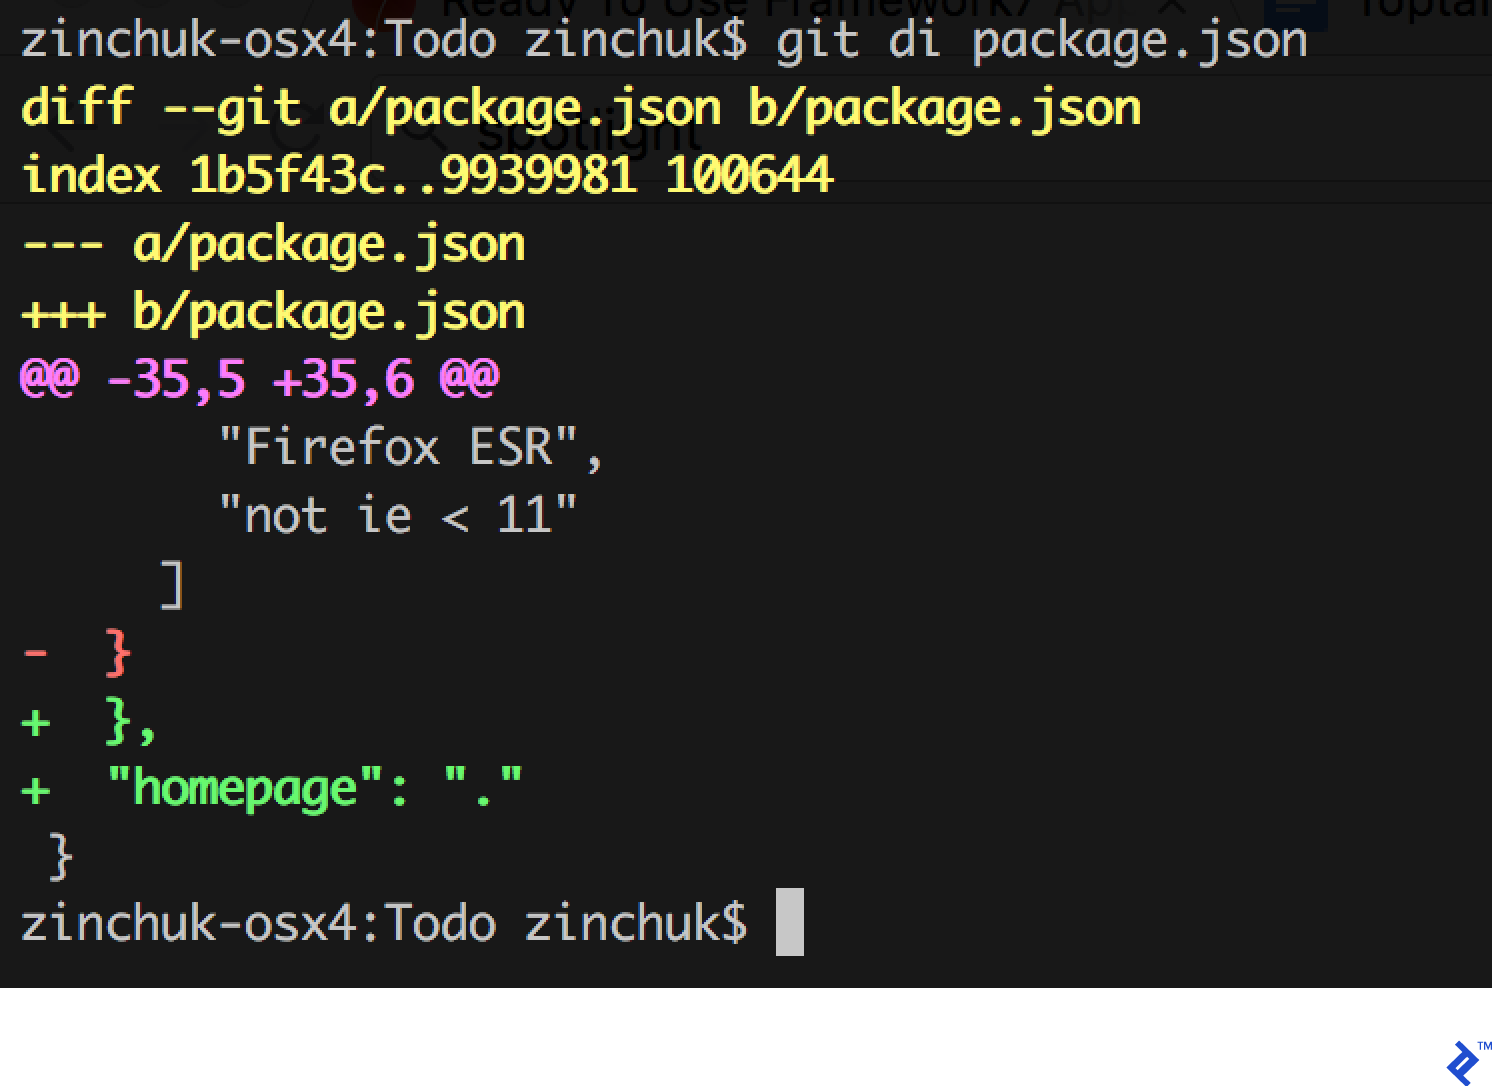
Since the template relies on the Create React App, to execute the compiled project within a Cordova environment, add the "homepage": "." setting to your ./package.json file located at the project’s root level:
Compile the Framework7 project and copy the output to the Cordova project:
| |
You can now launch the application on a device or emulator:
| |
That’s it for the setup! Hopefully, Framework7 will soon match Ionic’s level of development and initial setup convenience.
Building Task Lists
Ionic
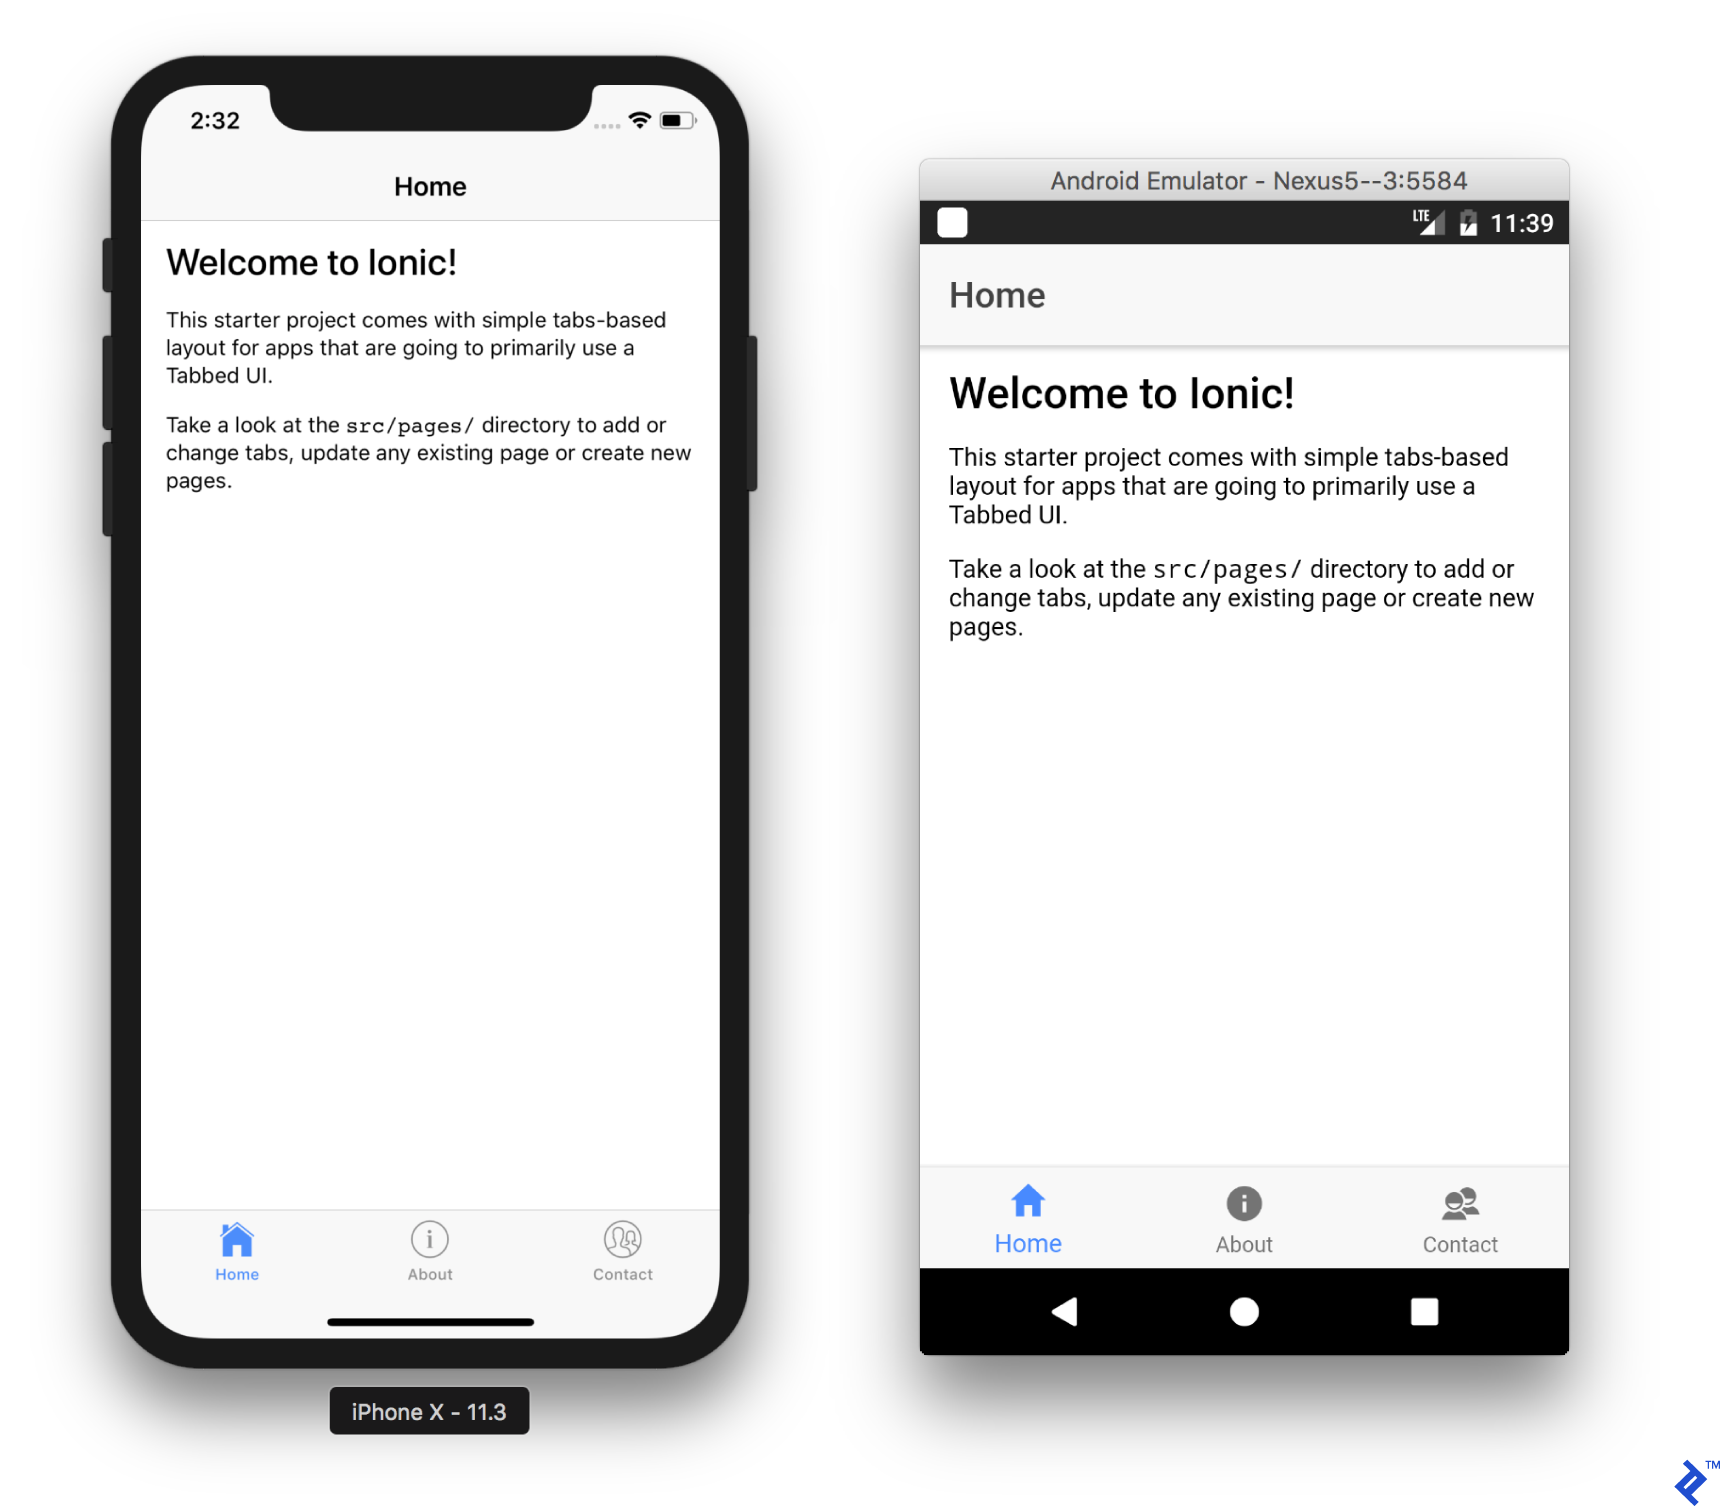
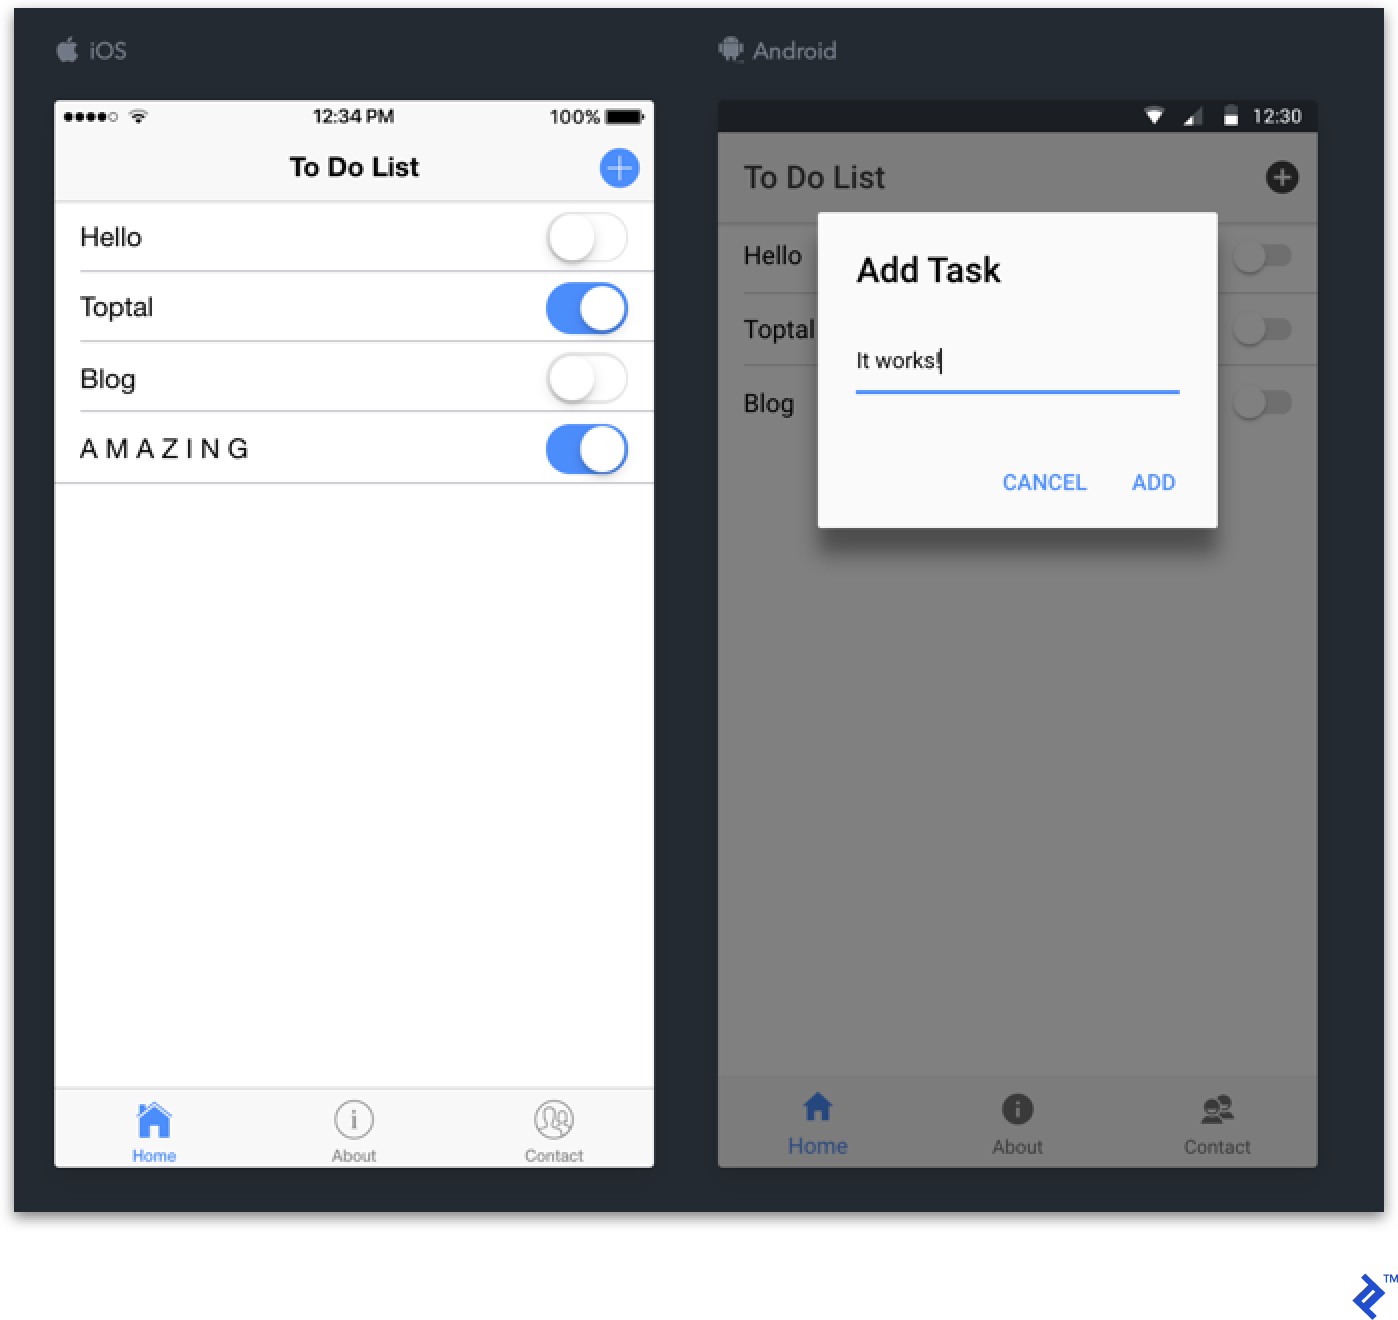
Let’s finally dive into application development! As this is a To Do app, the main page (src/pages/home/home.html file) will display the task list, allowing users to “mark completed” and “add new” tasks.
Ionic provides the <ion-list> and <ion-item> components for list creation. First, remove the padding property from the <ion-content> element to make the list span the entire screen width. Inside the list, display the text using an <ion-label> element and add an <ion-toggle> element for marking tasks as complete.
| |
Switch back to the browser tab where Ionic Lab is running. The application should update automatically:
Excellent! Now, let’s move the task data into a JavaScript object and manage its HTML rendering using Angular. Navigate to the src/pages/home/home.ts file and create the tasks property within the HomePage class instance:
| |
You can now reference the tasks array in your HTML code. Utilize the *ngFor Angular construct to dynamically create list elements for each item in the array. This makes your code more concise:
| |
The final step is to add a button to the page header for creating new tasks. To achieve this, use the <ion-navbar>, <ion-buttons>, <button>, and <ion-icon> components:
| |
Pay attention to the (click)="addTask()" Angular construct. As you might have guessed, it attaches a tap handler to the button and invokes the addTask() method of our component. Let’s implement this method to display a task name dialog when the button is tapped.
We’ll need the AlertController Ionic component for this purpose. To utilize this component, import its type:
| |
Then, specify it in the constructor parameter list for the page:
| |
Now you can call it within the addTask() method. Define this method after the controller. The following calls create and display the dialog window:
| |
Within the options object, define the message header, the field description, and two buttons. The “OK” button will add a new task to the tasks array:
| |
After adding an element to the this.tasks array, the component will reactively rebuild, and the new task will appear in the list.
Here’s the complete page code:
| |
Reinstall the application on your device:
| |
That’s all it takes! Not too difficult, right? Now let’s replicate this functionality using Framework7.
Framework7
Framework7 templates are designed to showcase all component capabilities. Therefore, we’ll retain only the src/components/pages/HomePage.jsx page in the src/components/App.jsx and src/routes.js files, clean up its content, and remove unnecessary code comments.
Now, let’s create the task list. Framework7 offers <List simple-list> and <ListItem> components for this purpose. To include a task completion toggle, add the <Toggle slot="after"/> component. Remember to import all these components from the framework7-react module. Your page code should now look like this:
| |
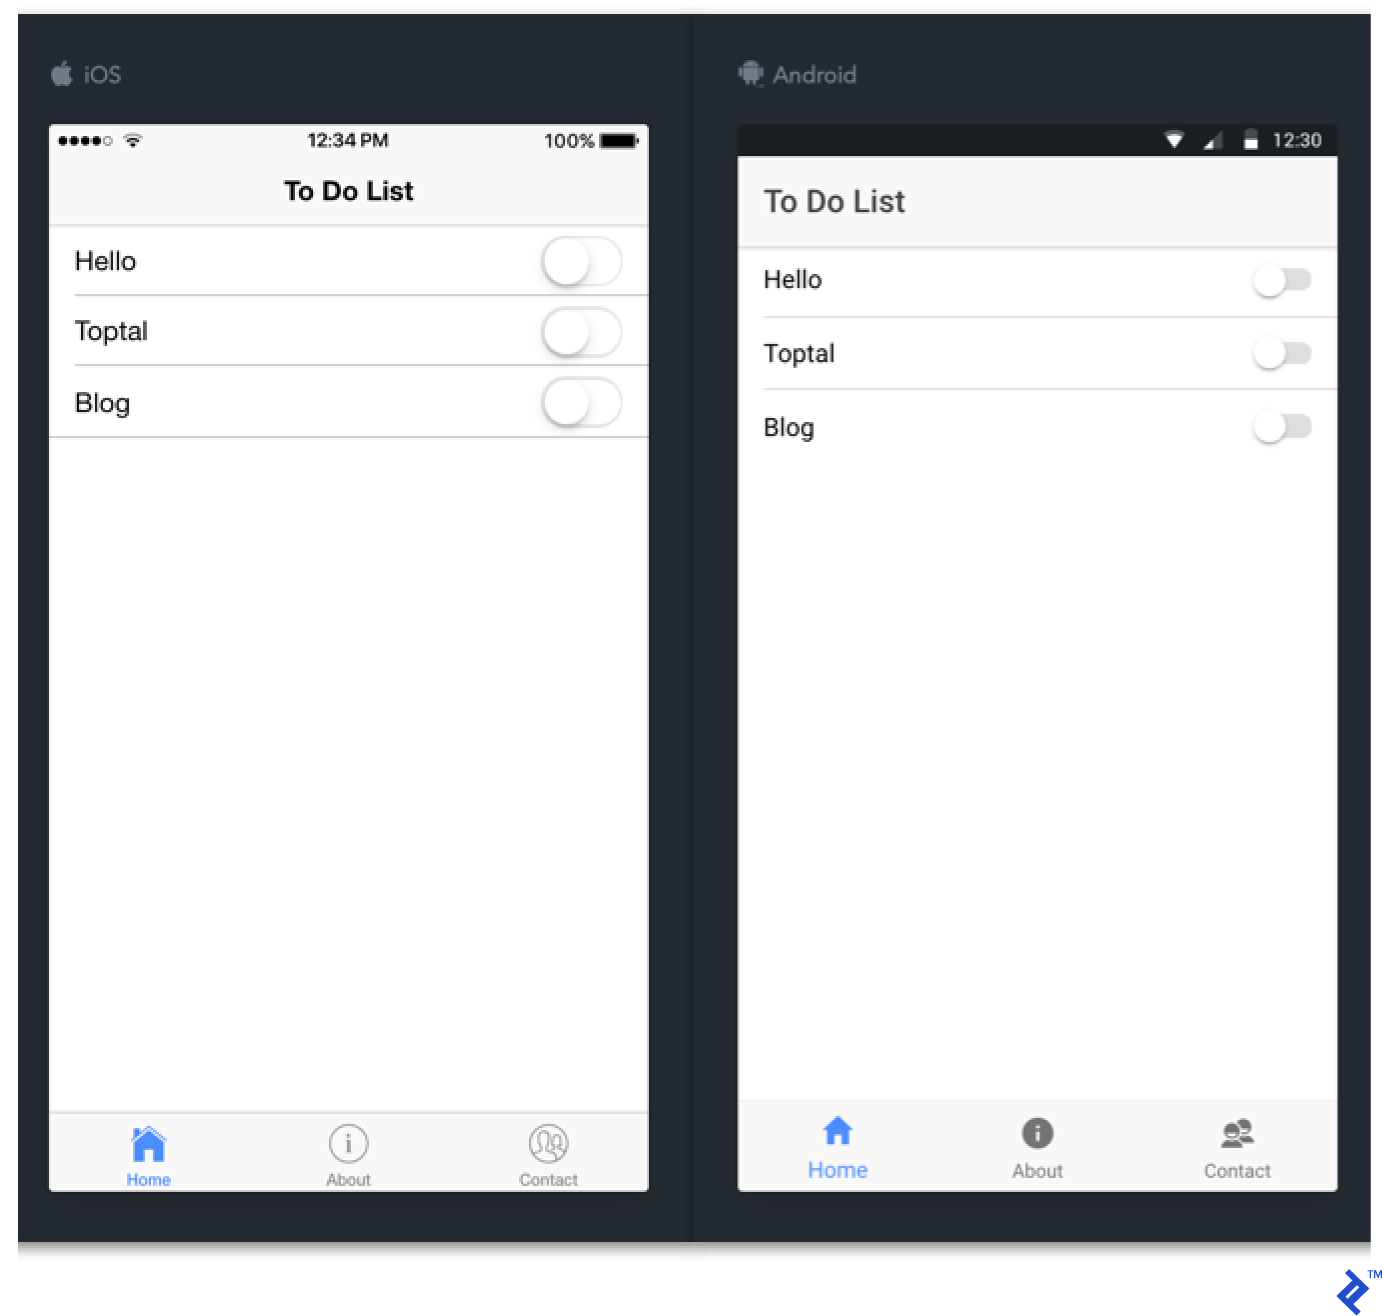
And the application itself should resemble this:
A solid start! Let’s extract the static data from the HTML code. To achieve this, we’ll use a smart component instead of the stateless component we previously had. Import the Component abstract class from React:
| |
Then, store the tasks array in the state variable instance:
| |
In a real-world application, you’d likely employ a more sophisticated data flow mechanism, such as Redux or MobX. However, for this simple example, we’ll stick with the internal component state.
Now you can leverage JSX syntax to iteratively generate list elements for each task in the array:
| |
All that remains is to add the header containing the button for creating new tasks. The <Navbar> element is already present, so let’s add <Link iconOnly> to the <NavRight> element:
| |
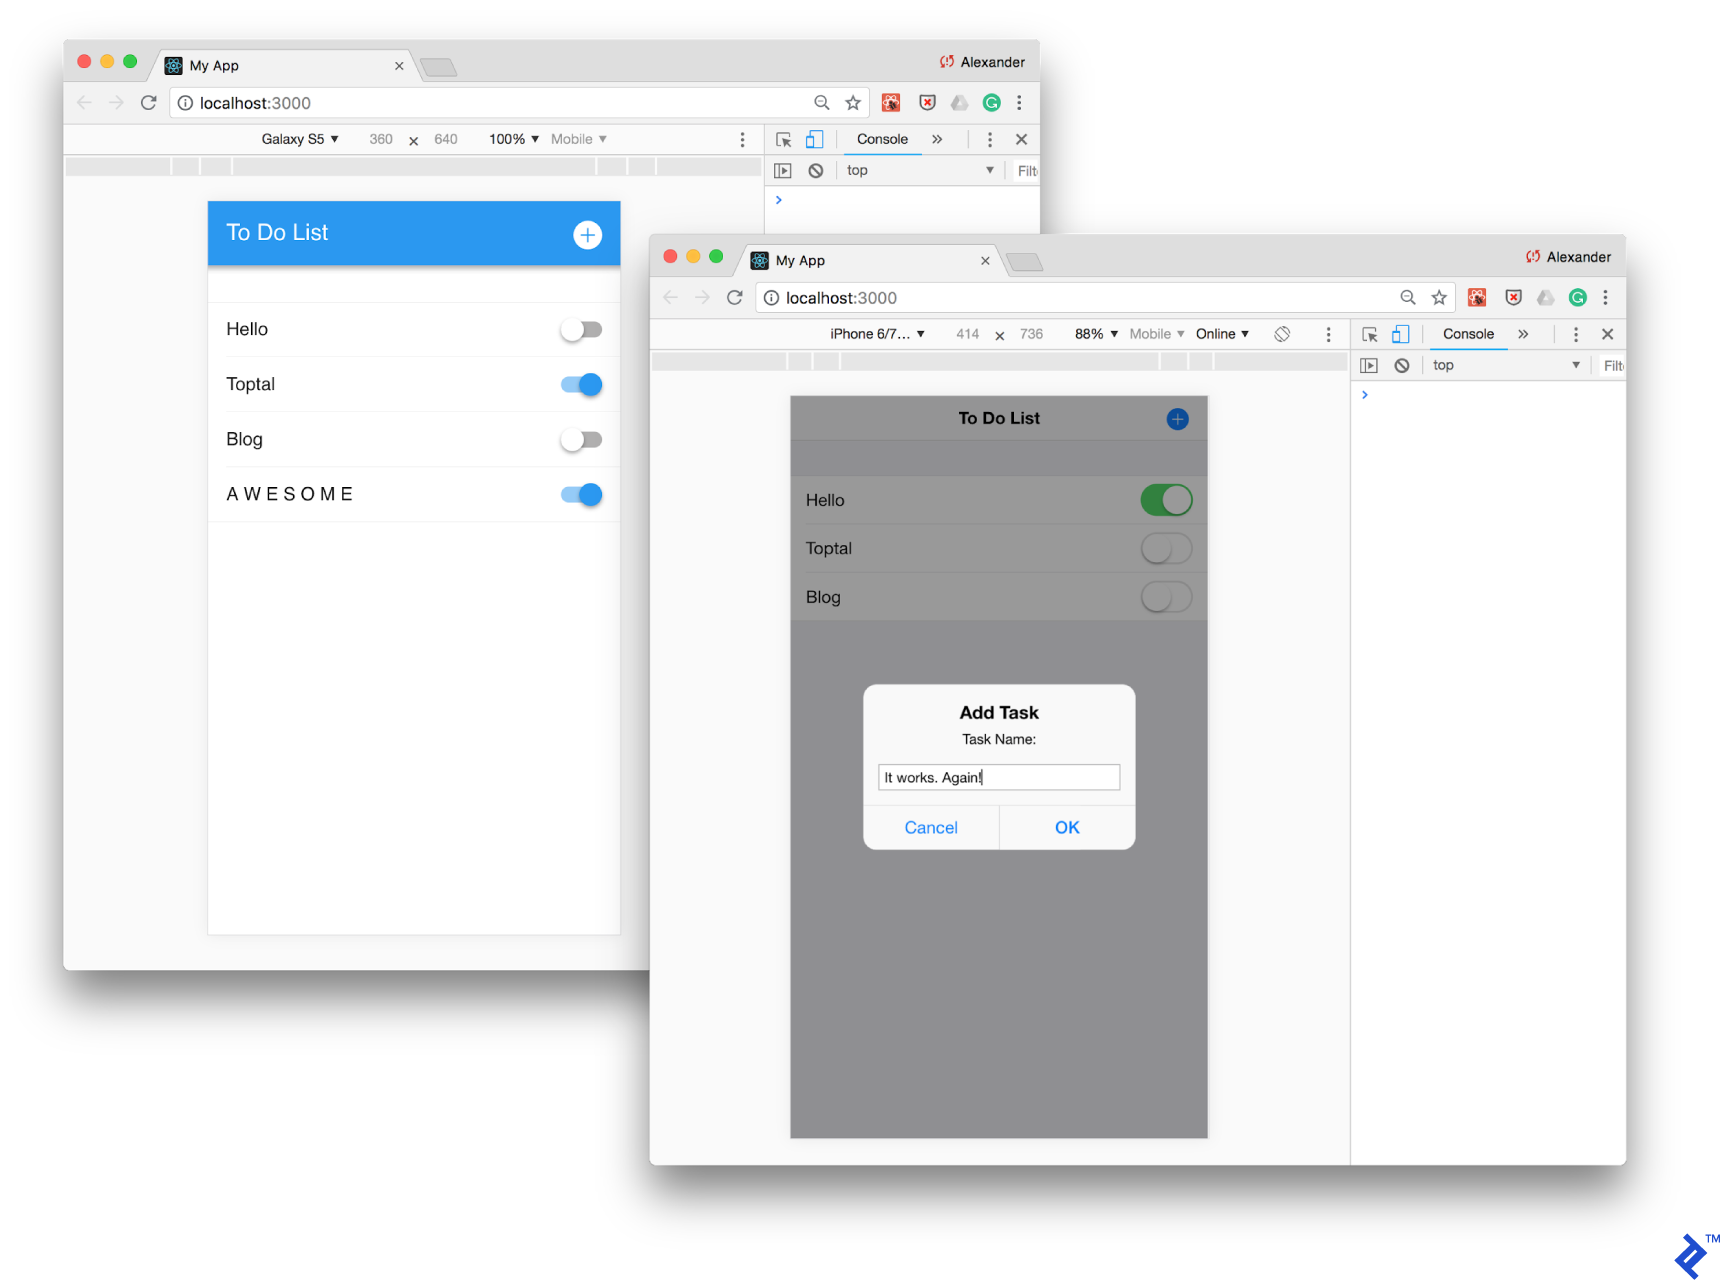
In React, tap handlers are attached using the onClick property and setting the callback pointer within it. Implement the handler to display the task name dialog.
Each element in Framework7 can access the application instance through the this.$f7 property. You can use the dialog.prompt() method in this manner. Before closing the dialog, call the setState() method of the React component and pass it a copy of the previous array with the new element appended. This will reactively update the list.
| |
Here’s the complete component code:
| |
Let’s check the result:
Finally, rebuild and deploy the application to your device:
| |
And we’re done!
The complete code for both projects is available on GitHub:
Conclusion
Having explored a comprehensive tutorial for each Cordova framework, let’s compare Framework7 and Ionic.
Initial Setup
Ionic emerges as the clear winner in terms of installation ease thanks to its CLI. Conversely, F7 demands more effort in selecting and setting up a template or performing a step-by-step installation from scratch.
Component Variety
Both frameworks offer a comprehensive set of meticulously designed standard components in two themes: iOS and Material Design. Ionic goes a step further by providing these components in a Windows theme and boasts a vast user themes marketplace.
In addition to faithfully replicating native design and animations, both frameworks prioritize performance optimization, yielding impressive results. It’s often challenging to distinguish applications built with either framework from their native counterparts.
Framework7 provides an extended collection of more intricate and practical components, including Smart Select, Autocomplete, Calendar, Contacts List, Login Screen, Messages, and Photo Browser. On the other hand, Ionic offers an extensive selection of user-created components.
Ecosystem and Community
Ionic undeniably excels in these aspects due to its longer tenure, robust financial support, and active community. The Ionic infrastructure is constantly evolving, with supporting services and cloud solutions paving the way for new offerings, and the plugin repository continuously expanding.
Framework7, while significantly improved, suffers from a lack of community support.
Third-party Dependencies
Framework7 exhibits greater flexibility regarding third-party solutions. Its most compelling feature is the ability to choose between Vue and React for your project, along with the option of using Webpack or Browserify. Conversely, Ionic’s reliance on Angular necessitates familiarity with it (and, consequently, TypeScript).
However, recent times have seen the emergence of Ionic developers announced a new Ionic 4 beta, which claims to be entirely UI-framework-agnostic, eliminating the need for Angular dependencies if desired.
Cordova Frameworks: Still a Viable Choice for Cross-platform Mobile App Development
The decision to utilize Cordova hinges on the specific project requirements. The speed of hybrid mobile app development and its cross-platform support are undeniable advantages. However, it’s crucial to acknowledge that trade-offs exist, and you might encounter drawbacks that wouldn’t arise with a native approach. These exceptional frameworks and their respective communities have made significant strides in mitigating these flaws and simplifying the development process. So why not give them a try?