You’re aware that Apple’s iOS SDK provides a wide range of built-in UI components. Buttons, containers, navigation elements, tabbed layouts—it’s all there, ready to use. Or is it?
While these basic components are great for creating standard UIs, what happens when you need to think outside the box? What if an iOS developer wants to create a specific behavior that the SDK doesn’t support out of the box?
This is where UITabBar becomes a challenge, as it lacks the functionality to swipe between tabs and doesn’t provide animations for tab switching.
Finding a Simple UITabBar Solution
After searching extensively, I only found one somewhat useful library on Github. However, despite initially seeming like a good solution, it introduced a number of problems when I tried using it in my application.
In simpler terms, the library was user-friendly but quite buggy, which unfortunately made it more trouble than it was worth. If you’re curious, you can find this library link.
After much thought and research, I decided to develop my own solution. I thought, “What if we combine a page view controller for swiping with a native UITabBar? Could we link these two, managing the page index during both swiping and tab bar taps?”
This led me to a solution, although it wasn’t without its challenges, as you’ll see later.
A More Complex UITabBar Solution
Let’s say you want to create three tab bar items. This implies having three pages/controllers that will be displayed for each corresponding item.
To achieve this, you’ll need to instantiate these three view controllers along with two placeholder/empty view controllers for the tab bar itself. This is necessary to create the tab bar items, manage their state when tapped, and enable programmatic tab index changes.
Let’s jump into Xcode and build some classes to illustrate how this works in practice.
Example: Swiping Through Tabs
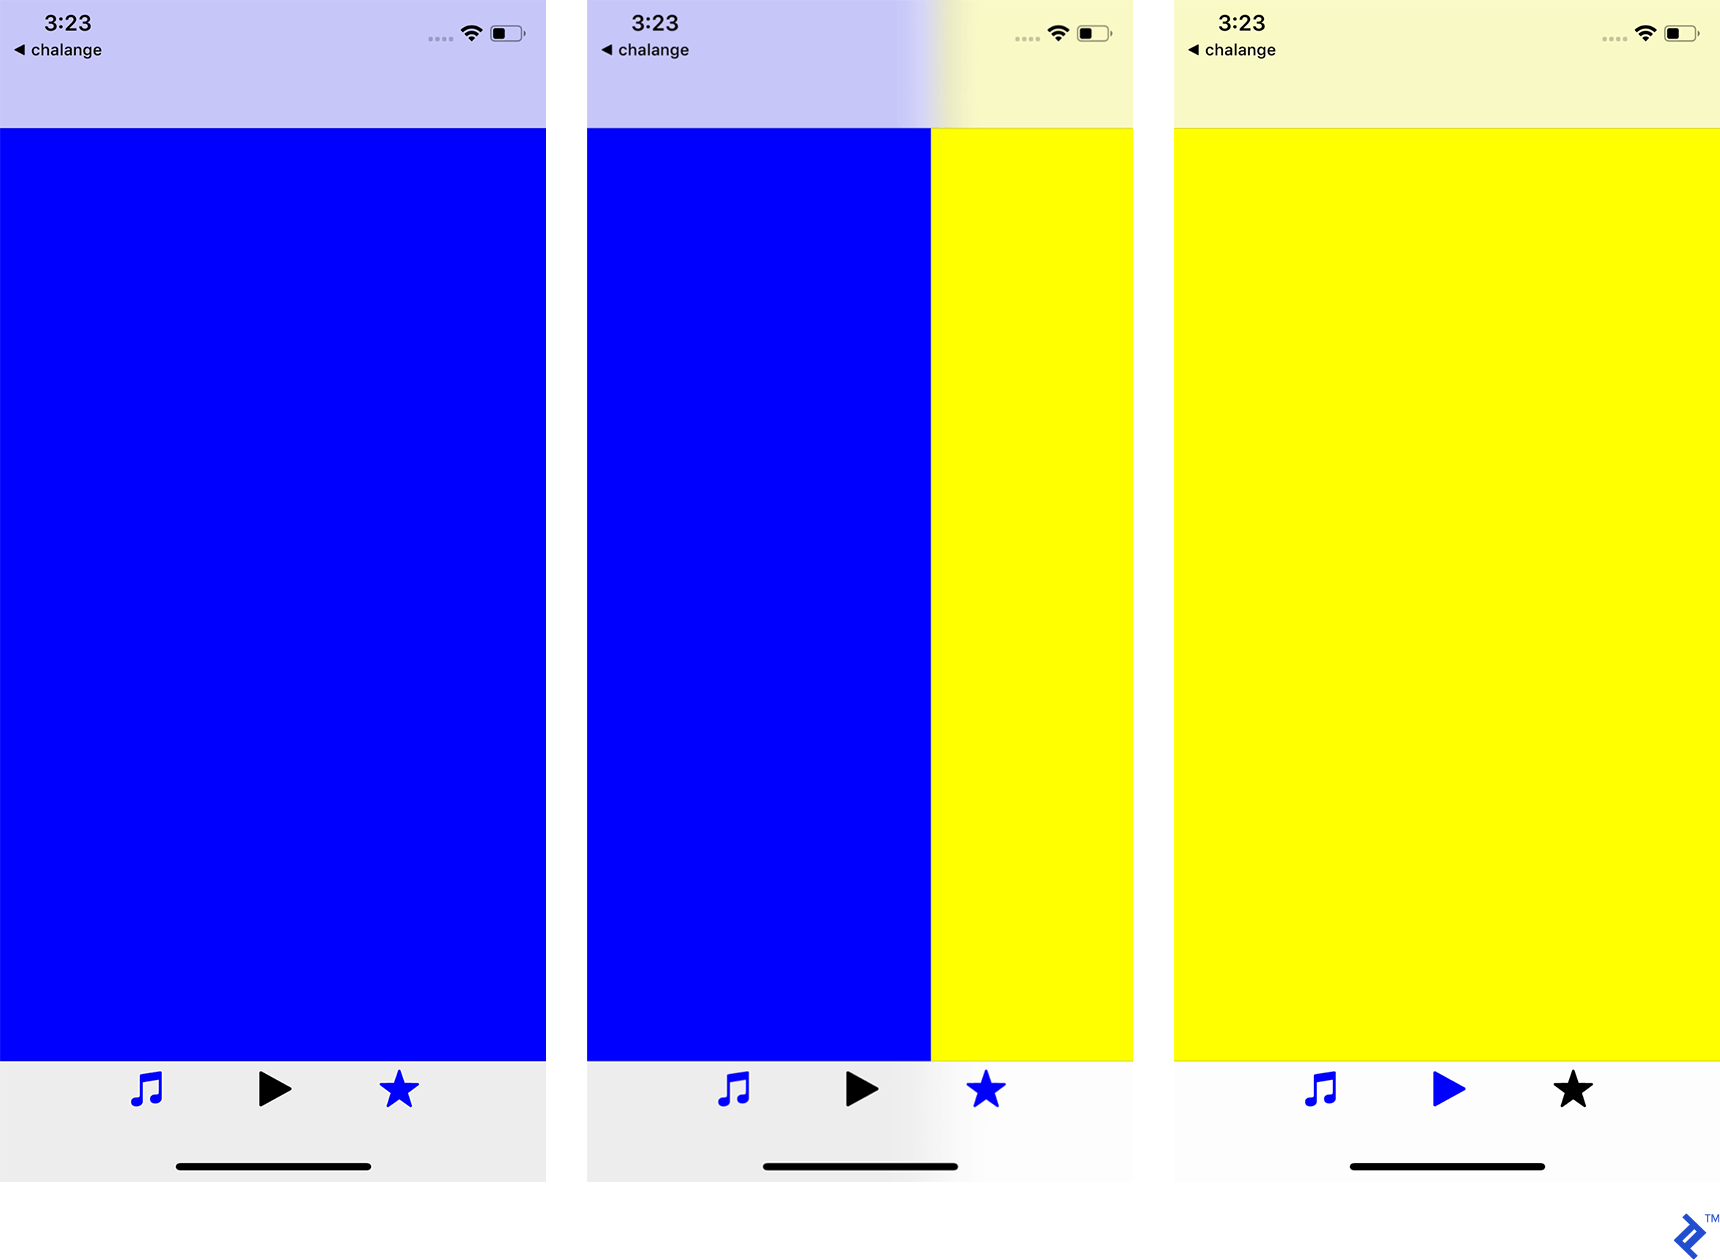
These screenshots demonstrate how the first tab bar item is initially blue. When the user swipes to the right, the yellow tab is selected. The last screenshot shows the third item selected, resulting in the entire page turning yellow.
Using the Swipeable Tab Bar Programmatically
Let’s dive into the code and create a straightforward example of a swipeable tab bar for iOS. Start by creating a new project.
The prerequisites are simple: Xcode and its command-line tools installed on your Mac.
To initiate a new project, launch Xcode and choose “Create a new Xcode project.” Give your project a name and then choose “Single View App” as the application type. Click Next.

The following screen will ask for some project details:
- Product Name: I went with SwipeableTabbar.
- Team: For running on a physical device, a developer account is required. I’ll be using my own.
Important: If you don’t have a developer account, you can still run the project on the Simulator.
- Organization Name: I used Toptal.
- Organization Identifier: I set this to com.toptal.
- Language: Select Swift.
- Uncheck: “Use Core Data,” “Include Unit Tests,” and “Include UI Tests.”
Click Next, and you’re ready to begin building your swipeable tab bar.
Basic Structure
When you create a new app, you automatically get a Main ViewController class and Main.Storyboard.
Before we design the UI, let’s create the required classes and files to ensure a smooth development process.
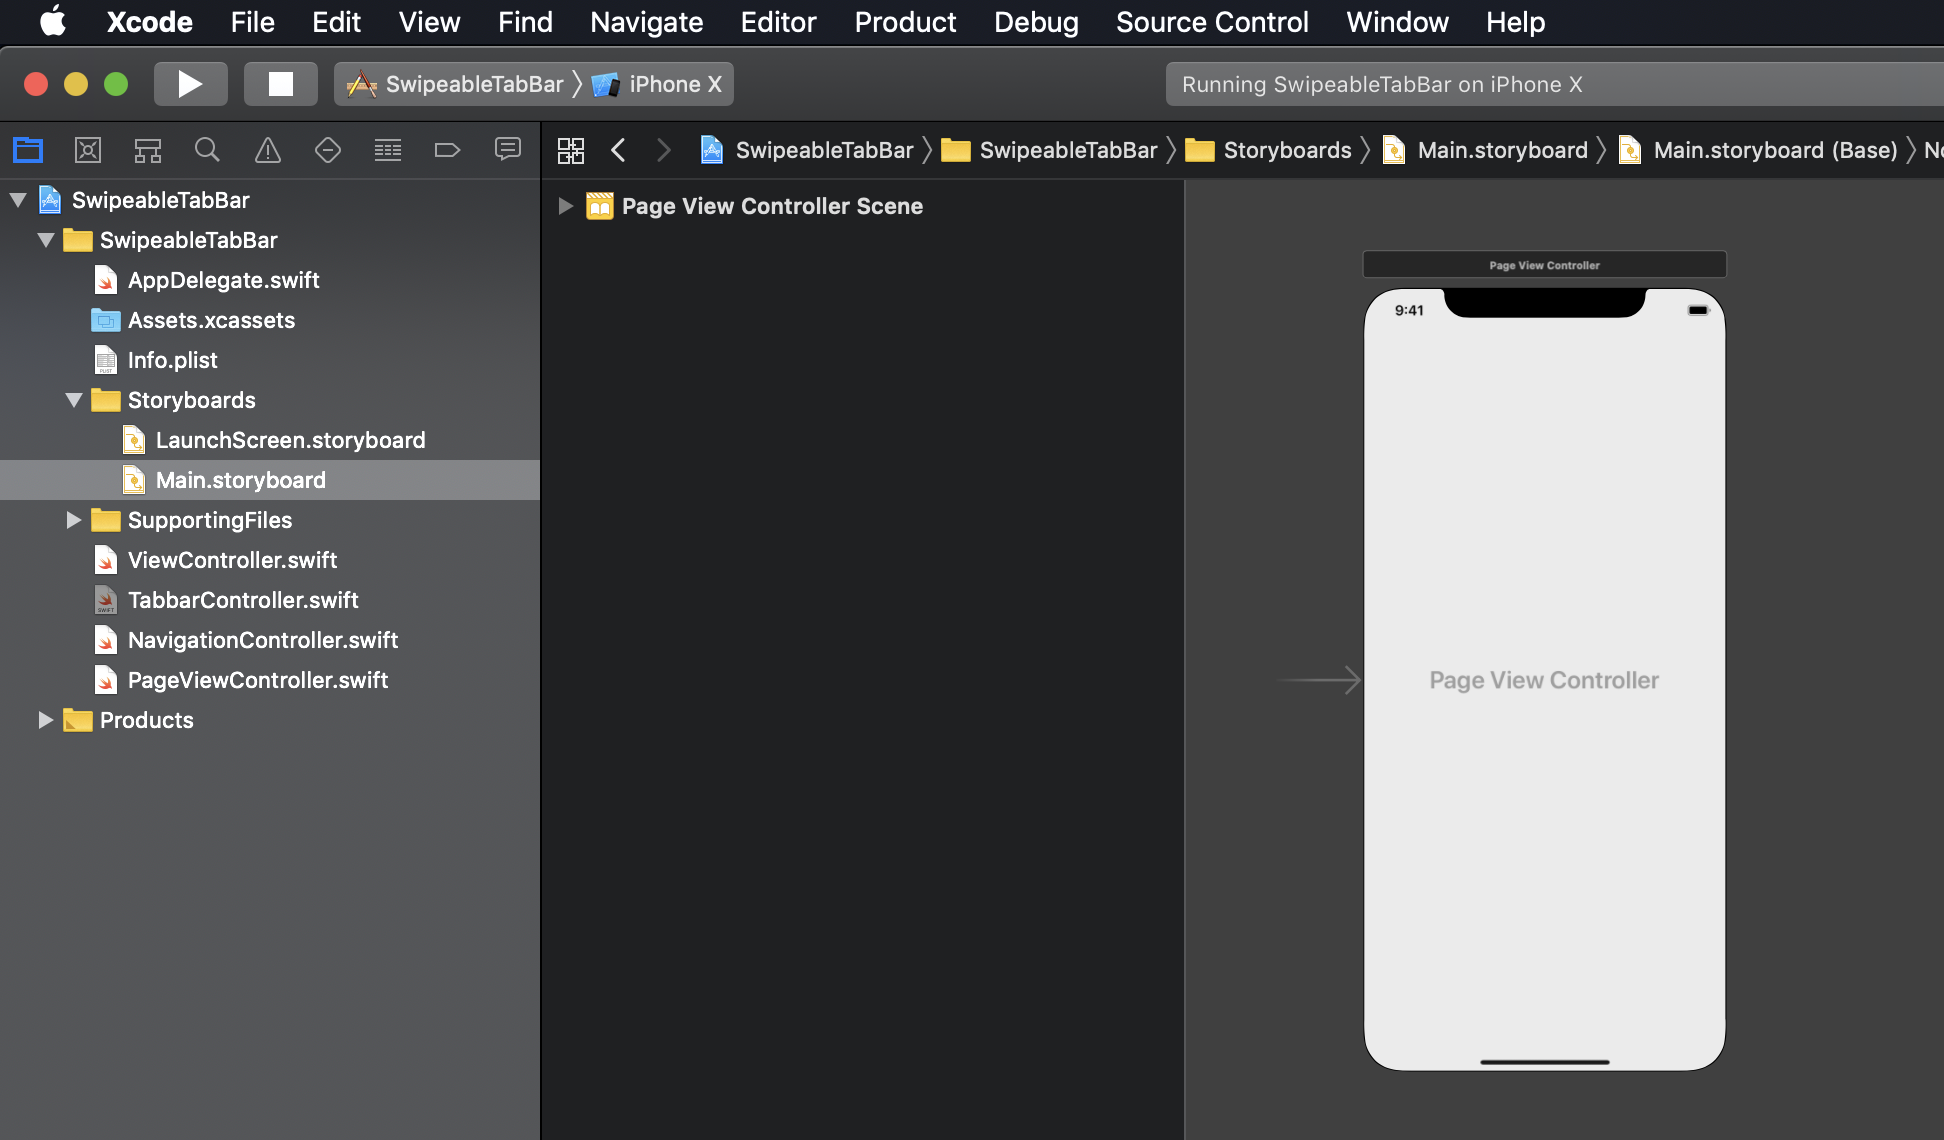
Within your project, create new files named TabbarController.swift, NavigationController.swift, and PageViewController.swift.
Here’s how it looks in my project.
In the AppDelegate file, remove all methods except for didFinishLaunchingWithOptions.
Within the didFinishLaunchingWithOptions method, paste the following code:
| |
Delete all content from the file ViewController.swift. We’ll revisit this file later.
Let’s start by writing the code for NavigationController.swift.
| |
This code defines a basic UINavigationController with a translucent navigation bar that has a gray tint color.
Next, let’s move on to the PageViewController.
This file requires a bit more code than the previous ones. It includes a class, a protocol, some UIPageViewController data source methods, and delegate methods.
Here’s what the complete file should look like:
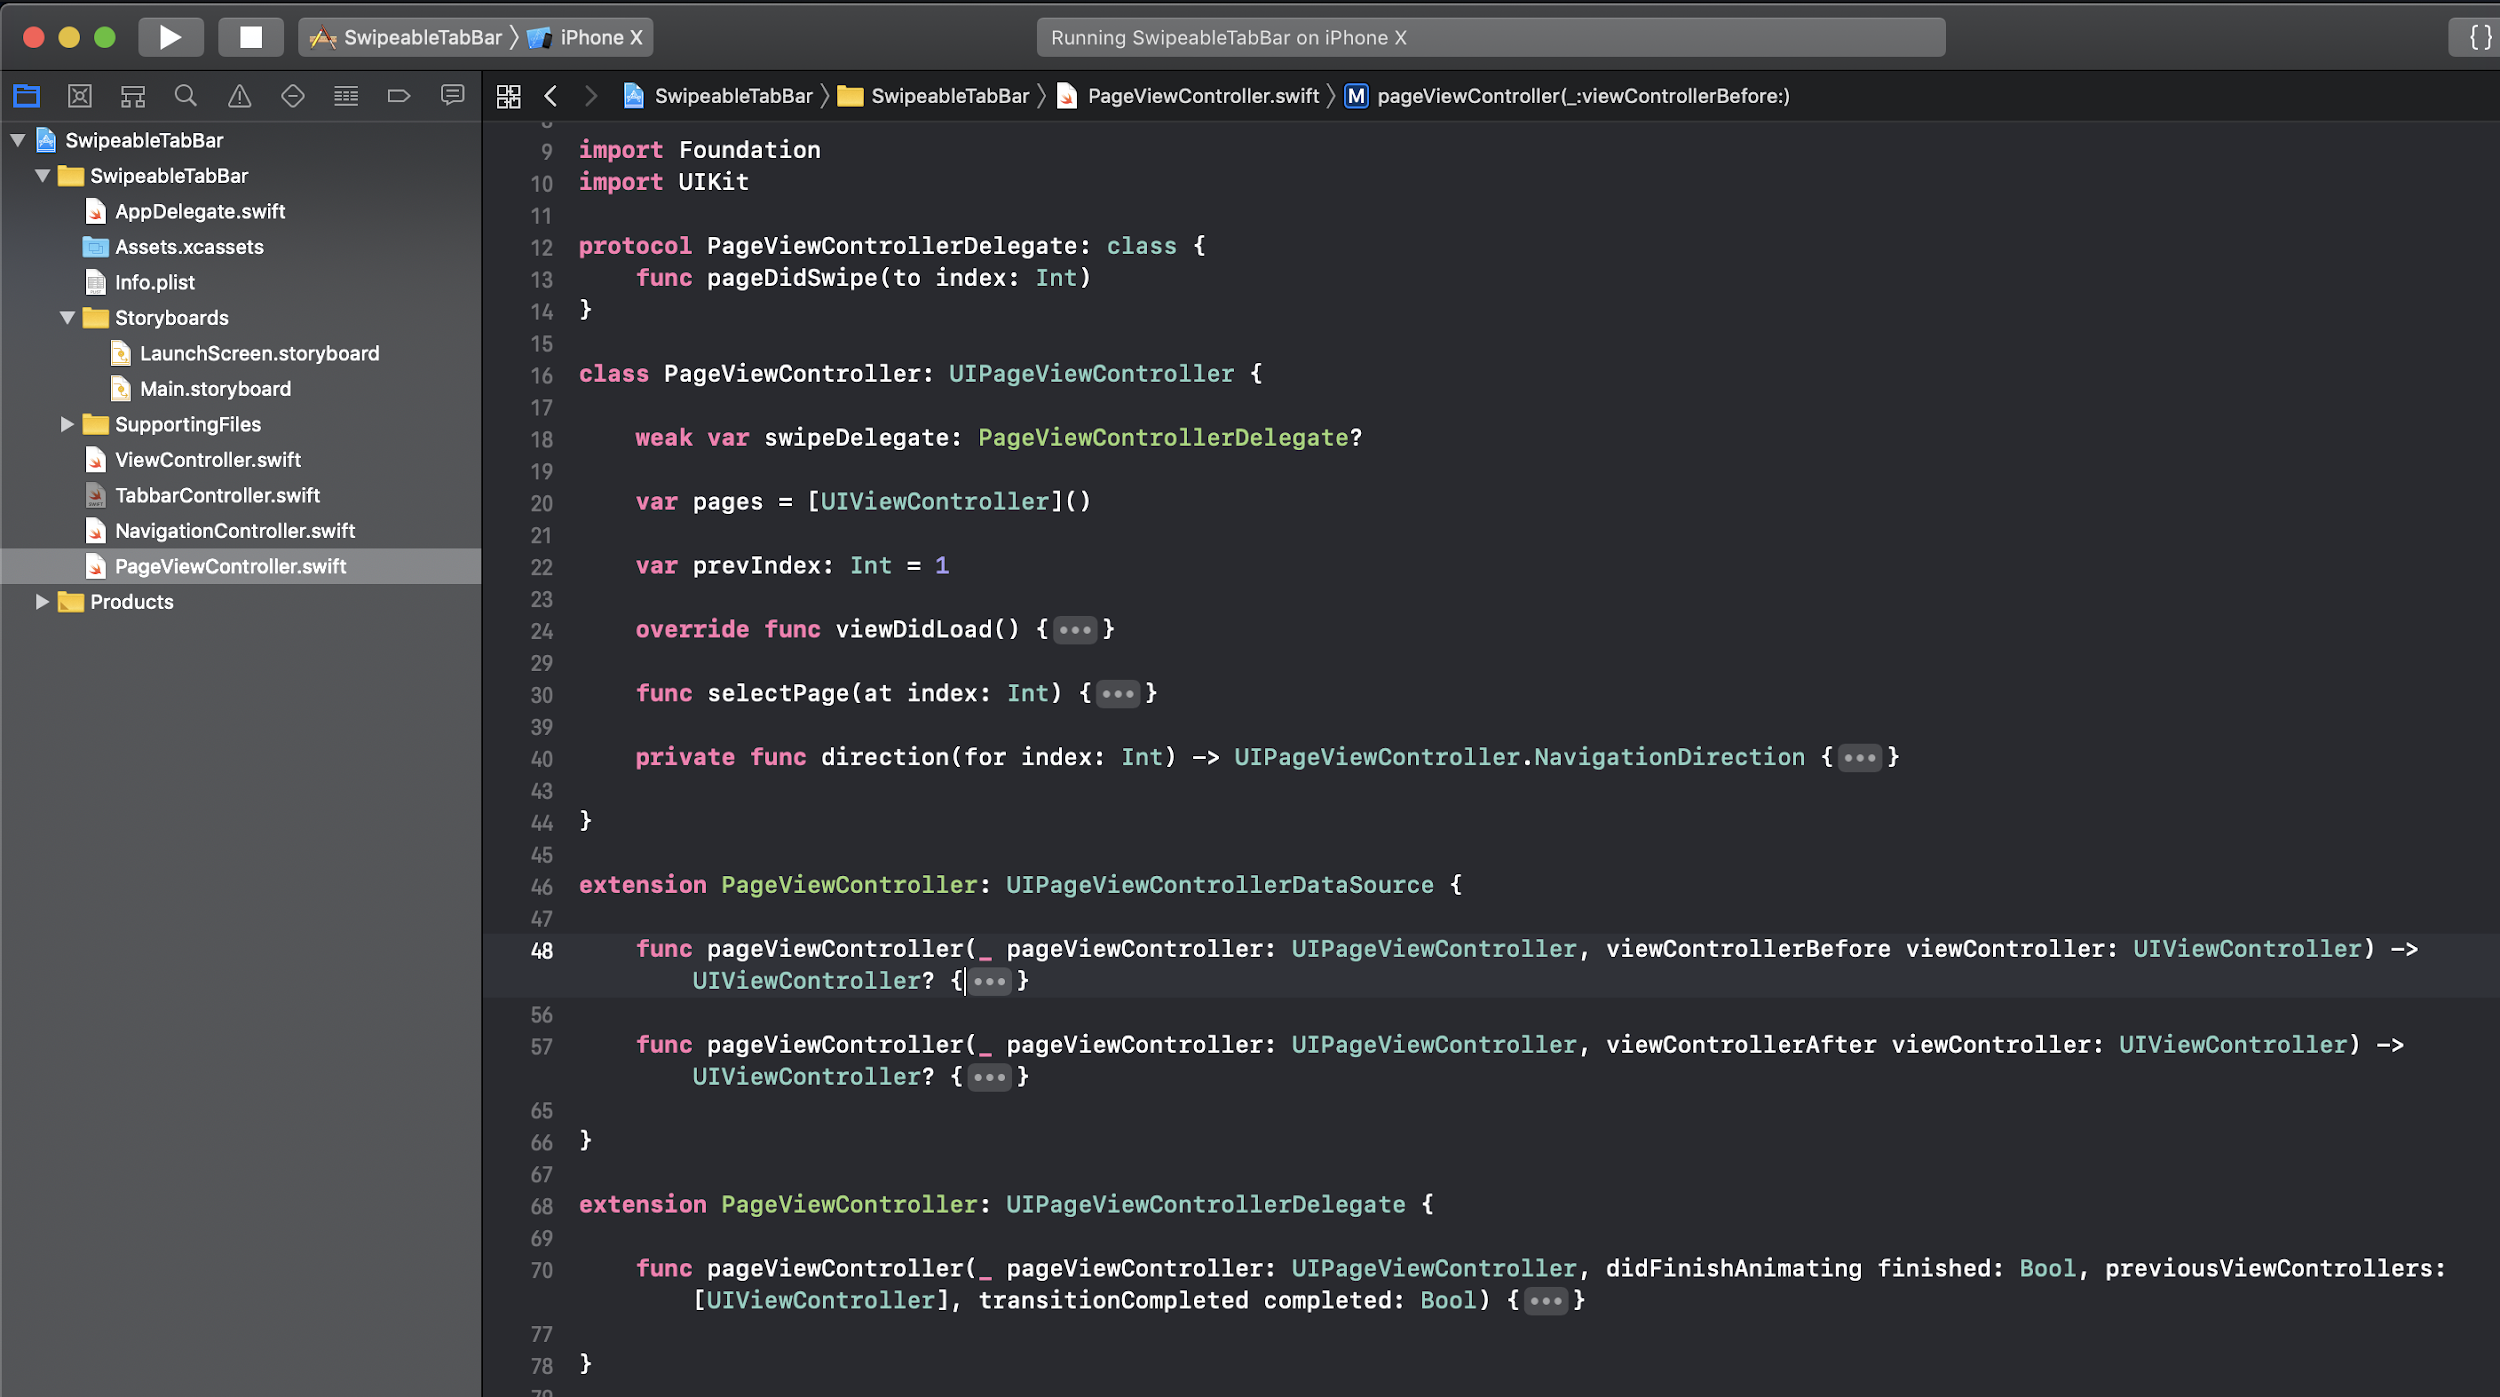
You’ll notice that we’ve declared a custom protocol called PageViewControllerDelegate, which is used to inform the tab bar controller about page index changes after a swipe is completed.
| |
Next, we create a class called PageViewController responsible for managing our view controllers, selecting pages at a specific index, and handling swipes.
Let’s assume we want the center view controller to be selected by default on the first run. We achieve this by setting the default index value to 1.
| |
Here, the pages variable stores references to all our view controllers.
The prevIndex variable keeps track of the last selected index.
To set the selected index, you can call the selectPage method.
To track page index changes, subscribe to the swipeDelegate. Each time a page swipe occurs, you’ll be notified, and you’ll receive the current index.
The direction method returns the swipe direction of the UIPageViewController. The final part of this class involves implementing delegate and data source methods.
These implementations are quite simple.
| |
The code above demonstrates three methods:
- The first method locates the index and returns the previous view controller.
- The second method locates the index and returns the next view controller.
- The last method determines if the swipe has ended, sets the local property
prevIndexto the current index, and then notifies the parent view controller about the successful swipe completion by calling the delegate method.
Now we can finally implement our UITabBarController:
| |
Here, we create the TabbarController with default properties and style. We define two colors for selected and deselected bar items. I’ve also included three images for the tab bar items.
In the viewDidLoad method, we set up the default configuration for our tab bar and select page #1 as the starting page.
| |
Within the setUp method, you’ll see that we create two placeholder view controllers. These are required for the UITabBar because the number of tab bar items must match the number of view controllers you have.
We’re using UIPageViewController to display controllers, but for the UITabBar to function correctly, we need to have all view controllers instantiated. This ensures that the bar items respond to taps. In this example, placeholderviewcontroller #0 and #2 are these empty view controllers.
For the center view controller, we create a PageViewController with three view controllers.
| |
The first two methods shown above are the initialization methods for our pageview controller.
The tabbar item method simply returns the tabbar item at the specified index.
Notice that I’m using tags for each view controller within the createCenterPageViewController() method. This helps me track which controller is currently displayed on the screen.
Now let’s move on to our most important method: handleTabbarItemChange.
| |
This method takes a view controller as a parameter and uses its tag to determine the selected index. We set the selected and unselected colors for the tab bar.
We loop through all controllers and check if i == selectedIndex.
If the condition is true, we render the image using the original rendering mode; otherwise, we use the template mode.
When an image is rendered in template mode, it inherits the item’s tint color.
We’re almost there! We just need to implement two crucial methods from UITabBarControllerDelegate and PageViewControllerDelegate.
| |
The first method is called when a tab item is pressed, while the second one is triggered when swiping between tabs.
Conclusion
By combining this code, you can achieve smooth scrolling and swiping between tab bar items without having to implement custom gesture handlers or write a lot of code.
This particular implementation may not be suitable for all use cases, but it offers a quick, clever, and relatively simple solution for adding these features with minimal coding effort.
Feel free to explore my approach further using my GitHub repo. Happy coding!