I recently received a faulty solenoid coil and the main circuit board from a Beogram 4002 turntable belonging to a customer in Texas. I requested the circuit board be sent along with the coil because there’s usually an underlying reason why these coils fail, especially in later models of the Beogram 4002 and 4004 turntables.
The components arrived as shown in the image:

My first step was to measure the coil’s resistance to verify the customer’s diagnosis:

As suspected, the resistance was significantly lower than the typical 9 ohms found in a functioning coil, measuring only 1.6 ohms.
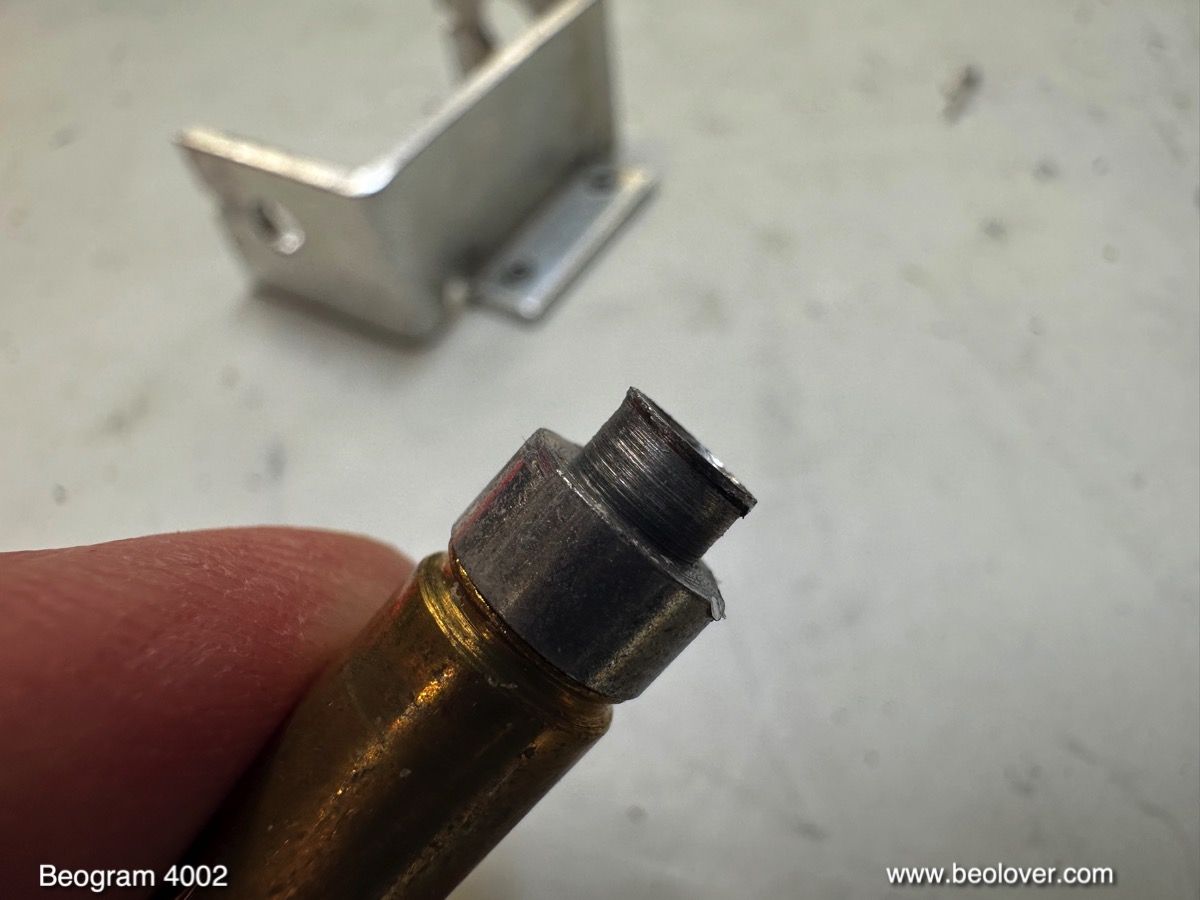
Interestingly, this coil assembly differed slightly from those I had previously worked on. The typical assembly (left) uses a locking washer to secure the tube within the coil:

In this instance (right, plunger already removed), the assembly appeared to be press-fit. This difference was also apparent at the back end of the assemblies, with the current one on the right:

Lacking a clear view of the tube’s mounting from the front, I opted to remove the coil with the assembly intact, hoping for clues on how to disassemble it. Unwinding the coil with the assembly in place was impossible, so I used a Dremel with a cutting wheel to make a cut:

With a bit of careful force, I removed most of the coil windings:

With the coil mostly gone, I discovered I could press the tube out using an arbor press. Here are the separated parts:

The tube was essentially riveted into the mounting bracket’s opening:
In the future, I will likely drill out the front of the pressed-in tube before using the arbor press. I then installed a new coil I had made using a 3D-printed plastic core:

These replacement coils are available for purchase in the Beolover Store.
I installed the refurbished coil assembly into my Beogram 4002 workbench:

I also installed the main circuit board that accompanied the coil. Upon plugging in the Beogram, the coil immediately activated. I swiftly unplugged the unit to prevent the coil from overheating. This suggested a blown 1IC4, the component responsible for regulating the solenoid current:

I replaced the original TIP125 Darlington transistor with a more robust TIP107, hoping for increased longevity:

This resolved the issue, and the Beogram functioned correctly, lowering the tonearm at the designated point on the record.
In my experience, many Beogram 4002 and 4004 turntables have problems with their power transistors, so I generally replace them as a preventative measure during restoration.
The main circuit board is now fully capable of controlling the solenoid. Time to send everything back to Texas!