Node.js is becoming increasingly popular for application development, and for good reason. Major companies like eBay, PayPal, and Walmart have been utilizing it successfully for years. Walmart’s mobile site, in particular, has seen impressive results, with a significant portion of traffic during peak times being handled by their Node.js-powered platform. Walmart servers processed 1.5 billion requests, 70 percent of which were delivered through mobile and powered by Node.js. The Node package manager (npm) also speaks to this growth, as it recently hit a new milestone with over 150,000 modules available.
While Ruby has Rails and Python has Django, the leading application development framework for Node.js is still up for grabs. However, a strong contender is emerging: LoopBack, an open-source API framework developed by StrongLoop, a company based in San Mateo, California. StrongLoop plays a significant role in the Node.js community, not only as a major contributor to the latest Node version, but also as the long-standing maintainer of Express, one of the most popular Node.js frameworks available.
Let’s dive into LoopBack’s capabilities and see it in action by creating a sample application.
What is LoopBack and How Does It Work with Node?
LoopBack provides a framework for building APIs and linking them to backend data sources. Built on top of Express, it can generate a fully functional REST API from a data model definition. This API can then be accessed by any client.
LoopBack includes a built-in client called API Explorer, which we’ll be using. This simplifies the process of viewing our results and keeps the focus on API development in our example.
Before proceeding, ensure you have Node installed on your system. You can download it here. npm is included, which makes installing the necessary packages straightforward. Let’s get started.
Create a Skeleton
Our application, named Givesomebody, will connect people looking to donate unwanted items with those in need. We’ll have two user types: Donors and Receivers. Donors can create and view gifts, while Receivers can browse and claim available gifts. While we could represent both roles within a single “User” entity, we’ll separate them to demonstrate how LoopBack handles relationships.
Begin by installing the StrongLoop command line tools using npm:
| |
Next, use LoopBack’s application generator:
| |
Now, let’s add a model called “Gift.” LoopBack will ask for the data source and base class. For now, choose db (memory) as the data source, as we haven’t set one up yet. Select PersistedModel as the base class, providing us with standard CRUD methods. When asked if the model should be REST-exposed (yes), press enter to accept the default REST service name, which pluralizes the model name (in this case, gifts).
| |
Lastly, define the property names, data types, and whether they are required. Our “Gift” model will have name and description properties:
| |
An empty property name signifies that you’re finished defining properties.
The model generator will create two files in your application’s common/models directory: gift.json and gift.js. The JSON file outlines the entity’s metadata: properties, relationships, validations, roles, and methods. The JavaScript file defines additional behavior and specifies remote hooks for execution before or after operations like create, update, or delete.
Our remaining models, “Donor” and “Receiver,” will be created similarly, using “User” as the base class. This grants us properties like username, password, and email out of the box. We’ll add properties like “name” and “country,” and for “Receiver,” a “delivery address.”
Project Structure
Let’s examine the generated project structure:
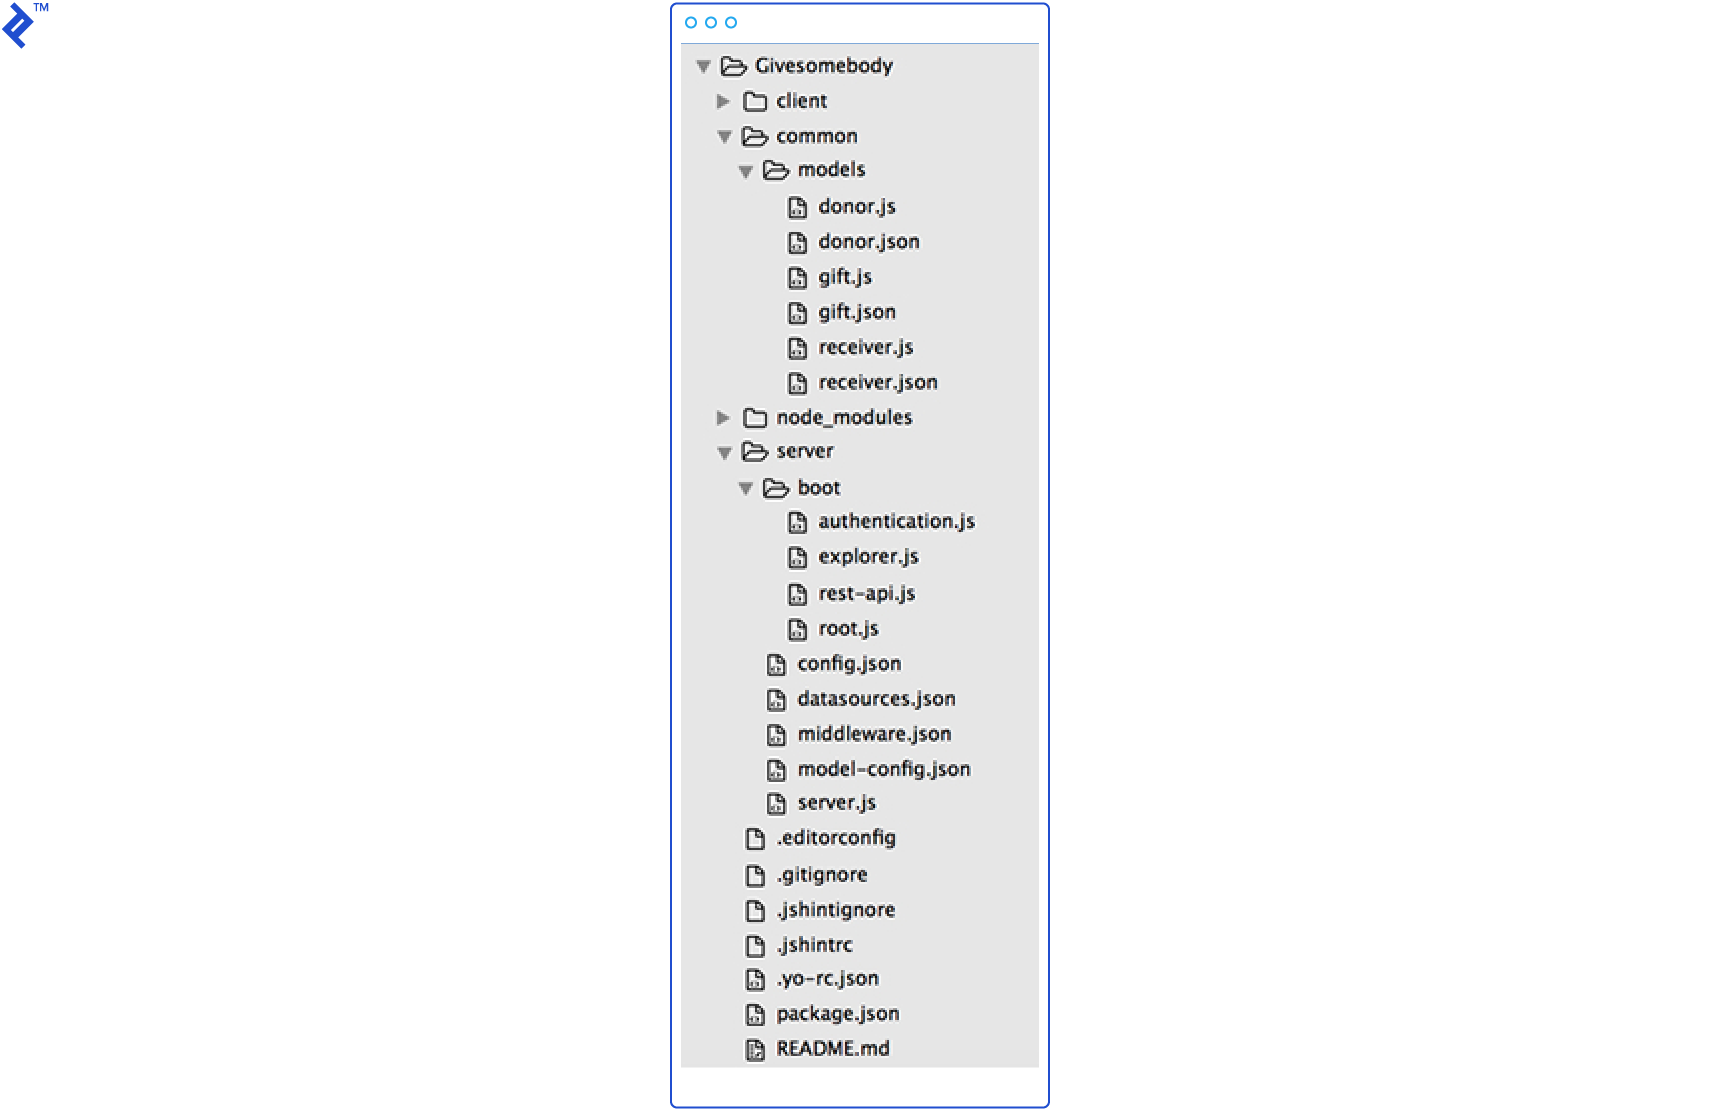
The project has three primary directories: - /server – Contains Node.js application scripts and configuration. - /client – Holds static files such as .js, .html, .css. - /common – Shared between server and client, this folder contains model files.
Here’s a breakdown of each directory’s contents, as outlined in the LoopBack documentation:
| File or directory | Description | How to access in code |
|---|---|---|
| Top-level application directory | ||
package.json | Standard npm package specification. See package.json | N/A |
| /server directory - Node application files | ||
server.js | Main application program file. | N/A |
config.json | Application settings. See config.json. | app.get('setting-name') |
datasources.json | Data source configuration file. See datasources.json. For an example, see Create new data source. | app.datasources['datasource-name'] |
model-config.json | Model configuration file. See model-config.json. For more information, see Connecting models to data sources. | N/A |
middleware.json | Middleware definition file. For more information, see Defining middleware. | N/A |
/boot directory | Add scripts to perform initialization and setup. See boot scripts. | Scripts are automatically executed in alphabetical order. |
| /client directory - client application files | ||
README.md | LoopBack generators create empty README file in markdown format. | N/A |
| Other | Add your HTML, CSS, client JavaScript files. | |
| /common directory - shared application files | ||
/models directory | Custom model files:
| Node:myModel = app.models.myModelName |
Build Relationships
Our example involves several key relationships. A Donor can donate multiple Gifts (“Donor has many Gift”). Similarly, a Receiver can receive many Gifts (“Receiver has many Gift”). Conversely, a “Gift belongs to Donor” and can also “belong to Receiver” upon acceptance. Let’s translate this into LoopBack’s terminology.
| |
Note: There’s no through model; we’re simply referencing the Gift.
Repeating this process for Receiver and adding two “belongs to” relationships to Gift completes our backend model design. LoopBack automatically updates the model JSON files to reflect these relationships:
| |
Add a Datasource
Now, let’s connect a real datasource to store our application data. We’ll use MongoDB for this example, but LoopBack offers modules for Oracle, MySQL, PostgreSQL, Redis, and SQL Server as well.
Start by installing the connector:
| |
Then, add the datasource to your project:
| |
Next, configure your datasource in server/datasources.json. This configuration is for a local MongoDB server:
| |
Finally, update server/model-config.json, setting the datasource for all entities we want to be saved in the database to "givesomebody".
| |
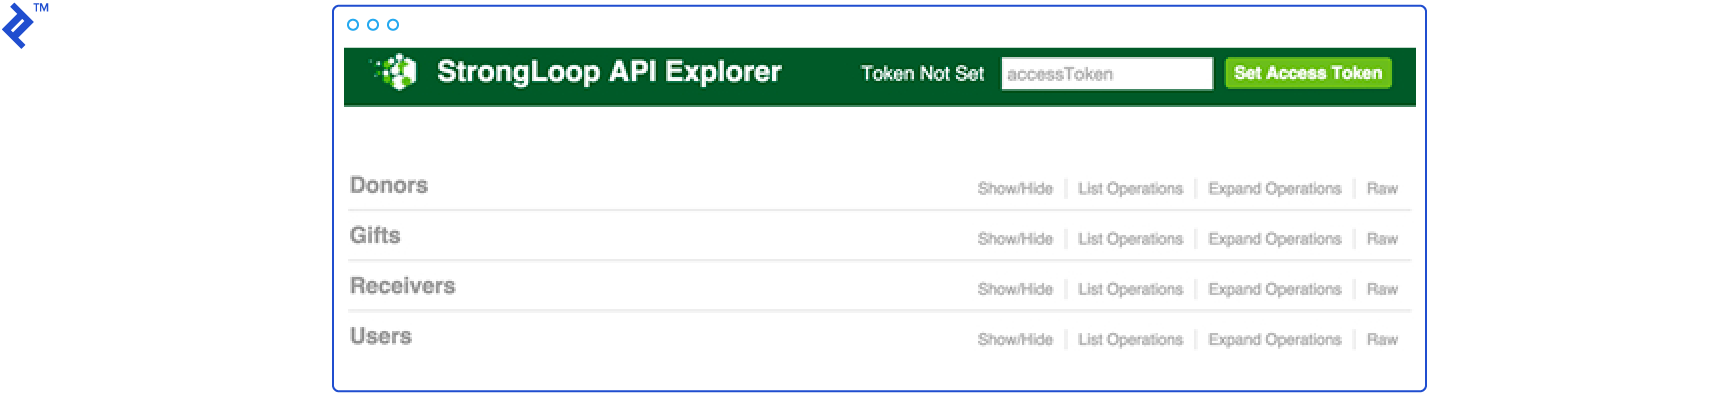
Testing Your REST API
Let’s see our work in action! We’ll use the built-in API Explorer tool as our client.
First, in a separate window, start MongoDB:
| |
Then, run the application:
| |
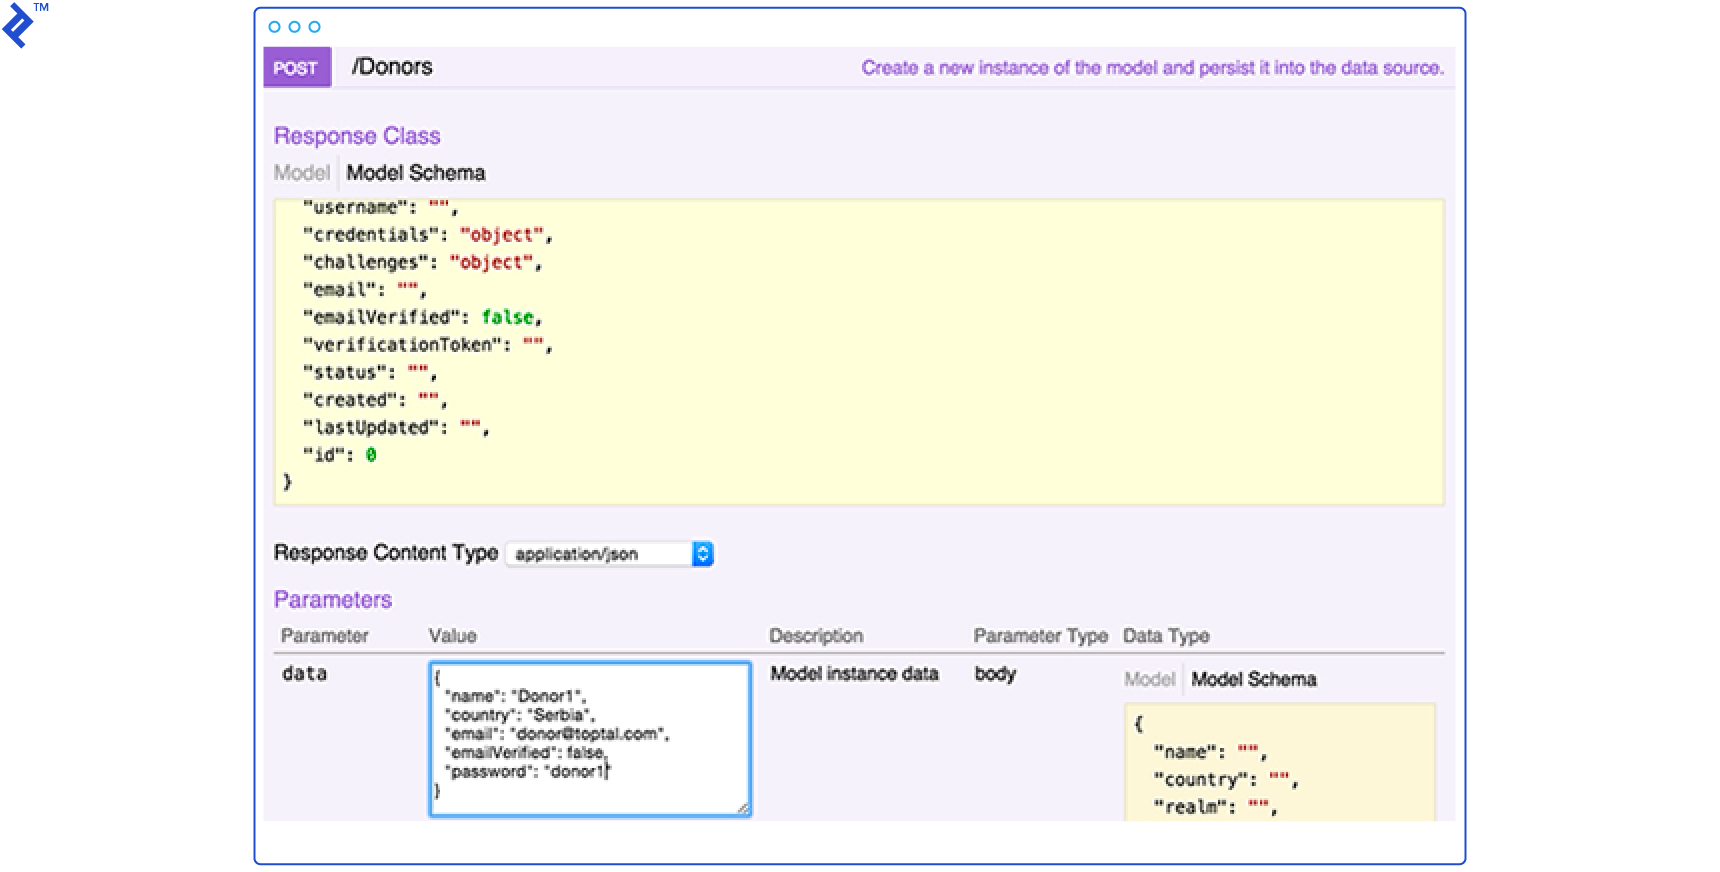
Open your browser and navigate to http://localhost:3000/explorer/. You should see your entities and their available operations. Try adding a Donor using a POST /Donors call.
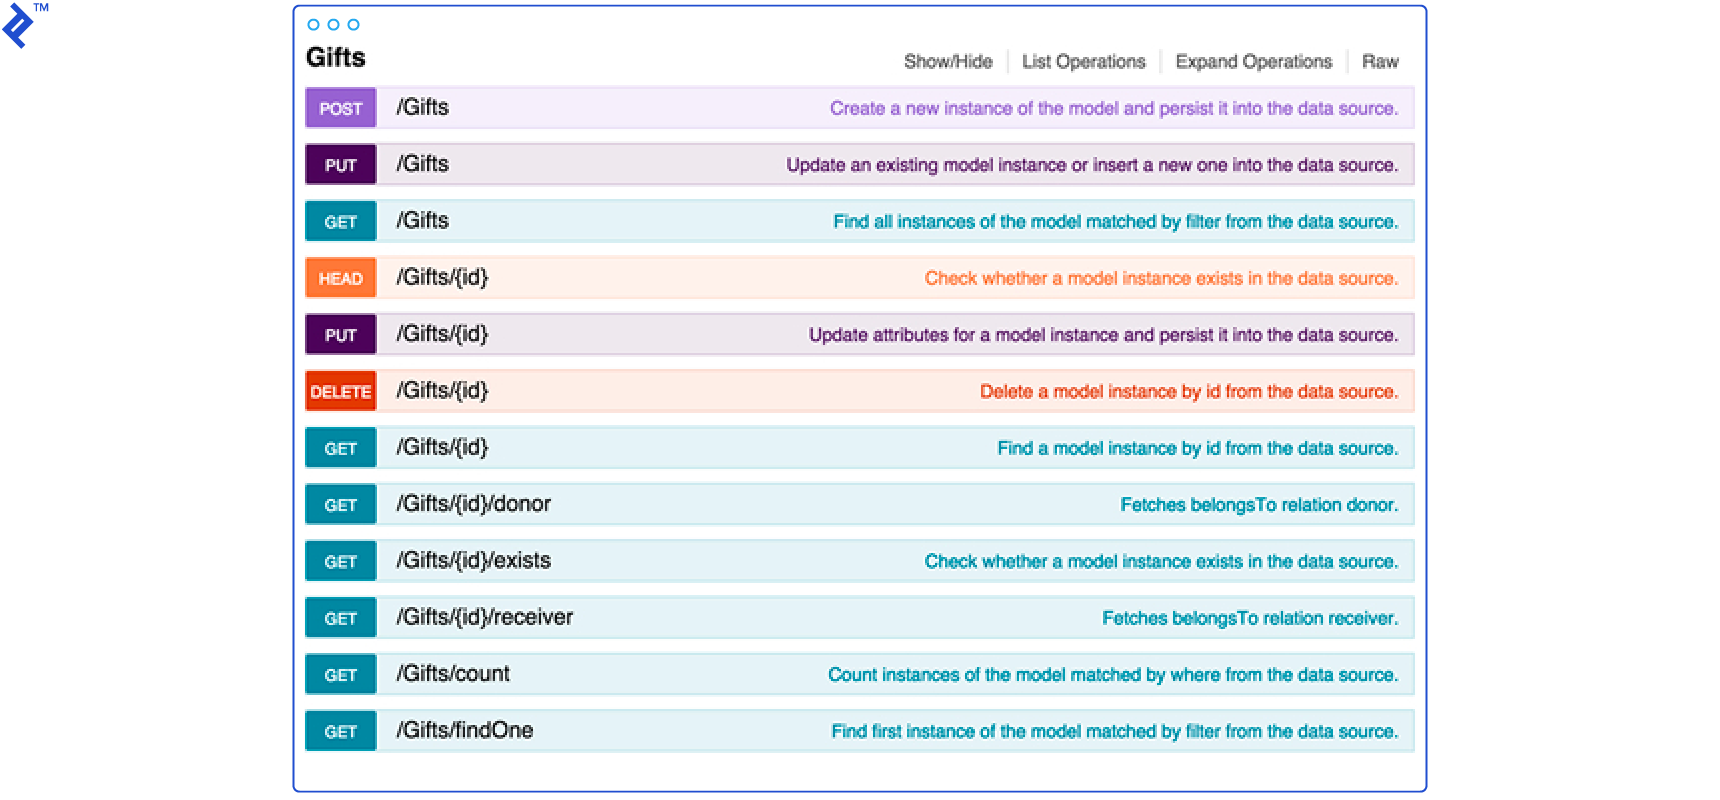
API Explorer is intuitive: select a method, and the model schema appears in the bottom right corner. Write your custom HTTP request in the “data” text area and click “Try it out.” The server’s response will be displayed below.
User Authentication
LoopBack provides a pre-built “User” class with login, logout methods, and the ability to be associated with an “AccessToken” entity for storing user tokens. Essentially, a complete user authentication system is ready to use. Calling /Donors/login through API Explorer returns:
| |
The id represents the “AccessToken” value generated and stored in the database. You can set and use this access token for subsequent requests.

Remote Methods
Remote methods are static model methods exposed through custom REST endpoints, used for operations not included in LoopBack’s standard model REST API.
We can define custom methods in the [model].js file in addition to the provided CRUD methods. Let’s add a remote method to the “Gift” model for checking if a gift is reserved and another for listing all unreserved gifts.
First, add a new property called “reserved” to the model’s properties in gift.json:
| |
Then, add the remote method in gift.js:
| |
Now, to check a gift’s availability, the client can send a POST request to /api/Gifts/free with the gift’s id.
Remote Hooks
Sometimes we need to execute methods before or after a remote method. Remote hooks can be either:
beforeRemote()- Executes before the remote method.afterRemote()- Executes after the remote method.
Both types take two arguments: a string matching the target remote method (wildcards are supported) and the callback function.
Let’s implement a hook that logs a message whenever a new Donor is created. We’ll add a “before create” hook in donor.js:
| |
The request is called with the provided context, and the middleware’s next() callback (discussed later) is called after the hook executes.
Access Controls
LoopBack applications access data through models, so we control data access by defining model restrictions – specifying who or what can read, write, or execute methods on them. LoopBack uses access control lists (ACLs) for this purpose.
Let’s allow viewing gifts without logging in but restrict creation and deletion to logged-in Donors.
| |
First, deny all access to all endpoints:
| |
Allow everyone to read Gift models:
| |
Allow authenticated users to create Gifts:
| |
Finally, allow gift owners to make changes:
| |
Reviewing gift.json, everything should be configured:
| |
Important: While $authenticated represents all system users (Donors and Receivers), we only want Donors to create new Gifts. We’ll need a custom role. Since “Role” is a pre-built entity, we can utilize its API call to create the $authenticatedDonor role in the boot function and then update principalId in gift.json.
Create a new file, server/boot/script.js, and add the following code:
| |
The “RoleMapping” entity maps Roles to Users. Ensure both “Role” and “RoleMapping” are exposed through REST by checking if "public" is set to true for the “Role” entity in server/model-config.json. Then, in donor.js, write a “before create” hook to map the userID and roleID in the “RoleMapping” POST API call.
Middleware
Middleware functions execute when a REST endpoint receives a request. LoopBack builds on Express, so it utilizes Express middleware with an additional concept: “middleware phases.” These phases dictate the execution order of middleware functions.
LoopBack docs define these predefined phases:
- initial - The first point for middleware execution.
- session - Session object preparation.
- auth - Authentication and authorization handling.
- parse - Request body parsing.
- routes - HTTP routes containing application logic. Middleware registered via Express API app.use, app.route, app.get (and other HTTP verbs) runs at this phase’s beginning. Also use this phase for sub-apps like loopback/server/middleware/rest or loopback-explorer.
- files - Serving static assets (file system access occurs here).
- final - Handling errors and requests for unknown URLs.
Each phase has three subphases. For instance, the initial phase has:
- initial:before
- initial
- initial:after
Let’s look at our default middleware.json:
| |
In the initial phase, we call loopback.favicon() (loopback#favicon is the middleware ID). Then, third-party npm modules compression and cors are called (with or without parameters). The final phase has two more calls: urlNotFound (a LoopBack call) and errorhandler (a third-party module). This demonstrates how built-in calls and external npm modules are used similarly. Of course, we can create and call our own middleware through this JSON file.
loopback-boot
Finally, let’s mention the module that exports the boot() function for initializing the application. This snippet from server/server.js bootstraps the application:
| |
This script loads scripts found in the server/boot folder alphabetically. Therefore, we can define scripts to run at startup in this folder, such as explorer.js, which runs API Explorer.
Conclusion
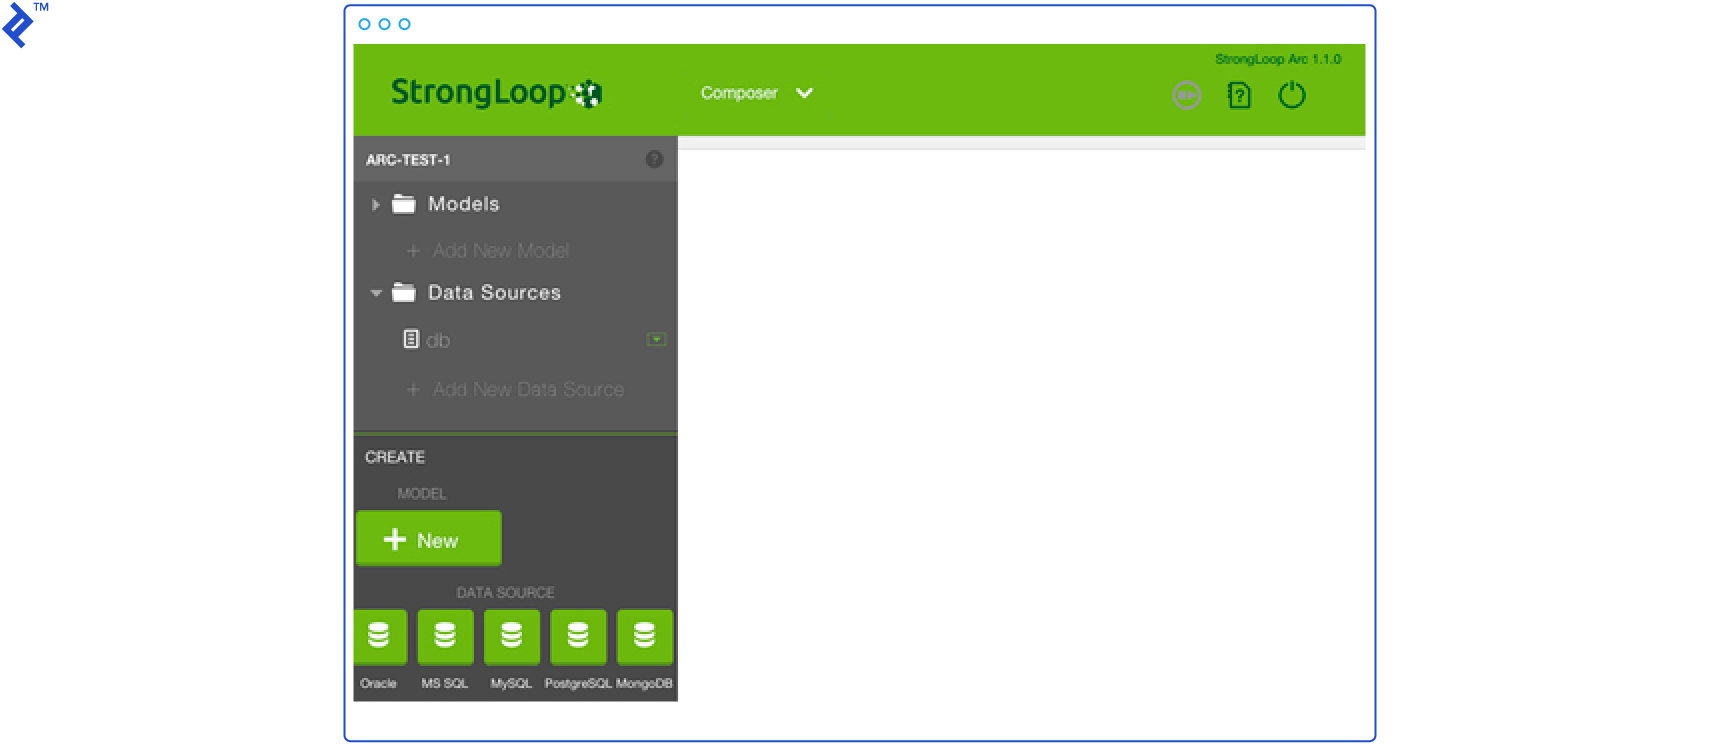
Before concluding, it’s worth mentioning StrongLoop Arc, a graphical UI alternative to the slc command line tools. It offers tools for building, profiling, and monitoring Node.js applications. If you prefer GUIs, it’s worth checking out. However, keep in mind that StrongLoop Arc is being phased out, and its functionality is being integrated into the IBM API Connect Developer Toolkit.
Overall, LoopBack simplifies development by providing numerous features out of the box, allowing you to concentrate on application-specific logic. If your application relies heavily on CRUD operations and managing predefined entities, if you’re tired of rewriting authentication and authorization logic, or if you want to leverage a robust framework like Express, then building your REST API with LoopBack could be the perfect solution. It’s a breeze!