Whenever a new version of Picasso, our component library, is launched, we upgrade all our front-end applications. This allows us to leverage the newest features and maintain design consistency across our website.
Last month, we deployed a Picasso update to the platform used by our talent to secure jobs and engage with clients—the Toptal Talent Portal. We knew this update would bring significant design changes. To reduce the risk of unforeseen issues, we decided to use visual regression testing to identify problems before release.
This type of testing is not new; many Toptal projects, including Picasso, already utilize it.
While tools like Percy, Happo, and Chromatic can assist teams in establishing a reliable visual regression pipeline, we found their setup process potentially time-consuming and disruptive to our timeline. With a code freeze date already set for the migration just days away, we needed to think outside the box.
Visual Regression Testing Integrated with UI Testing
Although our project lacked dedicated visual regression tests, we had comprehensive UI integration tests using Cypress. While not its primary function, Cypress offers a documentation page dedicated to visual testing and another listing the available plug-ins for visual testing configuration.
From Cypress to Screenshots
Guided by the documentation, we explored cypress-snapshot-plugin. Setup was quick, but we soon realized we weren’t seeking a conventional visual regression output.
Many tools in this domain compare snapshots, highlighting pixel discrepancies between a known baseline and the modified version. If the difference exceeds a threshold, the element is flagged for review. However, we anticipated numerous minor changes across our UI components, making a threshold impractical. Even a completely different component might be acceptable in the new version. Likewise, a tiny pixel deviation could indicate a production-unfit component.

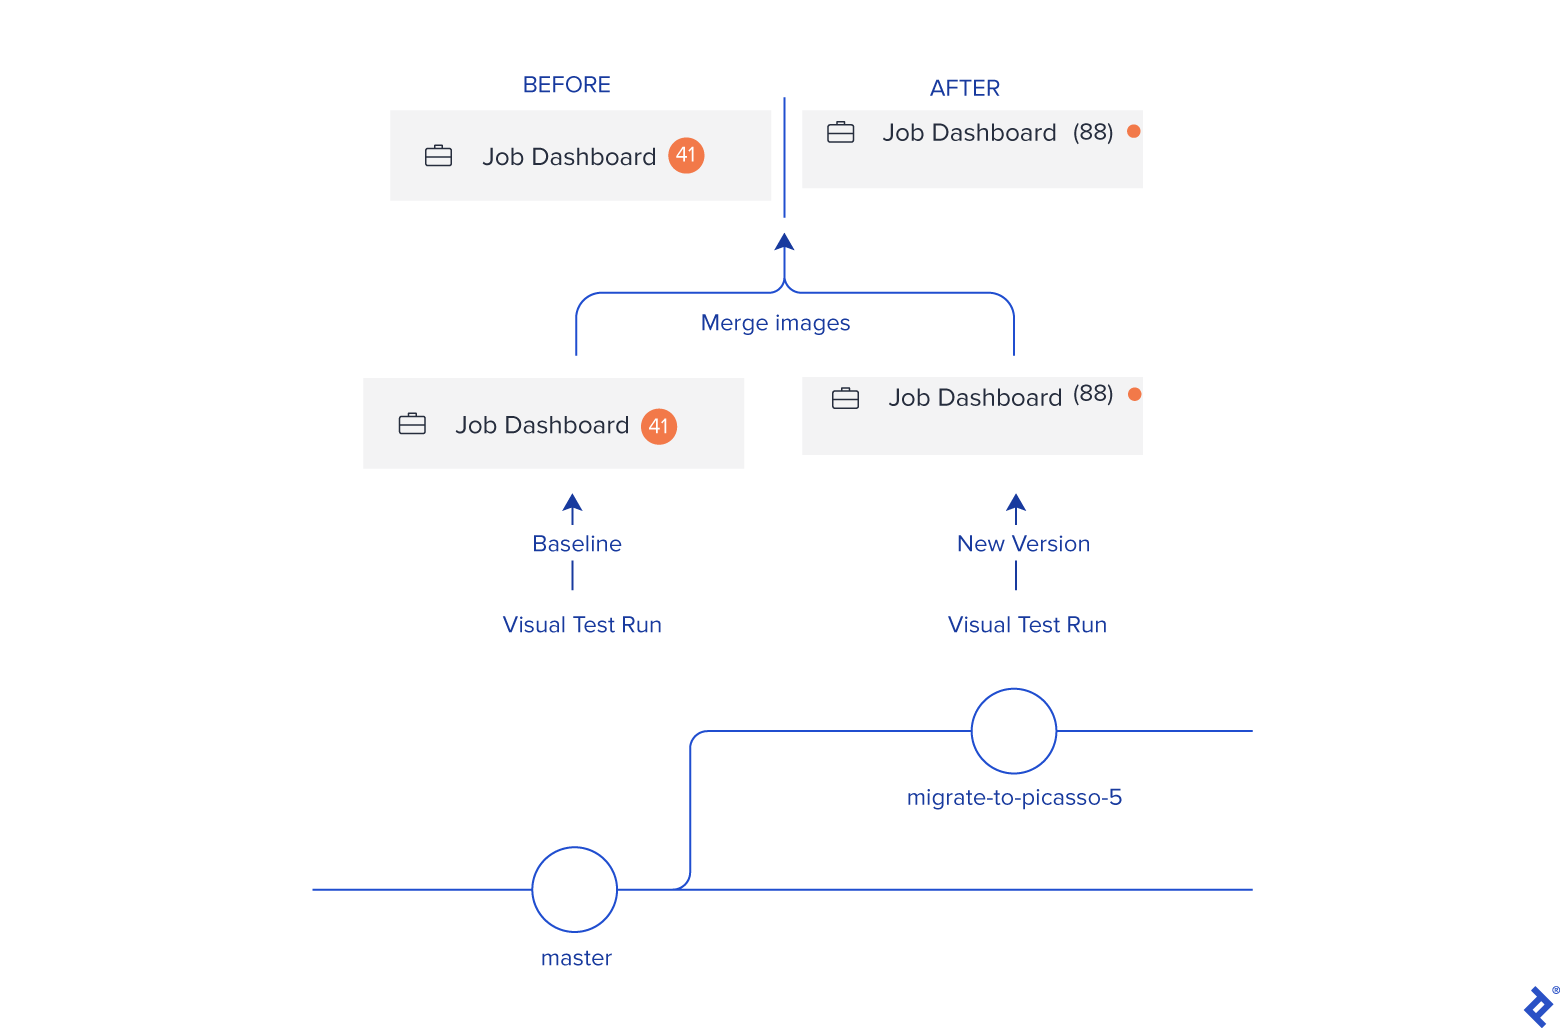
Two things became evident: pixel-level comparisons wouldn’t suffice, but a side-by-side component view was crucial. We abandoned the plugin, aiming instead to create a collection of component images before and after the Picasso update. This would allow us to quickly scan for compliance with the site’s requirements and library standards.
Our revised plan was to capture a component screenshot, store it locally, repeat the process after the Picasso update, then merge the images. This wasn’t drastically different from our initial approach, but it provided implementation flexibility by eliminating plugin dependencies.
Utilizing APIs for Comparison Images
With a defined objective, we examined how Cypress could facilitate screenshot generation. Given our extensive UI tests covering most of the Talent Portal, we chose to capture individual element screenshots after each interaction to maximize coverage.
Alternatives included full-page screenshots at key points or selective captures based on individual test case analysis. However, we found the former difficult to compare and prone to errors, while the latter was too time-intensive. Capturing all elements within our page tests seemed a pragmatic compromise.
We turned to Cypress’s API for image generation. The cy.screenshot() command natively supports individual component screenshots, while the After Screenshot API allows file renaming, directory changes, and distinguishing visual regression from standard runs. Combining these, we created runs that didn’t interfere with our functional tests and stored images appropriately.
We began by extending the index.js file in our plugins directory to accommodate two new run types: “baseline” and “comparison.” Then, we set the image path based on the run type:
| |
Next, we invoked each run type by adding the corresponding environment variable to the Cypress call in our project’s package.json:
| |
After executing our new commands, we found all screenshots placed in their respective folders.

Our next attempt was to override cy.get(), Cypress’s main command to return DOM elements, to capture a screenshot of any called element while retaining its default behavior. However, modifying cy.get() directly proved challenging, as calling it within its own definition creates leads to an infinite loop. The recommended workaround involves creating a custom command that captures the screenshot after element retrieval:
| |
Fortunately, our element interactions were already wrapped in an internal getElement() function, simplifying the process to just ensuring a screenshot was captured upon function call.
Outcomes of Visual Regression Testing
With screenshots in hand, the remaining task was merging them. We created a simple Node.js script using Canvas which generated 618 comparison images. While some discrepancies were easily noticeable by simply navigating the Talent Portal, others were less conspicuous.


Adding Value to UI Testing
The visual regression tests proved valuable, uncovering several issues that might have otherwise been missed. Despite anticipating component differences, visualizing the actual changes helped pinpoint problematic cases. If your project has a user interface but lacks these tests, implementing them is highly recommended!
Perhaps the more crucial takeaway is the reminder that perfect is the enemy of good. Had we dismissed visual regression testing due to the lack of prior setup, we might have overlooked bugs during the migration. Instead, we devised a feasible, albeit not ideal, plan, executed it swiftly, and reaped the rewards.
For a comprehensive guide on implementing a robust visual regression pipeline in your project, consult Cypress’s visual testing page, choose the tool best suited to your requirements, and follow the tutorial videos.