The camera is a fundamental element in game development, playing a crucial role in various genres, from simple chess apps to complex 3D adventures. This article provides a comprehensive guide to designing a modular and extensible camera system specifically for 2D games, with a particular focus on platformers, using the popular game engine Unity.
Transitioning from 2D to 2.5D: Building a Versatile Camera System
Our objective is to create a camera system that is both adaptable and scalable. It will consist of a core set of components providing essential functionality, complemented by optional components and effects that can be incorporated based on specific requirements. While tailored for 2D platformers, this system can be readily extended to other 2D genres, 2.5D games, and even 3D environments.

The camera’s functionality is divided into two primary categories: tracking and effects.
Tracking
Tracking, the ability of the camera to follow objects within the game scene, constitutes a major part of camera movement. We will implement tracking mechanisms to address common scenarios encountered in 2D platformers, with the flexibility to incorporate additional tracking types for unique situations.
Effects
To enhance visual impact, we’ll incorporate effects such as screen shake, zoom, fade, and color overlay.
Setting Up the Project
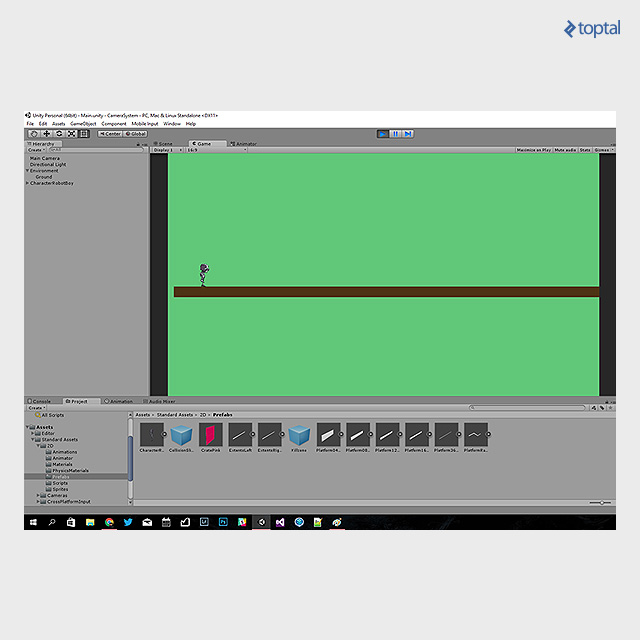
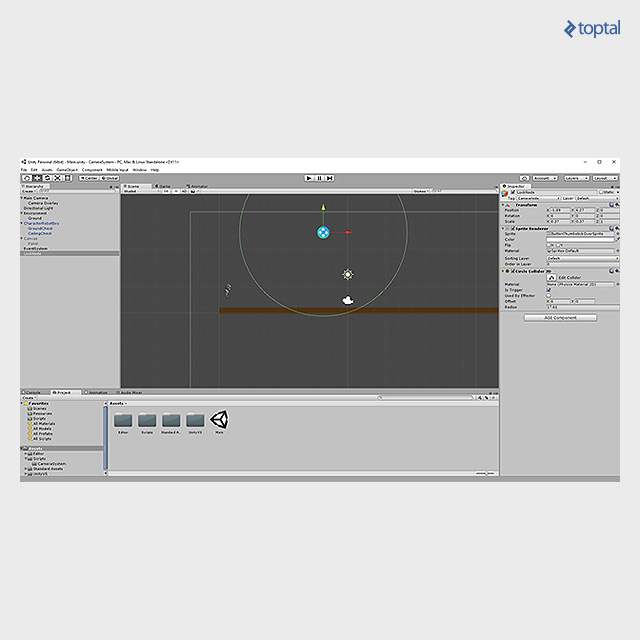
Begin by creating a new 2D project in Unity and importing standard assets, particularly the RobotBoy character. Create a ground platform and add an instance of the character. Ensure that the camera is set to Orthographic mode, allowing for a flat, two-dimensional perspective.
Implementing Target Tracking
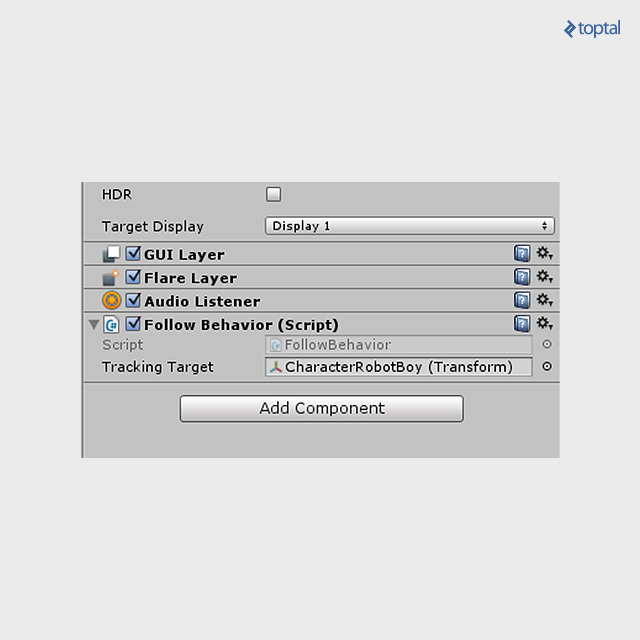
Let’s start by adding basic tracking functionality to our main camera using a script. This script, attached to the main camera object, allows you to designate a target object for tracking. The script will then synchronize the camera’s x and y coordinates with the target object’s position during each frame update.
| |
In your scene hierarchy, drag the RobotBoy character onto the “Tracking Target” field of the tracking script to enable tracking of the main character.
Introducing Camera Offset
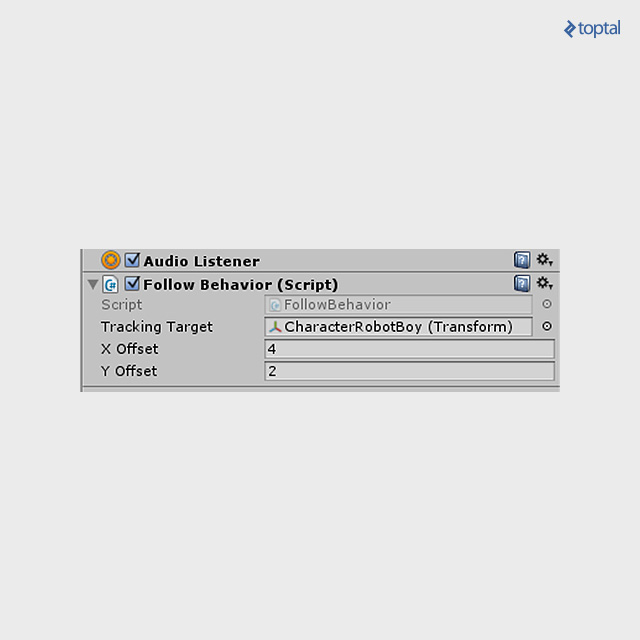
While functional, this setup has a drawback: the character remains perpetually centered on the screen. This limits the player’s view of what lies ahead, which can hinder gameplay. To address this, we’ll introduce offset parameters to the script, allowing for adjustable camera positioning relative to the target.
| |
Here’s an example of how you can configure the newly added offset fields:
Enhancing Smoothness with Interpolation
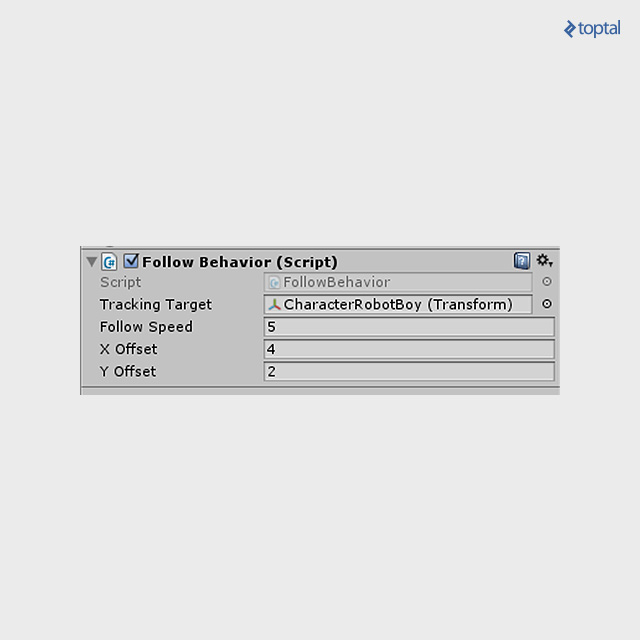
The current camera movement is rigid and can be disorienting for players. To rectify this, we’ll introduce a delay in camera tracking using linear interpolation. This will be controlled by a new field determining the speed at which the camera adjusts to the character’s movement.
| |
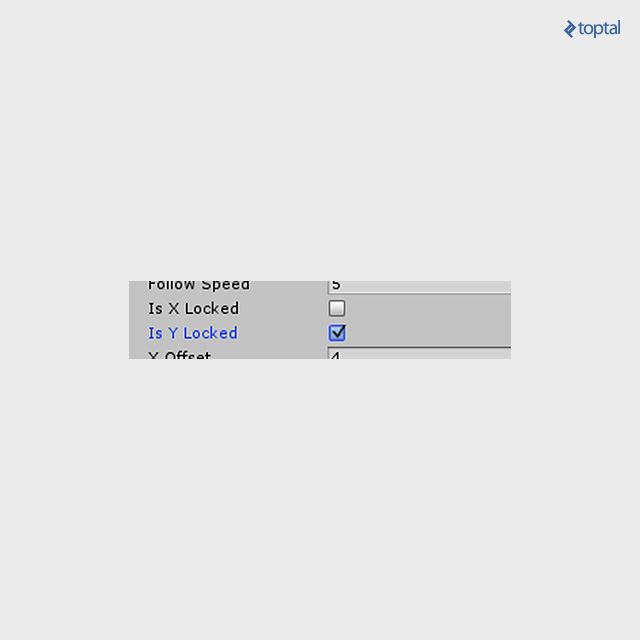
Mitigating Disorientation: Axis Locking
To prevent visual discomfort caused by excessive vertical camera movement, we’ll implement axis locking. This feature restricts camera tracking to a single axis. We’ll modify the tracking code to allow for axis-independent tracking while incorporating the new locking flags.
| |
Implementing a Lane System
With horizontal-only camera tracking, our vertical movement is limited to the screen’s height. To overcome this, we’ll introduce a lane system.
Consider the following scenario:

The character begins on the lower lane. While within this lane’s boundaries, the camera moves horizontally, maintaining a lane-specific height offset. When the character transitions to another lane, the camera smoothly follows, adjusting its vertical position accordingly.
Careful lane design is crucial to prevent jarring lane switches during actions like jumps. A lane change should only occur when the character is expected to remain within the new lane for a significant duration.
The level design can incorporate varying lane heights or even transition to different camera tracking systems as needed. Consequently, we need mechanisms to define lane boundaries.
Implementation Details
A straightforward approach is to represent lanes as objects within the scene. Their Y-coordinate, combined with the tracking script’s Y offset, will determine the camera’s vertical position.
Add the LaneSystem class to your camera object, alongside the tracking script, and assign lane objects to the provided array. Designate the player character in the Reference field. If the reference falls between two lanes, the lower lane will dictate the camera’s position.

The LaneSystem class manages camera transitions between lanes based on the reference position. The followSpeed parameter ensures smooth interpolation during lane switches.
| |
This implementation provides a foundation for a lane system, allowing for further customization and visual refinement.
Introducing Lock Nodes
While a lane system is effective, there are instances where locking the camera onto specific points of interest (POIs) is desirable.
This can be achieved by placing POIs within the scene and attaching trigger colliders to them. When the character enters a trigger collider, the camera focuses on the corresponding POI. As the character exits the trigger area, the camera seamlessly reverts to its previous tracking mode.
The transition between camera tracking modes can be managed using a simple switch or a stack system, where tracking modes are pushed and popped.
Implementation Details
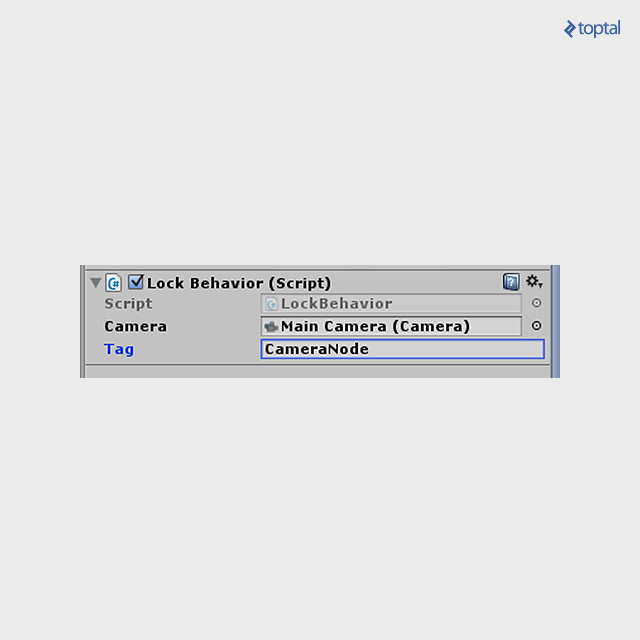
To set up a lock node, create an object (empty or a sprite) and attach a Circle Collider 2D component. This collider defines the area where the camera will lock onto the node. You can use any collider type, but a Circle Collider is suitable for our example. Create a tag, such as “CameraNode,” and assign it to this object.
Add the following property to the tracking script on your camera:
| |
Next, attach the following script to the player object. This script temporarily switches the camera’s target to the designated lock node when the player enters the trigger area. It also stores the previous target, ensuring a seamless transition back. While this example uses a simple switch, you can expand it into a stack system for more complex scenarios. Remember that you can adjust the Circle Collider 2D’s position or use different collider types as needed.
| |
Implementing Camera Zoom
Camera zoom can be triggered by user input or animated for dramatic effect, such as focusing on a POI or a specific area within a level.
In Unity, you can achieve 2D camera zoom by manipulating the camera’s orthographicSize property. Attach the following script to your camera and use the SetZoom method to control the zoom factor. A value of 1.0 represents no zoom, 0.5 zooms in twice, 2 zooms out twice, and so on.
| |
Simulating Screen Shake
Screen shake is a powerful effect for conveying impacts, explosions, or other dramatic events.

A practical implementation example can be found on GitHub: gist.github.com/ftvs/5822103. This implementation is straightforward and leverages randomness to create a convincing shaking effect.
Fading and Overlaying
Fade-in and fade-out effects are commonly used during level transitions or to create cinematic transitions.
You can achieve this by adding a non-interactive UI texture within a panel that covers the entire screen. Initially transparent, this panel can be filled with any color and opacity, or animated, to achieve the desired effect.
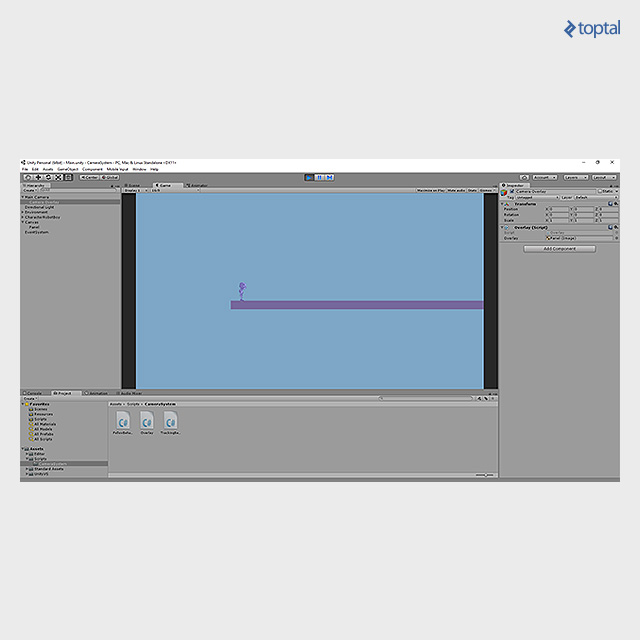
Here’s an example configuration. Note that the UI Panel object is assigned as a child of the Main Camera Object, named “Camera Overlay.” The Camera Overlay utilizes a script called Overlay with the following properties:
| |
To create a fade-in effect, modify the Overlay script to interpolate between the initial color (black or white) and a target color set using SetOverlayColor. You can adjust the fadeSpeed to control the transition’s duration.
| |
Conclusion
This article provides a foundational understanding of building a modular 2D camera system in Unity, equipping you with the knowledge to create engaging and immersive gameplay experiences. By grasping the basic tracking principles and simple effects outlined here, you can develop a wide range of camera behaviors, paving the way for more advanced implementations. Consider packaging your camera system into a reusable Unity package for use across multiple projects.
Just as the advent of film revolutionized storytelling in theater, a well-designed camera system can significantly enhance your game’s atmosphere and player immersion. By mastering these techniques, you’ll have the tools to elevate your game projects to new heights of cinematic excellence.