Software projects rely heavily on automated tests to ensure their quality, maintainability, and capacity for future expansion. When it comes to Java, JUnit is the key to achieving this automation. This article primarily focuses on the creation of robust unit tests and the utilization of techniques like stubbing, mocking, and dependency injection. Additionally, we’ll delve into the realm of JUnit integration tests.
The JUnit test framework is a widely used, open-source, and freely available testing tool specifically designed for Java-based projects.
At the time of this writing, JUnit 4 holds the position of the current major release. It was initially launched over a decade ago, with its most recent update occurring over two years ago.
Active development is underway for JUnit 5, which incorporates the Jupiter programming and extension models. This iteration boasts enhanced compatibility with language features introduced in Java 8 and comes equipped with other innovative and compelling features. While certain teams might deem JUnit 5 ready for implementation, others might opt to continue utilizing JUnit 4 until the official release of version 5. We will explore examples from both versions.
Executing JUnit Tests
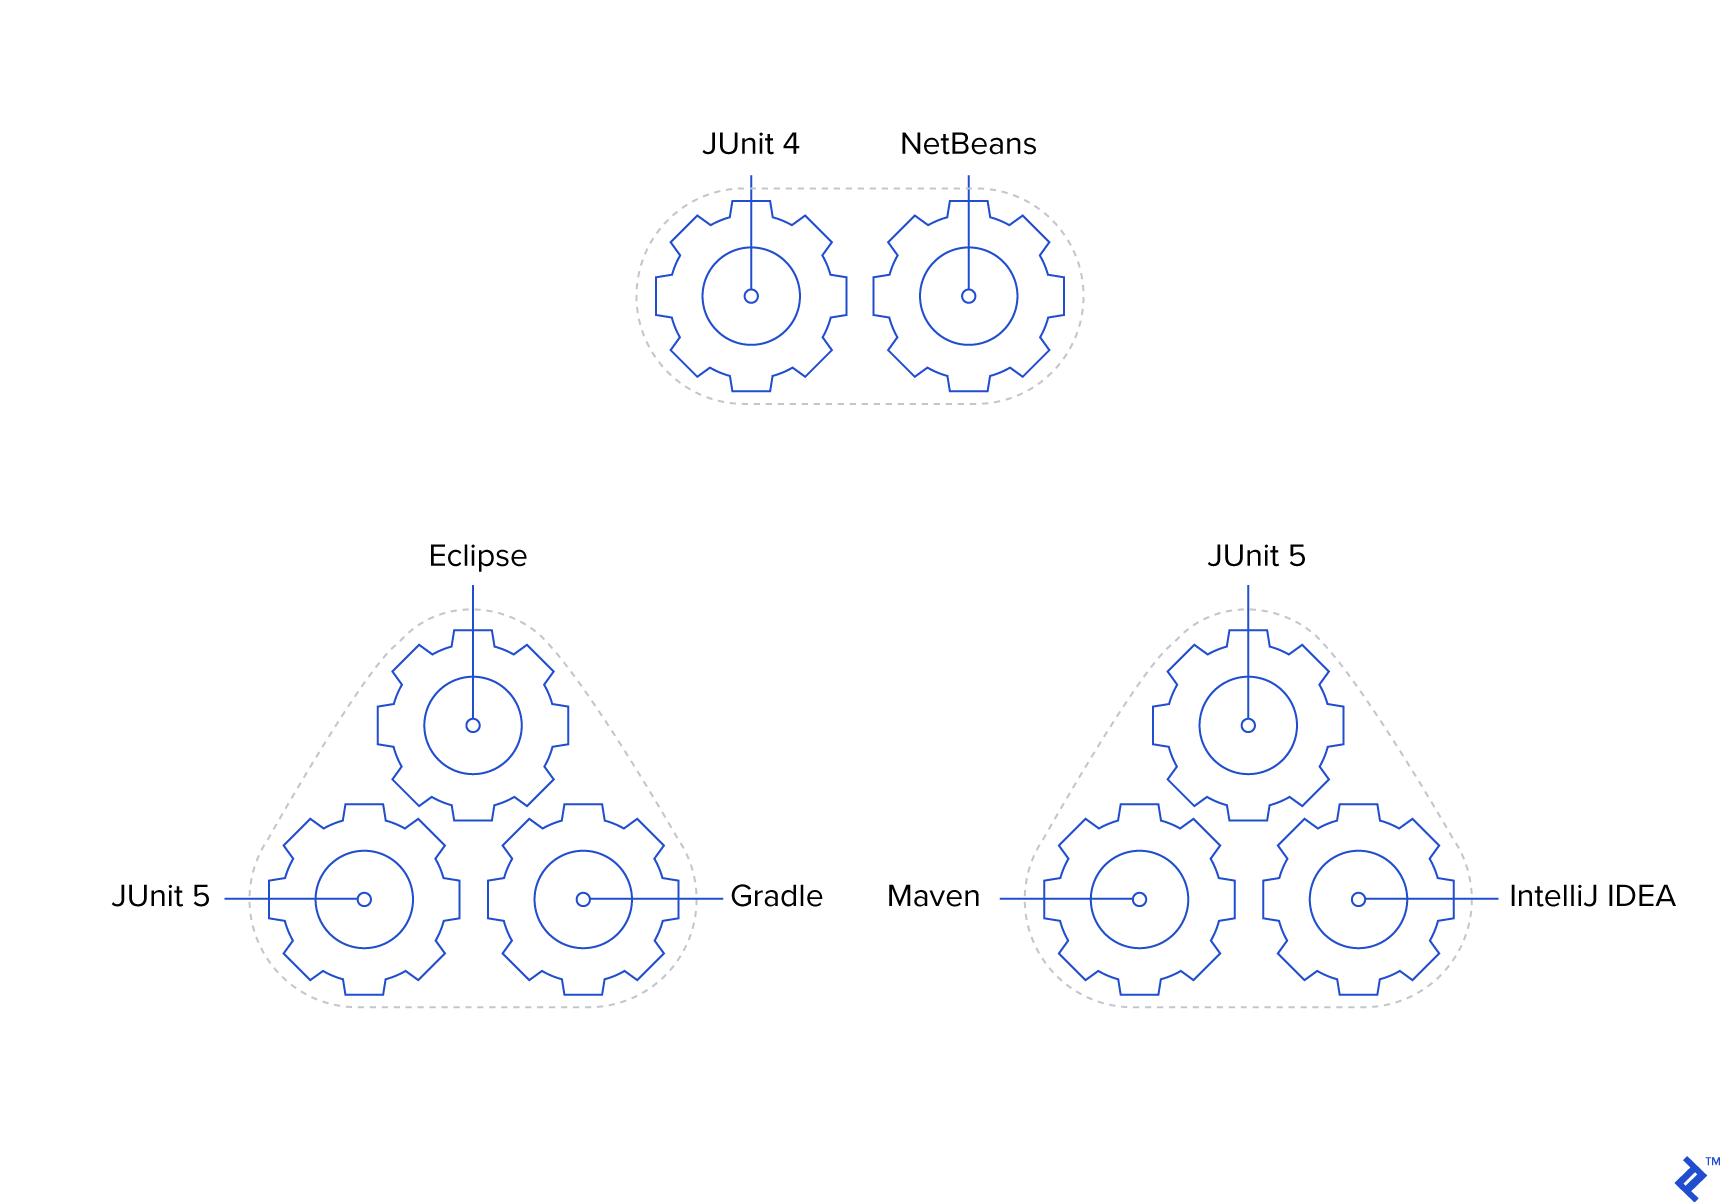
Running JUnit tests is possible directly within IntelliJ, as well as other IDEs like Eclipse, NetBeans, or even through the command line.
It’s crucial to execute tests, particularly unit tests, during the build process. A build should be considered unsuccessful if any tests fail, regardless of whether the issue stems from the production code or the test code itself. This approach necessitates discipline from the development team and a commitment to prioritizing the resolution of failing tests. However, it’s an indispensable practice to uphold the principles of automation.
Furthermore, continuous integration systems like Jenkins can be employed to execute and generate reports on JUnit tests. Projects utilizing tools such as Gradle, Maven, or Ant benefit from the ability to seamlessly integrate test execution as an integral part of their build process.
Gradle
For a practical illustration of a Gradle project utilizing JUnit 5, refer to the Gradle section of the JUnit user guide and the junit5-samples.git repository. It’s noteworthy that this setup can also run tests written using the JUnit 4 API, often referred to as “vintage” tests.
You can create the project in IntelliJ by navigating through the following menu options: File > Open… > locate the junit-gradle-consumer subdirectory > OK > Open as Project > OK. This sequence will initiate the project import from Gradle.
For those using Eclipse, the Buildship Gradle plugin can be conveniently installed from Help > Eclipse Marketplace… Subsequently, the project can be imported by following these steps: File > Import… > Gradle > Gradle Project > Next > Next > Browse to the junit-gradle-consumer subdirectory > Next > Next > Finish.
Once you have the Gradle project set up in either IntelliJ or Eclipse, executing the Gradle build task will automatically encompass the execution of all JUnit tests via the test task. Keep in mind that tests might be skipped in subsequent build executions if no modifications have been made to the codebase.
For insights into working with JUnit 4, consult JUnit’s use with Gradle wiki.
Maven
When working with JUnit 5, the Maven section of the user guide and the junit5-samples.git repository provide a valuable example of a Maven project structure. Similar to the Gradle setup, this configuration can also handle vintage tests, which are tests utilizing the JUnit 4 API.
In IntelliJ, you can import the project using the following steps: File > Open… > navigate to the junit-maven-consumer/pom.xml file > OK > Open as Project. To run the tests, go to Maven Projects > junit5-maven-consumer > Lifecycle > Test.
For Eclipse users, the project can be imported via File > Import… > Maven > Existing Maven Projects > Next > Browse to the junit-maven-consumer directory > Select the pom.xml file > Finish.
Test execution is achieved by right-clicking on the project and selecting Run As > Maven build… > specify test as the goal > Run.
Guidance on utilizing JUnit 4 with Maven can be found in JUnit in the Maven repository.
Development Environments
In addition to employing build tools like Gradle or Maven, various IDEs offer the capability to directly execute JUnit tests.
IntelliJ IDEA
To work with JUnit 5 tests, you’ll need IntelliJ IDEA 2016.2 or a more recent version. However, JUnit 4 tests should function without issues in older IntelliJ versions.
For the purposes of this article, you might find it beneficial to create a new project in IntelliJ using one of my GitHub repositories (JUnit5IntelliJ.git or JUnit4IntelliJ.git). These repositories come complete with all the necessary files for a straightforward Person class example and utilize the built-in JUnit libraries. To run the test, simply navigate to Run > Run ‘All Tests’. You can also execute the test directly from the PersonTest class within IntelliJ.
These repositories were created by initializing new IntelliJ Java projects and establishing the directory structures src/main/java/com/example and src/test/java/com/example. The src/main/java directory was designated as a source folder, while src/test/java was designated as a test source folder. After creating the PersonTest class with a test method annotated with @Test, you might encounter compilation errors. In such cases, IntelliJ helpfully suggests adding JUnit 4 or JUnit 5 to the classpath, which can be loaded from the IntelliJ IDEA distribution (for more detailed information, refer to these answers on Stack Overflow). Lastly, a JUnit run configuration was added for running all tests.
For further insights, see IntelliJ Testing How-to Guidelines.
Eclipse
In Eclipse, a newly created empty Java project won’t have a designated test root directory. To add this, go to Project Properties > Java Build Path > Add Folder… > Create New Folder… > specify the Folder name > Finish. The newly created directory will be automatically selected as a source folder. Confirm by clicking OK in the remaining dialog boxes.
To create JUnit 4 tests, go to File > New > JUnit Test Case. Choose “New JUnit 4 test” and select the recently created source folder intended for tests. Specify a “class under test” and a “package,” ensuring that the package matches the class under test. Then, provide a name for the test class. Upon completing the wizard, if prompted, choose to “Add JUnit 4 library” to the build path. You can then run the entire project or individual test classes as JUnit Tests. For more details, refer to Eclipse Writing and Running JUnit tests.
NetBeans
NetBeans currently only provides support for JUnit 4 tests. Within a NetBeans Java project, you can create test classes by going to File > New File… > Unit Tests > JUnit Test or Test for Existing Class. By default, the project directory will house the test root directory named test.
A Simple Production Class and its JUnit Test Case
Let’s delve into a basic example of production code and its corresponding unit test code using a very simple Person class. Feel free to download the sample code from my github project and open it in IntelliJ.
src/main/java/com/example/Person.java
| |
The immutable Person class consists of a constructor and a getDisplayName() method. Our goal is to test whether the getDisplayName() method returns the name formatted according to our expectations. Here’s the test code for a single unit test implemented using JUnit 5:
src/test/java/com/example/PersonTest.java
| |
PersonTest makes use of JUnit 5’s @Test annotation and assertion mechanism. For compatibility with JUnit 4, the PersonTest class and its methods need to be declared as public, and different imports should be used. Here’s the JUnit 4 example Gist.
Upon running the PersonTest class in IntelliJ, you’ll observe that the test passes, indicated by green UI indicators.
Common JUnit Conventions
Naming
Although not mandatory, it’s a common practice to follow specific conventions when naming the test class. Typically, we start with the name of the class undergoing testing (in this case, Person) and append “Test” to it, resulting in PersonTest. The naming of test methods follows a similar pattern, beginning with the method being tested (getDisplayName()) and prepending “test” to it (testGetDisplayName()). While numerous other perfectly acceptable conventions exist for naming test methods, consistency across the team and project is paramount.
| Name in Production | Name in Testing |
|---|---|
| Person | Person Test |
getDisplayName() | testDisplayName() |
Packages
Another convention we employ involves creating the test code PersonTest class within the same package (com.example) as the production code’s Person class. Opting for a different package for tests would necessitate the use of the public access modifier in production code classes, constructors, and methods referenced by unit tests, even in scenarios where it might not be suitable. Therefore, it’s generally more practical to maintain them within the same package. However, we do utilize separate source directories (src/main/java and src/test/java) because, in most cases, we aim to exclude test code from released production builds.
Structure and Annotation
The presence of the @Test annotation (from either JUnit 4 or 5) instructs JUnit to execute the testGetDisplayName() method as a test method and provide a report indicating whether it passes or fails. As long as all assertions (if any) within the test method hold true and no exceptions are thrown during its execution, the test is deemed to have passed.
Our test code adheres to the structure pattern known as Arrange-Act-Assert (AAA). Other common patterns include Given-When-Then and Setup-Exercise-Verify-Teardown (with Teardown typically not explicitly required for unit tests). However, for the purpose of this article, we will be employing AAA.
Let’s analyze how our test example aligns with the AAA pattern. The initial line, representing the “arrange” phase, is responsible for creating a Person object that will be subjected to testing:
| |
The second line embodies the “act” phase, which exercises the production code’s Person.getDisplayName() method:
| |
The third line represents the “assert” phase, verifying that the result obtained aligns with our expectations:
| |
Behind the scenes, the assertEquals() call leverages the “Hayden, Josh” String object’s equals() method to ascertain whether the actual value returned by the production code (displayName) matches the expected value. A mismatch would result in the test being marked as failed.
It’s important to note that test methods often involve more than a single line of code for each of these AAA phases.
Unit Tests and Production Code
Having covered some testing conventions, let’s shift our attention to designing production code with testability in mind.
Returning to our Person class, we introduce a method designed to calculate and return a person’s age based on their date of birth. The code examples provided require Java 8 to leverage the advantages offered by the new date and functional APIs. Here’s how the updated Person.java class looks:
Person.java
| |
Running this class (at the time of this writing) would reveal that Joey is 4 years old. Now, let’s proceed to add a test method:
PersonTest.java
| |
As of today, this test would pass. However, a question arises: what about its outcome when we execute it a year from now? This test suffers from non-determinism and brittleness because its expected result relies on the current date of the system on which the test is being run.
Stubbing and Injecting a Value Supplier
In a production environment, our preference lies in using the actual current date, obtained through LocalDate.now(), to determine a person’s age. However, to establish a test that yields deterministic results even when executed a year later, our tests need the capability to supply their own currentDate values.
This practice is commonly referred to as dependency injection. We strive to prevent our Person object from being responsible for determining the current date itself. Instead, our goal is to provide this logic as an external dependency. This way, unit tests can utilize a known, stubbed value, while production code can rely on the system to provide the actual value at runtime.
Let’s incorporate a LocalDate supplier into our Person.java:
Person.java
| |
To streamline the testing of our getAge() method, we’ve modified it to utilize currentDateSupplier, a LocalDate supplier, for the purpose of retrieving the current date. If the concept of a supplier is unfamiliar, I encourage you to explore Lambda Built-in Functional Interfaces.
We’ve also introduced a dependency injection mechanism: a new constructor specifically designed for testing purposes enables tests to furnish their own custom current date values. The original constructor now invokes this new constructor, passing a static method reference LocalDate::now, which acts as a supplier of a LocalDate object. As a result, our main method continues to function as before. Now, let’s turn our attention to the test method and update PersonTest.java accordingly:
PersonTest.java
| |
With this modification, the test now possesses the ability to inject its own desired currentDate value, ensuring that our test will consistently pass even when executed in future years. This technique is widely known as stubbing, which involves providing a predetermined value to be returned. However, to enable this, we first needed to modify the Person class to accommodate the injection of this dependency.
Take note of the concise lambda expression, lambda syntax (()->currentDate), used during the construction of the Person object. This expression is treated as a supplier of a LocalDate, as dictated by the newly introduced constructor.
Mocking and Stubbing a Web Service
We’re now ready to take our Person object—which has solely resided within the confines of JVM memory thus far—and enable it to interact with the external world. Our objective is to incorporate two new methods: publishAge(), responsible for posting the person’s current age, and getThoseInCommon(), which will retrieve the names of famous individuals who share the same birthday or are of the same age as our Person object. Let’s assume the existence of a RESTful service called “People Birthdays” that we can communicate with. For this purpose, we have a Java client at our disposal, represented by a single class named BirthdaysClient.
com.example.birthdays.BirthdaysClient
| |
Now, let’s enhance our Person class. We’ll begin by adding a new test method to define the expected behavior of the publishAge() method. Why start with the test instead of diving directly into implementing the functionality? Because we’re adhering to the principles of test-driven development (commonly abbreviated as TDD), a methodology where we prioritize writing the test first, followed by writing the code necessary to make it pass.
PersonTest.java
| |
At this juncture, the test code will fail to compile because we haven’t yet created the publishAge() method it’s attempting to call. Once we introduce an empty Person.publishAge() method, everything will compile successfully. We’re now prepared for the test to verify that the person’s age is actually being published to the BirthdaysClient.
Adding a Mocked Object
Given that this is a unit test, our aim is for it to execute swiftly and entirely in memory. Therefore, the test will construct our Person object with a mock BirthdaysClient, preventing it from making any actual web requests. Instead, the test will leverage this mock object to verify that it was invoked as anticipated. To accomplish this, we’ll introduce a dependency on the Mockito framework library (licensed under MIT) to facilitate the creation of mock objects. With this dependency in place, we can proceed to create a mocked BirthdaysClient object:
PersonTest.java
| |
Furthermore, we’ve expanded the signature of the Person constructor to accept a BirthdaysClient object as an argument. Additionally, we’ve modified the test to inject the mocked BirthdaysClient object.
Adding a Mock Expectation
Our next step involves appending an expectation to the end of our testPublishAge method. This expectation will assert that the BirthdaysClient is indeed being called. The expectation is that Person.publishAge() should invoke it, as demonstrated in our updated PersonTest.java:
PersonTest.java
| |
Our Mockito-enhanced BirthdaysClient diligently keeps track of all calls made to its methods. This capability enables us to verify that no calls have been made to the BirthdaysClient prior to calling publishAge() using the verifyZeroInteractions() method. While not strictly essential, this step provides assurance that the constructor isn’t making any unintended calls. In the verify() line, we precisely define the expected format of the call to the BirthdaysClient.
Note that because the publishRegularPersonAge() method includes IOException in its signature, we need to add it to the signature of our test method as well.
Executing the test at this point will result in a failure:
| |
This outcome is expected because we haven’t yet implemented the necessary changes to Person.java. Remember, we’re following the test-driven development approach. Our next step is to make this test pass by implementing the required modifications:
Person.java
| |
Testing for Exceptions
We’ve modified the production code constructor to instantiate a new BirthdaysClient, and the publishAge() method now makes a call to the birthdaysClient. All tests are passing, and everything appears to be in order. However, upon closer inspection, we notice that the publishAge() method is suppressing the IOException. Instead of letting it propagate up the call stack, our goal is to wrap it within our own custom exception, PersonException, which we’ll define in a new file named PersonException.java:
PersonException.java
| |
To address this scenario, we’ll introduce a new test method within our PersonTest.java file:
PersonTest.java
| |
The Mockito doThrow() call is used to stub the birthdaysClient to throw an exception when its publishRegularPersonAge() method is invoked. If the expected PersonException is not thrown, the test is marked as failed. Otherwise, we assert that the exception was properly chained with the IOException and verify that the exception message matches our expectations. As it stands, because we haven’t implemented any exception handling in our production code, our test will fail because the anticipated exception wasn’t thrown. Let’s rectify this by making the necessary changes to Person.java to ensure the test passes:
Person.java
| |
Stubs: Whens and Assertions
Our next task involves implementing the Person.getThoseInCommon() method, resulting in the following updated Person.Java class: this.
Unlike the testPublishAge() method, our testGetThoseInCommon() method doesn’t focus on verifying specific calls made to birthdaysClient methods. Instead, it employs when calls to stub return values for the findFamousNamesOfAge() and findFamousNamesBornOn() methods, which will be invoked by the getThoseInCommon() method. Subsequently, we assert that all three of the stubbed names we provided are indeed returned.
By wrapping multiple assertions within the assertAll() method provided by JUnit 5, we enable the checking of all assertions collectively, rather than halting execution after encountering the first failed assertion. Additionally, we include a message with assertTrue() to pinpoint specific names that might be missing from the results. Here’s what our “happy path” (an ideal scenario) test method looks like. Keep in mind that this test suite doesn’t qualify as robust due to its “happy path” nature—we’ll elaborate on this later:
PersonTest.java
| |
Keep Test Code Clean
While often overlooked, maintaining clean and concise test code is equally crucial. Clean code principles, such as “don’t repeat yourself”, play a vital role in upholding a high-quality codebase, applicable to both production and test code alike. You might have noticed that our most recent PersonTest.java file exhibits some code duplication now that we have multiple test methods.
To address this, we can implement several improvements:
- Extract the
IOExceptionobject into a private final field. - Extract the
Personobject creation logic into its own dedicated method (e.g.,createJoeSixteenJan2()), given that most of ourPersonobjects are instantiated with the same set of parameters. - Create a reusable
assertCauseAndMessage()method to consolidate the logic for verifying thrownPersonExceptionsacross various tests.
These clean code enhancements can be observed in the refined version of the PersonTest.java file.
Test More Than the Happy Path
When a Person object is constructed with a date of birth that falls after the current date, what course of action should be taken? Defects in applications frequently arise from unexpected input or a lack of anticipation regarding corner, edge, or boundary cases. It is of paramount importance to anticipate such situations to the best of our abilities, and unit tests often serve as the ideal testing ground for doing so. While building our Person and PersonTest classes, we did incorporate a few tests to handle anticipated exceptions. However, our test coverage is far from comprehensive.
Consider, for instance, our use of the LocalDate class, which lacks the capability to represent or store time zone information. However, calls to LocalDate.now() return a LocalDate instance based on the system’s default time zone, which could potentially be a day earlier or later than the time zone of the user interacting with the system. These are factors that warrant careful consideration through appropriate tests, and corresponding behavior should be implemented to address them.
Boundaries should also be subjected to rigorous testing. Take, for example, a Person object equipped with a getDaysUntilBirthday() method. Our tests should encompass scenarios such as whether the person’s birthday has already passed in the current year, whether the person’s birthday coincides with the current day, and the influence of leap years on the calculated number of days. These scenarios can be thoroughly covered by performing checks one day before the person’s birthday, on the day of their birthday, and one day after their birthday, specifically when the following year is a leap year. Here’s the relevant test code to illustrate this:
PersonTest.java
| |
Integration Tests
Our primary focus so far has been on unit tests. However, JUnit can also be effectively employed for integration testing, acceptance testing, functional testing, and system testing. Such tests often necessitate more elaborate setup code compared to unit tests. Examples include starting external servers or populating databases with known data. While we can typically execute thousands of unit tests within seconds, larger integration test suites might require minutes or even hours to complete. It’s generally advisable to avoid using integration tests as a means to cover every single permutation or code path; unit tests are better suited for this purpose.
For web applications, testing scenarios like driving web browsers to fill out forms, click buttons, wait for content to load, and so on are commonly conducted using Selenium WebDriver (released under the Apache 2.0 license) in conjunction with the “Page Object Pattern” (for more information, refer to SeleniumHQ github wiki and Martin Fowler’s article on Page Objects).
JUnit proves to be an effective tool for testing RESTful APIs when used in combination with an HTTP client such as Apache HTTP Client or Spring Rest Template (HowToDoInJava.com provides a good example).
In the case of our Person object, an integration test could involve utilizing the real BirthdaysClient instead of relying on a mock implementation. This could involve configuring the base URL of the “People Birthdays” service. An integration test would then proceed to interact with a test instance of this service, verifying that birthdays are successfully published to it and creating famous people within the service to be retrieved.
Other JUnit Features
JUnit offers a plethora of additional features that we haven’t delved into within the scope of these examples. Let’s briefly describe some of them and provide references for further exploration.
Test Fixtures
It’s crucial to understand that JUnit instantiates a new instance of the test class for the execution of each @Test method. Furthermore, JUnit provides annotation hooks that allow for the execution of specific methods before or after all or each of the @Test methods. These hooks are frequently utilized for tasks such as setting up or cleaning up database connections or mock objects. The specific annotations used for these hooks differ between JUnit 4 and JUnit 5.
| JUnit 4 | JUnit 5 | For a Static Method? |
|---|---|---|
@BeforeClass | @BeforeAll | Yes |
@AfterClass | @AfterAll | Yes |
@Before | @BeforeEach | No |
@After | @AfterEach | No |
In our PersonTest example, we opted to configure the BirthdaysClient mock object directly within the @Test methods themselves. However, there are scenarios where more intricate mock structures, potentially involving multiple objects, need to be constructed. In such cases, @BeforeEach (JUnit 5) or @Before (JUnit 4) are often more suitable choices.
The @After* annotations are more prevalent in integration tests compared to unit tests because the JVM’s garbage collection mechanism effectively handles most objects created during unit testing. The @BeforeClass and @BeforeAll annotations find common usage in integration tests that require the execution of expensive setup and teardown actions only once, rather than repeatedly for each individual test method.
For insights into JUnit 4’s approach to test fixtures, please refer to the test fixtures guide (note that the general concepts still hold true for JUnit 5).
Test Suites
Situations might arise where you want to execute a specific subset of related tests instead of running all available tests. JUnit addresses this need by allowing the grouping of tests into test suites. To learn how to accomplish this in JUnit 5, explore HowToProgram.xyz’s JUnit 5 article and the JUnit team’s documentation for JUnit 4.
JUnit 5’s @Nested and @DisplayName Annotations
JUnit 5 introduces the ability to utilize non-static nested inner classes as a means to better represent the relationships between tests. This approach will resonate with those familiar with nested describes in test frameworks like Jasmine for JavaScript. To leverage this feature, the inner classes are annotated with @Nested.
The @DisplayName annotation is another newcomer in JUnit 5. It provides a way to furnish a descriptive string for a test, which is then included in test reports alongside the test method identifier.
Although @Nested and @DisplayName can be used independently, when combined, they contribute to clearer and more informative test results that effectively convey the behavior of the system under test.
Hamcrest Matchers
The Hamcrest framework, while not directly part of the JUnit codebase, presents an alternative approach to using conventional assert methods within tests. Hamcrest enables more expressive and human-readable test code. Consider the following example demonstrating verification using both a traditional assertEquals and a Hamcrest assertThat:
| |
Hamcrest seamlessly integrates with both JUnit 4 and JUnit 5. For a comprehensive guide to its features and usage, refer to Vogella.com’s tutorial on Hamcrest.
Additional Resources
- The article titled “Unit Tests, How to Write Testable Code, and Why It Matters” delves into more specific examples and best practices for writing clean, testable code.
- “Build with Confidence: A Guide to JUnit Tests” examines different philosophies and strategies for unit and integration testing, emphasizing the importance of choosing a consistent approach.
- The JUnit 4 Wiki and JUnit 5 User Guide are invaluable resources that serve as excellent reference points for all things JUnit.
- The Mockito documentation provides comprehensive information on advanced JUnit functionality, along with illustrative examples.
JUnit: The Gateway to Automation
This exploration has covered numerous facets of testing in the Java realm using the JUnit framework. We’ve touched upon unit and integration tests, explored how to seamlessly integrate JUnit into both development and build environments, and learned how to effectively utilize mocks, stubs, suppliers, and the Mockito library. Additionally, we’ve discussed common conventions, best coding practices, considerations for what to test, and some of the other remarkable features offered by JUnit.
Now it’s your turn, dear reader, to embark on a journey of growth in skillfully applying, diligently maintaining, and reaping the substantial benefits of automated testing using the powerful JUnit framework.