Running a Google Ads account can demand a significant amount of time and effort, especially without dedicated resources. Thankfully, Google Ads offers built-in automation tools to streamline account management. Among my favorites is the automated rules feature. This guide will walk you through the process of setting up effective automated rules. Let’s dive in!
Understanding Automated Rules
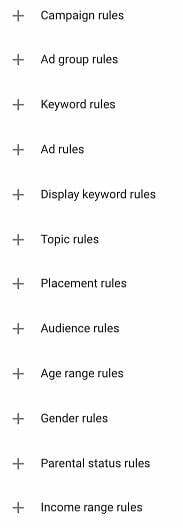
While Google Ads automation has its nuances, automated rules provide a powerful means of semi-automating your accounts. They function precisely as their name suggests: by applying predefined conditions, they automatically trigger changes within your accounts. Automated rules offer a high degree of customization, enabling scheduled modifications across various aspects of your account. They can be applied to:
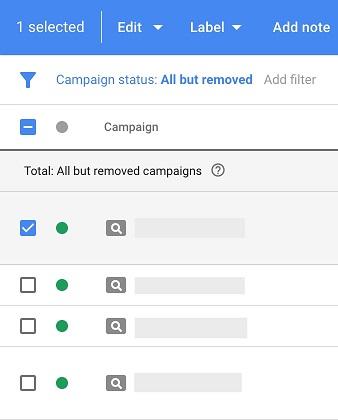
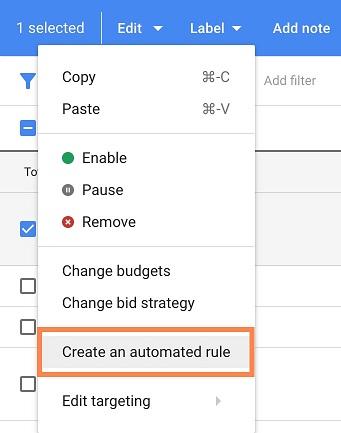
Creating a new rule can be achieved in a couple of ways. The first method involves navigating to the specific campaign or account element you wish to automate within the interface. Simply select the checkbox next to it, click “Edit,” and choose “Create an automated rule.”
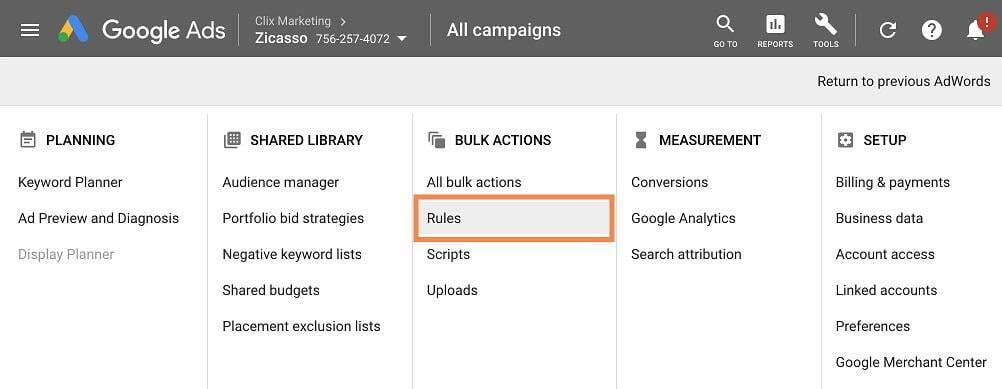
Alternatively, you can use the top navigation menu. Go to “Tools,” then select “Rules” under the “Bulk Actions” section.
Once you’ve decided what to automate, you’ll need to define the type of rule you want to implement. Depending on the area you’re automating, there are several options, generally categorized as:
- Pause
- Enable
- Send Email
- Change Bid/Budget These categories are fairly self-explanatory, so we’ll delve into the specifics later. The next stage of rule creation allows for customization tailored to your needs. After selecting the rule type, it’s time to establish conditions, which is where the real customization happens. The automated rule builder presents you with a screen similar to this, varying slightly depending on your chosen path:
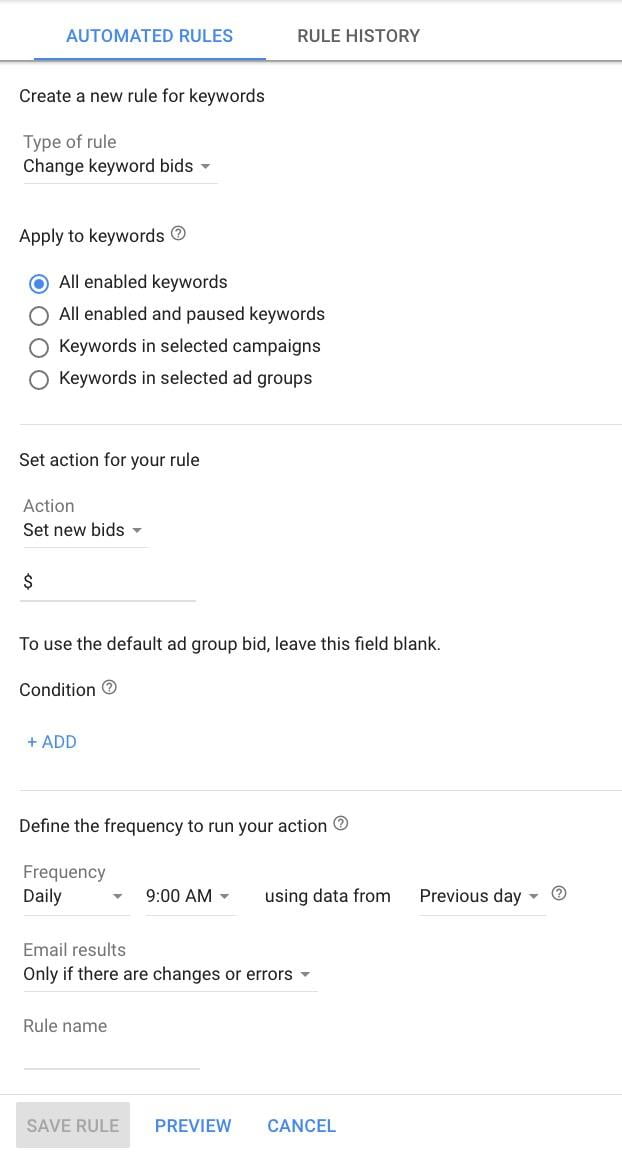
Let’s illustrate this with a more complex example: modifying keyword bids based on performance. Keep in mind that your rules can be as straightforward or as intricate as you deem necessary. This screen displays six key sections for rule creation:
- Rule Type
- Apply to
- Set Action
- Conditions
- Date ranges
- Email results and Rule name Since we’ve already covered Rule Type, let’s explore the remaining components.
Apply To:
This section determines which parts of your account the rule will affect. In this case, we’ll focus on specific keywords. However, you can target campaigns, ads, demographics, and more, depending on the rule type. Let’s assume we only want to target keywords within a few specific campaigns. Selecting the “Keywords in selected campaigns” option would prompt us to choose the desired campaigns from a pop-up:
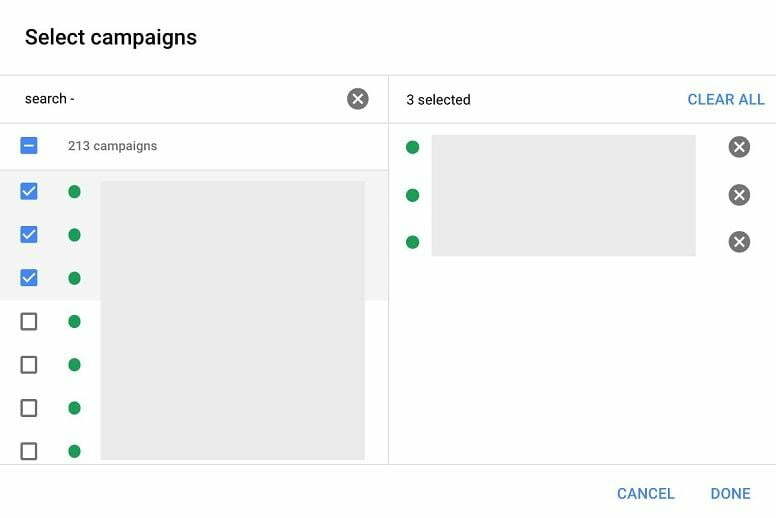
With the campaigns selected, the rule will apply exclusively to keywords within those campaigns, leaving other keywords untouched.
Set Action:
Here, we define the actions to be performed on the keywords, which depend on the conditions set in the subsequent section. For our keyword rule, we have various actions at our disposal:
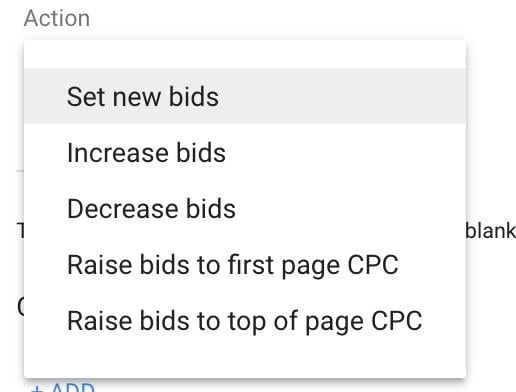
In this instance, our goal is to lower bids when the cost-per-acquisition (CPA) becomes excessive. Therefore, we’ll choose the “Decrease bids” option. Next, we specify whether to decrease bids by a percentage or a fixed amount.

A percentage decrease means reducing bids by a fixed percentage each time the rule runs. Conversely, decreasing by an amount implies a fixed reduction, such as $0.25. When automating multiple keywords, ads, or campaigns with varying bid or budget levels, percentage-based rules are recommended to ensure consistent impact. A $0.25 bid decrease might be insignificant for a keyword with a $20 bid, but for keywords with $1.00 or $0.50 bids, the reduction is substantial (25% to 50%). If you’re only automating a few elements with similar starting points, a fixed amount change might be suitable. As a rule of thumb, opt for percentage-based changes unless you have specific reasons for fixed adjustments.
Conditions:
This section defines the performance thresholds that trigger the rule. For instance, if we aim to lower bids when the CPA exceeds a certain limit, we need to specify that threshold. Clicking the blue “+ADD” link in the conditions builder reveals a list resembling filters found throughout the account. This is where automated rules shine, allowing you to create highly granular conditions.
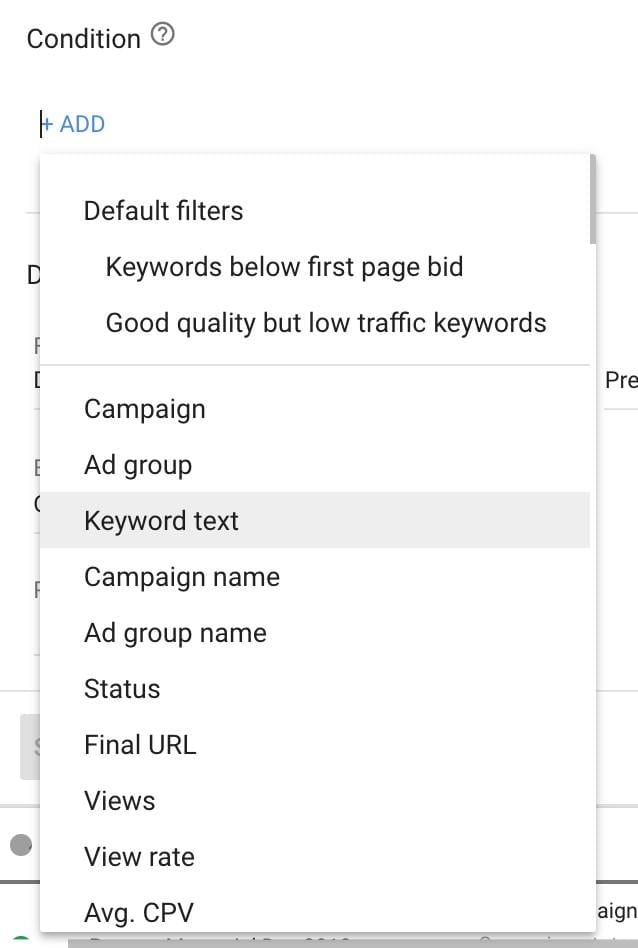
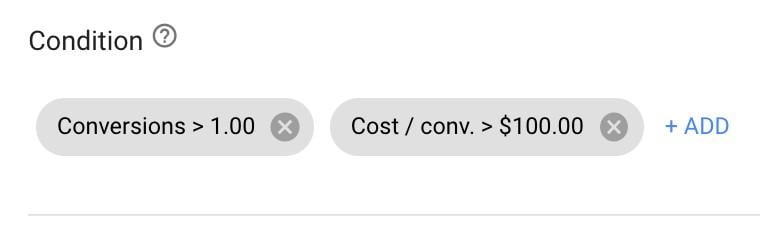
In our example, let’s choose “Conversions” and “Cost/conv.” These conditions mean that if there’s more than one conversion and the CPA surpasses $100, the rule will decrease bids by the predetermined percentage.
You have the flexibility to define virtually any criteria here. Importantly, conditions can be based on keyword text, campaign name, and more. While selecting specific campaigns and keywords upfront is ideal, there might be exceptions. Suppose we want to exclude certain keywords from the rule applied to the selected campaigns. By choosing “Keyword text” from the condition options, selecting “does not contain,” and entering the desired keyword phrases, we can exclude specific terms.
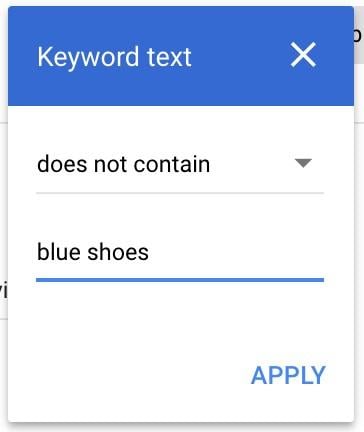
With this modification, the rule will apply to all keywords within the chosen campaigns except those containing the phrase “blue shoes.”
Frequency:
Setting the rule’s frequency is crucial for optimal performance. The first date option determines how often the rule checks for conditions and applies changes.
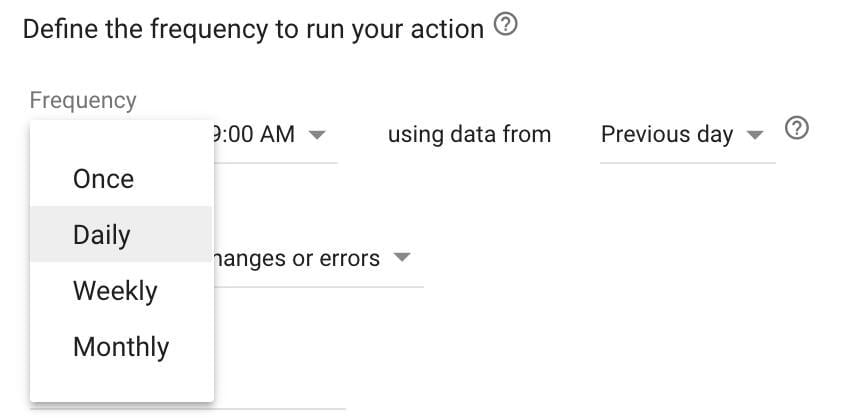
The “Once” setting ensures the rule runs only once, making it suitable for actions like pausing/enabling campaigns during holidays or promotions. Other settings establish recurring rules. For our example, let’s set the rule to run weekly, meaning it will scan associated keywords for the defined conditions once a week, making adjustments only when those conditions are met. We can further specify the day of the week and the hour for the rule to run. The “using data from” option lets you choose the timeframe for condition evaluation, offering a wide range of options.
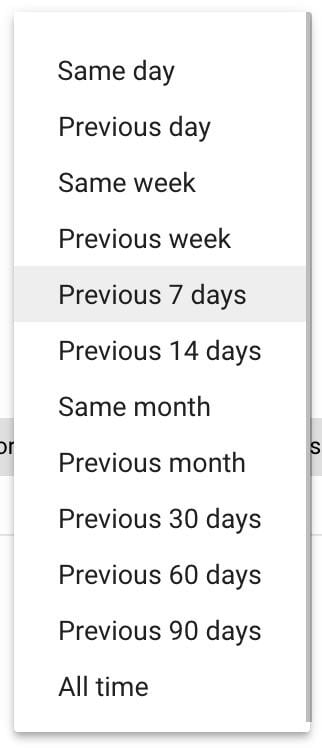
Avoiding Data Duplication
It’s crucial to avoid optimizing based on the same data multiple times. If the rule runs weekly, the maximum data window should be “Previous 7 Days.” Going further back, such as “Previous 14 Days,” would lead to optimizing on the same data twice: once within the past 7 days and again within the past 14 days. Optimize on a dataset only once, implement the desired changes, and analyze the new performance to assess their effectiveness. If successful, great! If not, further adjustments might be needed. However, the initial dataset should be excluded from subsequent optimizations.
Email Rules:
This section controls the frequency of email notifications related to the automated rule:
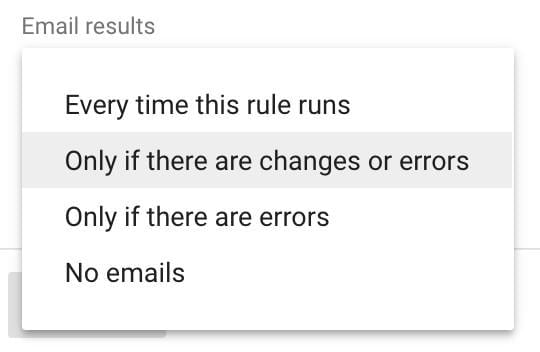
If you’re new to automated rules, receiving an email every time the rule runs with changes or errors is recommended. This provides insights into the modifications made based on your rules. Otherwise, setting notifications only for errors is a suitable default. For rules designed to highlight issues or performance fluctuations, using the “Every time this rule runs” setting is optimal. For instance, to ensure brand keywords consistently maintain an average position of 1.2 or higher, a rule like this could be implemented:
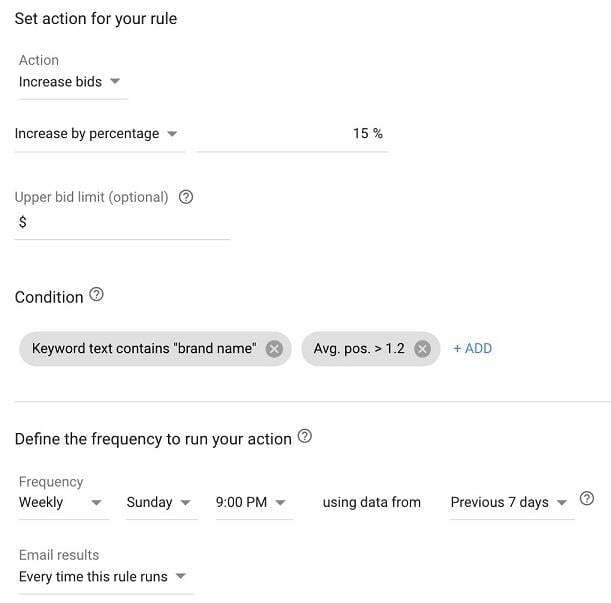
With this setting, you’ll only be notified when your brand keywords drop below the desired average position, allowing you to intervene accordingly.
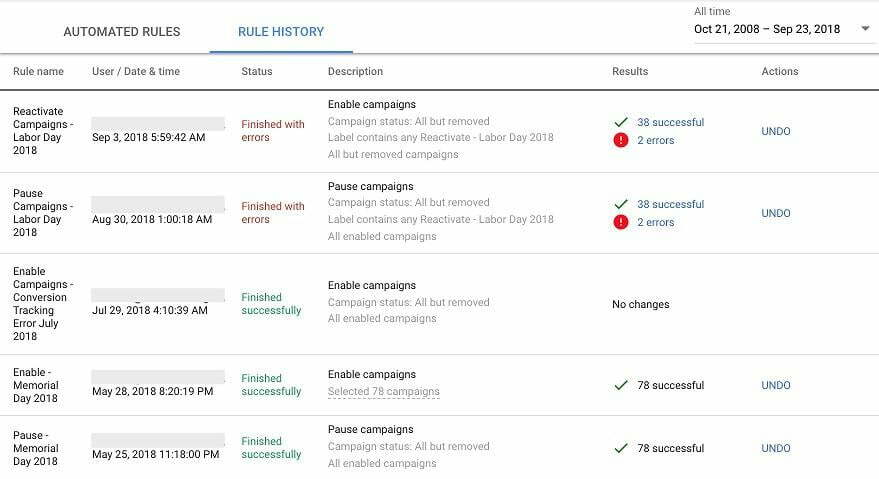
Rule Name:
While seemingly trivial, naming your rules is essential for long-term account management. Clear and descriptive names facilitate retroactive reporting and analysis. For example, a rule to pause campaigns over Labor Day should be named more specifically than just “Pause Campaigns.” Including “Labor Day” and the year, or even the exact date and time, can significantly improve clarity. Detailed rule names also enhance the automated rules change history, which provides a log of rule executions, changes made, and any encountered errors.
Practical Automated Rule Examples
Here are some practical examples of automated rules you can implement:
- Pausing/Enabling campaigns during holidays or promotions
- Adjusting keyword bids based on CPA and conversion performance
- Increasing keyword bids to maintain desired average position or impression share
- Increasing bid modifiers for specific age groups with CPA significantly below target
- Lowering budget on display campaigns with higher-than-desired CPC
- Allocating more budget to YouTube campaigns achieving high average view rates (e.g., over 50%) The possibilities are vast. Think of them as simple “if/then” statements applied to your account.
Essential Tips for Automated Rules
Before diving into automated rule creation, keep these best practices in mind:
Don’t Automate What You Haven’t Done Manually
If you haven’t performed an action manually, avoid automating it. There are too many potential pitfalls when automating unfamiliar changes. While pausing and enabling campaigns after a holiday is relatively straightforward, bid and budget adjustments require more caution. Manually implement the desired changes at the intended rule frequency for at least a month before automating them. This allows you to assess the impact and fine-tune your approach. For instance, a 10% bid adjustment might need to be adjusted to 15% for some keywords and 5% for others, potentially necessitating two separate rules. This initial testing phase ensures your automated rules are as effective as possible.
Supervise Your Automated Rules
Automated rules can reduce manual workload but should never replace human oversight. Regularly review your rules to ensure they’re functioning as intended and achieving the desired outcomes. Even if it’s just monthly or quarterly, periodic checks are crucial for maintaining control and optimizing performance.
Consider Both Positives and Negatives
In our previous example, we focused on lowering bids for keywords with high CPA (a negative aspect). However, it’s equally important to consider the positive side. For every automated rule, think about its counterpart. Should you also increase bids for keywords with low CPAs? If pausing campaigns, do they need to be reactivated later? Balancing rules might not always be necessary, but the thought process can enhance your strategy and ensure comprehensive rule implementation. To conclude, automated rules can be invaluable for saving time and streamlining your Google Ads account management. However, they require careful planning, implementation, and ongoing monitoring to maximize their effectiveness.