Ahrefs, Moz, and SEMrush are just a few examples of the excellent SEO tools available today. These tools offer a wide range of capabilities, including backlink profile analysis, keyword research, identification of unlinked mentions and guest posting opportunities, and even the ability to conduct comprehensive SEO audits with a single click. However, regardless of whether you work for an agency or in-house, or whether you represent a small business or a large enterprise, there are certain areas where these tools fall short. In these instances, Google Search Console steps in to save the day.

Despite its power, a standard SEO tool should complement, not replace, your primary SEO approach. If your goal is to optimize for organic search, you should be deeply engaged with Search Console and utilize other tools to support your efforts. If you’re not entirely at ease using Search Console in this way, don’t worry! This guide will show you how to navigate and utilize its most essential features.
What’s even better is that Google officially moved it out of beta last week, following the January launch of the new and improved Search Console. So, in addition to outlining seven steps to maximizing the new Google Search Console, this guide will also highlight the distinctions between the new and old interfaces.
Let’s dive in!
Step #1: Add and Verify Your Site
Before exploring the functionalities, you need to add and verify your site in Search Console. Click on “Add Property” from the dropdown menu located in the top left corner of your dashboard.
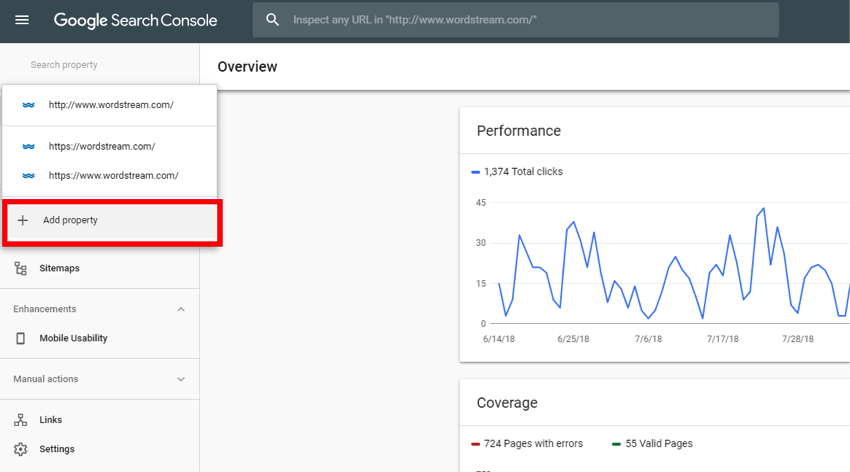
Ensure that your site’s URL is entered exactly as it appears in your browser. If you use multiple protocols (http:// and https://) or multiple domains (e.g., example.com, m.example.com, and www.example.com), add each one as a separate property. Search Console will start gathering data once you add your site.
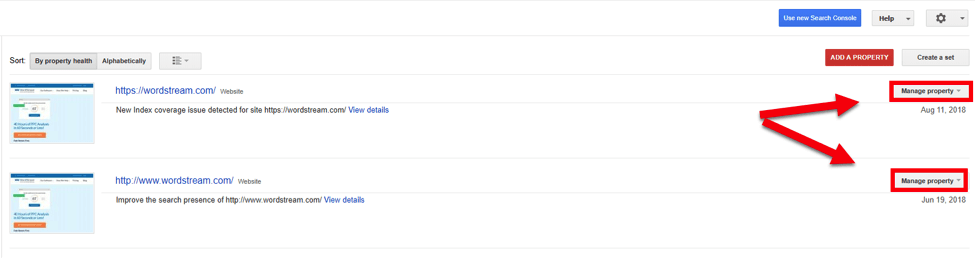
However, adding a property alone won’t grant you access; you must also prove ownership. To do this, go to the Manage Property tab for the property you added on the Search Console home page.
From the dropdown menu, select “Verify Property,” and then choose one of the suggested verification options. The available options will depend on the structure of the site being verified. If you encounter difficulties implementing a verification method, wish to switch to a different method, or simply require a more detailed explanation of each process, this page is a great resource provides comprehensive information on all aspects of site verification.
Step #2: Set a Preferred Domain
By specifying a preferred domain, you tell Google whether you want your site to be listed as https://www.example.com or https://example.com. While choosing one option over the other won’t give you a leg up in organic search, making a choice is essential.
Select your property from the Search Console homepage. (Note: We’ll be performing this action in the old Search Console interface.) Once selected, click the gear icon located in the upper right corner of your dashboard and select “Site Settings”:

In the Preferred Domain section, you’ll have the option to choose between the www.example.com and example.com versions of your site. You’ll also see the option to “Don’t set a preferred domain.” Selecting this option may result in Google treating “www” and “non-www” URLs as distinct addresses, potentially fragmenting the link equity of those pages and hindering your search visibility. Conversely, choosing a “preferred” version of your site instructs Google to treat any non-preferred domains it encounters as your preferred domain.
Step #3: Integrate Search Console with Google Analytics
Analytics provides traffic and conversion data, while Search Console sheds light on the search factors that drive that data. Connecting the two significantly enhances your reporting capabilities.
To link Search Console and Analytics, navigate to the admin panel located at the bottom left of your Analytics dashboard. From there, click on “Property Settings” at the Property level.
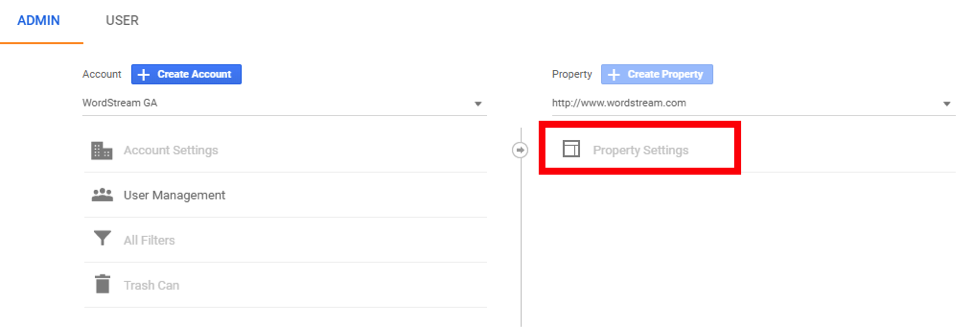
Please note: If you lack access to Property Settings (as demonstrated here), it signifies that you don’t have Edit permissions at the Property level. You’ll need to obtain these permissions from another owner to link Search Console yourself.
Next, scroll down to “Search Console Settings.” You should see your website’s URL, confirming its verification in Search Console and your authorization to make changes. Under Search Console, choose the reporting view where you’d like to see the data, click “Save,” and you’re good to go!
A Search Console report will now appear within the Audience tab of your Analytics dashboard.
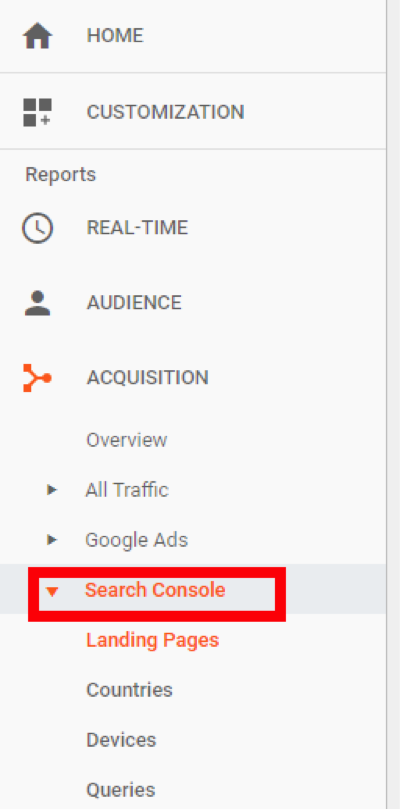
This report allows you to correlate pre-click data like queries and impressions with post-click data such as bounce rate and goal completions. The Landing Pages report displays search data for each URL on your site that appears in search results. Consequently, if you’ve recently updated a page and hope for increased traffic due to improved rankings, or if a page is experiencing a decline in traffic and you’re trying to pinpoint the contributing search metrics, the Landing Pages report can help you fully grasp these relationships.
How has the change in click-through rate over time impacted goal completions? How has the average position in the SERP affected sessions or time on page? Linking Search Console and Analytics enables you to analyze these unique interactions. Furthermore, you can leverage the Countries report, Devices report, and Queries report to analyze these same metric relationships segmented by country, device, and search query.
Another point to consider: Regrettably, the Search Console report only displays data from the time Search Console began tracking your site. While the old Search Console provided only three months of search data, the new Search Console offers 16 months’ worth. This distinction is irrelevant if you’re just linking Analytics to Search Console now, but having access to this additional historical data over time can be invaluable. (Think about how often you review data beyond the past three months to examine a page’s historical traffic and conversion numbers.)
Step #4: Submit a Sitemap
Unsure if you have a sitemap? Go to example.com/sitemap.xml. If nothing appears, then you don’t have one.
You obviously need a sitemap to submit one to Search Console. Here are some best practices for sitemap generation:
- File size: Keep it under 50 MB.
- Number of URLs: Limit it to 50,000.
- If you have over 50,000 URLs: Generate multiple sitemaps.
- Include only canonical URLs: Exclude any URLs blocked by robots.txt.
- From Google: “XML sitemaps should list URLs for all pages on your site.” For large sites, this can be interpreted as, “… all valuable pages on your site.” This includes pages with high-quality, original content, and excludes “utility pages”—pages that might be helpful to users but don’t serve as suitable search landing pages.
- Popular CMS platforms like WordPress and Drupal offer plugins to help you create sitemaps. Others, like Squarespace, automatically generate and update them.
- If all else fails, this article provides a guide on creating a dynamic sitemap. If you have a small site, this tool can generate one for you.
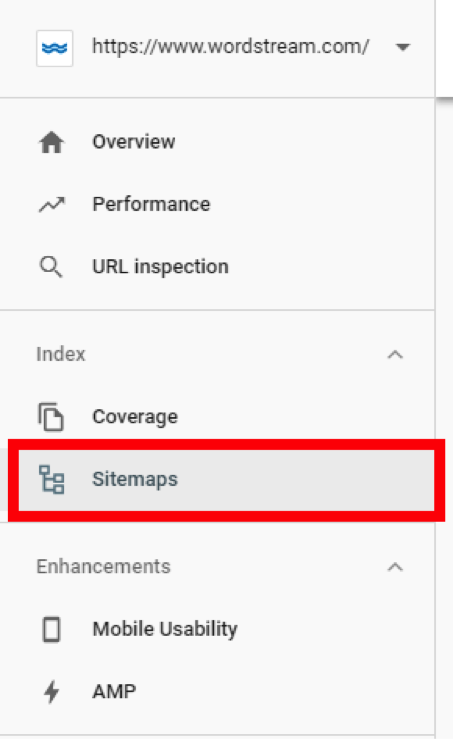
Okay, so you have your sitemap! To help Google understand your site’s content, you’ll want to submit it. To do this, go to the Sitemap tab in the new Search Console:
Enter your sitemap’s URL, click “Submit,” and that’s it! You’re all set.
Step #5: Use the Index Coverage Status Report to Fix Site Errors
Previously found under the Google Index tab, the Index Status report is now prominently displayed on the new Search Console’s dashboard.
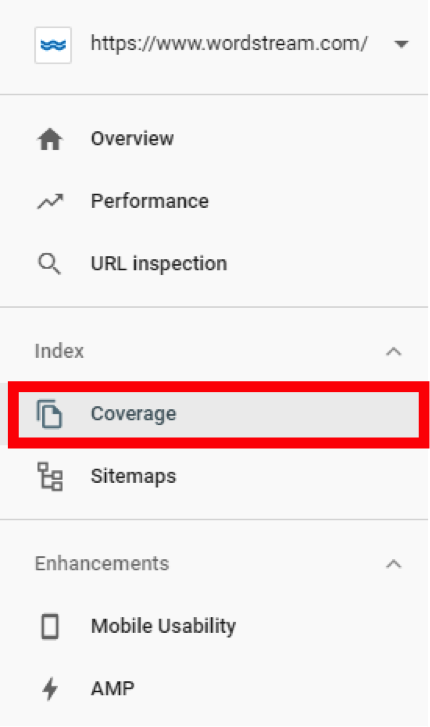
The report’s name has also been updated to the Index Coverage Status report. It appears as follows:
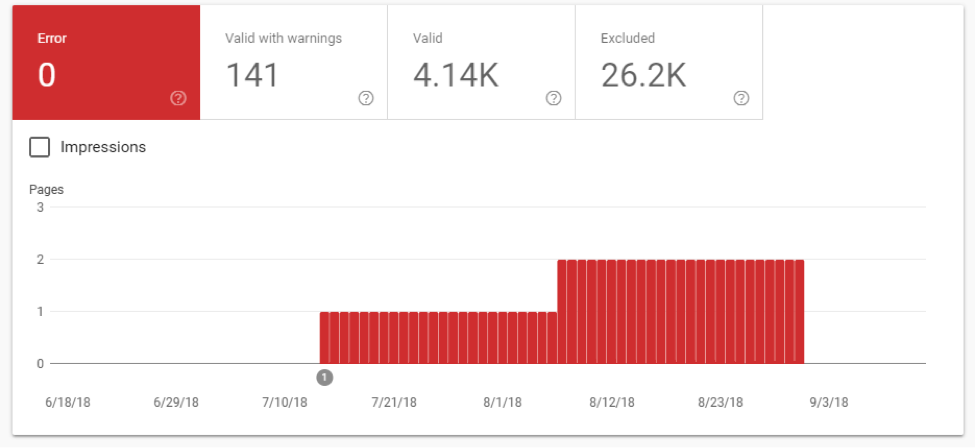
According to Google, the new report provides all the information from the old report, along with detailed crawl status data from the Index. What valuable insights can be gathered from this new (yet seemingly unchanged) report? Let’s examine each tab.
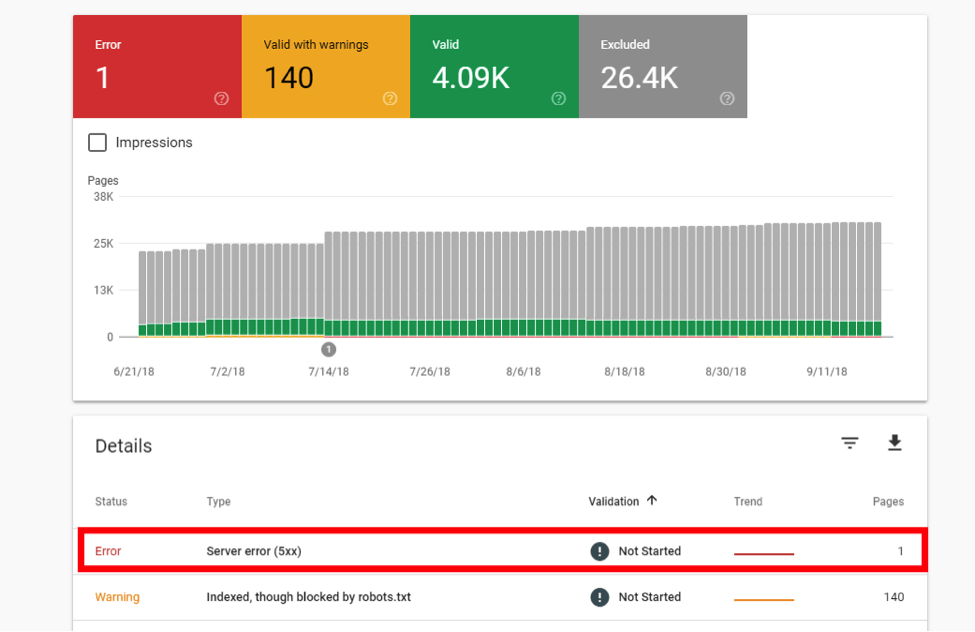
- Error: This tab lists potential site errors for you to review and correct. These errors might include server errors, redirect errors, robots.txt errors, 404 errors, and various others.
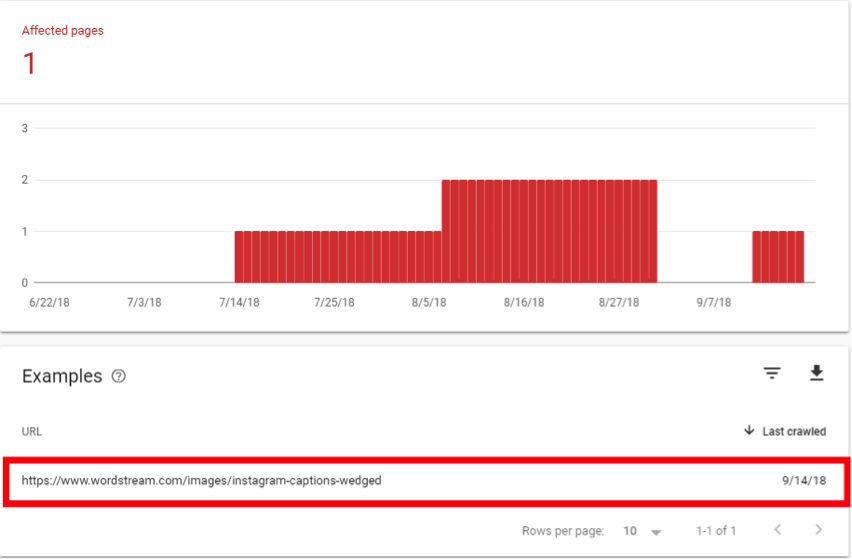
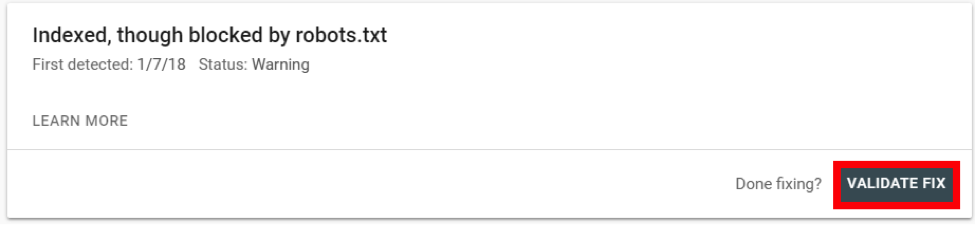
- Warnings: A warning indicates a page is indexed but blocked by robots.txt. If you intend to block a page from the index, Google prefers the ‘noindex’ tag over robots.txt. Note that a page blocked through robots.txt can still appear in the index if other pages link to it. These warnings allow you to properly de-index such pages.
- Valid Pages: All pages listed here are indexed. If you encounter the “Indexed, not submitted in sitemap” status, ensure these URLs are added to your sitemap. The status “Indexed; consider marking as canonical” means a page has duplicate URLs, and you should mark it as canonical.
- Excluded Pages: These pages have been blocked from the index for reasons such as a ’noindex’ directive, removal through a page removal tool, blocking by robots.txt, a crawl anomaly, or being identified as duplicate content.
Google gives great insight offers a detailed explanation of each status and how to address them. While covering all of them here isn’t feasible, you can typically obtain information about a specific URL by clicking the relevant tab and then clicking the description populating the Details section of the report:
Next, click the URL in the Examples tab:
This will open a helpful panel that provides several options for inspecting the issue:
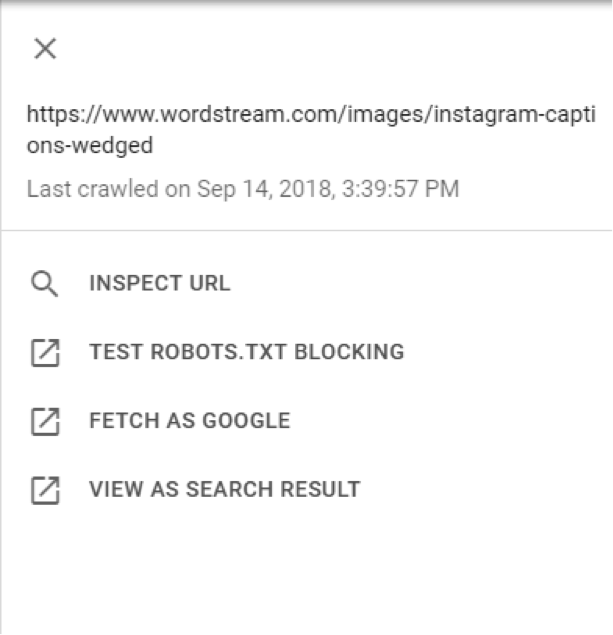
Here’s a breakdown of each function:
- Inspect URL: View the referring page, the last crawl time, whether crawling is permitted, whether indexing is allowed, whether you’ve designated the page as canonical, and whether Google considers the page canonical.
- Test Robots.txt blocking: Access your site’s robots.txt file (example.com/robots.txt) to see all site elements blocked from the Index. Since it’s easy to forget which elements are on which pages, the robots.txt tester highlights portions of your page that might be triggering the robots.txt block.
- Fetch as Google: This feature lets you see your page exactly as Google does. Googlebot accesses your page directly and displays the downloaded HTTP response it reads. Using “Fetch and Render” allows you to see the page’s visual layout as Google sees it.
- View as Search Results: This shows you what your page looks like in the Index.
These functions are available for all your URLs indexed by Search Console, allowing you to address the statuses associated with errors, warnings, valid pages, and excluded pages. Remember to validate your fixes so Google prioritizes re-crawling the affected page:
That’s it in a nutshell! The Index Coverage Report helps you detect and resolve various site errors.
Step #6: Leverage the Performance Report to Update Content
Essentially, all the metrics visible in Analytics after linking your Search Console account originate from the Performance Report. In the new Search Console, the Performance Report replaces the “Search Analytics” report. Similar to the Index Coverage report, there aren’t many differences between the old and new versions. However, you can still achieve impressive results with it. Let’s take a closer look.
Start by opening the Performance Report—the first table displayed in your overview.
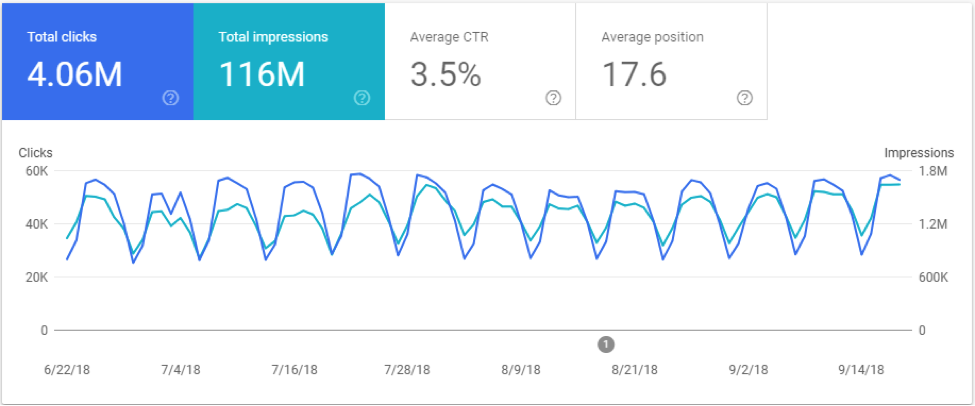
You’re not limited to tracking these metrics in Analytics; you can use them to identify areas for improvement. The most effective way to do this is by using the filter function:
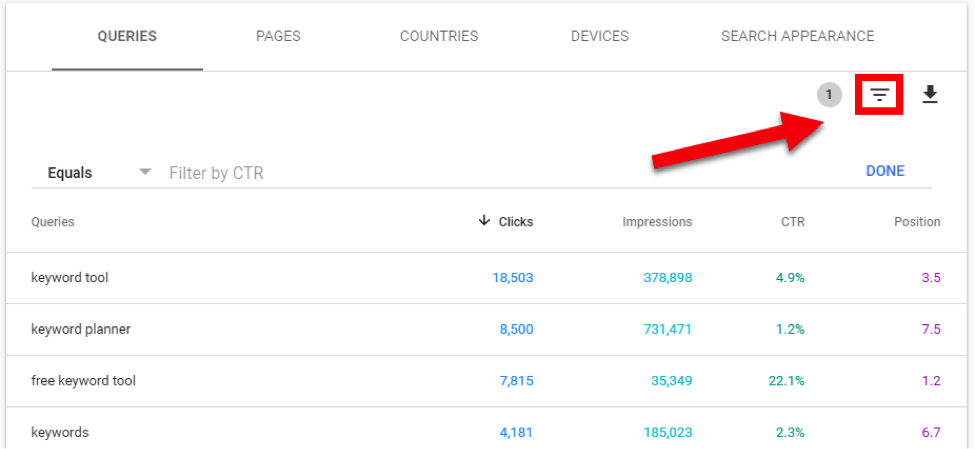
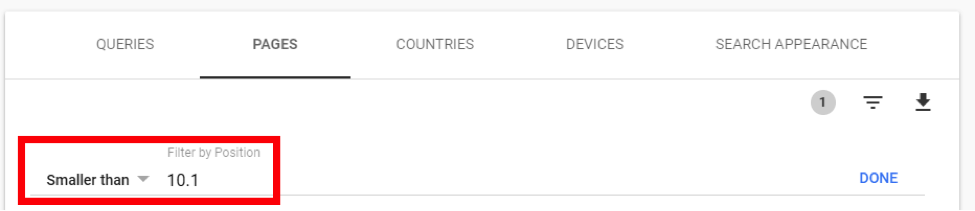
Utilize the tabs to examine your pre-click metrics at the query, page, country, or device level. For instance, you might want to see which pages rank on page one of the search results but have a lower-than-average CTR for your site over the past six months:

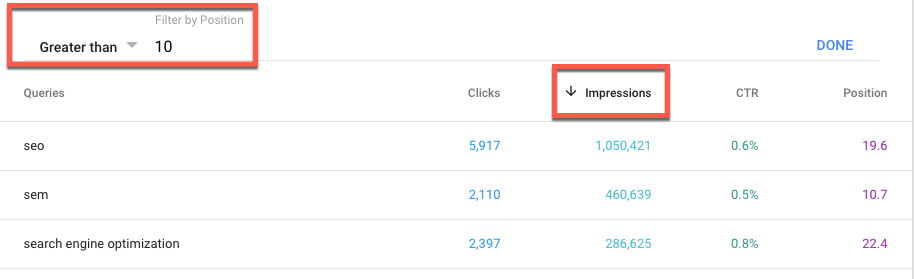
Alternatively, perhaps you’re looking for queries where you rank outside the top 10 but still receive a substantial number of impressions. This allows you to revisit and optimize the relevant pages in an attempt to improve their ranking:
While most third-party SEO tools offer comparable functionalities for identifying keyword opportunities, it’s beneficial to obtain this data directly from Google!
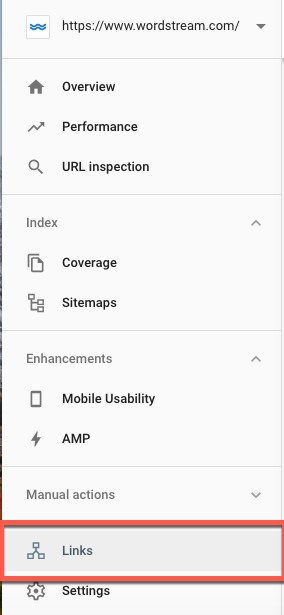
Step #7: Use the Links Report to Boost Specific Pages
The Links Report is situated at the bottom of your dashboard:
It offers several useful features, but here are two favorites:
1. Enhance specific pages by leveraging your most linked-to pages. Your site’s most linked-to content holds the most link equity. Internally linking to pages you want to boost from these authoritative pages is an excellent way to improve their ranking. To identify the pages on your site with the most link juice, click on either of the top linked pages sections within the Links report:
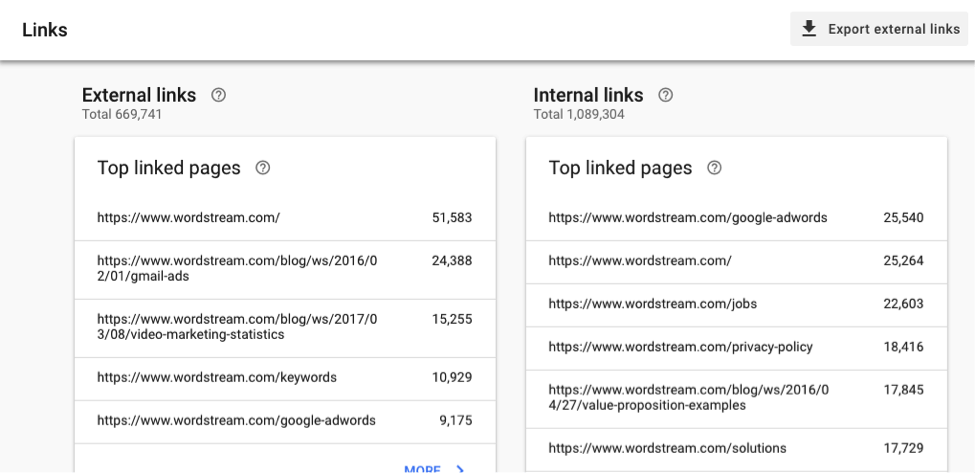
The external links section allows sorting by the number of referring domains—a significant ranking factor for Google. Consequently, these pages possess considerable inherent equity. Identify pages with the potential to drive significant business value, link to them (naturally) from these high-quality pages, and monitor the results!
2. Disavow links from spammy sites.
Go to “Top linking sites” in your Links Report overview. Expand the list to see all the domains linking to your site. Add any low-quality or spammy domains to the file you’ll upload to Google’s disavow links tool. Note: According to Google, you should only disavow links if you’re certain they’re harming your site. Disavowing links that contribute positively to your performance will negatively affect your site. Nevertheless, it’s worth investigating whether any domains linking to your site raise concerns.
Beyond the 7 Steps
By understanding these seven steps, you’re well on your way to mastering Google Search Console. These concepts and reports form the core of Search Console’s usefulness as an SEO tool. However, you can always delve deeper. Backlinko has a super useful guide provides valuable insights into more advanced techniques if you’re interested in exploring further.