Your Facebook Business Page is super important for your online presence. Why? It’s your hub for connecting with customers, addressing their feedback, engaging potential buyers, and even simply updating everyone on Facebook’s 2.9 billion users. While Facebook Business Pages offer a lot, setting them up can seem a tad overwhelming.
 Don’t worry! With a little guidance, you can turn these features into powerful tools to make your business stand out on the world’s biggest social media platform.
Let’s break down your Facebook Business Account setup step-by-step, and then explore how to make it professional and engaging to attract and convert more customers.
Don’t worry! With a little guidance, you can turn these features into powerful tools to make your business stand out on the world’s biggest social media platform.
Let’s break down your Facebook Business Account setup step-by-step, and then explore how to make it professional and engaging to attract and convert more customers.
What Exactly is a Facebook Business Page?
A Facebook Business Page is a public page representing a company, organization, or public figure (like a famous person or politician).
 Brands can use it to share pictures, videos, and text—just like personal profiles—allowing fans to view, like, comment, and share. However, unlike personal profiles meant for connecting with friends and family, Business Pages are designed to promote to a wider audience.
The content on Business Pages is also different. Posts might include product promotions, services, sales, educational material, or introductions to key people in the organization. It’s more professional than the casual posts you see on personal pages.
To run ads or a Facebook Shop, you’ll need a Facebook Business Account and Page. So, let’s dive in!
Brands can use it to share pictures, videos, and text—just like personal profiles—allowing fans to view, like, comment, and share. However, unlike personal profiles meant for connecting with friends and family, Business Pages are designed to promote to a wider audience.
The content on Business Pages is also different. Posts might include product promotions, services, sales, educational material, or introductions to key people in the organization. It’s more professional than the casual posts you see on personal pages.
To run ads or a Facebook Shop, you’ll need a Facebook Business Account and Page. So, let’s dive in!
Setting Up Your Facebook Business Page in 7 Easy Steps
We’ve simplified the setup into eight steps, and trust me, they’re a breeze.
Step 1: Creating Your Facebook Business Page
Head over to Facebook’s Create a Page and choose the type of Business Page you want.
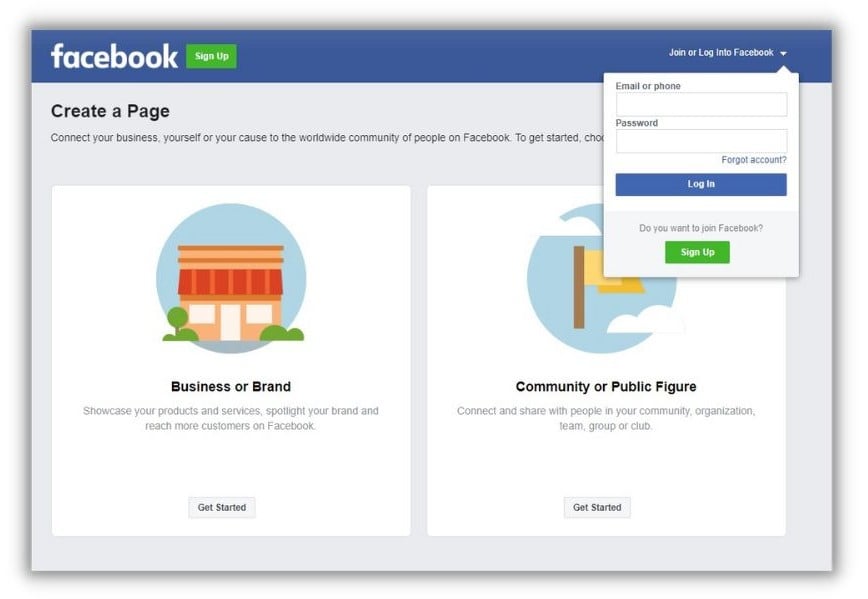 If you’re not logged into Facebook, you’ll be prompted to. This is because your Business Account needs to be linked to a personal profile.
Rest assured, your personal info won’t be visible on your Business Page. If you prefer keeping things separate, create a second personal account using your work email for your Business Account.
If you’re not logged into Facebook, you’ll be prompted to. This is because your Business Account needs to be linked to a personal profile.
Rest assured, your personal info won’t be visible on your Business Page. If you prefer keeping things separate, create a second personal account using your work email for your Business Account.
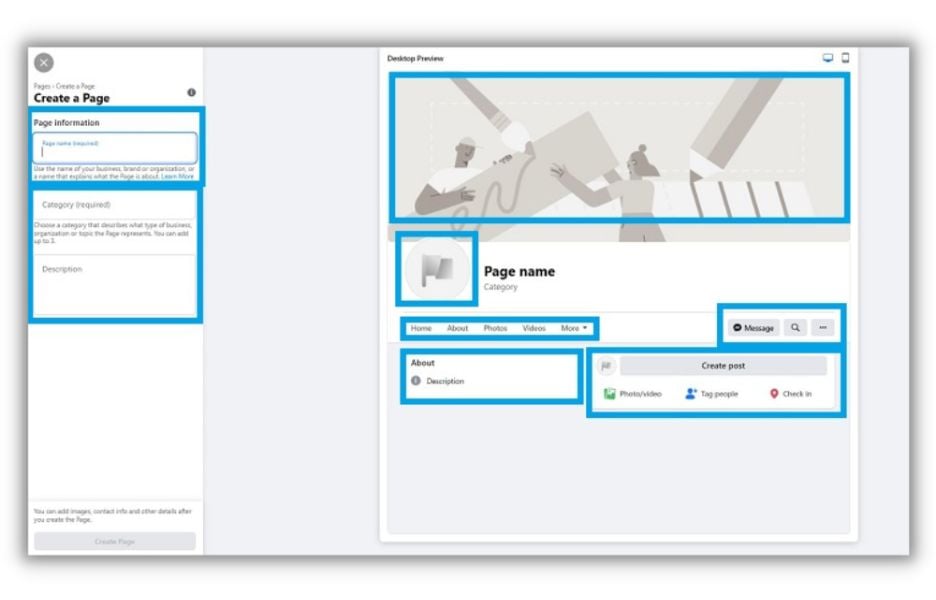
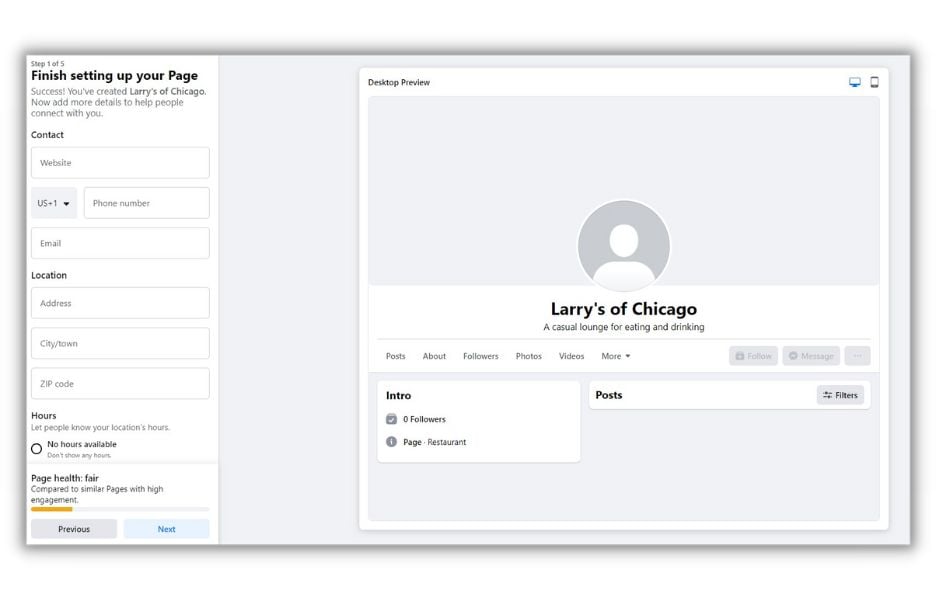
Step 2: Entering Basic Information
You’ll see a blank page template with fields to fill out on the left.
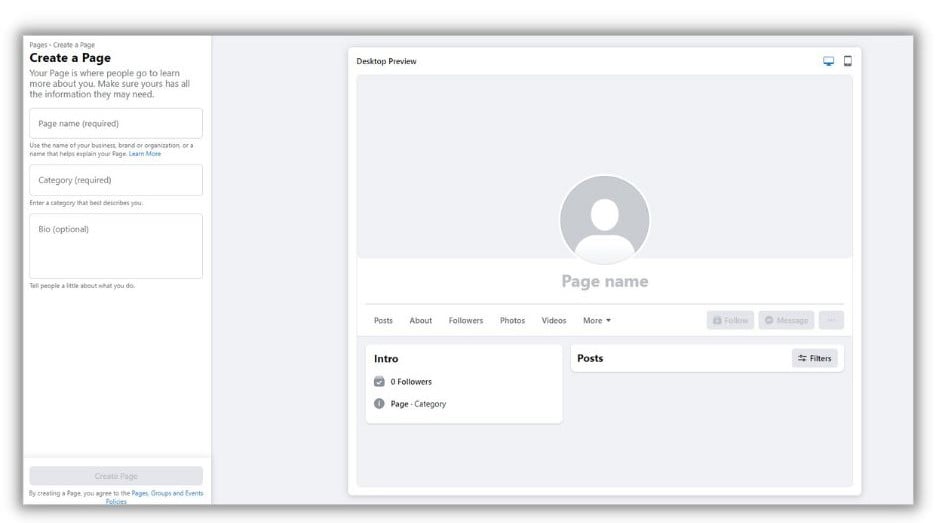 Name: Ideally, use your business name. If it’s taken, add a location or business type like “Larry’s Restaurant” or “Larry’s of Chicago” instead of just “Larry’s.”
Category: Choose the closest match to your business. No worries, you can change this later.
Description: This is your elevator pitch! Keep it concise, descriptive, and don’t be afraid to be a little bold.
Click “Create Page,” and congratulations! Your Facebook Business Account is officially live! It might look a bit basic for now, but we’ll fix that.
Name: Ideally, use your business name. If it’s taken, add a location or business type like “Larry’s Restaurant” or “Larry’s of Chicago” instead of just “Larry’s.”
Category: Choose the closest match to your business. No worries, you can change this later.
Description: This is your elevator pitch! Keep it concise, descriptive, and don’t be afraid to be a little bold.
Click “Create Page,” and congratulations! Your Facebook Business Account is officially live! It might look a bit basic for now, but we’ll fix that.
Step 3: Filling in the Details
Facebook will ask for some basic information about your business.
 Just fill out what you’re comfortable making public. All fields are optional.
Click “Next.”
Just fill out what you’re comfortable making public. All fields are optional.
Click “Next.”
Step 4: Adding Images
It’s time to make your page visually appealing!
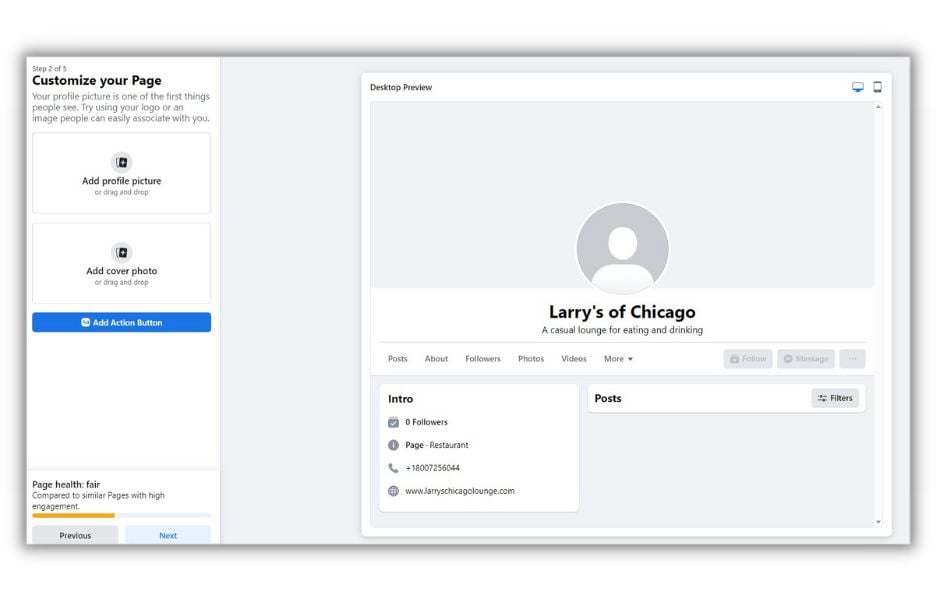 Facebook provides lots of ways to make your Business Page pop. Your cover picture is the most prominent, so choose images that represent your brand and what you do.
 For your profile picture (the smaller image on the lower left), you have options. A professional headshot works for solopreneurs, while a product photo, storefront, or action shot of you working is great for businesses.
Remember, your profile picture will be cropped into a circle.
For your profile picture (the smaller image on the lower left), you have options. A professional headshot works for solopreneurs, while a product photo, storefront, or action shot of you working is great for businesses.
Remember, your profile picture will be cropped into a circle.
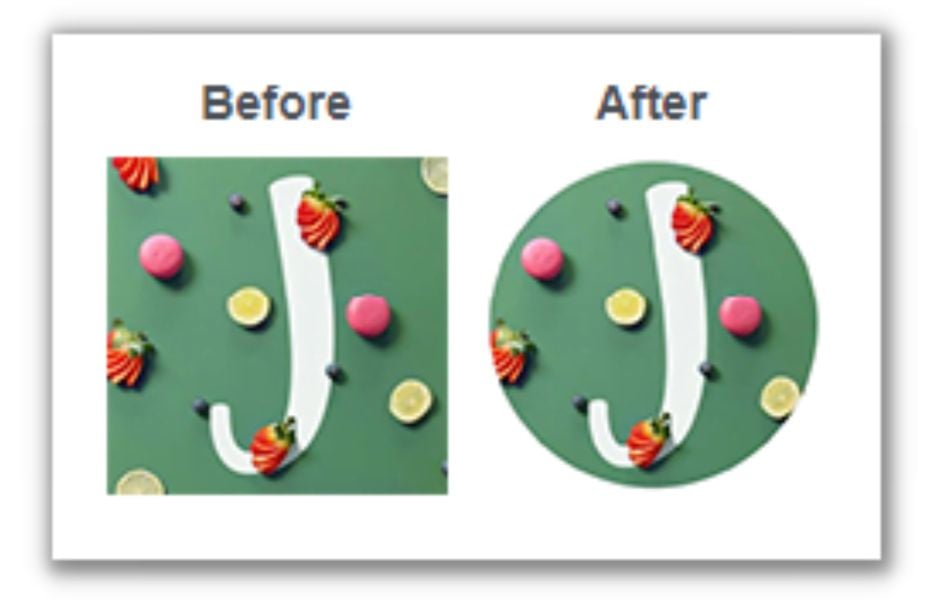 Choose an image where the important part fits within a circular shape.
Step 5: WhatsApp, Friends, and Notifications (Optional)
Facebook will present three optional choices: adding your WhatsApp, inviting friends to like your page, and setting up notifications. You can skip these by tapping “Skip.” If you want customers to reach you via WhatsApp, add your number.
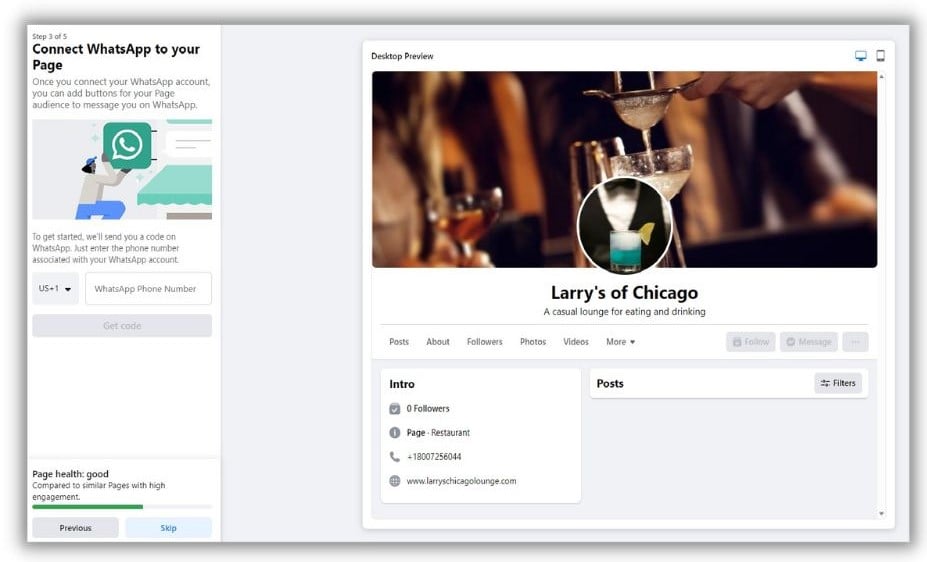 Decide about inviting friends and getting notifications, or skip ahead.
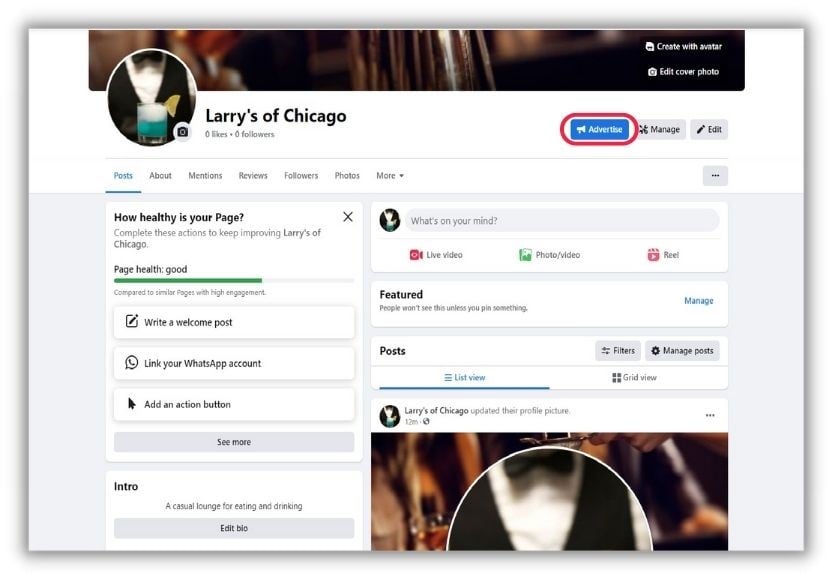
Step 6: Adding an Action Button
An action button (also known as a call to action or CTA) is a direct link encouraging visitors to take a specific action. To add one, click “Add an action button.”
 Facebook offers various CTA options.
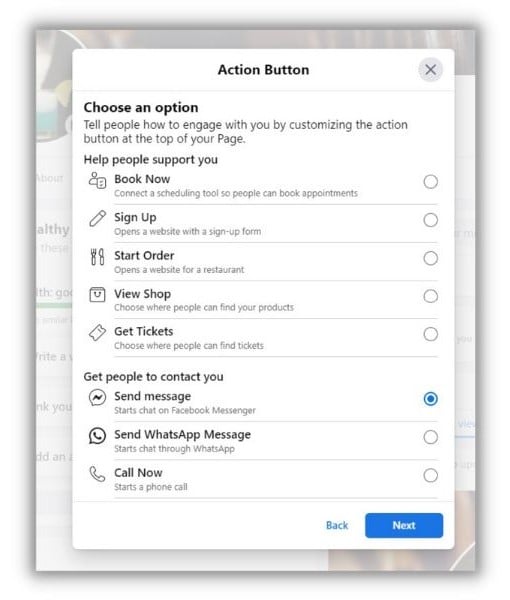 You might need to connect a phone number, website, or service (like a food delivery app) depending on your choice.
Step 7: Adding Contact Information
Click the “About” tab.
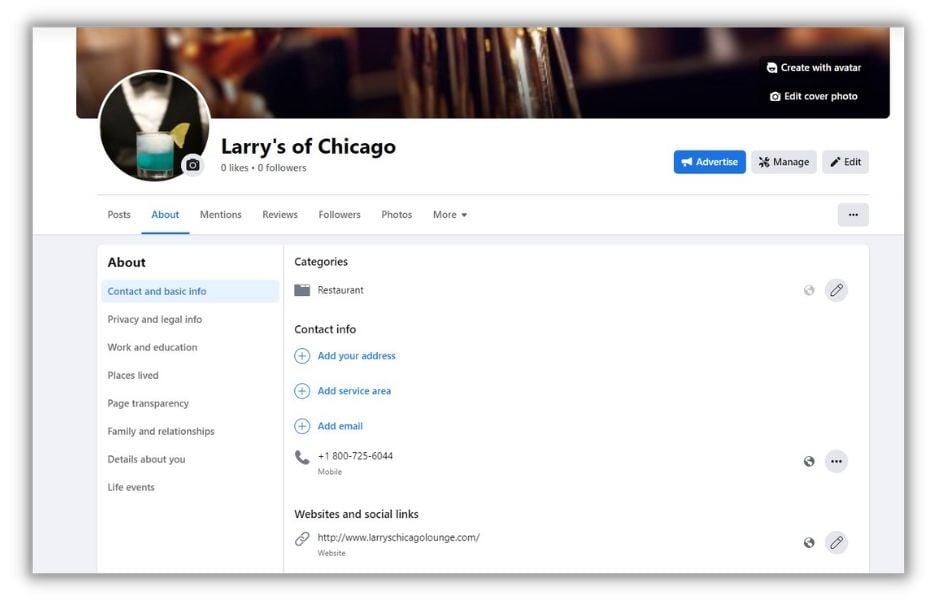 This is crucial, especially for local businesses. Add your address, phone number, website, and hours of operation.
And there you have it! Your Facebook Business Page is ready. Start sharing updates and engaging content!
This is crucial, especially for local businesses. Add your address, phone number, website, and hours of operation.
And there you have it! Your Facebook Business Page is ready. Start sharing updates and engaging content!
Pro tip: Once you set up your Page, you can start running paid Facebook ads. These Facebook ad targeting strategies will help you spend wisely and get more benefits for your Facebook buck.
Now, let’s enhance your Page to make it even more attractive and professional.
Optimizing Your Facebook Business Page
Launching your Page is a fantastic first step. Now, let’s turn visitors into customers!
Creating and Pinning a Welcome Post
Make a great first impression by pinning a welcoming post at the top of your page. This is the first thing people see, so make it count! Facebook might prompt you to create one. You can also write it directly in the “What’s on your mind?” section. Once it’s ready, pin it by clicking “Manage” in the Featured section.
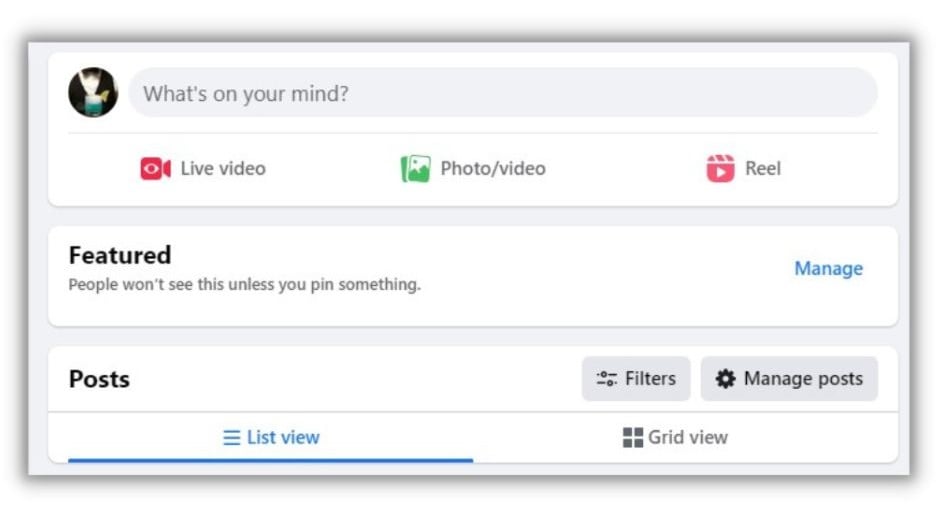 A pop-up will show recent posts. Choose your welcome message and pin it.
Customizing Your Page Tabs
Page tabs help visitors navigate your Page.
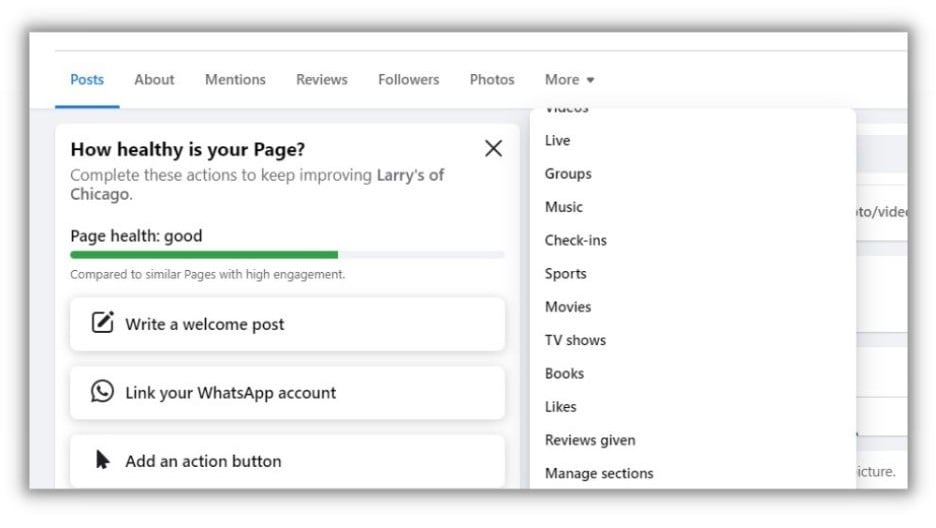 Keep only relevant tabs for easier navigation. To customize, click “Manage sections.” Uncheck tabs to remove them.
Enabling Reviews
Reviews build trust. To enable them:
- Click your profile picture (upper right).
- Go to Settings and Privacy > Settings > Privacy > Page and Tagging.
- Ensure “Allow others to view and leave reviews on your Page” is toggled on. If you’re new, you won’t have reviews yet. Check out these 22 ways to ask your customers for reviews. And here’s how to respond to negative reviews just in case you get a negative one!
Facebook Business Account FAQs
Let’s answer some common questions about Facebook Business Accounts.
Are Facebook Business Accounts Free?
Absolutely! Just like personal profiles, creating a Facebook Business Account is free. You can post, share, and comment without paying. However, Facebook Ads and boosted posts have a cost.
What’s the Difference Between a Personal and Business Facebook Account?
Business accounts have additional features not available on personal profiles, like the option to add a menu, shop, and other business-specific sections.
Does a Facebook Business Account Have to Be Connected to a Personal Profile?
Yes, you need a personal Facebook account to create and manage a Business Page. You can create a separate personal account using a different email address (like your work email) if you prefer to keep them separate.
Promote Your Facebook Business Page
Having a Facebook Business Page is a major step in boosting your online presence. But without promotion, it’s like a store without a sign. Facebook ads and social media marketing are key to turning your Page into a lead-generating machine. Plus, compared to other digital marketing methods, Facebook ads are relatively affordable.